
Categorie popolari
State cercando un filato?


Commenti / Domande (75)
![]() Tordis Skurdal ha scritto:
Tordis Skurdal ha scritto:
Ser tøffe ut, og varmer godt oppover leggen
25.06.2014 - 22:15
![]() Isabel Campos ha scritto:
Isabel Campos ha scritto:
Fantásticas para andar em casa
21.06.2014 - 21:12
![]() Martina Herold ha scritto:
Martina Herold ha scritto:
Möchte ich auf jeden Fall im Winter nicht vermissen !!!
15.06.2014 - 21:04Amalia Briceño ha scritto:
Las quiero tejer para mis 5 hijas y 7 nietas
15.06.2014 - 16:52
![]() Fatemeh ha scritto:
Fatemeh ha scritto:
Varm og god, for kalde vinter dager
05.06.2014 - 13:41
|
|||||||
One Step Ahead#onestepaheadslippers |
|||||||
 |
 |
||||||
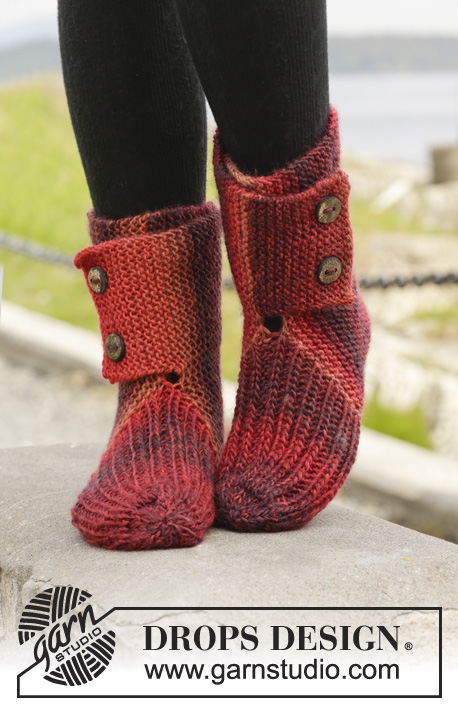
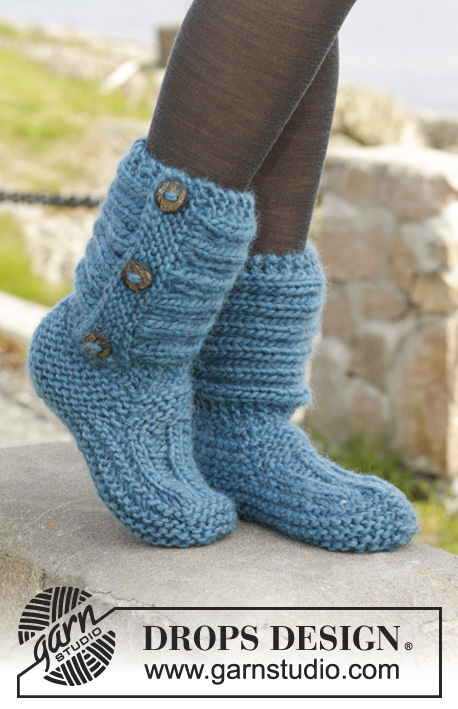
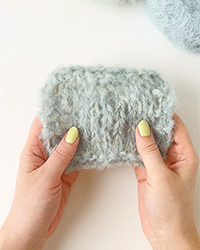
Pantofole DROPS ai ferri, a punto legaccio e coste, in "Andes". Taglie: Dalla 35 alla 42.
DROPS 158-47 |
|||||||
|
PUNTO LEGACCIO (in tondo sui ferri a doppia punta): * 1 giro a dir, 1 giro a rov *, ripetere da *-*. 1 “costa” a legaccio = 2 giri. PUNTO LEGACCIO (avanti e indietro sui ferri): Lavorare tutti i ferri a dir. 1 “costa” a legaccio = 2 ferri a dir. MOTIVO: Vedere il diagramma A.1. MOTIVO 2: Ferro 1(= diritto del lavoro): * 2 m dir, 2 m rov *, ripetere da *-* finché non rimangono 2 m, 2 m dir. Ferro 2 (= rovescio del lavoro): lavorare a dir le m dir e a rov le m rov. Ripetere il ferro 2. ---------------------------------------------------------- PANTOFOLE: Lavorare prima il bordo nella parte inferiore della gamba, proseguire con il piede. Finire con il bordo intorno alla gamba. GAMBA: Avviare 37-37-39 m sui ferri a doppia punta n° 6 con il filato Andes. Lavorare a PUNTO LEGACCIO in tondo - vedere le spiegazioni sopra - finché il lavoro non misura ca. 4 cm, finire dopo 1 giro a rov. RICORDARSI LA TENSIONE DEL LAVORO! PIEDE: Lavorare ora avanti e indietro Tenere ora le prime 10 m sui ferri, mettere in attesa su un ferma maglie le rimanenti 27-27-29 m. Lavorare ora le 10 m della parte centrale seguendo il MOTIVO 2 – vedere le spiegazioni sopra – ALLO STESSO TEMPO, alla fine dei 2 ferri successivi, avviare 1 m vivagno (lavorare la m vivagno a PUNTO LEGACCIO - vedere le spiegazioni sopra) = 12 m. Quando la parte centrale misura 7-8½-10 cm, diminuire 1 m vivagno da ciascun lato = 10 m. Riportare ora sui ferri di lavoro, le m messe in attesa sul ferma maglie e riprendere 12-14-16 m da ciascun lato della parte centrale (a 1 m dai bordi) = 61-65-71 m. DA ADESSO IN AVANTI, MISURARE IL LAVORO DA QUESTO PUNTO ! Inserire 1 segno al centro delle 10 m della parte centrale (= parte anteriore, verso la punta del piede) e 1 segno nella m del tallone, sul dietro: ci sono 30-32-35 m, tra i segni, da ciascun lato. Proseguire ora in tondo a punto legaccio. Quando il lavoro misura 2 cm, lavorare, ogni 2 giri, 2 m insieme a dir da ciascun lato di ogni segno (= 4 m in meno ad ogni giro). Proseguire queste diminuzioni finché il lavoro non misura 5-5-6 cm. Intrecciare le rimanenti m. Cucire sotto il piede nell’asola più esterna delle m per evitare una cucitura troppo spessa. BORDO DELLA GAMBA: Si lavora avanti e indietro sui ferri. Avviare 22 m sui ferri n° 6 con il filato Andes. Lavorare 4 coste a legaccio; ALLO STESSO TEMPO, nel corso dell’ultimo ferro, aumentare 6 m in modo uniforme = 28 m. Lavorare seguendo il diagramma A.1 (= 28 m) finché il lavoro non misura ca.35-36-38 cm. Lavorare 4 coste a legaccio; ALLO STESSO TEMPO, durante il 1° ferro, diminuire 6 m in modo uniforme = 22 m. Intrecciare le m. Sovrapporre il bordo di avvio delle m al bordo di chiusura e attaccare 3 bottoni come decorazione, nelle coste a legaccio della gamba. CONFEZIONE: Cucire il bordo della gamba al ferro di avvio della gamba (quindi le m avviate per la gamba, all’inizio delle spiegazioni). Disporre il bordo in modo che i bottoni si trovino sul lato esterno della pantofola, con l’apertura sul dietro, lato tallone - cucire sul rovescio del lavoro per avere una cucitura invisibile. Lavorare una seconda pantofola in modo uguale. Assicurarsi che l’apertura del bordo sia sull’altro lato. |
|||||||
Spiegazioni del diagramma |
|||||||
|
|||||||

|
|||||||
Avete terminato questo modello?Allora taggate le vostre foto con #dropspattern #onestepaheadslippers o inviatele alla #dropsfan gallery. Avete bisogno di aiuto con questo modello?Troverete 18 video tutorial, una sezione per i commenti/domande e molto altro guardando il modello su www.garnstudio.com © 1982-2025 DROPS Design A/S. Ci riserviamo tutti i diritti. Questo documento, compreso tutte le sue sotto-sezioni, è protetto dalle leggi sul copyright. Potete leggere quello che potete fare con i nostri modelli alla fine di ogni modello sul nostro sito. |
|||||||

Con oltre 40 anni di esperienza nel design di modelli di maglia e uncinetto, DROPS Design offre la più estesa collezione di modelli gratuiti su internet - tradotti in 17 lingue. Ad oggi vi possiamo fornire 319 cataloghi e 11897 modelli - 9169 dei quali sono tradotti in Italiano.
Ci stiamo impegnando molto per darvi il meglio che vi possiamo offrire in termini di maglia e uncinetto, ispirazioni e consigli così come filati di grande qualità ad un prezzo incredibile! Volete utilizzare i nostri modelli per qualcosa d'altro oltre al vostro uso personale? Potete leggere tutto ciò che è consentito nel testo sul Copyright in basso su tutte le pagine dei nostri modelli. Buon lavoro!
Lasciare un commento sul modello DROPS 158-47
Noi saremmo felici di ricevere i tuoi commenti e opinioni su questo modello!
Se vuoi fare una domanda, fai per favore attenzione a selezionare la categoria corretta nella casella qui sotto per velocizzare il processo di risposta. I campi richiesti sono indicati da *.