
Categorie popolari
State cercando un filato?


Commenti / Domande (72)
![]() Angel ha scritto:
Angel ha scritto:
Ich versteh nicht so genau wie ich die verkürzten Reihen stricken soll. Man wendet und strickt somit nur ein paar Maschen, dann jedes mal etwas mehr und wieder zurück. Werden sie ohne Rückreihen gestrickt? Und dann muss man jedes mal 8 Maschen mehr stricken und dann wenden? Dann ist die eine Seite von gestrickten ja viel kürzer als das andere? Das kann man ka gar nicht zusammen nähen später?
28.04.2021 - 09:55DROPS Design ha risposto:
Liebe Angel, mit der Erhöhung wird das Rückenteil etwas höher als das Vorderteil sein; dieses Video zeigt, wie man eine Erhöhung strickt, bei dieser Hose stricken Sie die Rückreihen im Bündchen. Vie lSpaß beim stricken!
28.04.2021 - 11:26
![]() Danièle ha scritto:
Danièle ha scritto:
Est-ce que le nombre de rangs raccourcis (14) indiqués pour la ré-hausse du dos n'est pas trop grand : cela rajoute 4,5 cm de côtes 2/2 dans le dos, cela semble beaucoup. Est-ce que cela ne devrait pas être différent selon les tailles ? Merci
10.04.2021 - 16:27DROPS Design ha risposto:
Bonjour Danièle, c'est bien correct ainsi, le nombre de mailles est adapté à chaque taille; vous pouvez en revanche tout à fait en tricoter plus ou moins si vous préférez ajuster la hauteur à votre convenance. Bon tricot!
12.04.2021 - 08:07
![]() Market ha scritto:
Market ha scritto:
Už jsem na to asi přišla..u videa Zub, schodek při začínání kruhové řady je postup Pozor! Pokud je to v návodu uvedeno, nahodíme 1 oko navíc. (což v návodu není, takže jsem nic nepřidávala), ale v anglickém návodu Note! Cast on 1 additional stitch than what pattern tells you - se má udělat oko navíc vždy a pak pokračovat podle návodu. Takže předpokládám, že se jedná o špatný předklad :(
19.01.2021 - 19:16DROPS Design ha risposto:
Dobrý den ještě jednou, překlad návodu je v pořádku. To, co popisujete, je začátek při pletení v kruhových řadách, jde o první spojení kruhové řady, kdy vzniká zoubek (ten se většinou zapraví při závěrečném zapošívání konců příze). Jak je z videa patrné, při spojení de facto 1 oko ujmeme - proto je tam poznámka, že v případě, kdy to návod výslovně uvádí, musíme nahodit o 1 oko víc; toto oko navíc ujmeme právě při spojení kruhové řady - jinak by nám ve vzoru přebývalo. Pokud bychom oko navíc nenahodili a použili tento způsob spojení kr. řady, oko by nám chybělo. Hodně zdaru! Hana
20.01.2021 - 06:08
![]() Market ha scritto:
Market ha scritto:
Dobrý den, je spravně, že se mi na zadní straně u vroubkovaného vzrou mezi koncem a začátkem řady dělá viditelný "šev" (řady jsou trošičku posunuté)? Jestli ne, tak co dělám špatně? Děkuji za radu :)
19.01.2021 - 14:04DROPS Design ha risposto:
Milá Market, těžko radit, pokud nemám k dispozici fotku - pokud jsou řady rozestouplé od sebe, je to v důsledku nestejnoměrného utahování (třeba když se vracíte k odložené práci) a nejde o nic dramatického. Pokud máte zlom, "zoubek" v průběhu řady, je to trochu horší: v tom případě jste zřejmě pohnula s oky - někde jste upletla oko 2x nebo vpíchla mimo; zkuste najít místo, kde se to začíná objevovat poprvé a pořádně prohédnout jak jsou očka vedena. Pak zvažte, co dál, ale tohle by se bez párání zřejmě neobešlo... Hodně zdaru! Hana
20.01.2021 - 05:45
![]() Helle ha scritto:
Helle ha scritto:
Jeg Slår -136 m op ( omg beg = midt bagpå) forhøjning i Ribben bag på bukserne således: Start midt bagpå og strik-8-m, vend arb Strik 16-m og vend arb. Strik 24 m og vend arb. Strik-32-) m og vend arb. Fortsæt Ribben således ved at strikke-8-m mere for hver gang der vendes, 10 gange til (= 14 forkortede p). Derefter fortsættes Ribben over alle m igen. DERFOR har jeg fået start omg begyndelse til at være 2/3 højre end den anden side . Hvad gør jeg? kan jeg sende et billed?
15.10.2020 - 13:46DROPS Design ha risposto:
Hej Helle. Det ska var likt på båda sidor så då har du nog dessvärre gjort något fel. Har du sett denna video? Det stickas 10 m mer per vändning och ett mindre antal forkortade pinner, men det är samma princip. Mvh DROPS Design
16.10.2020 - 09:27
![]() Nasreen Syed ha scritto:
Nasreen Syed ha scritto:
Meaning joining both ends this terminology is more easier for international knitters Thanks for replying if you can answer this will highly appreciate
07.08.2020 - 19:26DROPS Design ha risposto:
Dear Mrs Syed, pants is entirely worked in the round from the waist down to the crotch, then each leg is worked separately also in the round. This video shows how to work stocking stitch in the round and this one how to work garter stitch in the round. Hope this will help. Happy knitting!
10.08.2020 - 08:46
![]() Nasreen Syed ha scritto:
Nasreen Syed ha scritto:
Hi this is nasreen syed now doing the pants wanted to find when we are starting the project and casting the st on the circular needle are we joining and knitting in tounds like one piece if yes then its really tough to knit please advise i would appreciate if you can reply soon i am in the midfle of project thank you
05.08.2020 - 19:36DROPS Design ha risposto:
Hi Nasreen, Yes you work the piece in the round. After casting on work the first cast-on stitch which then makes a round . Happy knitting!
06.08.2020 - 07:12
![]() Susanne ha scritto:
Susanne ha scritto:
Hallo, Ich stricke gerade die Hose, jetzt ist mit beim Stricken der verkürzten Reihen aufgefallen, dass der Bauchbund laut Anleitung nur eine Höhe von 2 cm hat (Rippenmuster) ich habe das jetzt treudoof gemacht. Aber die Hose auf dem Foto zur Anleitung hat einen deutlichen breiteren Bauchbund. Könnte es sein, das da etwas mit der Anleitung nicht stimmt oder die Anleitung vielleicht nicht zum Foto passt? Herzliche Grüße
27.06.2020 - 23:58DROPS Design ha risposto:
Liebe Susanne, es wird im Rippenmuster gestrickt bis die Arbeit (6) 7-8-8-8 (8-9) cm in der vorderen Mitte misst - dh nach den verkürzten Reihen für die Erhöhung stricken Sie das Rippenmuster weiter über alle Maschen. Viel Spaß beim stricken!
29.06.2020 - 08:17
![]() Inga ha scritto:
Inga ha scritto:
Hallo, wenn ich im Rumpf beiderseits der Markierungen einen Umschlag mache und diese dann in der folgenden Runde rechts verschränkt abstricke entsteht bei mir ein Loch. Soll zwischen den Umschlägen jeweils eine Masche links getrickt werden um das zu verhindern? Vielen Dank!
09.06.2020 - 23:16DROPS Design ha risposto:
Liebe Inga, versuchen Sie die Umschläge nicht zu locker zu arbeiten, sonnst können Sie auch mit einer anderen Technik zunehmen wenn das Loch immer zu groß aussieht. Viel Spaß beim stricken!
10.06.2020 - 06:33
![]() Danielle Maddocks ha scritto:
Danielle Maddocks ha scritto:
Hi, I’ve got to the first leg but I’m finding it hard to start the leg on the round without creating a ladder. Do you have any advice on what to do? Thank you.
02.05.2020 - 12:48DROPS Design ha risposto:
Dear Mrs Maddocks, when knitting garter stitch in the round, you can avoid any ladder by tighting the yarn at the transition between the last stitch on the round and the firrst stitch next round. Hope this helps. Happy knitting!
04.05.2020 - 11:42
|
|
Smarty Pants#smartypants |
|
|
|
|
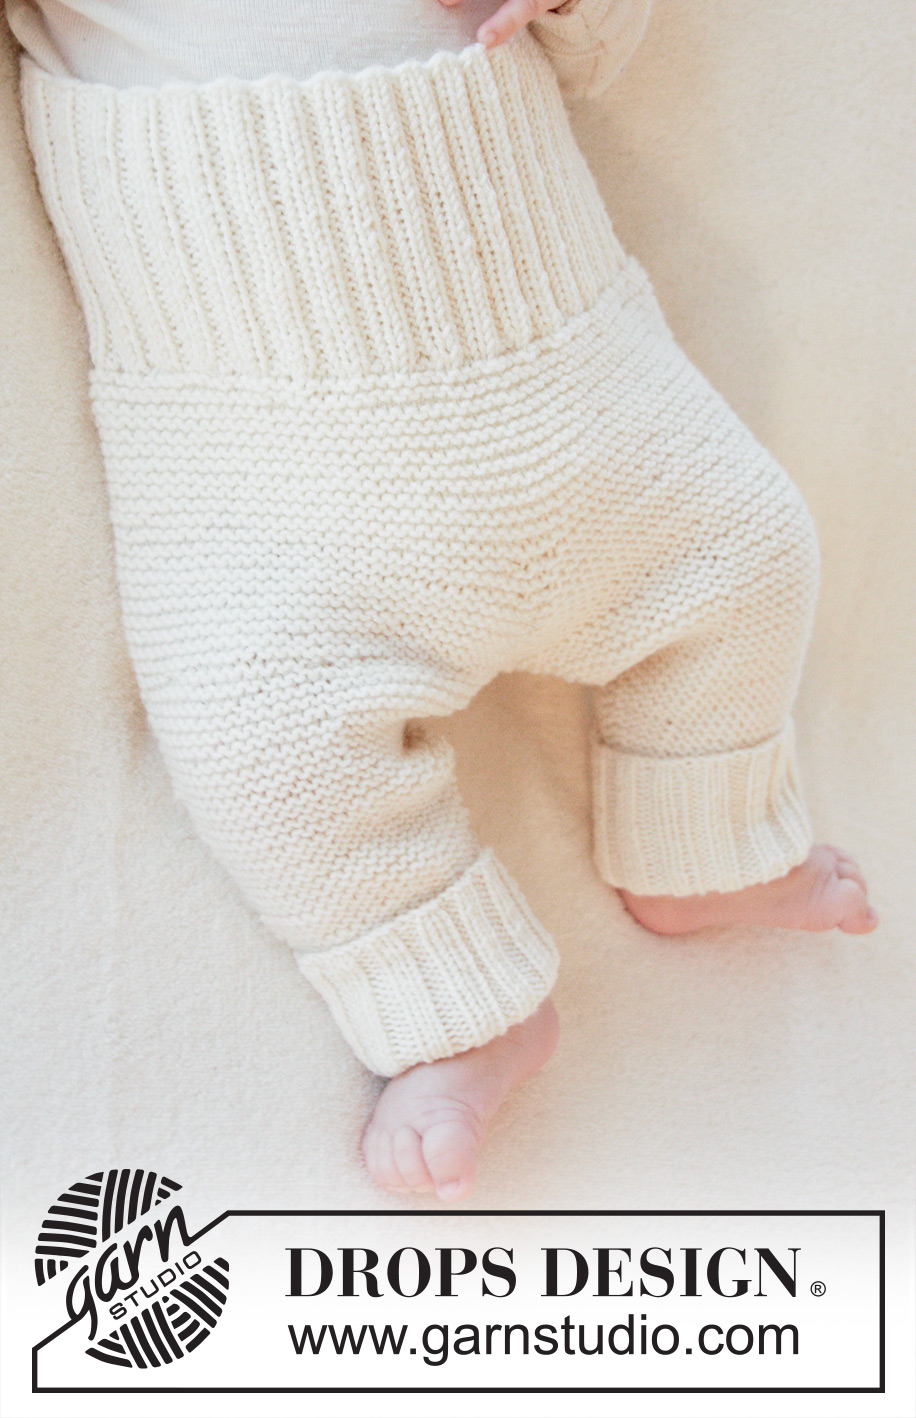
Pantaloni lavorati ai ferri a maglia legaccio per neonati in DROPS BabyMerino. Taglie: (prematuri) - 4 anni.
DROPS Baby 25-7 |
|
|
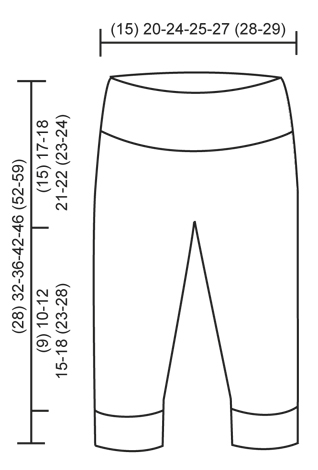
SUGGERIMENTO PER IL LAVORO: Tirare un po’ di più il filo quando si gira al centro del f per evitare buchi. M LEGACCIO (in tondo sui f a doppia punta/f circolari): * 1 giro dir e 1 giro rov *, ripetere *-*. SUGGERIMENTO PER GLI AUMENTI: Aumentare su un giro a rov e aumentare 1 m facendo 1 gettato come segue: 1 maglia rovescio, 1 gettato, lavorare a rovescio fino a quando rimane 1 maglia prima del segnapunti, 1 gettato, 2 maglie rovescio (il segnapunti è al centro di queste 2 maglie), 1 gettato, lavorare a rovescio fino a quando rimane 1 maglia prima del segnapunti, 1 gettato, 1 maglia rovescio. Sul giro successivo lavorare il gettato a dir ritorto per evitare buchi. SUGGERIMENTO PER LE DIMINUZIONI: Diminuire su un giro a dir. Passare 1 m a dir senza lavorarla, 1 m dir, accavallare la m passata sopra quella appena lavorata, 2 m insieme a dir. -------------------------------------------------------- PANTALONI: Lavorati in tondo dalla vita in giù. Avviare (84) 112-136-140-152 (156-164) m con i f circolari n° 2,5 mm con Baby Merino – inizio del giro = centro dietro. Lavorare a coste = 2 m dir/2 m rov. Quando le coste misurano (2) 2-3-3-3 (3-4) cm, lavorare un’alzata nelle coste sul dietro dei pantaloni come segue: iniziare al centro dietro e lavorare (4) 6-8-8-8 (8-8) m, girare il lavoro – LEGGERE IL SUGGERIMENTO PER IL LAVORO. Lavorare (8) 12-16-16-16 (16-16) m e girare il lavoro. Lavorare (12) 18-24-24-24 (24-24) m e girare il lavoro. Lavorare (16) 24-32-32-32 (32-32) m e girare il lavoro. Continuare a coste in questo modo lavorando (4) 6-8-8-8 (8-8) m in più ad ogni giro altre 10 volte (= 14 f accorciati). Poi continuare a coste in tondo su tutte le m. Quando le coste misurano (6) 7-8-8-8 (8-9) cm (misurati al centro davanti), passare ai f circolari n° 3 mm. Lavorare 1 giro dir e ALLO STESSO TEMPO distribuire (12) 16-20-20-22 (22-24) diminuzioni in modo uniforme = (72) 96-116-120-130 (134-140) m. Poi lavorare a M LEGACCIO in tondo sui f – leggere la spiegazione sopra. Quando il lavoro misura (12) 14-14-17-18 (19-20) cm dal bordo di avvio (misurati al centro davanti), inserire 1 segnapunti all’inizio del giro e 1 segnapunti dopo (36) 48-58-60-65 (67-70) m (indicano il centro davanti e il centro dietro sui pantaloni). Poi aumentare 1 m a ogni lato di entrambi i segnapunti (= 4 aumenti) – LEGGERE IL SUGGERIMENTO PER GLI AUMENTI. Ripetere gli aumenti ogni 4 giri altre (3) 3-4-4-4 (4-4) volte (= (4) 4-5-5-5 (5-5) aumenti in totale) = (88) 112-136-140-150 (154-160) m. Dopo l’ultimo aumento il lavoro misura circa (15) 17-18-21-22 (23-24) cm dal bordo di avvio (misurato al centro davanti). GAMBA: Iniziare al centro dietro, lavorare (44) 56-68-70-75 (77-80) m e trasferire le altre m su un fermamaglie. Lavorare a M LEGACCIO in tondo sui f – inserire 1 segnapunti all’inizio del giro (= interno della gamba). Quando la gamba è stata lavorata per (1) 1-1-1-1 (2-2) cm – aggiustarla in modo che il giro successivo sia un giro a dir, diminuire 1 m a ogni lato del segnapunti – LEGGERE IL SUGGERIMENTO PER LE DIMINUZIONI. Ripetere le diminuzioni altre (4) 8-11-10-10 (9-8) volte (= (5) 9-12-11-11 (10-9) diminuzioni in totale) come segue: TAGLIA PREMATURI: ogni 8 giri. TAGLIA 0/1 + 1/3 MESI: ogni 4 giri. TAGLIA 6/9 MESI: ogni 6 giri. TAGLIA 12/18 MESI: ogni 8 round. TAGLIA 2 ANNI: ogni 10 giri. TAGLIA 3/4 ANNI: ogni 14 giri. Alla fine delle diminuzioni ci sono (34) 38-44-48-53 (57-62) m sul f. Continuare a lavorare fino a quando il lavoro misura (24) 27-30-36-40 (46-52) cm dal bordo di avvio in giù (misurato al centro davanti). Passare ai f a doppia punta n° 2,5 mm e lavorare 1 giro dir. e ALLO STESSO TEMPO distribuire (10) 10-8-8-11 (11-10) aumenti in modo uniforme = (44) 48-52-56-64 (68-72) m. Poi lavorare a coste = 2 m dir/2 m rov fino a quando i pantaloni misurano (28) 32-36-42-46 (52-59) cm dalla vita (le coste misurano circa (4) 5-6-6-6 (6-7) cm). Intrecciare senza stringere con dir su dir e rov su rov. Lavorare l’atra gamba nello stesso modo. |
|
 |
|
Avete terminato questo modello?Allora taggate le vostre foto con #dropspattern #smartypants o inviatele alla #dropsfan gallery. Avete bisogno di aiuto con questo modello?Troverete 25 video tutorial, una sezione per i commenti/domande e molto altro guardando il modello su www.garnstudio.com © 1982-2026 DROPS Design A/S. Ci riserviamo tutti i diritti. Questo documento, compreso tutte le sue sotto-sezioni, è protetto dalle leggi sul copyright. Potete leggere quello che potete fare con i nostri modelli alla fine di ogni modello sul nostro sito. |


Con oltre 40 anni di esperienza nel design di modelli di maglia e uncinetto, DROPS Design offre la più estesa collezione di modelli gratuiti su internet - tradotti in 17 lingue. Ad oggi vi possiamo fornire 325 cataloghi e 12298 modelli - 9569 dei quali sono tradotti in Italiano.
Ci stiamo impegnando molto per darvi il meglio che vi possiamo offrire in termini di maglia e uncinetto, ispirazioni e consigli così come filati di grande qualità ad un prezzo incredibile! Volete utilizzare i nostri modelli per qualcosa d'altro oltre al vostro uso personale? Potete leggere tutto ciò che è consentito nel testo sul Copyright in basso su tutte le pagine dei nostri modelli. Buon lavoro!
Lasciare un commento sul modello DROPS Baby 25-7
Noi saremmo felici di ricevere i tuoi commenti e opinioni su questo modello!
Se vuoi fare una domanda, fai per favore attenzione a selezionare la categoria corretta nella casella qui sotto per velocizzare il processo di risposta. I campi richiesti sono indicati da *.