
Categorie popolari
State cercando un filato?


Commenti / Domande (115)
![]() Abigail Easley ha scritto:
Abigail Easley ha scritto:
How do I do the dec 1 st for sleeve?
03.11.2016 - 18:00DROPS Design ha risposto:
Dear Mrs Easley, dec 1 st on each side on left sleeve by K2 tog at the beg + at the end of row (= 2 sts dec per dec row) - repeat this dec every other cm (= every 2nd cm). Happy knitting!
04.11.2016 - 08:50
![]() Abigail Easley ha scritto:
Abigail Easley ha scritto:
Inc by making 1 YO inside 2 edge sts in garter st. On next row K YO twisted (i.e. work in back loop of st instead of front to avoid holes). Do I do......."make 1, YO on each side or where?
22.10.2016 - 01:33DROPS Design ha risposto:
Dear Mrs Easley, these inc apply to neckline on left front piece, ie work row from RS until 2 sts remain, make 1 YO, K last 2 sts. On next row from WS, K first 2 sts, K YO into back of loop and K to the end of row. (1 st inc on row). Happy knitting!
24.10.2016 - 09:24
![]() Abigail Easley ha scritto:
Abigail Easley ha scritto:
How do I do the BUTTON HOLES: 1 button hole = bind off 1 st and make 1 YO on next row over the bind off st. Do I bind off 1 st, make 1 knit, and yo? And repeat it till I get to 5 button holes?
17.10.2016 - 22:39DROPS Design ha risposto:
Dear Mrs Easley, for 1st buttonhole, bind off 1 st, work until 2nd buttonhole, bind off 1 st and repeat until 5 buttonholes have been made. On next row, work to the 1st buttonhole, make a YO over cast off st and continue to next buttonhole, make a YO over cast off st etc. On next row, K the YOs. Happy knitting!
18.10.2016 - 09:14
![]() Abigail Easley ha scritto:
Abigail Easley ha scritto:
After I slipped my 46 sts......do I continue to Garter stitch till length I wanted it to be?
13.10.2016 - 21:40DROPS Design ha risposto:
Dear Mrs Easley, when you have slipped the 46 sts on a st holder for back piece, work now as explained under "Front piece" (continue working in garter st), then slip back piece sts back on to needle and work back piece. Happy knitting!
14.10.2016 - 09:07
![]() Abigail Easley ha scritto:
Abigail Easley ha scritto:
Now that I have 38 sts and my knitted isn't 17 cm......Do I keep doing the garter st till I get to 17 cm? When piece measures 17-18-20 (24-28) cm / 6 3/4"-7"-8" (9½"-11"), loosely cast on 27-29-34 (39-42) new sts at beg
05.10.2016 - 15:18DROPS Design ha risposto:
Dear Mrs Easley, yes continue in garter st over the 38 sts until piece measures 17 cm (in 1st size). Happy knitting!
05.10.2016 - 15:41
![]() Abigail Easley ha scritto:
Abigail Easley ha scritto:
Am I supposed to do Inc 1 st on each side for the right sleeve or just do one Inc on one side?
04.10.2016 - 15:13DROPS Design ha risposto:
Dear Mrs Easley, you have to inc 1 st on each side on right sleeve, ie 1 st at the beg on row + 1 st at the end of row. Happy knitting!
04.10.2016 - 15:49
![]() Abigail Easley ha scritto:
Abigail Easley ha scritto:
Am I allowed to sell this sweater?
04.10.2016 - 04:27DROPS Design ha risposto:
Dear Mrs Easley, please look at the copyright rules at the end of the page to read more. Happy knitting!
04.10.2016 - 09:37
![]() Susie ha scritto:
Susie ha scritto:
I'm having a hard time understanding how to attach the stitches from the back (on the holder) onto the left front. Do you connect the pieces to the bottom of the left front or the top where the neckline is?
06.05.2016 - 20:40DROPS Design ha risposto:
Dear Susie, when you have finished the left front piece, on next row from RS work all sts from left front piece (from bottom of left front piece towards neckline, and sts from top of neckline towards bottom edge on back piece), then work the sts from back piece -insert a new marker to measure from marker. and work for 9-13 cm (see size). Happy knitting!
09.05.2016 - 09:13
![]() Maria ha scritto:
Maria ha scritto:
Hallo Ich möchte die Jacke lieber mit einem Garn stricken. Ist es richtig das zweimal A einem Garn der Stärke C entspricht? Liebe grüße Maria
22.04.2016 - 10:14DROPS Design ha risposto:
Liebe Maria, ja, das ist richtig.
22.04.2016 - 12:56
![]() Hilary ha scritto:
Hilary ha scritto:
Hej, Förstår inte från Vä framstycke eller rättare sagt efter det. Hur sätter jag maskorna från det vilande arbetet på samma sticka? Spelar det ingen roll åt vilket håll? Stickas vä ärm så att det blir en söm uppe på ärmen? När jag ska avmaska 27-29... i varje sida, är det på respektive del (som väl är "fria") och från vilket håll? Jag tycker mönstret är väldigt svårt att förstå. Nu vill jag bli klar med det här o begripa så kan jag förtydliga det så jag förstår och sticka en till.
04.04.2016 - 21:18
|
||||
Grey Gosling#greygoslingcardigan |
||||
 |
 |
|||
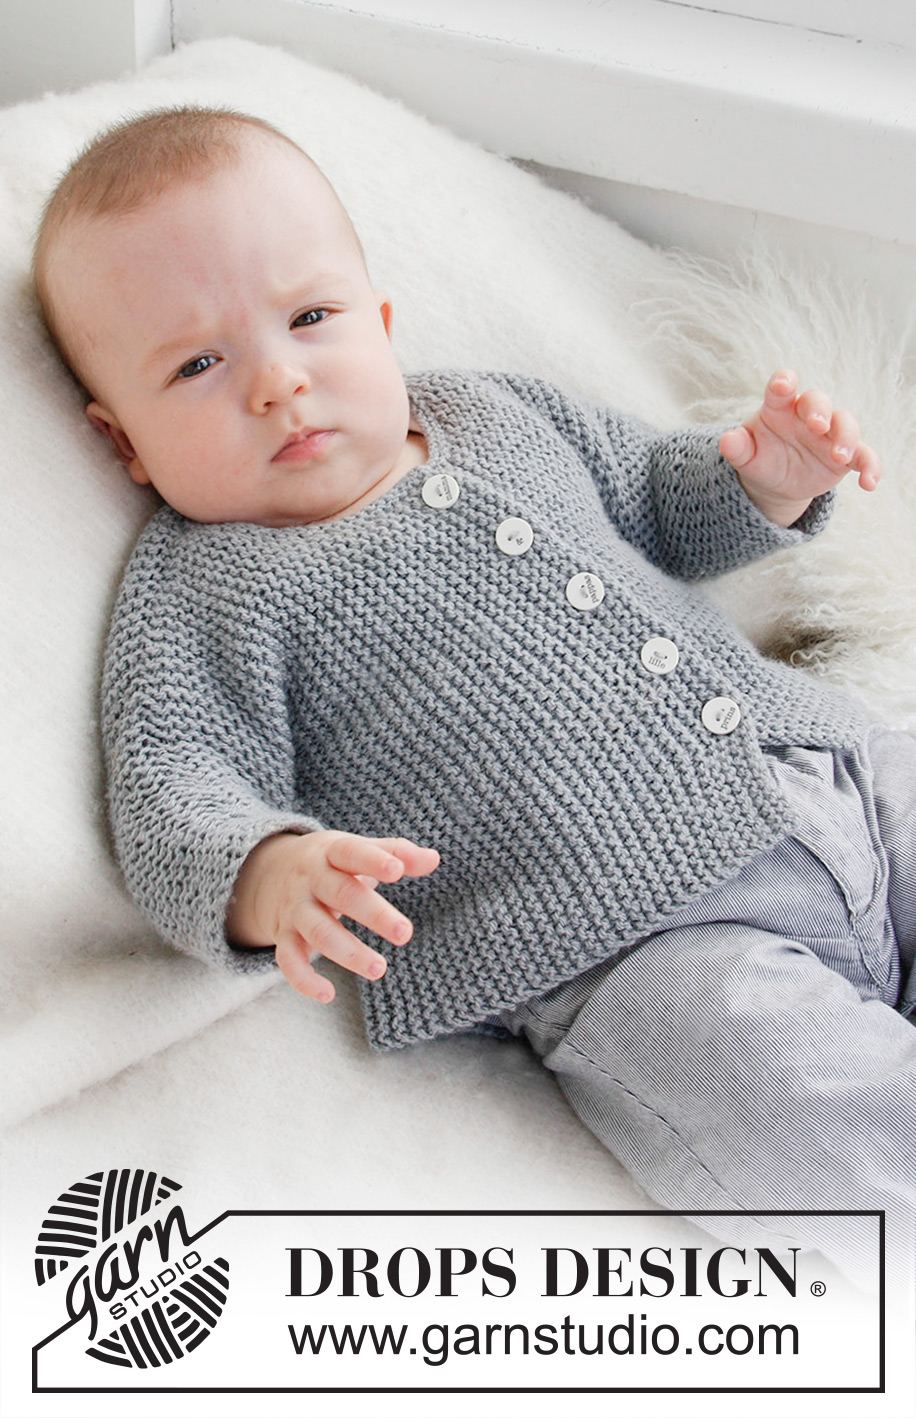
Cardigan lavorato ai ferri da lato a lato per neonati e bambini in 2 capi di DROPS Alpaca.
DROPS Baby 21-39 |
||||
|
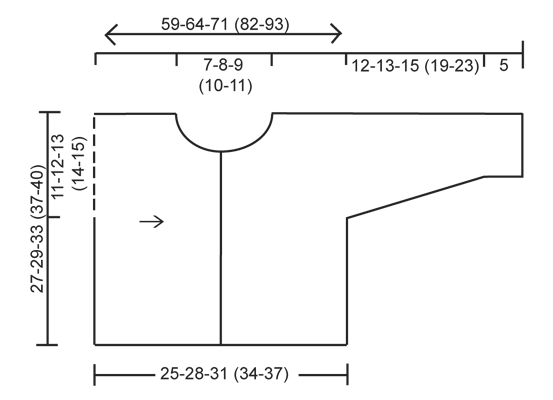
--------------------------------------------------------- M. A LEGACCIO (avanti e indietro sul ferro): lavorare a dir. tutti i f. SUGGERIMENTO PER GLI AUMENTI (applicato alla scollatura): Aumentare facendo un gettato all’interno delle 2 m. di vivagno a m. legaccio. Sul f. successivo lavorare il gettato a dir. ritorto (cioè lavorarlo nel filo dietro anziché in quello davanti per evitare buchi). NOTA: Lavorare la m. più esterna nella scollatura un po’ stretta in modo che il bordo risulti carino ASOLE: 1 asola = Intrecciare 1 m. e fare un gettato sul f. successivo sulla m. intrecciata. ------------------------------------------------------- CARDIGAN: Il davanti e il dietro sono lavorati in un pezzo, da braccio a braccio. MANICA DX: Con i ferri misura 5 mm e 2 capi di Alpaca avviare senza stringere 26-28-28 (30-30) m. (= in basso della manica dx.). Lavorare a m. legaccio – leggere la spiegazione sopra. Quando il lavoro misura 5 cm, aumentare 1 m. ad ogni lato, ripetere gli aumenti ogni 2 cm per un totale di 6-6-8 (9-11) volte = 38-40-44 (48-52) m. Quando il lavoro misura 17-18-20 (24-28) cm, avviare senza stringere 27-29-34 (39-42) nuove m. all’inizio e alla fine del f. per il davanti e il dietro = 92-98-112 (126-136) m. Continuare a lavorare fino a quando il lavoro misura 9-10-11 (12-13) cm da dove sono state avviate le m. per il davanti e il dietro (il lavoro misura 26-28-31 (36-41) cm dal margine di avvio in basso della manica). Lavorare il f. successivo sul diritto del lavoro come segue: Lavorare a dir. le prime 46-49-56 (63-68) m. sul ferro (= davanti) e trasferire le rimanenti 46-49-56 (63-68) m. su un ferro ausiliario (= dietro). Inserire un segnapunti nell'ultimo ferro e misurare da qui il dietro d'ora in poi. DAVANTI: = 46-49-56 (63-68) m. Girare il lavoro e intrecciare le prime 6-6-6 (7-7) m. sul f. per il collo. Poi diminuire per la scollatura verso il collo ogni cm: 1 m. per 3 volte in totale diminuire lavorando 2 m insieme all’interno delle 2 m vivagno = 37-40-47 (53-58) m. sul ferro. Lavorare fino alla larghezza del davanti = 12,5-14-15,5 (17-18,5) cm. Ora intrecciare per 5-5-5 (6-6) asole in modo uniforme sul f. seguente – leggere la spiegazione sopra. NB: L'asola in alto lato collo, deve essere posizionata dopo 2 m dal bordo collo. Poi lavorare 4 ferri a maglia legaccio. Intrecciare. DIETRO: Trasferire le 46-49-56 (63-68) m. dal ferro ausiliario al ferro di lavoro e lavorare a dir. ogni f. fino a quando il lavoro misura 7-8-9 (10-11) cm dal segnapunti dietro alla scollatura. Mettere il lavoro da parte e lavorare il davanti sx. DAVANTI SX.: Avviare senza stringere 37-40-47 (53-58) m. sui ferri misura 5 mm con 2 capi di Alpaca. Lavorare a dir. ogni f. finché il lavoro non misuri 4-4,5-5 (5,5-6) cm. Poi, aumentare, sul lato sinistro del lavoro, 1 m in totale 3 volte - leggere SUGGERIMENTO PER GLI AUMENTI. Quando il lavoro misura 6-6,5-7 (7,5-8) cm, avviare 6-6-6 (7-7) m al lato sinistro = 46-49-56 (63-68) m. Quando sono state aumentate tutte le m. per il collo, lavorare le 2 parti insieme – leggere il CORPO. CORPO: Trasferire le 46-49-56 (63-68) m. del dietro sullo stesso ferro del davanti sx. = 92-98-112 (126-136) m. sul ferro. Inserire 1 nuovo segnapunti nel lavoro – ora misurare il lavoro da qui! Lavorare fino a quando il lavoro misura 9-10-11 (12-13) cm. Intrecciare senza stringere all’inizio dei 2 f. successivi 27-29-34 (39-42) m. ad ogni lato = 38-40-44 (48-52) m. rimaste sul ferro per la manica sx. – ora misurare il lavoro da qui. Quando il lavoro misura 2-3-1 (3-3) cm, diminuire 1 m. ad ogni lato, ripetere ogni 2 cm per un totale di 6-6-8 (9-11) volte = 26-28-28 (30-30) m. sul ferro. Intrecciare senza stringere quando la manica misura 17-18-20 (24-28) cm (il lavoro misura circa 59-64-71 (82-93) cm da braccio a braccio). BORDO DEL COLLO: Con il ferro 5 mm e 2 fili di Alpaca, riprendere, sul diritto, ca 40 a 50 m intorno al collo. Lavorare 3 f a dir avanti e indietro, intrecciare poi senza stringere. CONFEZIONE: Piegare il lavoro a metà all’altezza delle spalle e cucire la manica e i margini dei lati nel filo davanti della m. più esterna per evitare una cucitura stretta. Attaccare i bottoni. |
||||
Spiegazioni del diagramma |
||||
|
||||
 |
||||
Avete terminato questo modello?Allora taggate le vostre foto con #dropspattern #greygoslingcardigan o inviatele alla #dropsfan gallery. Avete bisogno di aiuto con questo modello?Troverete 11 video tutorial, una sezione per i commenti/domande e molto altro guardando il modello su www.garnstudio.com © 1982-2026 DROPS Design A/S. Ci riserviamo tutti i diritti. Questo documento, compreso tutte le sue sotto-sezioni, è protetto dalle leggi sul copyright. Potete leggere quello che potete fare con i nostri modelli alla fine di ogni modello sul nostro sito. |
||||


Con oltre 40 anni di esperienza nel design di modelli di maglia e uncinetto, DROPS Design offre la più estesa collezione di modelli gratuiti su internet - tradotti in 17 lingue. Ad oggi vi possiamo fornire 324 cataloghi e 12291 modelli - 9562 dei quali sono tradotti in Italiano.
Ci stiamo impegnando molto per darvi il meglio che vi possiamo offrire in termini di maglia e uncinetto, ispirazioni e consigli così come filati di grande qualità ad un prezzo incredibile! Volete utilizzare i nostri modelli per qualcosa d'altro oltre al vostro uso personale? Potete leggere tutto ciò che è consentito nel testo sul Copyright in basso su tutte le pagine dei nostri modelli. Buon lavoro!
Lasciare un commento sul modello DROPS Baby 21-39
Noi saremmo felici di ricevere i tuoi commenti e opinioni su questo modello!
Se vuoi fare una domanda, fai per favore attenzione a selezionare la categoria corretta nella casella qui sotto per velocizzare il processo di risposta. I campi richiesti sono indicati da *.