
Categorie popolari
State cercando un filato?


Commenti / Domande (115)
![]() Kirsche ha scritto:
Kirsche ha scritto:
Hallo, ich möchte die Jacke gerne stricken, bin aber ein wenig verunsichert durch die vielen Fragen und Probleme mit der Anleitung. Ich möchte gerne wissen, wo bei der Jacke nun noch Nähte sind. Ich erstehe es so, dass es nur untere Ärmelnähte und seitliche Nähte am Körper gibt. Ist das richtig?
20.08.2018 - 10:54DROPS Design ha risposto:
Ja, das stimmt, Sie müssen an beiden Seiten die untere Ärmelnaht und die Seitennaht von Vorder- und Rückenteil schließen. Lassen Sie sich nicht verunsichern - wenn Sie etwas nicht verstehen, fragen Sie einfach noch einmal nach. :-) Viel Spaß beim Stricken!
22.08.2018 - 22:56
![]() Melanie ha scritto:
Melanie ha scritto:
Hallo, eine sehr schöne Jacke die ich gerne nachschicken möchte. Ich verstehe nur nicht warum mit 2 Fäden am Ärmel begonnen wird, wird die ganze Jacke mit doppelter Wolle gestrickt? Oder nur das Bündchen? Kann sie alternativ auch mit Merinowolle gestrickt werden? Danke!
13.06.2018 - 08:56DROPS Design ha risposto:
Liebe Melanie, die ganze Jacke wird mit 2 Fäden gestrickt - siehe Maschenprobe. Gerne können Sie auch mit 2 Fäden BabyMerino oder 1 Faden BigMerino stricken - benutzen Sie unseren Garnumrechner. Viel Spaß beim stricken!
13.06.2018 - 12:02
![]() Novello ha scritto:
Novello ha scritto:
Please would you add extra diagrams to help with this pattern. I am an experienced knitter but I’m finding this pattern terribly confusing. It is not explained clearly enough. It would help enormously if extra diagrams were added to show exactly how this is knitted and how it fixes together. I am half way through knitting it at the moment and I’m scratching my head trying to figure out how this will work.
04.04.2018 - 09:04DROPS Design ha risposto:
Dear Mrs Novello, this jacket is worked sideways starting from the right sleeve. You increase for sleeve then cast on new sts on each side for front and back piece. Then continue working only on front piece sts (put the sts for back piece on a st holder). When sts for front piece have been cast off, slip sts for back piece back on needle and work 7-11 cm (see size) and put aside. Work now left front piece and work then left front piece together with back piece until side: cast off sts for front and back piece and continue with left sleeve with dec to the wrist. Happy knitting!
04.04.2018 - 09:13
![]() Dani Toole ha scritto:
Dani Toole ha scritto:
Just finishing the left front and getting ready to attach to the body..which is the right side?? Are the increases on the left or right side???
11.01.2018 - 16:19DROPS Design ha risposto:
Hi Dani, When you have the left front piece on a table, flat in front of you, the left hand side of the piece will have the increases for the neck if you are looking at the right side. Happy knitting!
12.01.2018 - 07:51
![]() Ria De Klerk ha scritto:
Ria De Klerk ha scritto:
In het patroon Baby 21-39 zit er volgens mij een fout bij de beschrijving van de tweede mouw. Er staat elke cm 1 steek minderen aan weerszijden. Bij de beschrijving van de eerste mouw staat dat gemeerderd moet worden elke 2 cm. Dus moet m.i. bij de tweede mouw elke 2 cm geminderd worden.
14.12.2017 - 12:25
![]() Dirk ha scritto:
Dirk ha scritto:
Ich habe eben angefangen, die Jacke zu stricken in Größe 12-18 Monate Und habe schon mit dem Ärmel Probleme Nach 5 cm soll man links und rechts eine Masche zunehmen, und dann 8 mal wieder holen, alle 2cm, macht für mich 16 cm cm. Plus die 5 cm macht es 21 cm. Nun soll man nach 20cm aber auch schon dies Maschen für das Vorder - und Rückenteil. Wie soll das denn gehen?
15.10.2017 - 17:56DROPS Design ha risposto:
Lieber Dirk, die 1. Zunahmen wird nach 5 cm gestrickt, dann nehmen Sie noch 7 x alle 2 cm, dh: nach 7 cm, nach 9 cm, usw die letzte Zunahme wird beim 19 cm sein. Viel Spaß beim stricken!
16.10.2017 - 09:59
![]() EW ha scritto:
EW ha scritto:
Hei! En ymmärrä miten vasen etu- ja takakappale yhdistetään.. Jos otan kaikki 126 silmukkaa samalle puikolle ja alan neulomaan niin vasemmasta puolesta tulee tuplasti pidempi kuin oikeasta..?
29.07.2017 - 21:39DROPS Design ha risposto:
Hei, olen tarkistanut ohjeen ja mitat täsmäävät, eli etukappaleista tulee yhtä pitkät. Kiinnitä aina merkit työhön ohjeen mukaan ja ota mitat merkeistä, kuten ohjeessa opastetaan.
30.08.2017 - 14:19
![]() Amanda ha scritto:
Amanda ha scritto:
Hello. I have just finished the left front piece and am getting ready to add the stitches from the body. Should the left front piece be be facing or back side? I'm just confused about how to add the body section. Thank you
15.03.2017 - 18:37DROPS Design ha risposto:
Dear Amanda, when left front piece is done, work sts on left front piece from RS, then work the sts from back piece = all sts are now worked, insert a marker and continue back and forth on all sts. Happy knitting!
16.03.2017 - 08:38
![]() Meta ha scritto:
Meta ha scritto:
Kan jag använda Big Merino till detta mönster? Alltså sticka med enkel tråd? MVH Meta
31.01.2017 - 10:04DROPS Design ha risposto:
Hej Meta. Ja, det kan du sagtens, men strik en pröve först saa du har strikkefastheden i orden
31.01.2017 - 15:24
![]() Schön ha scritto:
Schön ha scritto:
Liebes Drops Team, wenn ich für die Jacke das Garn Big Merino nehme, brauche ich doch nur die Hälfte, oder?
31.01.2017 - 08:09DROPS Design ha risposto:
Liebe Schön, 2 Fäden Alpaca können durch 1 Faden Big Merino erszetzt werden, hier lesen Sie mehr wieviel Garn Sie dann brauchen. Viel Spaß beim stricken!
31.01.2017 - 09:32
|
||||
Grey Gosling#greygoslingcardigan |
||||
 |
 |
|||
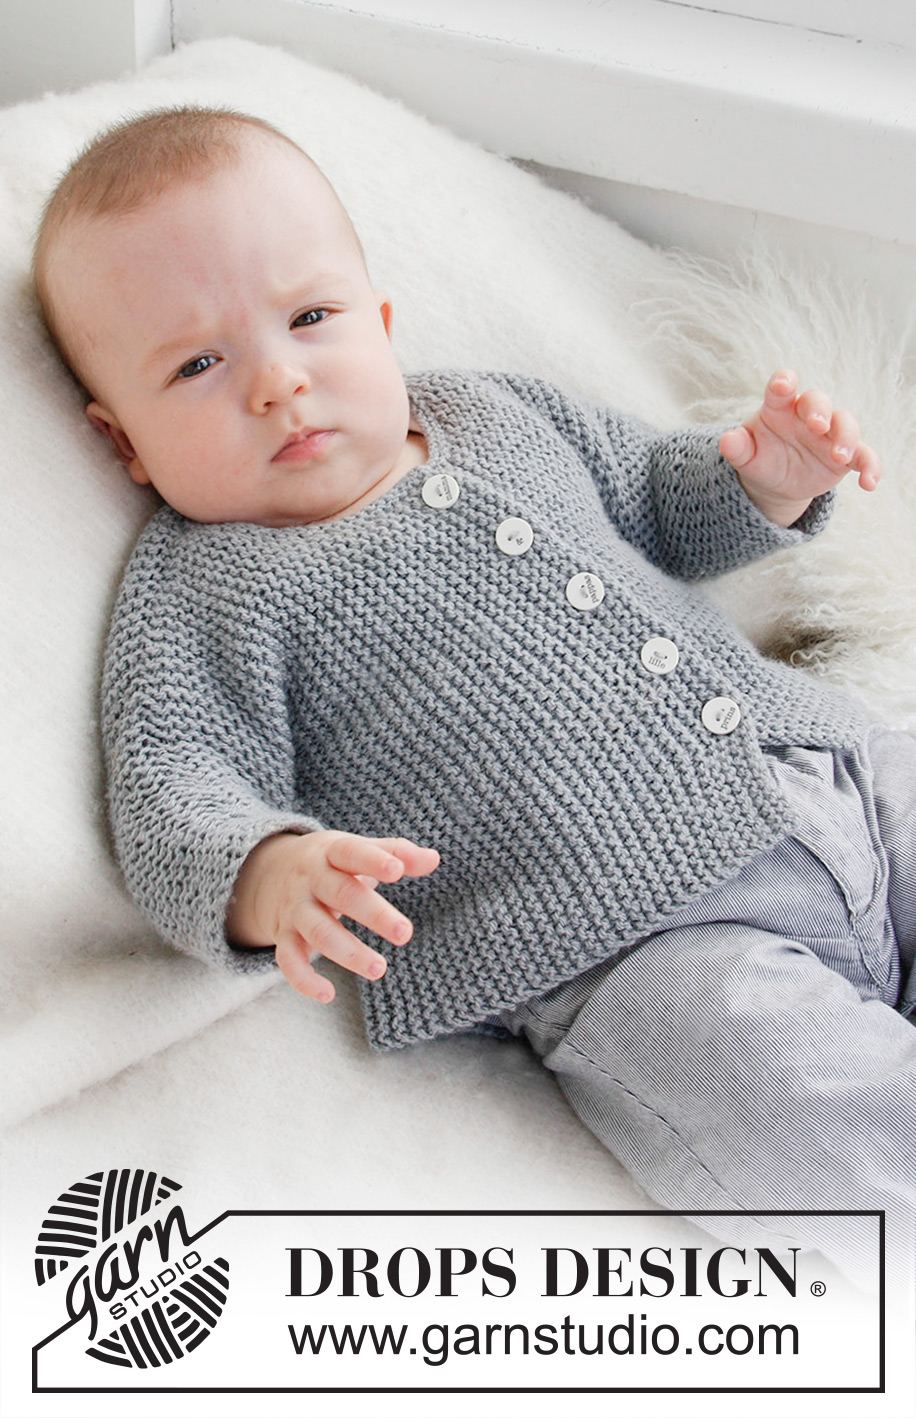
Cardigan lavorato ai ferri da lato a lato per neonati e bambini in 2 capi di DROPS Alpaca.
DROPS Baby 21-39 |
||||
|
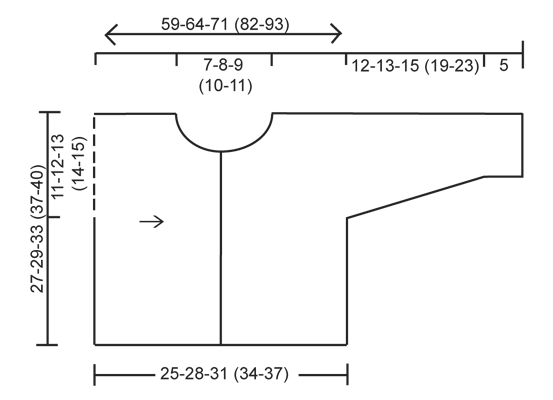
--------------------------------------------------------- M. A LEGACCIO (avanti e indietro sul ferro): lavorare a dir. tutti i f. SUGGERIMENTO PER GLI AUMENTI (applicato alla scollatura): Aumentare facendo un gettato all’interno delle 2 m. di vivagno a m. legaccio. Sul f. successivo lavorare il gettato a dir. ritorto (cioè lavorarlo nel filo dietro anziché in quello davanti per evitare buchi). NOTA: Lavorare la m. più esterna nella scollatura un po’ stretta in modo che il bordo risulti carino ASOLE: 1 asola = Intrecciare 1 m. e fare un gettato sul f. successivo sulla m. intrecciata. ------------------------------------------------------- CARDIGAN: Il davanti e il dietro sono lavorati in un pezzo, da braccio a braccio. MANICA DX: Con i ferri misura 5 mm e 2 capi di Alpaca avviare senza stringere 26-28-28 (30-30) m. (= in basso della manica dx.). Lavorare a m. legaccio – leggere la spiegazione sopra. Quando il lavoro misura 5 cm, aumentare 1 m. ad ogni lato, ripetere gli aumenti ogni 2 cm per un totale di 6-6-8 (9-11) volte = 38-40-44 (48-52) m. Quando il lavoro misura 17-18-20 (24-28) cm, avviare senza stringere 27-29-34 (39-42) nuove m. all’inizio e alla fine del f. per il davanti e il dietro = 92-98-112 (126-136) m. Continuare a lavorare fino a quando il lavoro misura 9-10-11 (12-13) cm da dove sono state avviate le m. per il davanti e il dietro (il lavoro misura 26-28-31 (36-41) cm dal margine di avvio in basso della manica). Lavorare il f. successivo sul diritto del lavoro come segue: Lavorare a dir. le prime 46-49-56 (63-68) m. sul ferro (= davanti) e trasferire le rimanenti 46-49-56 (63-68) m. su un ferro ausiliario (= dietro). Inserire un segnapunti nell'ultimo ferro e misurare da qui il dietro d'ora in poi. DAVANTI: = 46-49-56 (63-68) m. Girare il lavoro e intrecciare le prime 6-6-6 (7-7) m. sul f. per il collo. Poi diminuire per la scollatura verso il collo ogni cm: 1 m. per 3 volte in totale diminuire lavorando 2 m insieme all’interno delle 2 m vivagno = 37-40-47 (53-58) m. sul ferro. Lavorare fino alla larghezza del davanti = 12,5-14-15,5 (17-18,5) cm. Ora intrecciare per 5-5-5 (6-6) asole in modo uniforme sul f. seguente – leggere la spiegazione sopra. NB: L'asola in alto lato collo, deve essere posizionata dopo 2 m dal bordo collo. Poi lavorare 4 ferri a maglia legaccio. Intrecciare. DIETRO: Trasferire le 46-49-56 (63-68) m. dal ferro ausiliario al ferro di lavoro e lavorare a dir. ogni f. fino a quando il lavoro misura 7-8-9 (10-11) cm dal segnapunti dietro alla scollatura. Mettere il lavoro da parte e lavorare il davanti sx. DAVANTI SX.: Avviare senza stringere 37-40-47 (53-58) m. sui ferri misura 5 mm con 2 capi di Alpaca. Lavorare a dir. ogni f. finché il lavoro non misuri 4-4,5-5 (5,5-6) cm. Poi, aumentare, sul lato sinistro del lavoro, 1 m in totale 3 volte - leggere SUGGERIMENTO PER GLI AUMENTI. Quando il lavoro misura 6-6,5-7 (7,5-8) cm, avviare 6-6-6 (7-7) m al lato sinistro = 46-49-56 (63-68) m. Quando sono state aumentate tutte le m. per il collo, lavorare le 2 parti insieme – leggere il CORPO. CORPO: Trasferire le 46-49-56 (63-68) m. del dietro sullo stesso ferro del davanti sx. = 92-98-112 (126-136) m. sul ferro. Inserire 1 nuovo segnapunti nel lavoro – ora misurare il lavoro da qui! Lavorare fino a quando il lavoro misura 9-10-11 (12-13) cm. Intrecciare senza stringere all’inizio dei 2 f. successivi 27-29-34 (39-42) m. ad ogni lato = 38-40-44 (48-52) m. rimaste sul ferro per la manica sx. – ora misurare il lavoro da qui. Quando il lavoro misura 2-3-1 (3-3) cm, diminuire 1 m. ad ogni lato, ripetere ogni 2 cm per un totale di 6-6-8 (9-11) volte = 26-28-28 (30-30) m. sul ferro. Intrecciare senza stringere quando la manica misura 17-18-20 (24-28) cm (il lavoro misura circa 59-64-71 (82-93) cm da braccio a braccio). BORDO DEL COLLO: Con il ferro 5 mm e 2 fili di Alpaca, riprendere, sul diritto, ca 40 a 50 m intorno al collo. Lavorare 3 f a dir avanti e indietro, intrecciare poi senza stringere. CONFEZIONE: Piegare il lavoro a metà all’altezza delle spalle e cucire la manica e i margini dei lati nel filo davanti della m. più esterna per evitare una cucitura stretta. Attaccare i bottoni. |
||||
Spiegazioni del diagramma |
||||
|
||||
 |
||||
Avete terminato questo modello?Allora taggate le vostre foto con #dropspattern #greygoslingcardigan o inviatele alla #dropsfan gallery. Avete bisogno di aiuto con questo modello?Troverete 11 video tutorial, una sezione per i commenti/domande e molto altro guardando il modello su www.garnstudio.com © 1982-2026 DROPS Design A/S. Ci riserviamo tutti i diritti. Questo documento, compreso tutte le sue sotto-sezioni, è protetto dalle leggi sul copyright. Potete leggere quello che potete fare con i nostri modelli alla fine di ogni modello sul nostro sito. |
||||


Con oltre 40 anni di esperienza nel design di modelli di maglia e uncinetto, DROPS Design offre la più estesa collezione di modelli gratuiti su internet - tradotti in 17 lingue. Ad oggi vi possiamo fornire 324 cataloghi e 12291 modelli - 9562 dei quali sono tradotti in Italiano.
Ci stiamo impegnando molto per darvi il meglio che vi possiamo offrire in termini di maglia e uncinetto, ispirazioni e consigli così come filati di grande qualità ad un prezzo incredibile! Volete utilizzare i nostri modelli per qualcosa d'altro oltre al vostro uso personale? Potete leggere tutto ciò che è consentito nel testo sul Copyright in basso su tutte le pagine dei nostri modelli. Buon lavoro!
Lasciare un commento sul modello DROPS Baby 21-39
Noi saremmo felici di ricevere i tuoi commenti e opinioni su questo modello!
Se vuoi fare una domanda, fai per favore attenzione a selezionare la categoria corretta nella casella qui sotto per velocizzare il processo di risposta. I campi richiesti sono indicati da *.