
Categorie popolari
State cercando un filato?


Commenti / Domande (61)
![]() Provot Catherine ha scritto:
Provot Catherine ha scritto:
Re bonjour, Toujours sur le DROPS Childrens 22-18 Lorsqu'on rabat le 10 m on est au bord exterieur des 29 m rajoutes? merci!
29.01.2016 - 13:32DROPS Design ha risposto:
Bonjour Mme Provot, tout à fait, les 10 mailles rabattues sont celles de M.1, en début de rang. Bon tricot!
29.01.2016 - 16:32Provot Catherine ha scritto:
Bonjour, pour le point fantaisie du DROPS children 22-18: faut il rajouter chaque fois 29 m apres les 20 rangs du diagramme M1 et recommencer? Merci de votre réponse
29.01.2016 - 07:48DROPS Design ha risposto:
Bonjour Mme Provot, M.1 se tricote sur les 20 m de chaque côté jusqu'à ce que l'ouvrage mesure 49 cm (2ème taille) - quand les 20 rangs de M1 sont tricotés, reprenez au 1er rang. Bon tricot!
29.01.2016 - 09:11
![]() Regine ha scritto:
Regine ha scritto:
Smådrops 22-18 Dette er en uforståelig oppskrift. Jeg er vant med å lese og følge strikkeoppskrifter, men denne er ikke skrevet for at andre personer skal kunne strikke dette. Dere bør skrive oppskriften på nytt slik at det er forståelig!
26.11.2015 - 17:31
![]() Chantal Galarneau ha scritto:
Chantal Galarneau ha scritto:
Serait-il possible de savoir, maille par maille, rang par rang comment tricoter ce patron. Le fait d'expliquer les rangs raccourcit indépendamment du motif rend la chose très compliquer pour moi. J'ai lu et relu les explications et les commentaires, j'ai une vague idée, mais ne comprend toujours pas comment comment sur le 1er rang l'on doit rabattre 10 M et sur le second rand, en dessous de ces même mailles, faire une jeté entre des M maintenant inexistante... Merci de votre aide
19.04.2015 - 18:39DROPS Design ha risposto:
Bonjour Mme Galarneau, pour les rangs raccourcis, on tricote *2 rangs sur les m jusqu'au marqueur, 1 rang sur toutes les m, 2 rangs sur les mailles jusqu'au marqueur (de l'autre côté), puis 5 rangs sur toutes les mailes* (=2 rangs en plus sur les m de chaque côté). M.1 se lit en commençant en bas à droite vers la gauche sur l'endroit, les m sont rabattues au début des rangs 10 et 20. Bon tricot!
20.04.2015 - 10:07
![]() Mona ha scritto:
Mona ha scritto:
Går det an å få en "enklere" mønsterforklaring" på denne oppskriften. Dette var det ikke lett å finne ut av.
07.03.2015 - 11:59Hazel ha scritto:
Hi Thank you again for a quick and prompt reply. The problem is, you did not confirm my issue. I understand I do a short row after the 6th row.... I also understand that I must follow the M1 pattern. I then do another short row after row after the following 5th row..... BUT do I do any more short rows? Or is it just twice??? Thank you for your patience.
05.12.2014 - 02:27DROPS Design ha risposto:
Dear Hazel, you have to repeat the section from *-* under "SHORT ROWS" at the beg of the pattern (with M1 each side), from where you cast on new sts each side after sleeve, until you bind off these sts each side for 2nd sleeve (= 3 ridges over middle sts and 4 ridges over sts in each side every time you repeat the section from *-*). This will create the extra width in each side. Happy knitting!
05.12.2014 - 09:12Hazel ha scritto:
Thank you for your reply..... I sort of worked it out. Now another question ?? Do I do the short rows only twice, or every sixth row till I reach the desired length. Thank you.
04.12.2014 - 05:46DROPS Design ha risposto:
Dear Mrs Hazel, short rows are worked at the same time as you work diagram M1 each side, ie first work 6 rows over all sts then start short rows: *1 row to marker in one side, turn and work row back, 1 row over all sts, turn and work row back, 1 row to marker in the other side, turn and work row bac, 5 rows over all sts* - when you work sts from beg/end of row each side, work in pattern M1 as explained (1st row in diagram at the end of 1st row from RS and at the end of 2nd row from WS). Happy knitting!
04.12.2014 - 11:18Hazel ha scritto:
I don't understand this pattern at all. The pattern M1 gives me no clue to what are rows and what are stitches..... do I read it sideways or from top to bottom. Do I read from left to right and right to left on the next row? The diagram gives loads of numbers, but I have no clue to what they relate to!!! using a fluffy yarn, I do NOT want to knit and undo all the time. I am at a loss how to do the short rows also. Do I stop doing the pattern when doing short rows? HELP
02.12.2014 - 02:25DROPS Design ha risposto:
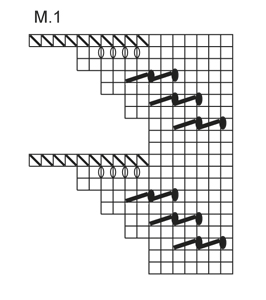
Dear Mrs Hazel, start reading diagram from bottom corner on the right side towards the left - work 1st row at the end of 1st row from RS and at the end of 2nd row from WS (ie row with holes will be worked at the end of row) - 1 square = 1 st x 1 row. You have to work short rows at the same time as pattern to get the extra width on each side of piece. Happy knitting!
02.12.2014 - 09:22
![]() Jose ha scritto:
Jose ha scritto:
Hoi, hier ben ik weer. Het lijkt wel of nog nooit gebreid heb, maar het tegendeel is waar. Maar ik krijg het niet voor elkaar. Ik begin met het werk dubbel te vouwen dan heb je een T. Als ik dan de zijnaden vast maak houd ik dus een dichtgenaaide T over. Als ik eerst de voorpanden tegen elkaar leg heb ik de mouwen aan de boven en onderkant zitten. Ik kom hier echt niet uit. Heb je misschien een telefoon nummer dat we elkaar kunnen spreken? Groetjes
02.07.2014 - 13:24DROPS Design ha risposto:
Hoi José. Dit heeft eigenlijk niet zo veel met breien te doen ;-) Het is correct, dat je na het vouwen een soort T hebt. Maar je moet niet de onderkant dichtnaaien. Alleen de twee zijkanten (de stipjes). De twee armsgaten en de hele onderrand (= de golfjes onderaan de "T") blijven open. Ga eventueel langs jouw winkel of breigroep. Ik ben voor niet telefonisch bereikbaar.
02.07.2014 - 15:45
![]() José ha scritto:
José ha scritto:
Ja, Hier ben ik weer. Als ik het werk dubbelvouw is het aan de bovenkant dicht. Hoe gaat het hoofd erdoor? Nogmaals heb het op 2 pennen gebreid Groetjes José Groetjes
30.06.2014 - 13:45DROPS Design ha risposto:
Hoi José. Nee, je naait alleen de zijkanten aan elkaar zoals te zien is op de tekeningen onderaan (de stippellijn). De golfjeslijn onderaan op de tekening zijn de voorkanten/randen.
01.07.2014 - 14:16
|
|||||||||||||||||||
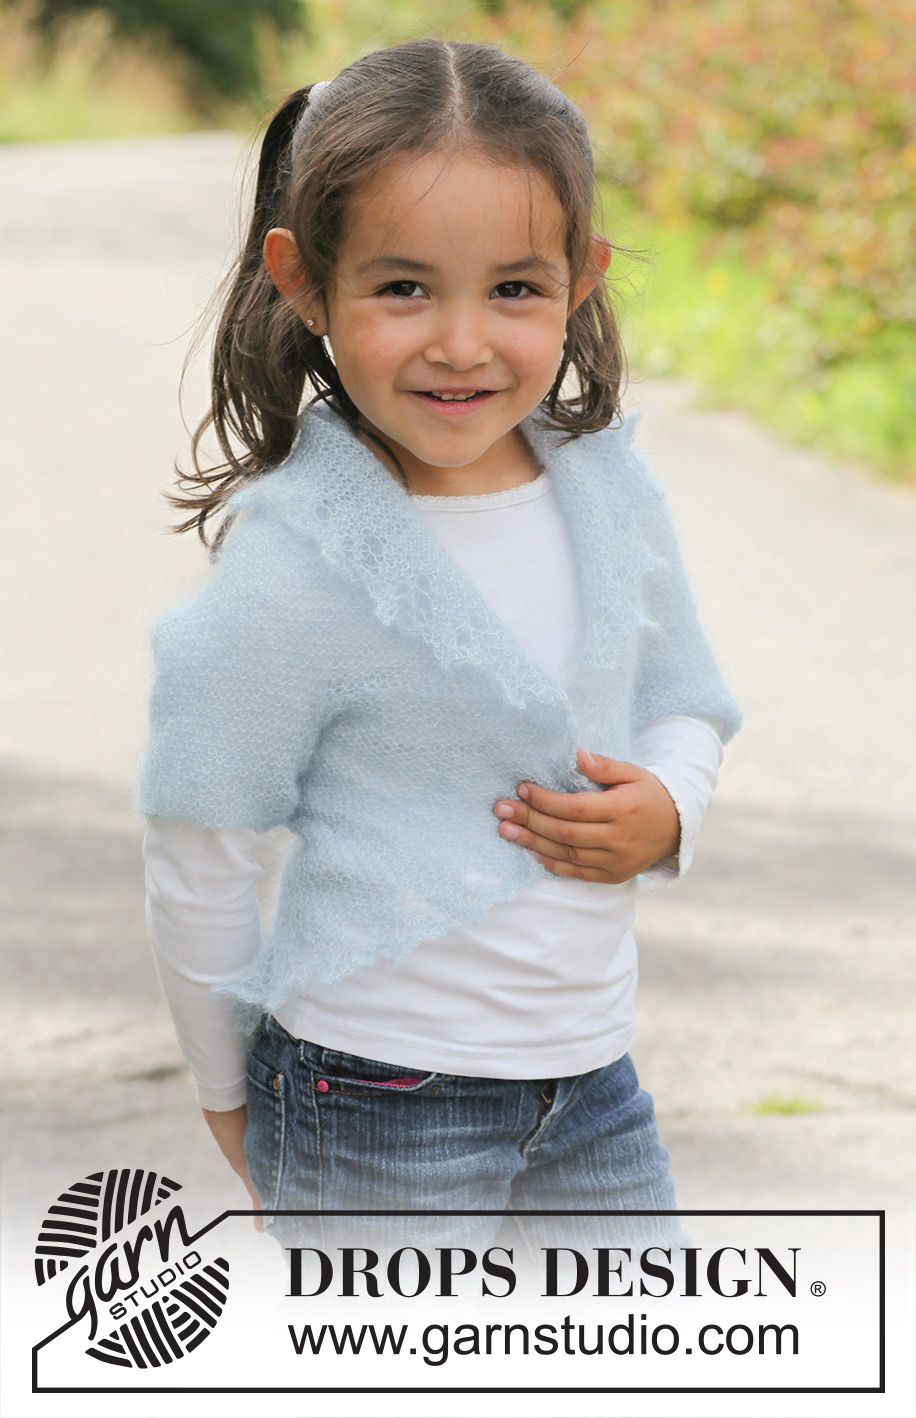
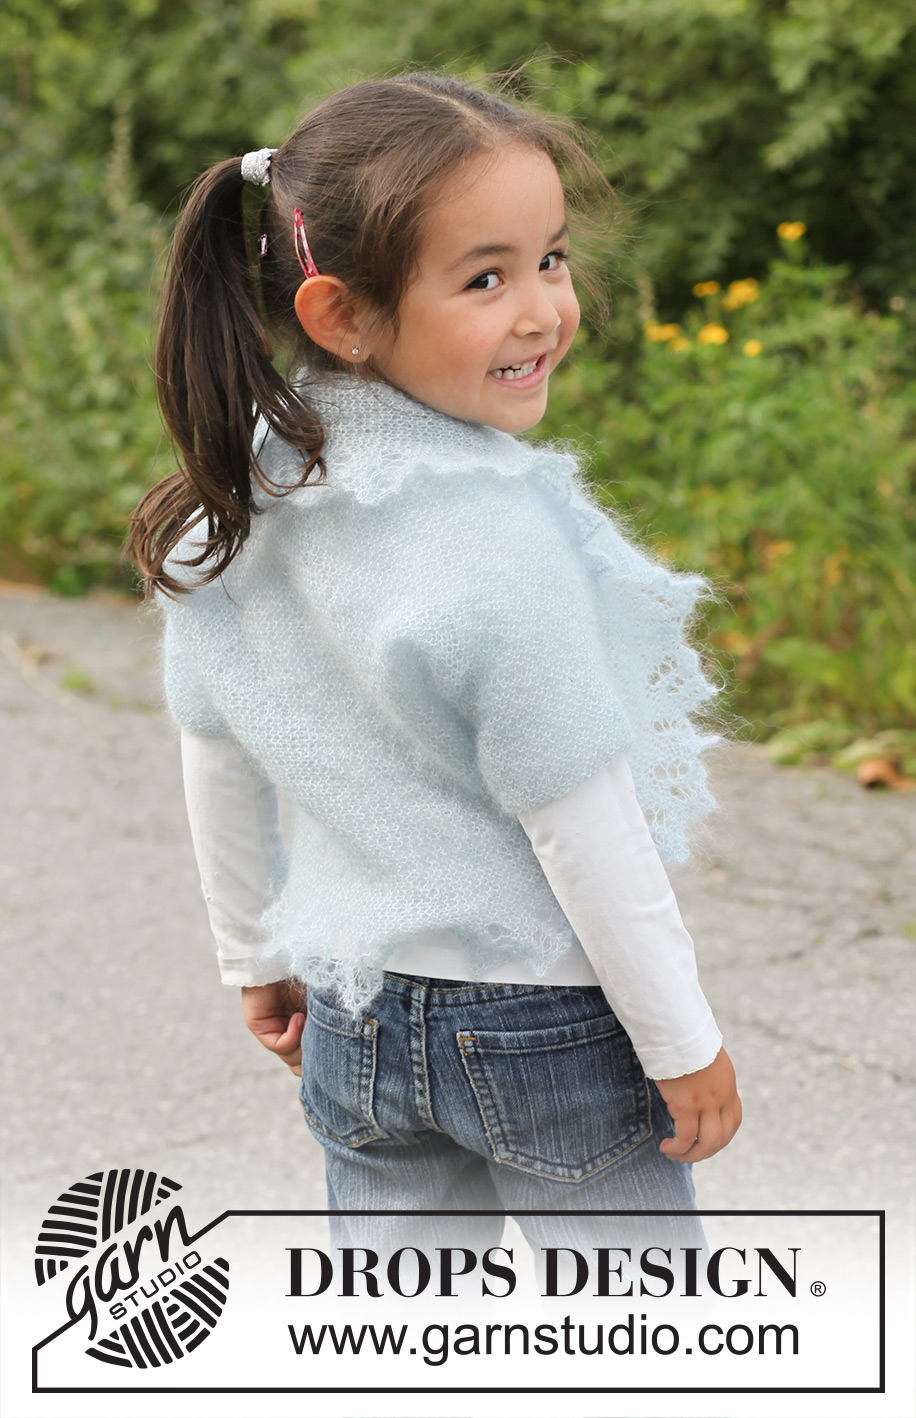
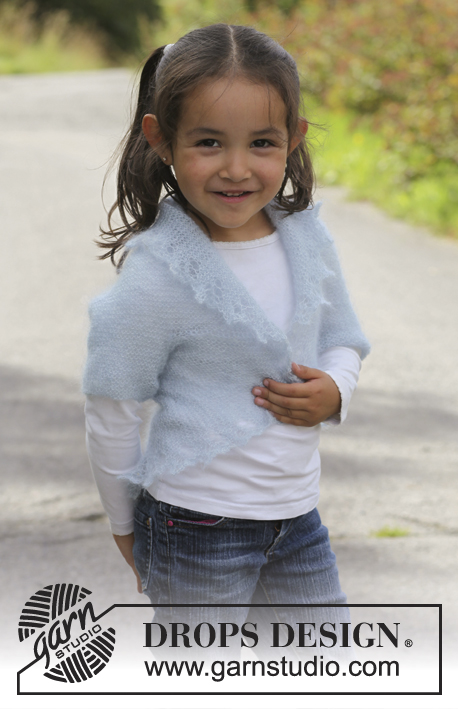
Fairy Wings#fairywingsbolero |
|||||||||||||||||||
 |
 |
||||||||||||||||||
Bolero DROPS ai ferri a punto legaccio con bordo traforato in "Kid-Silk". Taglie: Da 3 a 12 anni.
DROPS Children 22-18 |
|||||||||||||||||||
|
PUNTO LEGACCIO (avanti e indietro sui ferri): Lavorare tutti i ferri a diritto. 1 “costa” a legaccio = 2 ferri a dir MOTIVO: Vedere il diagramma M.1. Affinché il motivo sia uguale su entrambi i lati, lavorare il 1° ferro del diagramma alla fine del primo ferro sul diritto del lavoro e alla fine del secondo ferro sul rovescio del lavoro. Quindi tutti i ferri che prevedono m gettate e m da lavorare insieme a dir devono essere lavorati alla fine del ferro. Il numero delle m nel diagramma varia da 7 a 17. FERRI ACCORCIATI: Lavorare 6 ferri su tutte le m, * lavorare fino al segno su un lato, girare il lavoro, stringere il filo e lavorare il ferro successivo. Lavorare 1 ferro su tutte le m, girare il lavoro, lavorare fino al segno sull’altro lato, girare il lavoro, stringere il filo e lavorare il ferro successivo. Lavorare 5 ferri su tutte le m *, ripetere da *-*. Quindi, ad ogni ripetizione, vengono lavorati 6 ferri (= 3 coste a legaccio) sulle 70-76-78-86-92 m centrali e 8 ferri (4 coste a legaccio) sulle m laterali. -------------------------------------------------------- BOLERO: Si lavora nel senso della lunghezza, avanti e indietro sui ferri circolari, da una manica all’altra. Successivamente, piegare in due e cucire le maniche e i lati. Avviare 52-58-62-66-70 m sui ferri circolari n° 3,5 con 2 capi del filato Kid-Silk. Proseguire ora con 1 solo capo del filato e lavorare a PUNTO LEGACCIO – vedere le spiegazioni sopra! RICORDARSI LA TENSIONE DEL LAVORO! Quando il lavoro misura 8 cm (= manica), avviare 27-29-30-34-37 nuove m lente da ciascun lato (avviare le m alla fine dei 2 ferri successivi) = 106-116-122-134-144 m. Inserire 2 segni nel lavoro, a 18-20-22-24-26 m da ciascun lato (= tra i due segni ci sono 70-76-78-86-92 m). Proseguire a punto legaccio seguendo il MOTIVO sulle maglie più esterne – vedere le spiegazioni sopra – ALLO STESSO TEMPO lavorare a FERRI ACCORCIATI – vedere le spiegazioni sopra! Quando il lavoro misura ca. 44-49-54-59-64 cm (compresa la manica), chiudere, senza stringere troppo il filo, 27-29-30-34-37 m da ciascun lato (chiudere le m all’inizio dei 2 ferri successivi) – ATTENZIONE: Assicurarsi di chiudere le m dopo una ripetizione completa del diagramma M.1. Proseguire a punto legaccio sulle restanti 52-58-62-66-70 m (= manica). Quando la manica misura 8 cm, chiudere le m lavorandole con 2 capi del filato e senza stringere troppo. CONFEZIONE: Piegare il bolero in due – il diagramma mostra come piegare il lavoro. Cucire le maniche e i lati nell’asola anteriore della m più esterna; assicurarsi che la cucitura non stringa troppo – nel diagramma, la linea con i puntini mostra dove sono le cuciture. |
|||||||||||||||||||
Spiegazioni del diagramma |
|||||||||||||||||||
|
|||||||||||||||||||
 |
|||||||||||||||||||
 |
|||||||||||||||||||
Avete terminato questo modello?Allora taggate le vostre foto con #dropspattern #fairywingsbolero o inviatele alla #dropsfan gallery. Avete bisogno di aiuto con questo modello?Troverete 14 video tutorial, una sezione per i commenti/domande e molto altro guardando il modello su www.garnstudio.com © 1982-2026 DROPS Design A/S. Ci riserviamo tutti i diritti. Questo documento, compreso tutte le sue sotto-sezioni, è protetto dalle leggi sul copyright. Potete leggere quello che potete fare con i nostri modelli alla fine di ogni modello sul nostro sito. |
|||||||||||||||||||


Con oltre 40 anni di esperienza nel design di modelli di maglia e uncinetto, DROPS Design offre la più estesa collezione di modelli gratuiti su internet - tradotti in 17 lingue. Ad oggi vi possiamo fornire 324 cataloghi e 12290 modelli - 9561 dei quali sono tradotti in Italiano.
Ci stiamo impegnando molto per darvi il meglio che vi possiamo offrire in termini di maglia e uncinetto, ispirazioni e consigli così come filati di grande qualità ad un prezzo incredibile! Volete utilizzare i nostri modelli per qualcosa d'altro oltre al vostro uso personale? Potete leggere tutto ciò che è consentito nel testo sul Copyright in basso su tutte le pagine dei nostri modelli. Buon lavoro!
Lasciare un commento sul modello DROPS Children 22-18
Noi saremmo felici di ricevere i tuoi commenti e opinioni su questo modello!
Se vuoi fare una domanda, fai per favore attenzione a selezionare la categoria corretta nella casella qui sotto per velocizzare il processo di risposta. I campi richiesti sono indicati da *.