
Categorie popolari
State cercando un filato?


Commenti / Domande (238)
![]() Birgit Trede ha scritto:
Birgit Trede ha scritto:
In der Anleitung steht man soll 2 Maschen weniger stricken. Wo? Am Anfang, am Ende oder mittendrin?
26.12.2018 - 12:41DROPS Design ha risposto:
Liebe Frau Trede, jedesMal Sie die 1./2. Reihe stricken, stricken Sie 2 M weniger, dh das 1. Mal stricken Sie 102-112-124-140 M, das 2. Mal (Reihe 5/6) stricken Sie 100-110-122-138 M, dann 98-108-120-136 M usw. (= 2 Maschen weniger am Anfang der Hinreihe, bei der Rückreihe stricken Sie dieselbe Maschenanzahl wie bei der Hinreihe). Viel Spaß beim stricken!
02.01.2019 - 09:50Sonya ha scritto:
Sorry I did not phrase my question well. It was about the main body of the jacket, not the sleeves. How do you decrease stitches in rows 1 and 2? I assume that stitches are not knitted together, but slipped off the end? Is this correct?
15.10.2018 - 12:07DROPS Design ha risposto:
Dear Sonya, when working M.1 you work short rows as follows: row 1 and 2: over all sts, row 3 and 4 over the first 18-16-20 sts, then repeat these 4 rows, but work first 2 rows leaving 2 sts unworked at the end of row 1, then leaving 4 more sts unworked at the end of row 6-12 times in total (see size), then leaving 8 more sts unworked at the end of row 1 until the 18-16-20 sts from outermost side remain. When all short rows are done, repeat whole short rows. Happy knitting!
15.10.2018 - 14:03Sonya ha scritto:
Hi I have been reading all the comments to try to figure out how to work the decreases. I can’t figure it out though, are these cast off or retained?
15.10.2018 - 00:02DROPS Design ha risposto:
Dear Sonya, when you have to decrease evenly on sleeves, work the decreases as explained here. Happy knitting!
15.10.2018 - 10:47Zuzana ha scritto:
Dobrý deň, rada by som vedieť, či môžem na tento sveter použiť aj priadzu cotton merino (skupina B)? Nosím veľkosť M. Ak by som štrikovala podľa návodu (bez upravenia počtu ok) veľkosť M/L s cotton merino 1 priadzou, bude výsledný sveter veľkosti M alebo mám štrikovať veľkosť XL/XXL? Alebo mi viete poradiť ako upraviť počty ok na cotton merino priadzu alebo to nie je možné? Veľmi pekne ďakujem.
20.06.2018 - 21:54Oana ha scritto:
Hi Lena,again 😢.i understood very well your explanation,thank you so much.now the pattern started with 2 knitted rows or with the diagram?when those 2 knitted rows shall be repeated?when all the reduced stitches are done?also when the last stitches shall be purled?thank you again
06.02.2018 - 19:56DROPS Design ha risposto:
Dear Oana, you will work in pattern as shown in diagram (= with first sts in garter st seen from RS and all other sts in pattern as shown in M.1) and work the short rows over the first sts seen from RS until only the garter sts remain (= the outermost sts of circle). And repeat the short rows from row 1 all the way (at the same time you will then have to shape armholes). Happy knitting!
07.02.2018 - 08:39Oana ha scritto:
Hi.i am still confused about the pattern. so 1st row is worked as in the M1 diagram, 2nd row as well.starting 3rd row, the first 16 stitches are worked then turn and work over the 16 stitches.the 5th row , we work over the 16stitches till the end when we work over the 110 stitches and turn the work and knit till the end of row?(or we stop before 18 stitches).here where i am stalked and i don't know how to do it.would you please explain it for me.thank you so much
01.02.2018 - 18:25DROPS Design ha risposto:
Dear Oana, in 2nd size work 2 rows over the 112 sts, 2 rows over the first 16 sts, 2 rows over the 112 sts - 2 = 110 sts, work 2 rows over the first 16 sts, 2 rows over the 110 - 2 sts, 2 rows over the first 16 sts and so on, working 2 sts less when working row 1 &2, ie you will work next 108 sts, then 106 sts and so on a total of 10 times, then work 4 sts less a total of 12 times then 8 sts less a total of 5 times until the first 16 sts remain, at the same time continue working the short rows over the first 16 sts. Happy knitting!
02.02.2018 - 08:39
![]() DOLFIN ha scritto:
DOLFIN ha scritto:
Bonjour, J'ai fait ma couture au dos, mais cela forme un "bec", j'ai redéfais et rabattu mes mailles plus souplement, mais j'ai toujours un bec. J'ai même enlevé un motif entier, mais rien n'y fait. Pouvez-vous m'aider ? Merci
27.01.2018 - 10:17DROPS Design ha risposto:
Bonjour Mme Dolfin, assemblez les mailles rabattues à celles du montage en suivant cette technique et en veillant à ne pas trop serrer la couture. Un blocage (lavage/séchage) peut aider à ce que la couture soit plate, mais veillez à bien avoir les bonnes dimensions pour le cercle (le bon nombre de motifs) pour que le cercle ait la bonne taille et forme. Bon assemblage!
29.01.2018 - 09:17
![]() Gisela Fydrich ha scritto:
Gisela Fydrich ha scritto:
Vielen Dank. Ich hatte es gerade auch verstanden. Habe zu kompliziert gedacht.
06.07.2017 - 09:38
![]() Gisela Fydrich ha scritto:
Gisela Fydrich ha scritto:
Hallo.Das mit dem Stricken klappt super.Aber ich habe eine Frage zum messen.Wenn die Arbeit vor mir liegt, messe ich dann von A zur 69 Masche? Vielen Dank im voraus.
05.07.2017 - 14:55DROPS Design ha risposto:
Liebe Frau Fydrich, der Markierer (am besten ein Faden) soll im 69. Masche sein, dann messen Sie an den Markierer entlang (das Bandmaß wird nicht gerade sondern am Bogen sein). Viel Spaß beim stricken!
06.07.2017 - 09:25Mel ha scritto:
Think I must be thick. I do not understand how the pattern works ie how can the chart be knitted on the same short rows, or are 248 stitches cast on? the pattern is not clear to me.
31.05.2017 - 09:06DROPS Design ha risposto:
Dear Mel, you are working back and forth on 102-112-124-140 sts (see size) with short rows so that the beg of rows from RS will be the outside of circle and the end of rows from RS (where you will work less rows) will be the inner side, ie the center of circle. When working armholes, you will work the outermost sts and the inner sts separately but at the same time, ie with 2 balls to make sure short rows will continue. Then you will sew the cast off sts to the cast on sts to get the whole circle. Happy knitting!
31.05.2017 - 10:13
|
||||||||||||||||
Blue Moon |
||||||||||||||||
 |
 |
|||||||||||||||
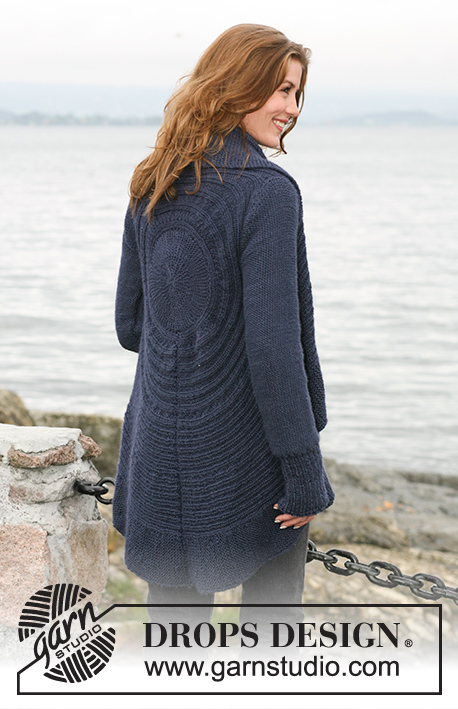
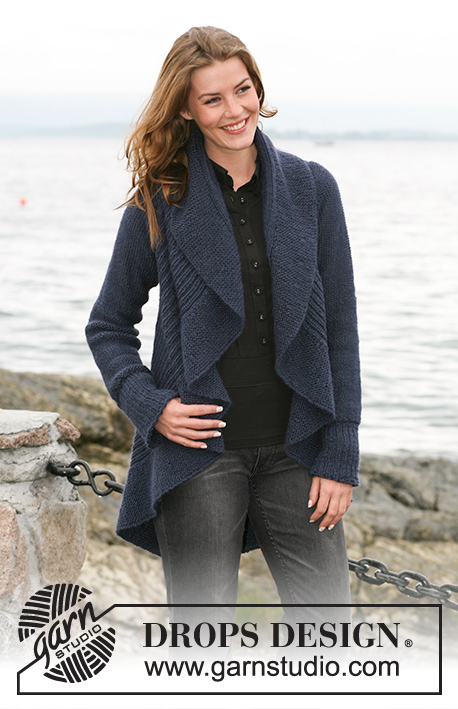
Giacchino circolare DROPS in "Silke Alpaca" con motivo a tessuto. Taglia: dalla S alla XXXL
DROPS 102-6 |
||||||||||||||||
|
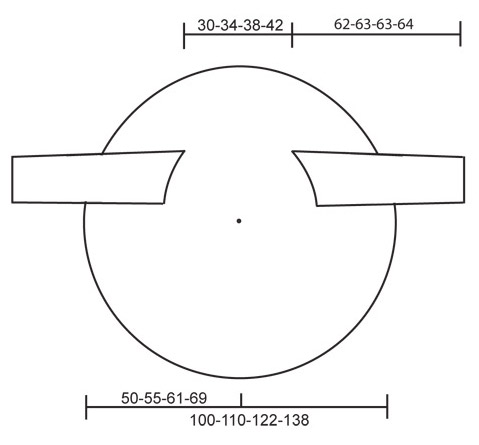
Campione: 17 m. x 22 f. a m. rasata = 10 x 10 cm MOTIVO: vedere il diagramma M.1. I diagrammi sono visti dal diritto del lavoro. NOTA: ogni taglia ha il suo diagramma. FERRI ACCORCIATI: lavorare a f. accorciati per ottenere la forma circolare del lavoro come segue: 1° / 2° f.: 102-112-124-140 m. dir., girare il lavoro e lavorare il f. di ritorno. 3° / 4° f.: lavorare avanti e indietro sulle prime 18-16-20-20 m. sul f. (queste m. = esterno del cerchio) – leggere il suggerimento per il lavoro 1 sotto. Ripetere i ferri 1 - 4, ma a ogni ripetizione del 1° / 2° f., lavorare 2 m in meno prima di girare il lavoro – ripeterlo per 10-10-12-12 volte in totale. Poi, lavorare 4 maglie in meno prima di girare il lavoro – ripeterlo 6-9-8-12 volte in totale. Lavorare poi 8 m in meno prima di girare il lavoro – ripetere 5-5-6-6 volte in totale, finché non ce ne siano soltanto le 18-16-20-20 m. più esterne sul cerchio. Iniziare ancora da capo su tutte le m. – leggere il suggerimento per il lavoro 2 sotto.  SUGGERIMENTO per il lavoro 1: Quando girate il lavoro passare la 1° m. a dir. senza lavorarla e tirate il filo stretto prima di continuare a lavorare. Viene fatto per evitare buchi quando girate. Non è applicato alle 20-20-24-24 m. più interne del cerchio – quando il lavoro viene girato lavorare su tutte le m. come al solito. SUGGERIMENTO per il lavoro 2: Sui ferri dove sono lavorate tutte le m., lavorare a rov. le 20-20-24-24 m. più interne del cerchio (visto sul diritto del lavoro). Poi continuare lo schema M.1 come prima. SUGGERIMENTO per le misurazioni: Tutte le misurazioni sul cerchio vengono fatte con il lavoro disteso. Non misurare la diagonale! Le misure seguono la curva fino alla 63°-69°-73°-81° m. CERCHIO: Lavorare avanti e indietro sui ferri per avere spazio per tutte le m. Avviare 102-112-124-140 m. con i ferri circolari misura 4,5 mm con il filato Silke Alpaca. Inserire un segnapunti dopo 63-69-73-81 m., fare tutte le misurazioni da questo punto. Lavorare il diagramma M.1 (vedere il diagramma per la vostra taglia) da destra a sinistra (cioè dall’esterno verso l’interno sul cerchio). 1° f. = diritto del lavoro. Allo stesso tempo, insieme al diagramma M.1 lavorare a f. accorciati – leggere la spiegazione sopra – per modellare il cerchio. Quando il lavoro misura 37-40-49-57 cm dal segnapunti – leggere il suggerimento per le misurazioni – lavorare gli scalfi. SCALFO: trasferire le 63-69-73-81 m. più esterne su un altro ferro misura 4,5 mm (ferro circolare per avere spazio per tutte le m.). Continuare e intrecciare le 2 m. successive (= scalfo). Inserire 1 segnapunti tra le 2 m. intrecciate. Lasciare le m. rimaste sul f. Continuare, lavorare le 2 parti (m. prima e dopo lo scalfo) in modo separato, ma lavorarle contemporaneamente su 2 ferri separati con gomitoli separati. Viene fatto in modo che i ferri accorciati siano corretti su entrambi i lati dello scalfo. Continuare con il motivo e i ferri accorciati come prima. Quando lo scalfo misura 18-21-23-25 cm avviare 2 nuove m. sullo scalfo (cioè tra le 2 parti). Continuare, trasferire tutte le m. su un ferro = 102-112-124-140 m. Inserire 1 segnapunti dopo 63-69-73-81 m. Continuare, misurare il lavoro da questo punto.Ora lavorare il diagramma M.1 e i ferri accorciati su tutte le m. Continuare in questo modo fino a quando il lavoro misura circa 15-17-19-21 cm, dovrebbe essere metà del cerchio. Continuare fino a quando il lavoro misura circa 30-34-38-42 cm dal segnapunti – leggere il suggerimento per il lavoro. Ora fare gli scalfi nello stesso modo. Quando tutte le m. sono ancora sullo stesso f. di lavoro inserire 1 segnapunti dopo 63-69-73-81 m. Continuare a misurare da qui. Continuare con M.1 e i ferri accorciati fino a quando il lavoro misura circa 37-40-49-57 cm dal segnapunti (aggiustarlo a un’intera ripetizione del motivo a f. accorciati). Intrecciare senza stringere. MANICA: Lavorata avanti e indietro con i ferri circolari. Avviare 56-59-65-68 m. (compresa 1 m. di vivagno da ogni lato) con i ferri misura 4,5 mm con il filato Silke Alpaca. Lavorare 1 f. a rov. dal rovescio del lavoro. Continuare a coste 2 m. dir./1 m. rov. e 1 m. di vivagno per ogni lato. Quando le coste misurano 13-13-14-14 cm lavorare 1 f. a dir. dal rovescio del lavoro e allo stesso tempo distribuire 10-11-13-14 diminuzioni in modo uniforme = 46-48-52-54 m. Continuare a m. rasata con il rovescio del lavoro in fuori fino alla lunghezza finale. Quando il lavoro misura 16 cm aumentare 1 m. da ogni lato ogni 9-4,5-3,5-3 cm 5-9-11-13 volte in totale = 56-66-74-80 m. Quando il lavoro misura 56 cm intrecciare per modellare il sopra della manica da ogni lato a f. alterni: 4 m. 1-2-2-2 volte. Continuare, intrecciare 2 m. da ogni lato fino a quando il lavoro misura circa 61-62-62-63 cm. Poi intrecciare 4 m. 1 volta da ogni lato. Il lavoro misura circa 62-63-63-64 cm. Intrecciare le rimanenti m. CONFEZIONE: Cucire il cerchio nel bordo più esterno delle m. di avvio e di chiusura. Attaccare le maniche in modo che le cuciture si incontrino al centro del segnapunti posizionato in basso sullo scalfo e il centro dell’alto della manica incontri il segnapunti posizionato sull’alto dello scalfo. Cucire i margini delle maniche. |
||||||||||||||||
Spiegazioni del diagramma |
||||||||||||||||
|
||||||||||||||||
 |
||||||||||||||||
 |
||||||||||||||||
Avete terminato questo modello?Allora taggate le vostre foto con #dropspattern o inviatele alla #dropsfan gallery. Avete bisogno di aiuto con questo modello?Troverete 15 video tutorial, una sezione per i commenti/domande e molto altro guardando il modello su www.garnstudio.com © 1982-2026 DROPS Design A/S. Ci riserviamo tutti i diritti. Questo documento, compreso tutte le sue sotto-sezioni, è protetto dalle leggi sul copyright. Potete leggere quello che potete fare con i nostri modelli alla fine di ogni modello sul nostro sito. |
||||||||||||||||


Con oltre 40 anni di esperienza nel design di modelli di maglia e uncinetto, DROPS Design offre la più estesa collezione di modelli gratuiti su internet - tradotti in 17 lingue. Ad oggi vi possiamo fornire 324 cataloghi e 12245 modelli - 9515 dei quali sono tradotti in Italiano.
Ci stiamo impegnando molto per darvi il meglio che vi possiamo offrire in termini di maglia e uncinetto, ispirazioni e consigli così come filati di grande qualità ad un prezzo incredibile! Volete utilizzare i nostri modelli per qualcosa d'altro oltre al vostro uso personale? Potete leggere tutto ciò che è consentito nel testo sul Copyright in basso su tutte le pagine dei nostri modelli. Buon lavoro!
Lasciare un commento sul modello DROPS 102-6
Noi saremmo felici di ricevere i tuoi commenti e opinioni su questo modello!
Se vuoi fare una domanda, fai per favore attenzione a selezionare la categoria corretta nella casella qui sotto per velocizzare il processo di risposta. I campi richiesti sono indicati da *.