
Categorie popolari
State cercando un filato?


Commenti / Domande (12)
![]() Christina Eldero ha scritto:
Christina Eldero ha scritto:
Hej! Jag har problem att förstå hur antalet maskor man ska plocka/sticka upp för ärm kan stämma med det antal cm man är instruerad att sticka för bak- och för framstycket: I stl L: 18 cm bakstycke och 24 cm framstycke. Med en stickfasthet på 22 varv/10 cm ska man sticka avrundat 40 varv till bakst. och 53 varv till framst., MEN man ska plocka/sticka upp 41 maskor längs framst. och 31 längs bakst. Hur går det ihop??
26.01.2024 - 03:41DROPS Design ha risposto:
Hei Christina. Om man skal plukke opp like mange masker som pinner (varv) vil ikke overgangen mellom bol / erme bli pen. Ermene vil da"pose" seg ut ved overgangen. Slik at når du skal plukke opp masker "hopper" man over ca hver 3 -4 pinne/varv, slik at overgangen blir penest mulig. mvh DROPS Design
05.02.2024 - 09:12
![]() Maria Christine Weber ha scritto:
Maria Christine Weber ha scritto:
Ich habe 12 Strangen alpaka-silk Wolle und würde gerne eine Jacke stricken. Leider finde ich keine Anleitung. Können Sie mir helfen,bitte.
11.09.2023 - 23:40DROPS Design ha risposto:
Liebe Frau Weber, haben Sie DROPS Brushed Alpaca Silk (siehe Farbkarte? Dann finden Sie alle passende Anleitungen hier; oder haben Sie DROPS Baby Alpaca Silk (jetzt ausgelaufen), dann finden Sie passende Anleitung (Garngruppe A) hier. Viel Spaß beim stricken!
12.09.2023 - 09:25
![]() Fran ha scritto:
Fran ha scritto:
Thanks for your help. I finished this sweater few days ago, I love it!
13.03.2023 - 16:45
![]() Fran ha scritto:
Fran ha scritto:
Hello, my question is about the Front piece, "increase sts at the beginning of each row from the RS for the neck, inside 3 sts. Increase 1st 4 times". I'm supposed to increase 1 st at the beginning of the row on the RS, 4 times. So, I have to knit 8 rows in total, increasing only on RS. Also, what does mean "inside 3sts"? Where I have to increase, between the 2nd and 3rd stitch? It's the first time I knit this kind of sleeves, I'm a little confused. TIA!
16.02.2023 - 12:27DROPS Design ha risposto:
Dear Fran, "inside 3 sts" means you work the first 3 stitches then increase 1 stitch (when increasing at the beg of the row on left front piece) and/or work until 3 sts remain then increase 1 stitch (when increasing at the end of the row on right front piece). Increase as explained above under INCREASE FROM RIGHT SIDE, before marker = after the first 3 sts, before marker = when 3 sts remain. This video is showing (for another pattern but same technique) how to work such a front piece. Happy knitting!
16.02.2023 - 13:54
![]() De Weirt Françoise ha scritto:
De Weirt Françoise ha scritto:
Bonjour Combien de pelotes faudrait-il pour tricoter double fil aiguilles 5 ou 6? Merci Françoise
12.12.2022 - 10:51DROPS Design ha risposto:
Bonjour Mme De Weirt, ce modèle se tricote avec 1 seul fil DROPS Brushed Alpaca Silk et des aiguilles 5 - retrouvez la quantité pour chaque taille sous l'en-tête - divisez le poids par celui de la pelote (25 g) pour avoir le nombre de pelotes pour la taille. Pour tricoter avec 2 fils du groupe A, utilisez notre convertisseur pour voir les alternatives et les quantités correspondantes. Bon tricot!
12.12.2022 - 16:01
![]() Cathleen Castaneda ha scritto:
Cathleen Castaneda ha scritto:
Hello again! I have one more question. Why do I cast on more stitches on the front portion of the sleeve than on the back portion of the sleeve instead if equal nimber if stitches? Thank you fir your help!!!
11.12.2022 - 01:20DROPS Design ha risposto:
Dear Cathleen, it's a specific type of sleeve, where the seam is displaced towards the back. That's why the number of stitches is not equal. Happy knitting!
11.12.2022 - 23:45
![]() Cathleen Castaneda ha scritto:
Cathleen Castaneda ha scritto:
Hello! I’m not understanding how to start the sleeve section. The underarm section of the body is squared off. Do I start picking up stitches on either end of the squared off portion or do I start in the middle of the 8 cast on stitches that formed the squared off section? And the pattern says to knit back & forth for 3/8” before joining to knit in the round, but the pattern doesn’t say anything about sewing the underarm seam together since it wasn’t started in the round
11.12.2022 - 01:10DROPS Design ha risposto:
Dear Cathleen, you start picking up around the stitches of the 8 cast on stitches (excluding them). You will sew the rows worked back and forth with these 8 stitches (you can see the B and b in the diagram after the pattern explanations). Happy knitting!
11.12.2022 - 23:45
![]() Sylvia Marzolf ha scritto:
Sylvia Marzolf ha scritto:
Bonjour nCombien de pelotes faut-il pour ce pull en M ?nMerci
06.12.2022 - 14:10DROPS Design ha risposto:
Bonjour Mme Marzolf, vous trouverez toutes les quantités nécessaires pour chaque taille dans l'en-tête, avec la taille des aiguilles et l'échantillon, autrement dit, en M il faut ici 175 g Brushed Alpaca Silk / 25 g la pelote = 7 pelotes. Bon tricot!
06.12.2022 - 16:30
![]() Cathie Castaneda ha scritto:
Cathie Castaneda ha scritto:
The video connected to this pattern shows increases done on every row but instructions for the Front Piece sound like increases are only done on right side. Instructions say “every right side”. Thank you!
01.12.2022 - 00:49DROPS Design ha risposto:
Dear Mrs Castaneda, videos are there to illustrate the technique, but depending on the pattern you might have to increase more/less stitches and more/less often, in this pattern you increase for the neck on every row from the right side, this means on every other row. Happy knitting!
01.12.2022 - 11:25
![]() Cathie Castaneda ha scritto:
Cathie Castaneda ha scritto:
Hello! I have a question on the 4th sentence in the paragraph under “Front Piece”. It says to “increase stitches at the beginning of each row from the right side for the neck. Increase one stitch 4 times.” Am I doing the increases on just the right side or doing the increase on both ride & wrong side like previously done on the back piece?
30.11.2022 - 21:54DROPS Design ha risposto:
Dear Mrs Castaneda, you increase for the neck on every row from the right side (at the beg of the row on left shoulder/at the end of the row on right shoulder). Happy knitting!
01.12.2022 - 11:16
|
|||||||||||||||||||
Marmalade#marmaladesweater |
|||||||||||||||||||
 |
 |
||||||||||||||||||
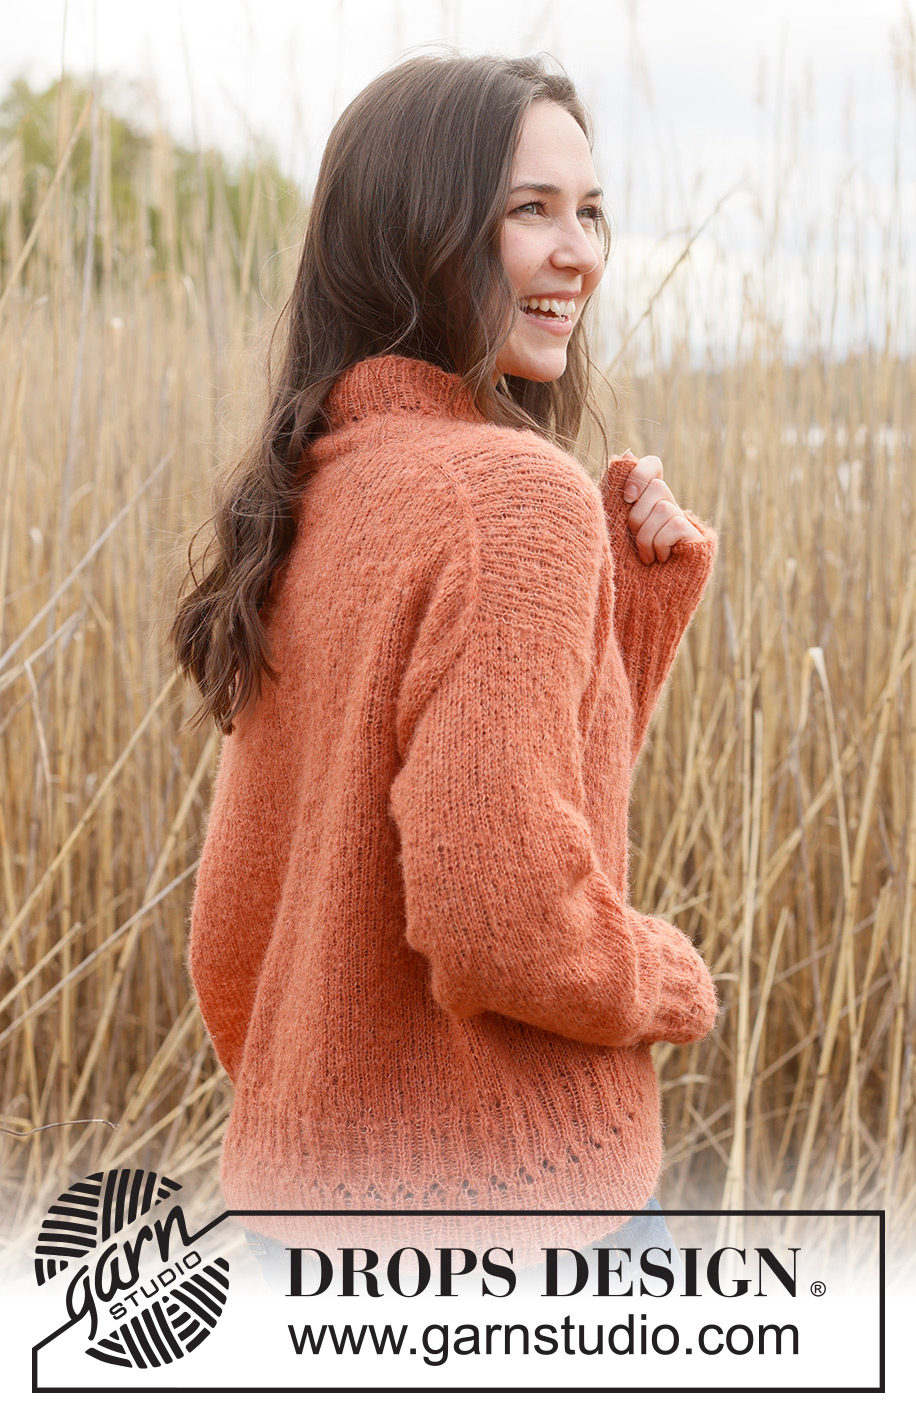
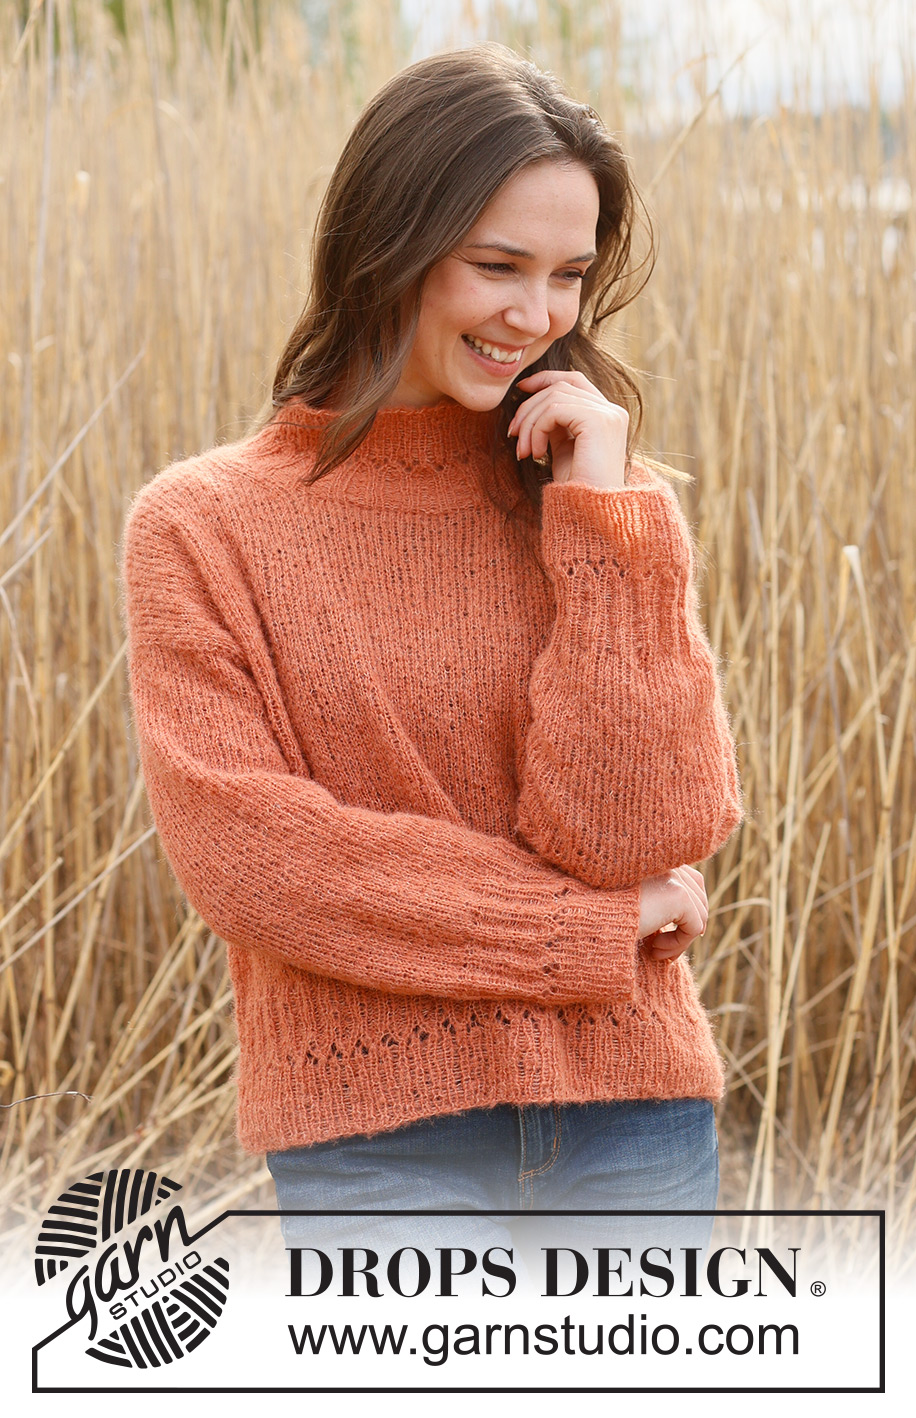
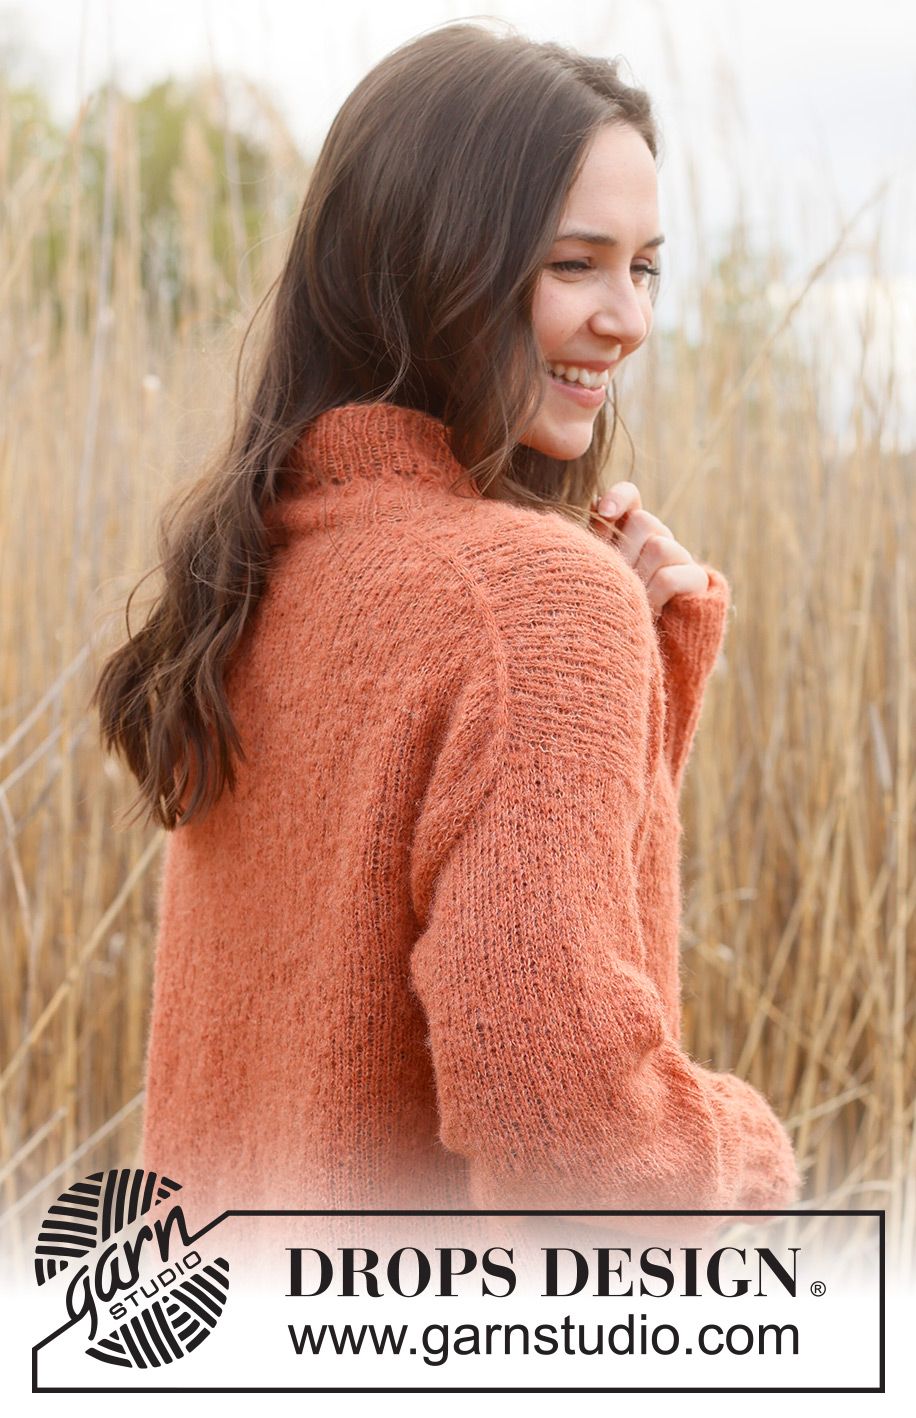
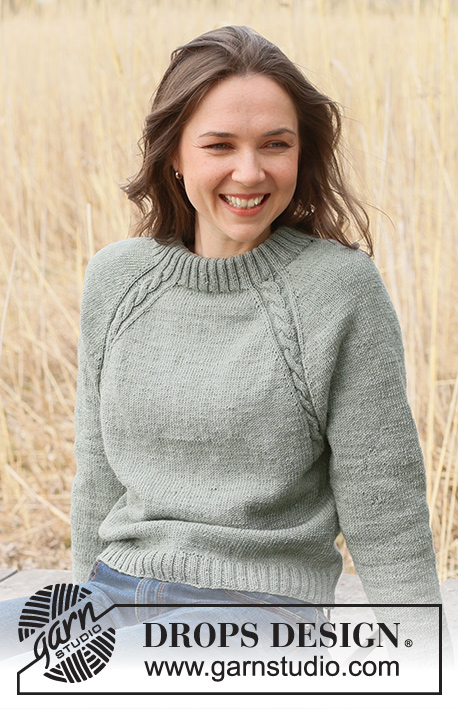
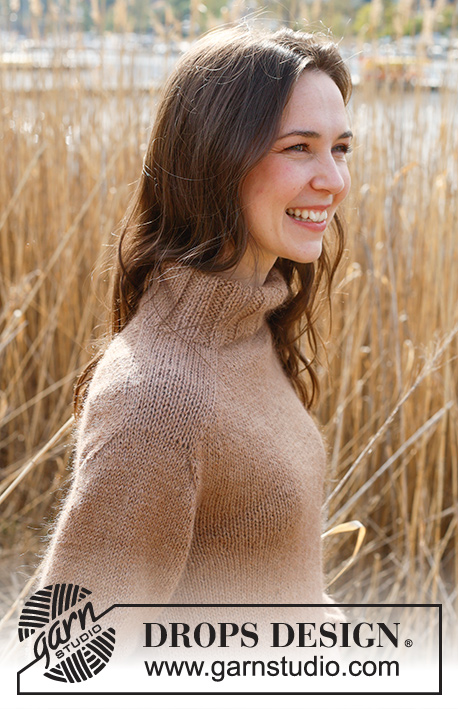
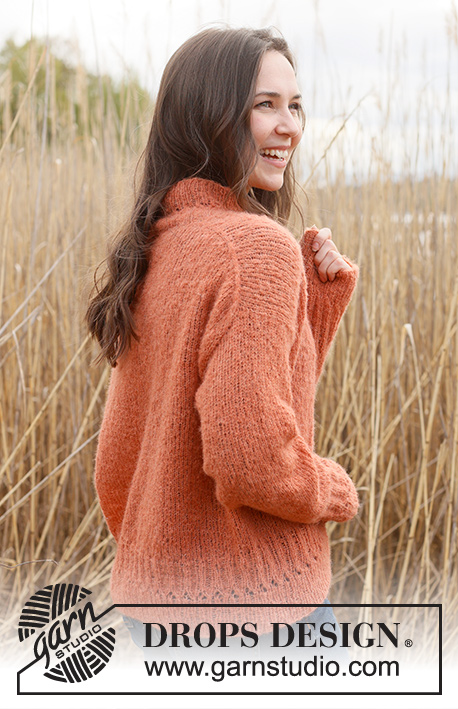
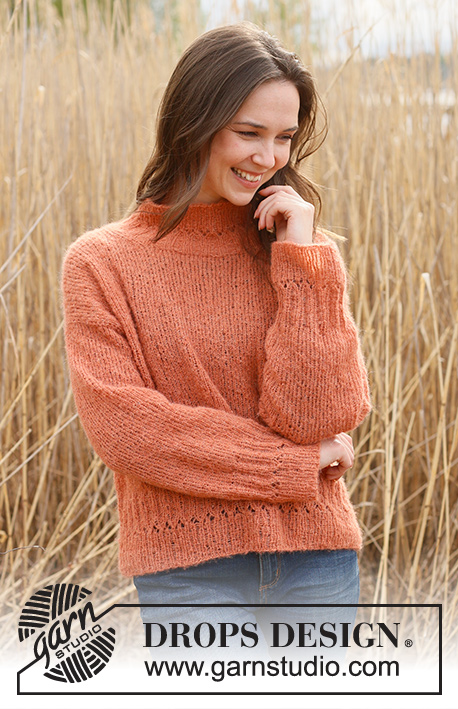
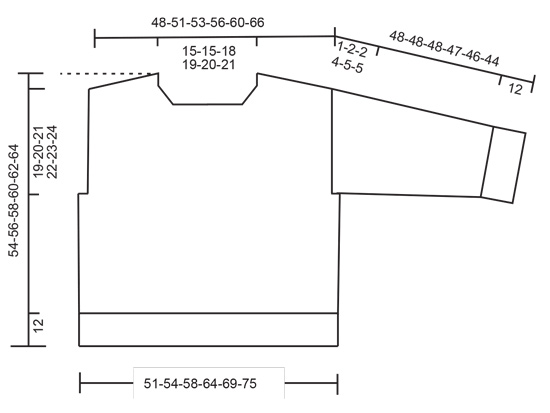
Maglione lavorato ai ferri in DROPS Brushed Alpaca Silk. Lavorato dall’alto in basso con spalle europee/diagonali delle spalle. Taglie: S - XXXL.
DROPS 236-23 |
|||||||||||||||||||
|
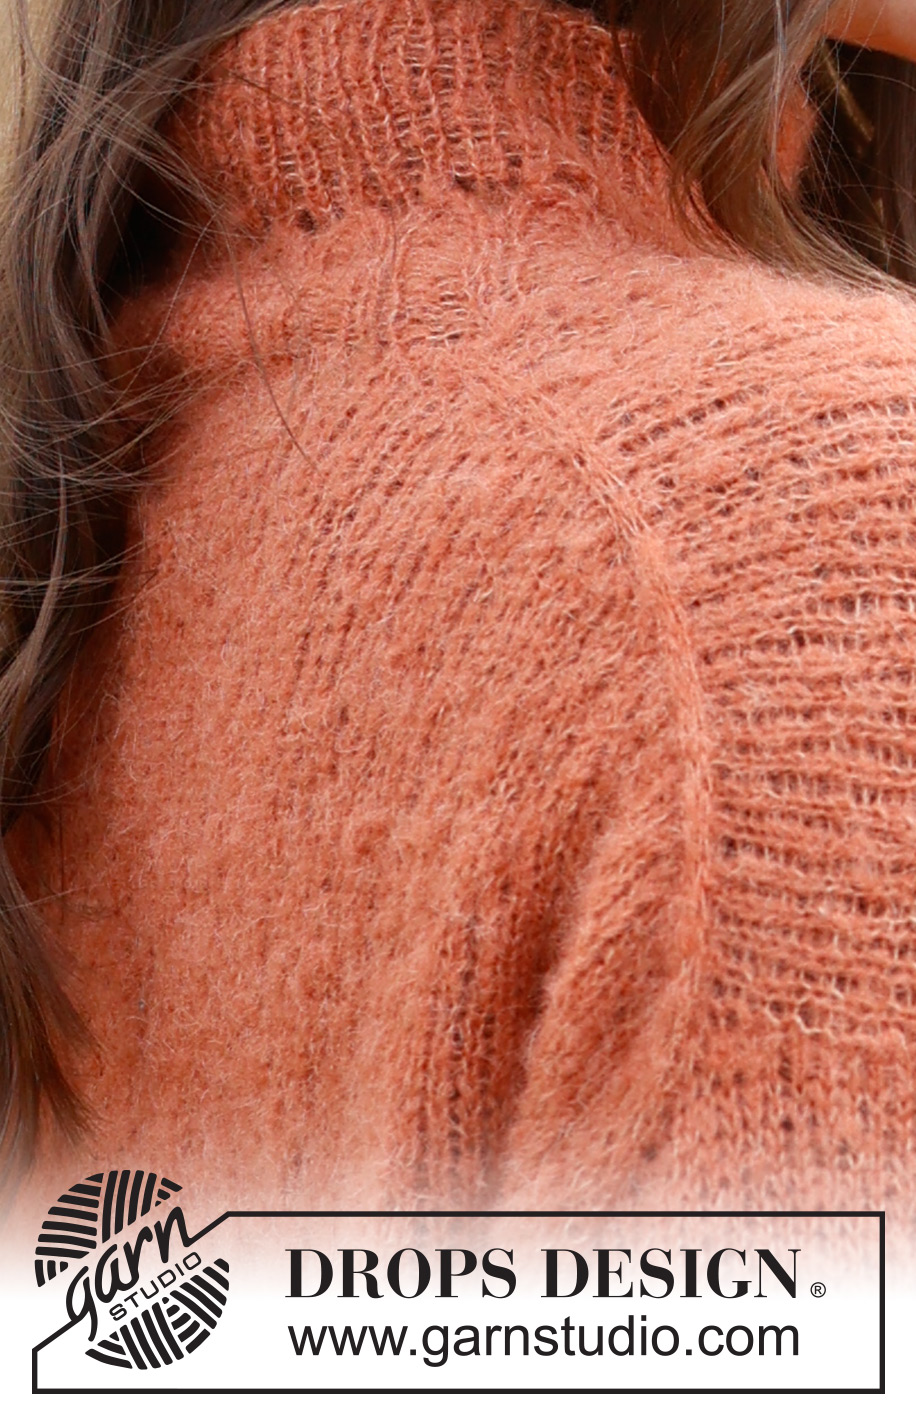
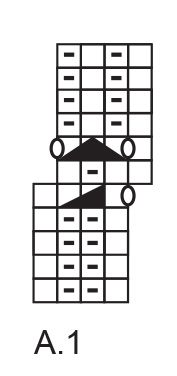
------------------------------------------------------- TECNICHE IMPIEGATE: ------------------------------------------------------- SUGGERIMENTO PER GLI AUMENTI DAL DIRITTO DEL LAVORO: Aumentare verso sinistra DOPO IL SEGNAPUNTI: Usare il ferro sinistro per riprendere il filo tra 2 maglie del ferro precedente, prenderlo da davanti e lavorare a diritto nel filo dietro. Aumentare verso destra PRIMA DEL SEGNAPUNTI: Usare il ferro sinistro per riprendere il filo tra 2 maglie del ferro precedente, prenderlo da dietro e lavorare a diritto nel filo davanti. SUGGERIMENTO PER GLI AUMENTI DAL ROVESCIO DEL LAVORO: Aumentare verso sinistra DOPO IL SEGNAPUNTI: Usare il ferro sinistro per riprendere il filo tra 2 maglie del ferro precedente, prenderlo da dietro e lavorare a rovescio nel filo davanti. Aumentare verso destra PRIMA DEL SEGNAPUNTI: Usare il ferro sinistro per riprendere il filo tra 2 maglie del ferro precedente, prenderlo da davanti e lavorare a rovescio nel filo dietro. SUGGERIMENTO PER LE DIMINUZIONI (applicato alle maniche): Diminuire 1 maglia a ogni lato del segnapunti come segue: Lavorare fino a quando rimangono 3 maglie prima del segnapunti, 2 maglie insieme a diritto, 2 maglie diritto (il segnapunti è al centro di queste 2 maglie), passare 1 maglia a diritto senza lavorarla, 1 maglia diritto, accavallare la maglia passata sopra quella appena lavorata. ------------------------------------------------------- INIZIO DEL LAVORO: ------------------------------------------------------- MAGLIONE – BREVE RIASSUNTO DEL LAVORO: Lavorare la parte superiore del dietro dall’alto in basso in piano sui ferri circolari fino alla parte inferiore degli scalfi. Riprendere le maglie lungo ogni spalla, aumentare le maglie per il collo e lavorare il davanti in piano con i ferri circolari fino alla parte inferiore degli scalfi. Unire il davanti e il dietro e lavorare il corpo in tondo con i ferri circolari. Riprendere le maglie attorno a ogni scalfo e lavorare l’arrotondamento della manica in piano prima di unire la manica e finire in tondo con i ferri circolari corti/ferri a doppia punta. Lavorare il collo in tondo alla fine. DIETRO: Avviare 30-30-34-36-38-40 maglie con i ferri circolari n° 5 mm e DROPS Brushed Alpaca Silk. Lavorare 1 ferro rovescio dal rovescio del lavoro. Inserire 1 segnapunti dopo la 3° maglia da ogni lato. I segnapunti devono rimane all'interno di 3 maglie su ogni ferro da qui in avanti. Lavorare a maglia rasata in piano. ALLO STESSO TEMPO aumentare DOPO il segnapunti all’inizio del ferro e PRIMA del segnapunti alla fine del ferro – leggere il SUGGERIMENTO PER GLI AUMENTI DAL DIRITTO DEL LAVORO. Sul ferro successivo (rovescio del lavoro) aumentare nello stesso modo – leggere il SUGGERIMENTIO PER GLI AUMENTI DAL ROVESCIO DEL LAVORO. Continuare ad aumentare in questo modo dal diritto e dal rovescio del lavoro per un totale di 26-28-28-30-32-36 volte = 82-86-90-96-102-112 maglie. Ora misurare il lavoro da qui! Continuare a maglia rasata fino a quando il lavoro misura 16-17-18-19-19-20 cm, lungo lo scalfo. Tagliare il filo, mettere le maglie in sospeso e lavorare il davanti. DAVANTI: Iniziare con la spalla sinistra (con il capo indossato). Riprendere 26-28-28-30-32-36 maglie all’interno della maglia più esterna lungo la spalla sinistra del dietro (con il capo indossato, riprendere 1 maglia in ogni ferro lungo il bordo). Lavorare a maglia rasata in piano per 4 cm. Ora aumentare le maglie all’inizio di ogni ferro dal diritto del lavoro per il collo, all’interno di 3 maglie - ricordarsi del SUGGERIMENTO PER GLI AUMENTI DAL DIRITTO DEL LAVORO. Aumentare 1 maglia 4 volte = 30-32-32-34-36-40 maglie. Lavorare 1 ferro rovescio dal rovescio del lavoro, tagliare il filo, mettere le maglie in sospeso e lavorare la spalla destra. Riprendere 26-28-28-30-32-36 maglie all’interno della maglia più esterna lungo la spalla destra del dietro. Lavorare a maglia rasata in piano per 4 cm. Ora aumentare le maglie alla fine di ogni ferro dal diritto del lavoro, all’interno di 3 maglie - ricordarsi del SUGGERIMENTO PER GLI AUMENTI DAL DIRITTO DEL LAVORO. Aumentare 1 maglia 4 volte = 30-32-32-34-36-40 maglie. Lavorare a rovescio dal rovescio del lavoro dopo l’ultimo aumento. Lavorare il ferro successivo dal diritto del lavoro come segue: lavorare a diritto le 30-32-32-34-36-40 maglie del davanti destro, avviare 22-22-26-28-30-32 maglie per il collo alla fine del ferro poi lavorare a diritto le 30-32-32-34-36-40 maglie del davanti sinistro = 82-86-90-96-102-112 maglie. Lavorare a maglia rasata in piano fino a quando il davanti misura 22-23-24-25-27-28 cm lungo lo scalfo. Ora unire il davanti e il dietro per il corpo come segue: CORPO: Lavorare a maglia rasata sulle 82-86-90-96-102-112 maglie del davanti e avviare 4-6-8-12-16-16 maglie alla fine del ferro (= lato), lavorare a maglia rasata sulle 82-86-90-96-102-112 maglie del dietro e avviare 4-6-8-12-16-16 maglie alla fine del ferro = 172-184-196-216-236-256 maglie. Lavorare a maglia rasata in tondo fino a quando il lavoro misura 42-44-46-48-50-52 cm dalla parte superiore del davanti. Lavorare 1 giro diritto e aumentare 16-16-20-20-24-24 maglie in modo uniforme = 188-200-216-236-260-280 maglie. Passare ai ferri circolari n° 3,5 mm e lavorare A.1 su tutte le maglie. Ripetere i primi 4 giri in altezza fino a quando le coste misurano 5 cm, poi finire A.1. Ripetere gli ultimi 4 giri fino a quando le coste misurano 12 cm in totale. Intrecciare. Il maglione misura circa 54-56-58-60-62-64 cm, misurati dalla parte superiore della spalla vicino al collo. MANICA SINISTRA: Usare i ferri circolari n° 5 mm e DROPS Brushed Alpaca Silk. Iniziare sulla parte inferiore dello scalfo e riprendere 37-39-41-43-46-48 maglie dal diritto del lavoro sul davanti fino alla spalla poi 27-29-31-31-32-34 maglie lungo il dietro, dalla spalla fino alla parte inferiore dello scalfo = 64-68-72-74-78-82 maglie. Inserire 1 segnapunti al centro del ferro – misurare la manica da questo segnapunti. Lavorare a maglia rasata in piano per 1-2-2-4-5-5 cm. Ora unire il lavoro con i ferri circolari corti/ferri a doppia punta n° 5 mm e finire la manica in tondo. Inserire 1 segnapunti all’inizio del giro (centro sotto la manica). Lasciare che questo segnapunti segue il lavoro. Iniziare all’altezza del segnapunti sotto la manica e lavorare a maglia rasata fino a quando la manica misura 4-4-4-5-6-6 cm. Ora diminuire 2 maglie sotto la manica – leggere il SUGGERIMENTO PER LE DIMINUZIONI. Diminuire in questo modo ogni 6-4-3-3-2½-2 cm per un totale di 6-8-9-9-10-11 volte = 52-52-54-56-58-60 maglie. Continuare a lavorare fino a quando la manica misura 36-36-36-35-34-32 cm dal segnapunti (mancano 12 cm – provare il maglione e lavorare fino alla lunghezza desiderata). Lavorare 1 giro diritto e aumentare 4-4-6-8-6-8 maglie in modo uniforme = 56-56-60-64-64-68 maglie. Passare ai ferri a doppia punta n° 3,5 mm e lavorare A.1 su tutte le maglie. Ripetere i primi 4 giri in altezza fino a quando le coste misurano 5 cm, poi finire A.1. Ripetere gli ultimi 4 giri fino a quando le coste misurano 12 cm in totale. Intrecciare. La manica misura circa 48-48-48-47-46-44 cm dal segnapunti. MANICA DESTRA: Lavorare nello stesso modo della sinistra, ma riprendere 27-29-31-31-32-34 maglie dalla parte inferiore dello scalfo sul dietro fino alla spalla poi 37-39-41-43-46-48 maglie lungo il davanti. Cucire la parte inferiore degli scalfi – vedere lo schema. COLLO: Iniziare all’altezza di una spalla e riprendere all’interno della maglia di vivagno dal diritto del lavoro 68 - 92 maglie attorno al collo, usando i ferri circolari corti n° 3,5 mm (numero delle maglie divisibile per 4). Lavorare A.1 su tutte le maglie. Ripetere i primi 4 giri in altezza fino a quando le coste misurano 3 cm, poi finire A.1. Ripetere gli ultimi 4 giri fino a quando le coste misurano 8 cm in totale. Intrecciare. |
|||||||||||||||||||
Spiegazioni del diagramma |
|||||||||||||||||||
|
|||||||||||||||||||
 |
|||||||||||||||||||
 |
|||||||||||||||||||
 |
|||||||||||||||||||
Avete terminato questo modello?Allora taggate le vostre foto con #dropspattern #marmaladesweater o inviatele alla #dropsfan gallery. Avete bisogno di aiuto con questo modello?Troverete 33 video tutorial, una sezione per i commenti/domande e molto altro guardando il modello su www.garnstudio.com © 1982-2026 DROPS Design A/S. Ci riserviamo tutti i diritti. Questo documento, compreso tutte le sue sotto-sezioni, è protetto dalle leggi sul copyright. Potete leggere quello che potete fare con i nostri modelli alla fine di ogni modello sul nostro sito. |
|||||||||||||||||||


Con oltre 40 anni di esperienza nel design di modelli di maglia e uncinetto, DROPS Design offre la più estesa collezione di modelli gratuiti su internet - tradotti in 17 lingue. Ad oggi vi possiamo fornire 324 cataloghi e 12290 modelli - 9561 dei quali sono tradotti in Italiano.
Ci stiamo impegnando molto per darvi il meglio che vi possiamo offrire in termini di maglia e uncinetto, ispirazioni e consigli così come filati di grande qualità ad un prezzo incredibile! Volete utilizzare i nostri modelli per qualcosa d'altro oltre al vostro uso personale? Potete leggere tutto ciò che è consentito nel testo sul Copyright in basso su tutte le pagine dei nostri modelli. Buon lavoro!
Lasciare un commento sul modello DROPS 236-23
Noi saremmo felici di ricevere i tuoi commenti e opinioni su questo modello!
Se vuoi fare una domanda, fai per favore attenzione a selezionare la categoria corretta nella casella qui sotto per velocizzare il processo di risposta. I campi richiesti sono indicati da *.