
Popular categories
Looking for a yarn?


Comments / Questions (20)
![]() Barbara wrote:
Barbara wrote:
Goedemorgen, zou deze baret ook met drops air gebreid kunnen worden? Alvast dank, groetjes Barbara
21.03.2021 - 11:17DROPS Design answered:
Dag Barbara,
Ja dat zou kunnen, je want dat garen valt in dezelfde garencategorie. Met de garenvervanger (onderaan de materialenlijst) kun je berekenen hoeveel gram wol je nodig hebt.
22.03.2021 - 20:57
![]() Labernia Pascale wrote:
Labernia Pascale wrote:
J aimerais avoir une précision sur la hauteur du tricot avant de faire les diminutions. Est-ce à 16 cm de hauteur de jersey ou 16 cm de hauteur totale (côtes comprises) ? C'est la première fois que je me lance dans un ouvrage de ce type, merci
02.03.2021 - 08:24DROPS Design answered:
Bonjour Mme Labernia, les 16 cm correspondent à la hauteur totale, côtes comprises, autrement dit, à partir du rang de montage. Bon tricot!
02.03.2021 - 10:44
![]() Zsófi wrote:
Zsófi wrote:
A leírás a passzé utáni sorra hibásan 38-40 szem fogyasztást ír, szaporítás helyett.
16.12.2020 - 22:59DROPS Design answered:
Kedves Zsófi! Köszönöm, hogy felhívta a figyelmet a hibára, így az javításra került! Sikeres kézimunkázást!
17.12.2020 - 08:57
![]() Ana Batista wrote:
Ana Batista wrote:
Olá outra vez. peço desculpa mas é a primeira vez que tricoto em circular e que faço uma boina e que faço aumentos assim no meio do trabalho. A partir do canelado, faz-se uma volta em meia e começa-se os aumentos. No meu caso que faço o tamanho S/M serão 38. Fazem-se todos na carreira seguinte distribuindo-os pelas 88 malhas já tricotadas, com intervalos de 2 a 3 malhas mais ou menos e depois continua-se a tricotar tudo em meia? Obrigada novamente. Ana Batista
13.12.2020 - 18:34DROPS Design answered:
Bom dia, Exactamente. A partir do canelado, faz-se, na primeira carreira, os aumentos e, depois, tricota-se em ponto meia até se ter 16 cm de altura total (a contar da carreira de montagem). Só depois, vêm as diminuições. Bons Tricôs! Boas Festas!
17.12.2020 - 10:21
![]() Ana Batista wrote:
Ana Batista wrote:
Olá de novo. o video que disponibilizam em baixo deste modelo, para os aumentos deixa buracos e na explicação da boina diz que deve-se tricotar a laçada torcida em mei para não ficar buracos. Podem disponibilizar um video demonstrativo com essa técnica igualmente, por favor. A dúvida anterior em relação à medida dos 16cm já está esclarecida depois de ver os comentários de outras pessoas. Muito obrigada.
13.12.2020 - 18:26DROPS Design answered:
Bom dia, Aqui está o link que explica com tricotar uma laçada torcida em meia para que não se forme qualquer buraco. https://www.garnstudio.com/video.php?id=1526&lang=pt Como aumentar 2 malhas com 1 laçada numa mesma malha Deve ver o vídeo até ao fim para compreender melhor a técnica do aumento com a laçada torcida (tricotada em meia). Bons tricôs! Boas festas!
17.12.2020 - 10:19
![]() Ana Batista wrote:
Ana Batista wrote:
Olá! Gostaria de saber, se a medida dos 16cm referidos para iniciar as diminuições é a contar do início do trabalho (montagem/canelado) ou a partir do canelado? Tenho outra questão? No início da explicação da boina, diz-se que esta começa de cima para baixo! Pergunto se está correto? Porque da minha interpretação do desenvolvimento da boina comparada com a imagem da boina parece que é de baixo para cima. Muito obrigada pelas vossas publicações e partilhas. Ana
13.12.2020 - 17:30DROPS Design answered:
Bom dia, Efectivamente, a boina tricota-se de baixo para cima, pelo que já se procedeu à alteração. Quanto aos 16 cm, contam a partir do início do trabalho. Vamos responder, de seguida, às suas outra perguntas. Obrigado pelo seu interesse nos nossos modelos!
17.12.2020 - 10:13
![]() Marcelina wrote:
Marcelina wrote:
Ok, już sobie rozszyfrowałam wszystko, więc można usunąć moje poprzednie pytanie i to też , żeby tu niepotrzebnie nie zaśmiecać :)
17.07.2020 - 13:14DROPS Design answered:
Witaj Marcelino, życzymy miłych wakacyjnych robótek, a zdjęcia koniecznie zamieszczaj na naszej facebookowej grupie DROPS Workshop :) Pozdrawiamy!
17.07.2020 - 13:21
![]() Alessandra wrote:
Alessandra wrote:
Ciao, vorrei segnalare che quando vanno inseriti i segnapunti, viene ripetuta 2 volte la taglia S/M anziché aggiungere la M/L. Le indicazioni sono comunque corrette, come sempre, e il modello è molto molto carino!
16.01.2020 - 18:09DROPS Design answered:
Buongiorno Alessandra. Abbiamo corretto il testo. La ringraziamo per la segnalazione. Buon lavoro!
16.01.2020 - 18:59
![]() Michelle Perry wrote:
Michelle Perry wrote:
When the pattern (after the band/edging is complete) says knit stockinette stitch until the beret measures 6 1/4 “... is the 6 1/4 inches including the band/edging OR in addition to the band/edging - so the total beret would measure 9 3/4 before decreasing begins? (Re: Sidewalk cafe beret)
20.11.2019 - 03:25DROPS Design answered:
Dear Mrs Perry, measure from cast on edge, ie start decreasing when piece measures 6 1/4". Happy knitting!
20.11.2019 - 08:14
![]() Nancy wrote:
Nancy wrote:
J'adore
12.07.2019 - 14:24
|
|
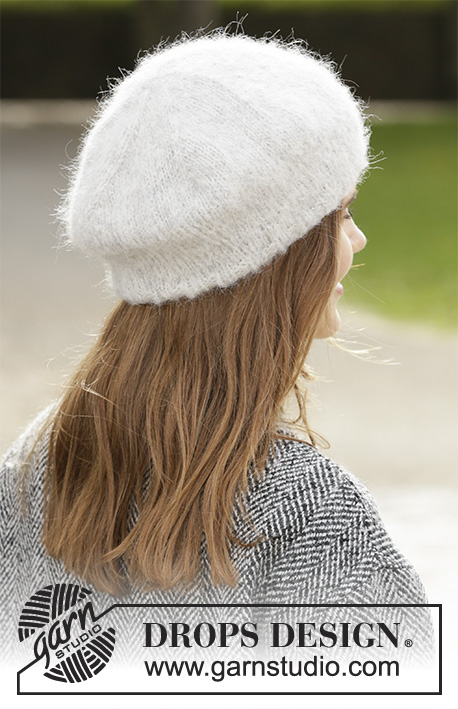
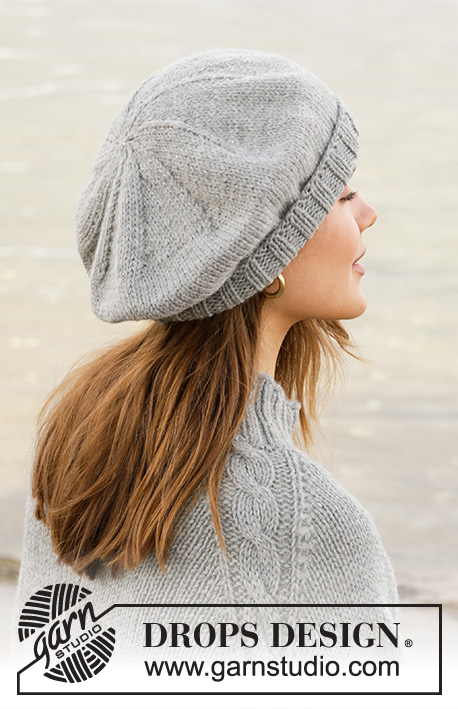
Sidewalk Café#sidewalkcafehat |
|
 |
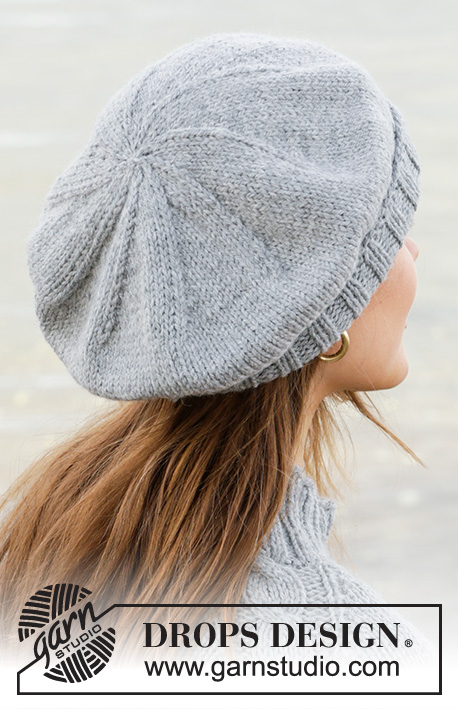 |
Knitted beret in DROPS Alaska.
DROPS 204-5 |
|
|
------------------------------------------------------- EXPLANATIONS FOR THE PATTERN: ------------------------------------------------------- INCREASE TIP (evenly spaced): To work out how to increase evenly, count the total number of stitches on the needle (e.g. 88 stitches) and divide by the number of increases to be made (e.g. 38) = 2.3. In this example, increase by making 1 yarn over after approx. each 2nd stitch. On the next round knit the yarn overs twisted to avoid holes. DECREASE TIP: Work until there are 2 stitches left before the marker thread, knit 2 together (= 1 stitch decreased). Repeat at all marker threads (= 9 stitches decreased on round). SHAPING TIP: Wet the beret and carefully press out any excess water. Stretch the beret over a plate with the same diameter and place the plate on a glass so the beret does not touch the surface. Allow the beret to dry and remove carefully from the plate. Do the same after each wash. ------------------------------------------------------- START THE PIECE HERE: ------------------------------------------------------- BERET – SHORT OVERVIEW OF THE PIECE: The piece is worked in the round with circular needle, bottom up. Change to double pointed needles when necessary. BERET: Cast on 88-92 stitches with circular needle size 4 mm and Alaska. Purl 1 round then work rib (= knit 2 / purl 2) for 8 cm. Change to circular needle size 5 mm and knit 1 round where you increase 38-40 stitches evenly spaced – read INCREASE TIP = 126-132 stitches. Work stocking stitch in the round. REMEMBER THE KNITTING TENSION! When the beret measures 16-17 cm insert 9 marker threads in the piece as follows in the different sizes: Size S/M: Insert 1 marker thread at the beginning of the round then insert the other 8 marker threads with 14 stitches between each one. Size M/L: Insert 1 marker thread at the beginning of the round then insert 6 new marker threads with 15 stitches between each and then the last 2 marker threads with 14 stitches between each one. After the last marker thread there are 14 stitches left on the round. All sizes: On the next round start to decrease – read DECREASE TIP. Decrease like this every 2nd round a total of 12 times = 18-24 stitches. Knit all stitches together 2 and 2 until there are 5-6 stitches left on the round. Cut the strand, pull it through the remaining stitches, tighten and fasten well. The beret measures approx. 28-29 cm in height. Fold up the ribbed edge at the bottom. Read SHAPING TIP. |
|
Have you finished this pattern?Tag your pictures with #dropspattern #sidewalkcafehat or submit them to the #dropsfan gallery. Do you need help with this pattern?You'll find 16 tutorial videos, a Comments/Questions area and more by visiting the pattern on garnstudio.com. © 1982-2026 DROPS Design A/S. We reserve all rights. This document, including all its sub-sections, has copyrights. Read more about what you can do with our patterns at the bottom of each pattern on our site. |
|


With over 40 years in knitting and crochet design, DROPS Design offers one of the most extensive collections of free patterns on the internet - translated to 17 languages. As of today we count 324 catalogues and 12290 patterns translated into English (UK/cm). 12290
We work hard to bring you the best knitting and crochet have to offer, inspiration and advice as well as great quality yarns at incredible prices! Would you like to use our patterns for other than personal use? You can read what you are allowed to do in the Copyright text at the bottom of all our patterns. Happy crafting!
Post a comment to pattern DROPS 204-5
We would love to hear what you have to say about this pattern!
If you want to leave a question, please make sure you select the correct category in the form below, to speed up the answering process. Required fields are marked *.