
Popular categories
Looking for a yarn?








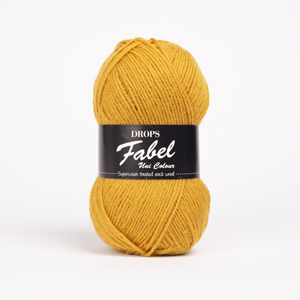
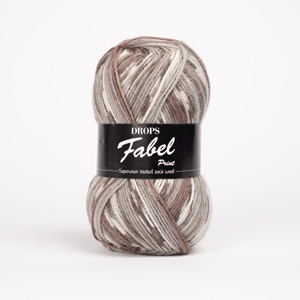
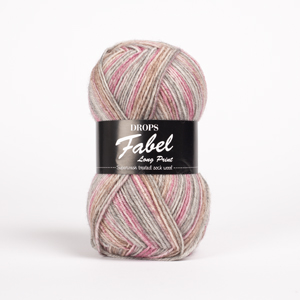


















Comments / Questions (64)
 Dominika wrote:
Hallo, bei dem 2. Raport der verkürzten Reihen, um wieviele Maschen soll verkürzt werden? Und wie oft soll ich den Raport wiederholen? VG
29.09.2026 - 13:05DROPS Design answered:
Liebe Dominika, wenn es Ihnen helfen kann, können Sie Markierung bei jedem "Wenden" einsetzen, z.B. 1 Markierer nach 103-108-112-115-119-122 M (zählen Sie am Anfang einer Hinreihe), 2. Markierer nach 89-94-97-99-103-105 M und 3. Markierer nach 71-75-77-79-81-83 M. So stricken Sie die verkürzten Reihen so: *2 Reihen über alle Maschen, 2 Reihen über Maschen von Anfang bis 1. Markierer (von der Vorderseite gesehen), 2 Reihen über Maschen bis 2. Markierer, 2 Reihen über Maschen bis 3. Markierer*. Viel Spaß beim Stricken!
30.09.2026 - 07:43
Dominika wrote:
Hallo. Ich verstehe es nicht mit dem Raport bei den verkürzten Reihen. Die Maschenzahl bei den verkürzten Reihen ist immer eine andere. Einmal sind es 12M, dann 14M, dann 18 M weniger... Soll das beim Wiederholen auch so sein? Und was soll das bedeuten 2R oben und 8R unten. Welche Reihen, wann? Danke für die Antwort. Vg
28.09.2026 - 18:07DROPS Design answered:
Liebe Dominika, so stricken Sie die verkürzten Reihen, die bei den Hinreihen bei der untere Kante der Jacke beginnen: *2 Reihen über alle Maschen, die ersten 1032-122 M stricken wenden und diese Maschen stricken (= 2 Reihen), die 89-105 ersten Maschen stricken, wenden und diese Maschen stricken (= 2 Reihen), die ersten 71-83 M stricken, wenden und diese Maschen stricken (= 2 Reihen)*. so haben Sie2+2+2+2=8 Reihen über die ersten Maschen von der Vorderseite gesehen (unteres Teil der Jacke) aber nur 2 Reihen über die letzen Maschen (immer noch von der Vorderseite gesehen = oberes Teil der Jacke). Kann das helfen?
29.09.2026 - 09:06
Sandra wrote:
Das heißt, dass bei den verkürzten Reihen für die Ärmel bei Größe XXL bspw im Rapports in der 7.reihe nur 7 Maschen gestrickt werden?
10.08.2026 - 16:39DROPS Design answered:
Liebe Sandra, ja genau, die verkürzten Reihen stricken Sie genauso wie zuvor weiter, es wird ja jeweils weniger Maschen gestrickt. Viel Spaß beim Stricken!
11.08.2026 - 09:44
 Yvette wrote:
Bonjour je voudrais savoir si vous avez une vidéo pour les points en crochet pour la bordure. Je n’ai jamais fait de crochet.. merci !
01.07.2026 - 04:27DROPS Design answered:
Bonjour Yvette, tout à fait, découvrez ici, en vidéo comment crocheter la bordure. Bonne continuation!
01.07.2026 - 07:59
 Léone wrote:
Bonjourcje suis désolée mais je ne comprends pas kes explications première chose selon ce qui est expliqué on ne fait qu'une seule série de rang raccourcis puis pour les manches on a que 55 m alors les explications de rangs raccourcis se font sur les 125 pour la taille L pourriez vous m'expliquer plus clairement merci
23.05.2026 - 16:21DROPS Design answered:
Bonjour Léone, pour obtenir la forme souhaitée = plus serrée en haut, côté encolure et plus large en bas du gilet, on va tricoter des rangs raccourcis du début du devant gauche jusqu'à la fin du devant droit; Répétez les rangs raccourcis de *à* sur les mailles que vous avez sur l'aiguille = 125 m pour le devant gauche mais seulement 55 pour la manche (tournez aux mêmes endroits que vous le faisiez auparavant pour le devant gauche pour former l'encolure et la manche). Bon tricot!
26.05.2026 - 09:56
 Britt-Inger wrote:
Hej! Har det kommit någon ändring i mönstret?
26.01.2026 - 12:05
 Natalia wrote:
Ho riprodotto questo modello con filati e taglie diverse, anche con maniche lunghe. Tutte le mie amiche soddisfatte MA io non lo sone perchè sempre il collo dietro risulta troppo basso/aperto rispetto al davanti. Sembra che sarebbe necessario avviare meno maglie per poi aumentare man mano per avere umo scollo che copra i collo dietro così da scaldare anche la cervicale. Come posso fare? se risolvo il problema allora sarebbe perfetto non solo bello. Un aiuto! Grazie
16.04.2025 - 20:40DROPS Design answered:
Buongiorno Natalia, per un'assistenza così personalizzata può rivolgersi al suo rivenditore DROPS di fiducia. Buon lavoro!
16.04.2025 - 22:41
 Phyllis wrote:
The pattern gives measurements for the lower edge, can you give an indication of bust measurements so that I know I'm knitting the right size for me. Thanks
09.01.2025 - 22:55DROPS Design answered:
Dear Phyllis, the body piece is actually worked straight, so the lower edge measurements should fit the chest measurements; the A-shape is obtained by working less rows on the neck, but the rest of the body is the same width. You can check the pattern photo and dropsfan gallery photo to see that the lower edge is not wider than the chest. Happy knitting!
12.01.2025 - 13:07
 Nancy St-Pierre wrote:
J'ai tricoté les 3 cm de bordure devant. On me dit de continuer en rangs raccourcis *-* est-ce qu'il faut débuter avec 2 rgs complets suivis des rgs raccourcis ? Ou puis-je commencer par les rgs raccourcis suivis de 2 rgs tricotés au complet? Merci
19.11.2024 - 05:10DROPS Design answered:
Bonjour Mme St-Pierre, les rangs raccourcis se tricotent de *-* autrement dit, au 1er rang, tricotez toutes les mailles pendant 2 rangs, puis commencez à tricoter moins de mailles comme indiqué, répétez bien les rangs de *-*. Bon tricot!
19.11.2024 - 08:45
JOUET-JUNGELSON wrote:
Merci ! Merci ! Merci ! J'avance !!! Pour des modèles équivalents (taille cintrée, particulièrement adaptée pour les femmes 'rondes' contrairement aux formes 'sac') j'ai trouvé : 164-15, 157-13, 142-31 et 141-6. Jacqueline, la Parisienne.
21.06.2024 - 12:47
|
||||
Eden#edencardigan |
||||
|
|
||||
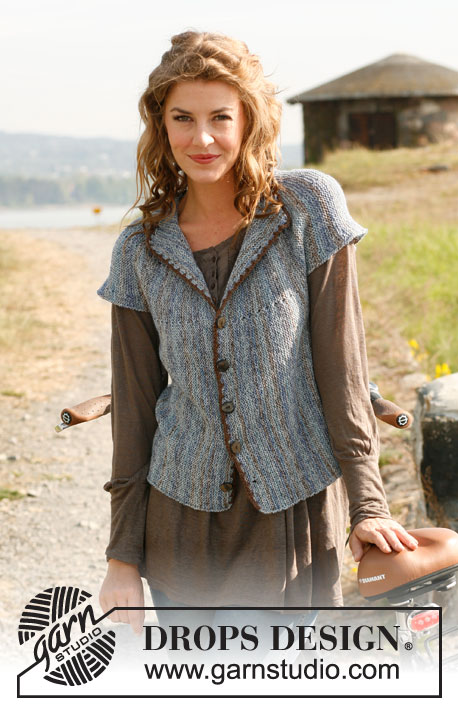
Knitted DROPS vest in garter st worked sideways with short rows in ”Fabel”. Size: S - XXXL.
DROPS 134-4 |
||||
|
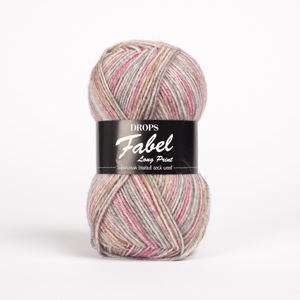
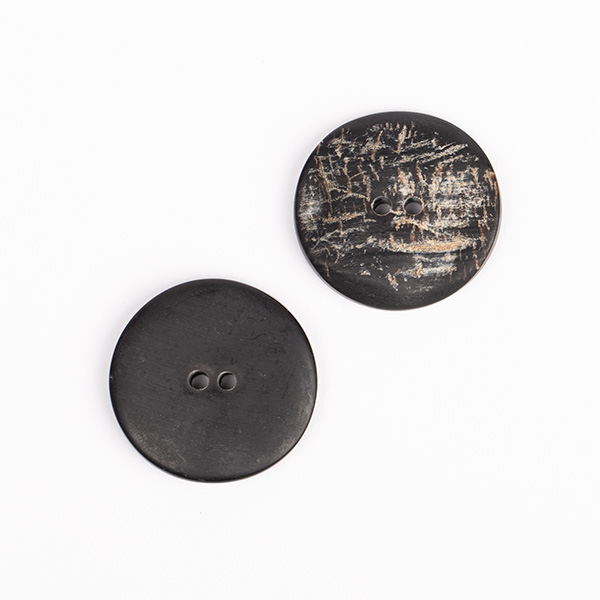
KNITTING TIP: Every time piece is turned in the middle of piece, slip first st as if to K, tighten thread and return. This is done to avoid holes when working short rows. SHORT ROWS: Work short rows in the middle of the piece to give the garment a slight A shape. Beg from bottom edge and work up to neck. * Work all sts, turn and work back. Work 103-108-112-115-119-122 sts, turn and work back. READ KNITTING TIP! Work 89-94-97-99-103-105 sts, turn and work back. Work 71-75-77-79-81-83 sts, turn and work back *. Repeat from *-*, i.e. 1 repetition = 2 rows at the top and 8 rows at the bottom. MEASURING TIP: Measure when piece is flat, it is important not to stretch the piece when measuring. -------------------------------------------------------- VEST: Worked across back and forth on needle. Beg mid front on left front piece and finish mid front on right front piece. NOTE: The picture of the vest has been reversed. LEFT FRONT PIECE: The whole piece is worked in garter st, i.e. K all rows. Loosely cast on 115-120-125-129-134-138 sts on needle size 3.5 mm with ocean view Fabel. 1st row is worked from RS (= from bottom edge and up to neck). Work 3 cm over all sts (= band), finish after 1 row from WS. REMEMBER THE KNITTING TENSION! Continue with SHORT ROWS - see explanation above! Continue like this until piece measures approx. 23-25-27-30-33-35 cm from cast on edge (measured at the bottom on the widest) – READ MEASURING TIP! Then work side piece as follows: Work 1 cm back and forth over only the 64-67-70-72-74-76 sts from bottom edge. Insert 1 marker (= middle of the side). Work 1 cm back and forth over the same sts, and slip them on 1 stitch holder (finish after 1 row from RS, sts are to be used on back piece later). Then work sleeve. LEFT SLEEVE: = 51-53-55-57-60-62 sts on needle. Work back and forth with short rows on the same places as before until piece measures approx. 30-31-32-33-34-35 cm (at the bottom on the widest), finish after 1 row from WS. BACK PIECE: Work the 64-67-70-72-74-76 sts from stitch holder back on needle (from WS) = 115-120-125-129-134-138 sts. Continue with short rows as before. When piece measures approx. 21-23-25-28-31-33 cm from marker in the side (measured at the bottom on the widest), insert another marker (= mid back). Continue with short rows until piece measures approx. 20-22-24-27-30-32 cm from marker mid back (measured at the bottom on the widest). Now work side piece as follows: Work 1 cm back and forth over only the 64-67-70-72-74-76 sts from bottom edge. Insert another new marker (= middle of the side). Work 1 cm back and forth over the same sts (finish after 1 row from RS), then slip them on 1 stitch holder. Work right sleeve. RIGHT SLEEVE: Work as left sleeve. RIGHT FRONT PIECE: Work the 64-67-70-72-74-76 sts from stitch holder back on needle (from WS) = 115-120-125-129-134-138 sts. Continue with short rows as on back piece. When same no of rows have been worked on right front piece as on left front piece (minus band = 3 cm), work band as follows: Work 1½ cm back and forth over all sts. On next row from RS, cast off for button holes as follows (= from bottom edge): Work 12 sts for all sizes, cast off the next 2 sts, * work 12-13-14-14-15-15 sts, cast off the next 2 sts *, repeat from *-* a total of 4 times, work the rest of row. On next row cast on 2 new sts over the cast off sts. Work over all sts until band measures a total of 3 cm. Loosely cast off. ASSEMBLY: Crochet with 2 threads brown on hook size 4 mm as follows: Beg at the bottom of right front piece with 1 dc, * 2 ch, skip approx. 1 cm and fasten with 1 dc *, repeat from *-* up along right front piece, along the collar, back of neck and down along left front piece, cut the threads and fasten. Sew on buttons. |
||||
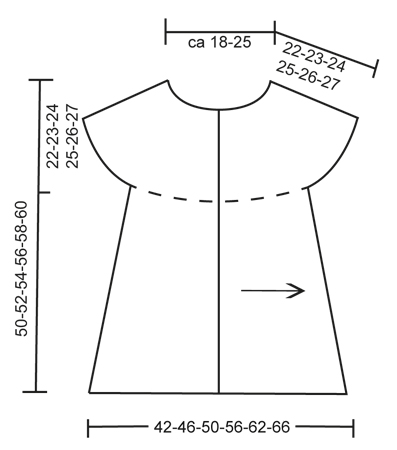
Diagram explanations |
||||
|
||||
 |
||||
Have you finished this pattern?Tag your pictures with #dropspattern #edencardigan or submit them to the #dropsfan gallery. Do you need help with this pattern?You'll find 6 tutorial videos, a Comments/Questions area and more by visiting the pattern on garnstudio.com. © 1982-2026 DROPS Design A/S. We reserve all rights. This document, including all its sub-sections, has copyrights. Read more about what you can do with our patterns at the bottom of each pattern on our site. |
||||






With over 40 years in knitting and crochet design, DROPS Design offers one of the most extensive collections of free patterns on the internet - translated to 17 languages. As of today we count 333 catalogues and 12525 patterns translated into English (UK/cm). 12525
We work hard to bring you the best knitting and crochet have to offer, inspiration and advice as well as great quality yarns at incredible prices! Would you like to use our patterns for other than personal use? You can read what you are allowed to do in the Copyright text at the bottom of all our patterns. Happy crafting!
Post a comment to pattern DROPS 134-4
We would love to hear what you have to say about this pattern!
If you want to leave a question, please make sure you select the correct category in the form below, to speed up the answering process. Required fields are marked *.