
Popular categories
Looking for a yarn?


Comments / Questions (19)
![]() Leslie wrote:
Leslie wrote:
So I've gotten to the hood and I'm confused how to increase by 4 on each side in the middle of the back with the 3rd row of the pattern. The 3rd row is P3tog and (k1, p1, k1) into one stitch. Shouldn't the increase be on row 2 or 4? If the increase is on row 3, please explain. Thank you
20.09.2021 - 21:46DROPS Design answered:
Dear Leslie, increases have to be worked from right side, when you have to purl all stitches, ie knit 1 row from WS, then 2 rows in pattern (= first row = RS), and on next row = RS, increase on each side of the middle 2 sts. Happy knitting!
21.09.2021 - 09:06
![]() Leslie wrote:
Leslie wrote:
Which Berry pattern are you using and what are the multiples for the gauge? I'm looking on YouTube for the Berry pattern to follow, but I can't find anything that starts with P3. Could you please give me the actual stitches by row as the chart description is confusing. It's really beautiful and I would love to knit it. Thank you in advance.
01.09.2021 - 21:12DROPS Design answered:
Dear Leslie, this video shows how to work the blackberry stitch. Hope this will help, happy knitting!
02.09.2021 - 08:36
![]() Robin D Bell wrote:
Robin D Bell wrote:
I would love to make this but can't seem to see on the pattern how many skeins of yarn are needed, and since having to substitute to the Drops Melody yarn I'm not sure how many to order. Thanks so much!
26.12.2015 - 23:17DROPS Design answered:
Dear Mrs D Bell, you will find requested amount of yarn under tab "materials", ie in 1st size you need 250 g Melody / 50 g a ball Melody = 5 balls. Happy knitting!
02.01.2016 - 13:53
![]() Evelin Bürger wrote:
Evelin Bürger wrote:
Würde diese Model gern stricken, nur mit anderer (glatter Wolle) ist das machbar? Bekommt man dann trotzdem den Schnitt?
25.08.2014 - 12:12DROPS Design answered:
Liebe Evenlin, das Muster fällt durch die luftige Vienna-Wolle natürlich besonders locker und schön. Wenn Sie eine glattere und schwerere Wolle verwenden, hängt sich das Muster wahrscheinlich stärker aus und wirkt nicht mehr so luftig. Am besten stricken Sie ein Probestück, um zu sehen, wie sich Ihre bevorzugte Wolle dabei verhält.
01.09.2014 - 13:10Nadia wrote:
Very feminine!!
27.03.2010 - 13:16
![]() Gabriele wrote:
Gabriele wrote:
Kann Patricia nur Recht geben! Schaue jeden Tag, ob die Anleitung schon eingestellt ist.
27.01.2010 - 08:19
![]() Jacqui wrote:
Jacqui wrote:
There are so many nice designs. I don't know where to start,but this is outstanding!!!!!!
18.01.2010 - 23:31
![]() Patricia wrote:
Patricia wrote:
Scheint so leicht und angenehm, man möchte gleich hineinschlüpfen. Ich hoffe die Anleitung ist bald verfügbar.
18.01.2010 - 21:05
![]() Hélène wrote:
Hélène wrote:
Un très beau modèle pour flâner à la maison.
07.01.2010 - 02:41Laila wrote:
Modèle très classe
06.01.2010 - 17:47
|
||||||||||
Powder Dreams#powderdreamscardigan |
||||||||||
 |
 |
|||||||||
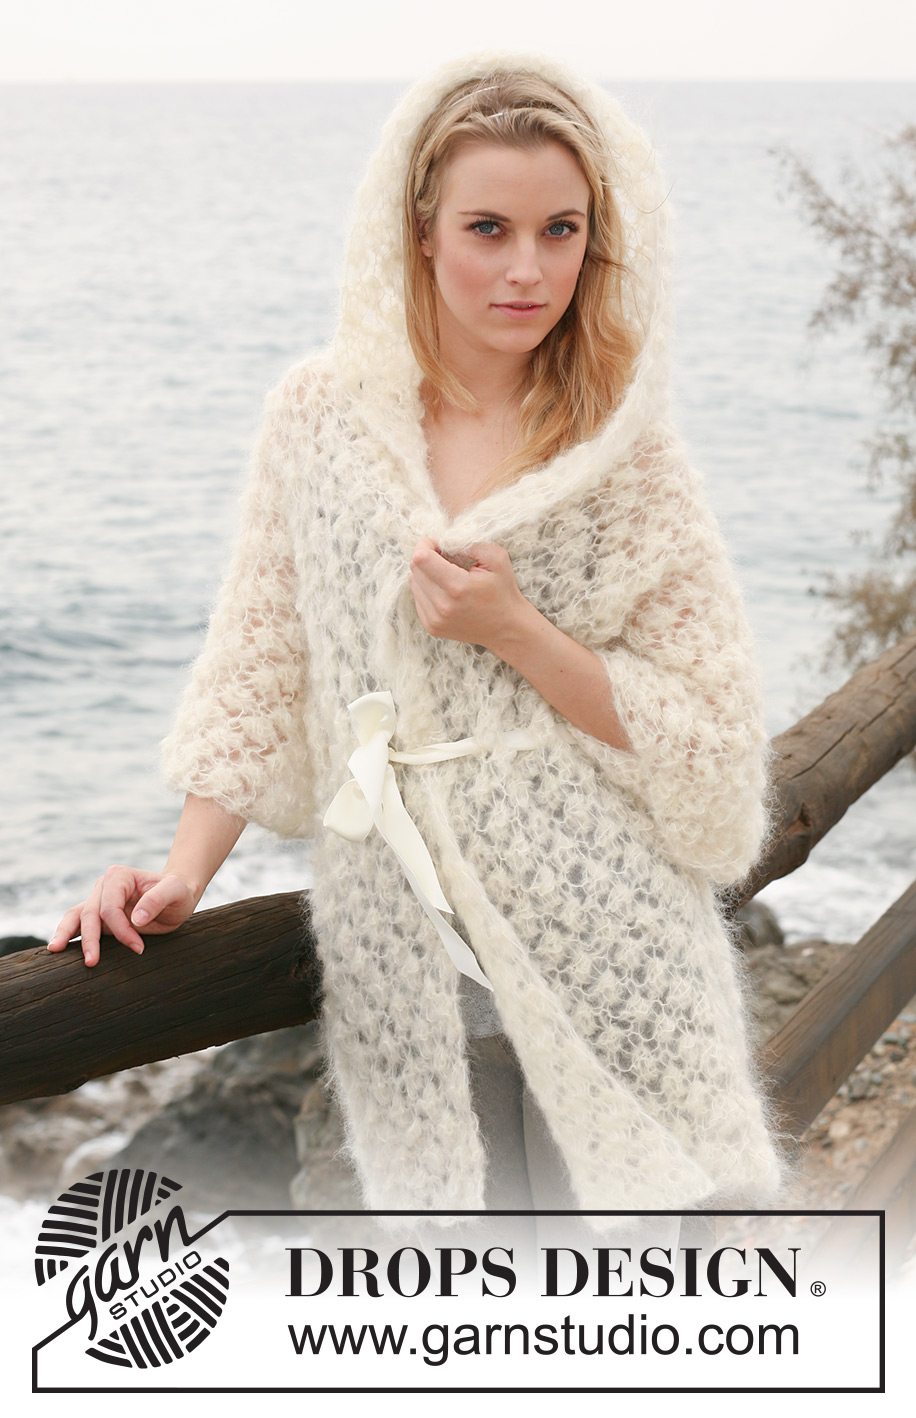
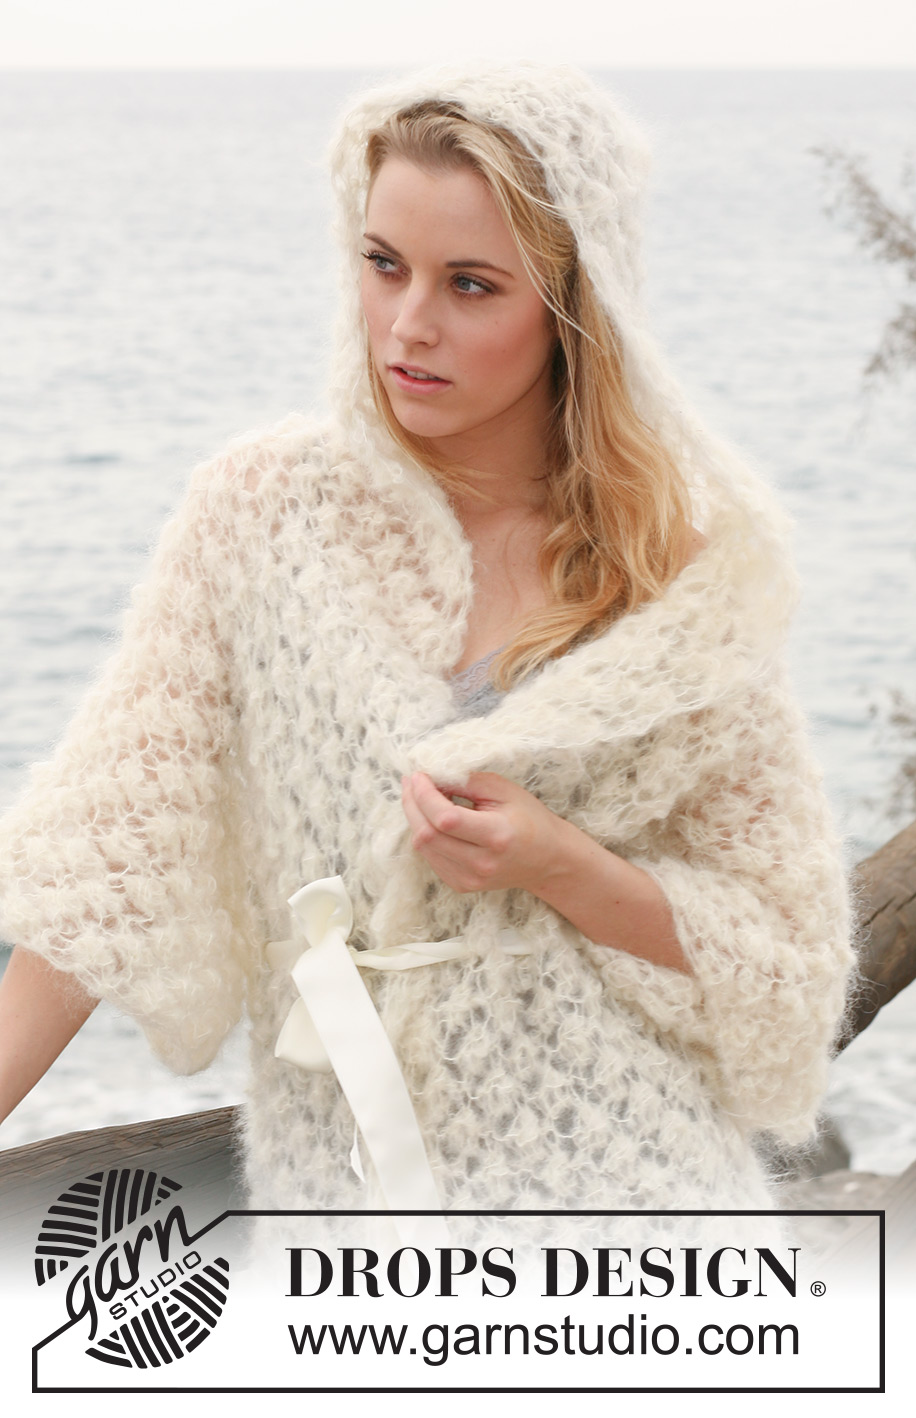
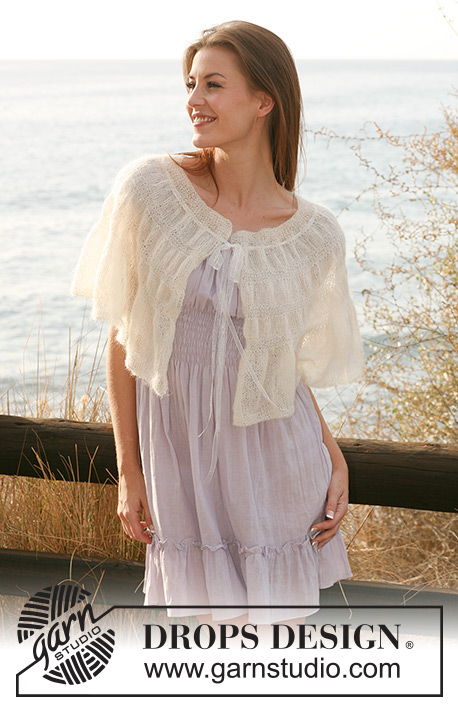
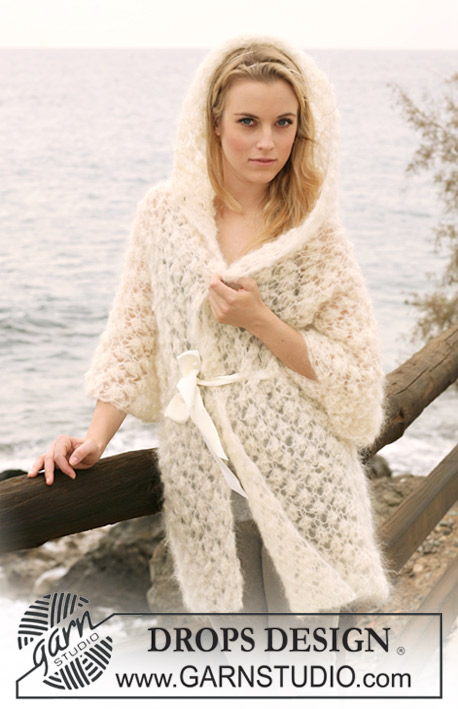
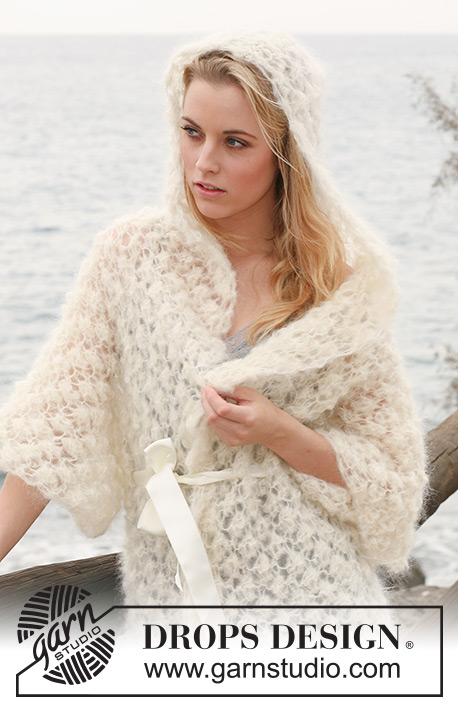
DROPS jacket in ”Vienna” or "Melody" with berry pattern and large hood. Size S - XXXL.
DROPS 119-13 |
||||||||||
|
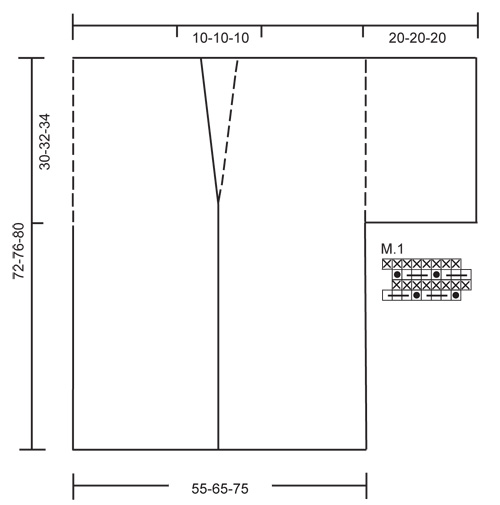
BERRY PATTERN: See diagram M.1 - pattern in diagram is seen from RS. 1 repeat = 4 sts. GARTER ST (back and forth on needle): K all rows. INCREASING TIP: Inc 4 sts by working 5 sts in 1 st as follows from RS: P1, 1 YO, P1, 1 YO, P1. -------------------------------------------------------- -------------------------------------------------------- BACK PIECE: Worked back and forth on circular needle in order to fit in all sts. Cast on 46-54-62 sts (includes 1 edge st each side) on circular needle size 12 mm with Vienna or Melody. Work BERRY PATTERN – see above, with 1 edge st each side in GARTER ST – see above! When piece measures 42-44-46 cm cast on 16 new sts each side for sleeves (i.e. at the end of the next 2 rows) = 78-86-94 sts. Continue in berry pattern on all sts with 1 garter st each side on sleeve edges. REMEMBER THE KNITTING TENSION! When piece measures 70-74-78 cm loosely cast off the middle 8 sts for neck and complete each shoulder (= 35-39-43 sts) separately. Continue until piece measures approx 72-76-80 cm (adjust to after a row from WS) and cast off with K sts from RS. LEFT FRONT PIECE: Worked back and forth on circular needle. Cast on 30-34-38 sts (includes 1 edge st at the side and 1 front band st towards mid front) on circular needle size 12 mm with Vienna or Melody. Work berry pattern with 1 garter st each side. When piece measures 42-44-46 cm cast on 16 new sts for sleeve at the end of next row towards the side = 46-50-54 sts. Continue in pattern with 1 garter st each side. When piece measures approx 44-46-48 cm inc 4 sts in st inside edge st towards mid front – SEE INCREASING TIP = 50-54-58 sts. On next row work inc sts into berry pattern. Repeat the inc when piece measures approx 58-60-62 cm = 54-58-62 sts. When piece measures approx 72-76-80 cm (adjust to after a row from WS) work next row as follows: P 19 sts and now slip these on a stitch holder for hood, cast off remaining 35-39-43 sts with K sts from RS, cut the thread. RIGHT FRONT PIECE: Like left front piece, but mirrored. ASSEMBLY: Sew shoulder/over arm seams edge to edge. Sew side- and under arm seams inside 1 edge st. HOOD: Work sts from stitch holder on right front piece back on circular needle size 12 mm, pick up 8 sts along neckline on back piece and work sts from stitch holder on left front piece back on needle = 46 sts. K 1 row from WS and then work 2 rows berry pattern with 1 edge st in garter st each side. On next row (= RS) inc 4 sts in each of the 2 middle sts on back piece - SEE INCREASING TIP = 54 sts. Continue in berry pattern with 1 edge st each side in garter st until hood measures approx 45 cm (adjust to after a row from WS), and cast off with K sts from RS. Place hood double and sew tog at the top, edge to edge. Thread the silk ribbon through a row at the waist of jacket and tie a bow. |
||||||||||
Diagram explanations |
||||||||||
|
||||||||||
 |
||||||||||
Have you finished this pattern?Tag your pictures with #dropspattern #powderdreamscardigan or submit them to the #dropsfan gallery. Do you need help with this pattern?You'll find 14 tutorial videos, a Comments/Questions area and more by visiting the pattern on garnstudio.com. © 1982-2026 DROPS Design A/S. We reserve all rights. This document, including all its sub-sections, has copyrights. Read more about what you can do with our patterns at the bottom of each pattern on our site. |
||||||||||


With over 40 years in knitting and crochet design, DROPS Design offers one of the most extensive collections of free patterns on the internet - translated to 17 languages. As of today we count 324 catalogues and 12290 patterns translated into English (UK/cm). 12290
We work hard to bring you the best knitting and crochet have to offer, inspiration and advice as well as great quality yarns at incredible prices! Would you like to use our patterns for other than personal use? You can read what you are allowed to do in the Copyright text at the bottom of all our patterns. Happy crafting!
Post a comment to pattern DROPS 119-13
We would love to hear what you have to say about this pattern!
If you want to leave a question, please make sure you select the correct category in the form below, to speed up the answering process. Required fields are marked *.