
Popular categories
Looking for a yarn?


Comments / Questions (3)
![]() Heidi wrote:
Heidi wrote:
Wo genau ist beim Ärmel: - der Markierer - Anfang, wo Maschen aufgefasst werden - Anfang der 1 Reihe
03.08.2025 - 17:27DROPS Design answered:
Liebe Heidi, hier können Sie mit Fotos sehen, wie man so einen Ärmel strickt, einschl. wo die Markierungen eingesetzt werden. Viel Spaß beim Stricken!
04.08.2025 - 09:14
![]() Camilla Sloth Sonne wrote:
Camilla Sloth Sonne wrote:
Under stykket hvor samling af forstykket er beskrevet, står der strik til arbejdet måler 24 cm(str m). Men hvor skal man måle fra? Fra hvor man samlede masker op?
26.04.2025 - 19:24DROPS Design answered:
Hej Camilla, ja det stemmer :)
30.04.2025 - 15:01
![]() Engel wrote:
Engel wrote:
Bij de garenkwaliteit staat: Drops Alpaca Bouclé behoort tot garengroep B. Maar deze kwaliteit behoort toch tot de groep C?
13.03.2025 - 19:52
|
|
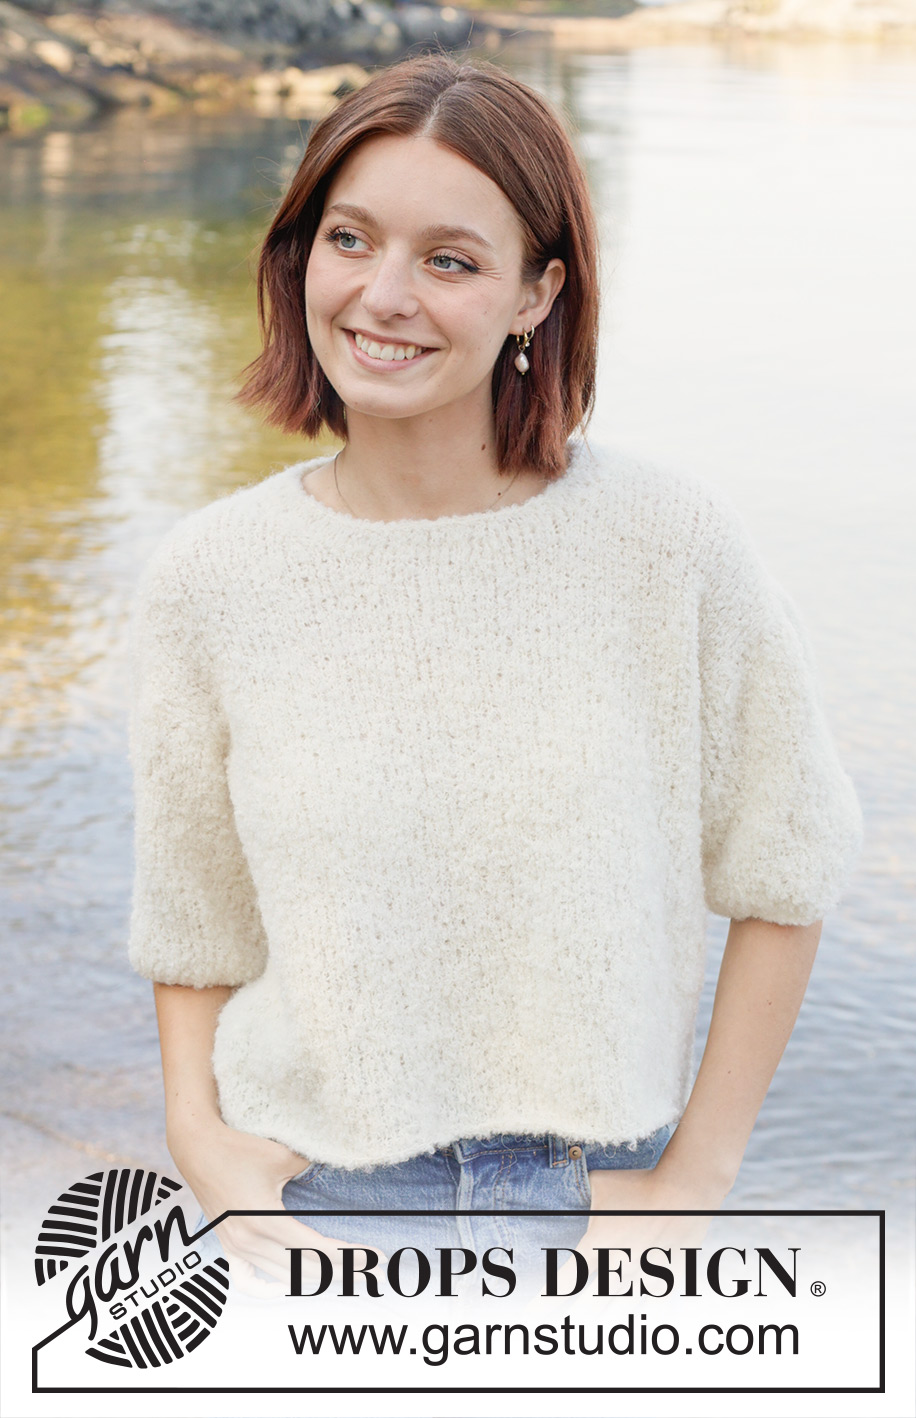
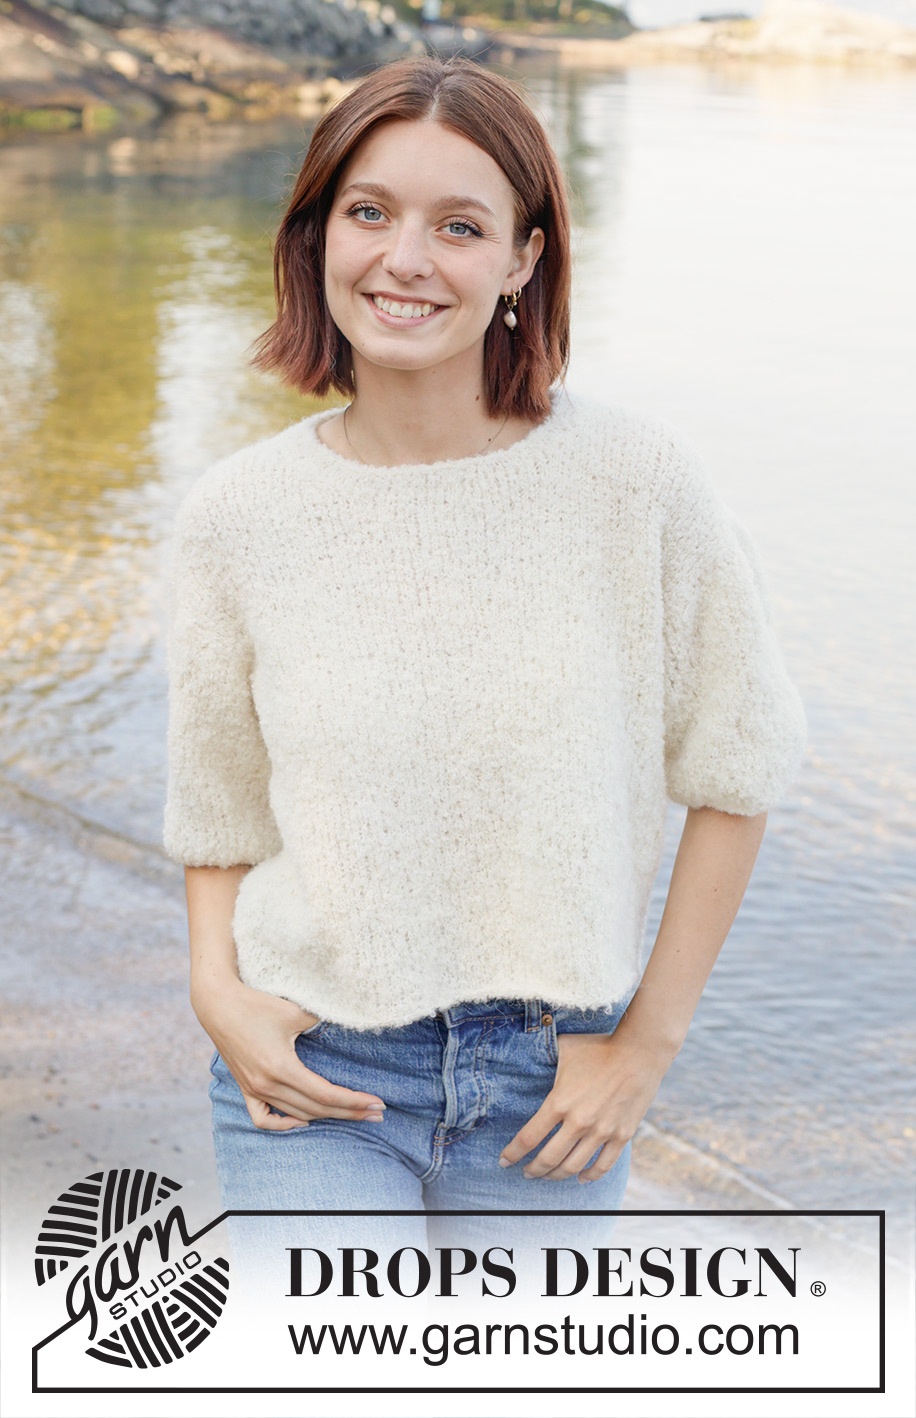
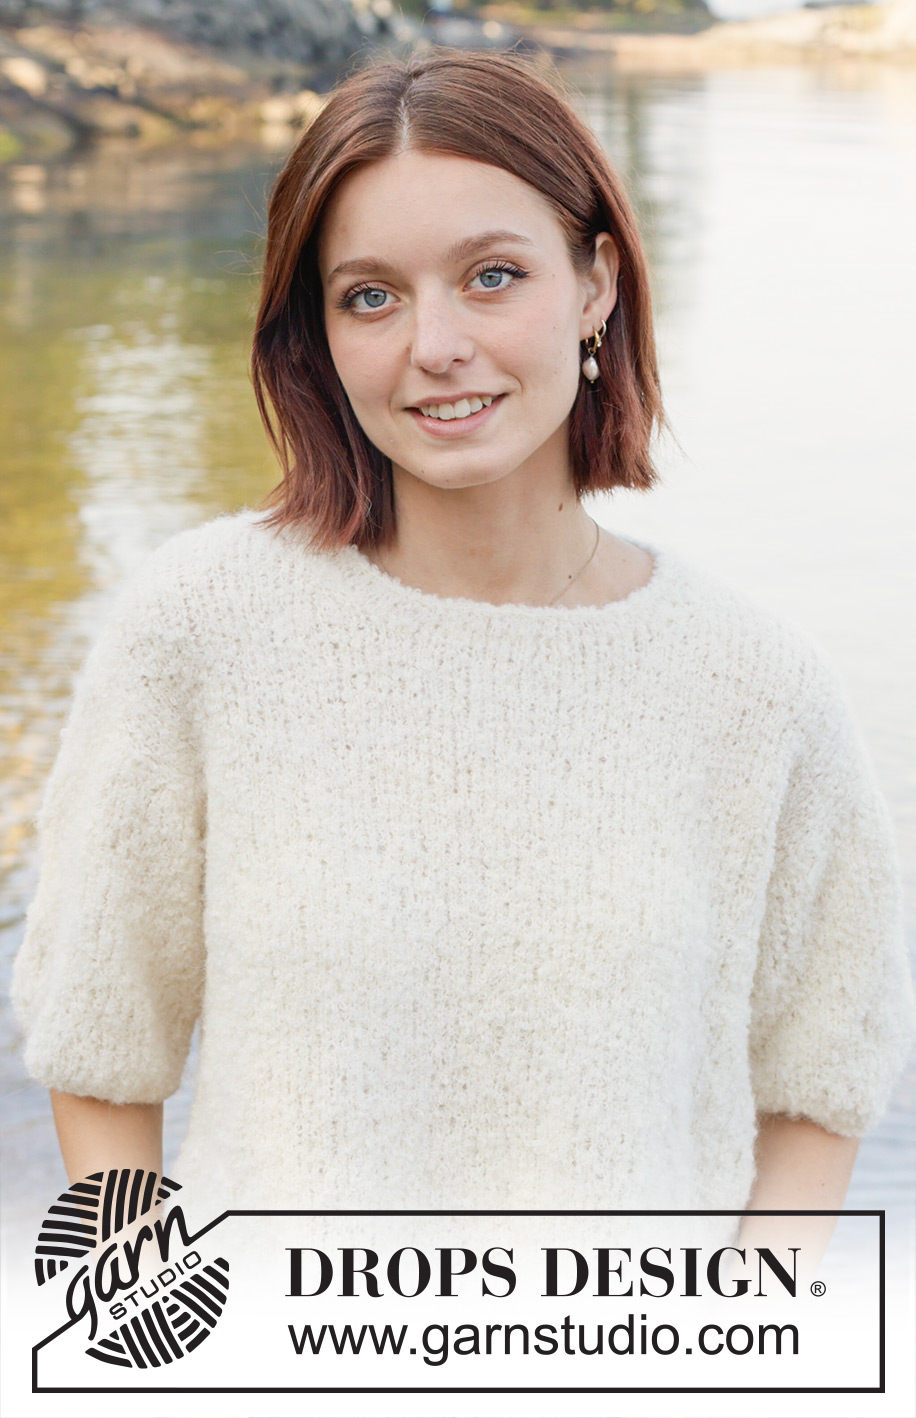
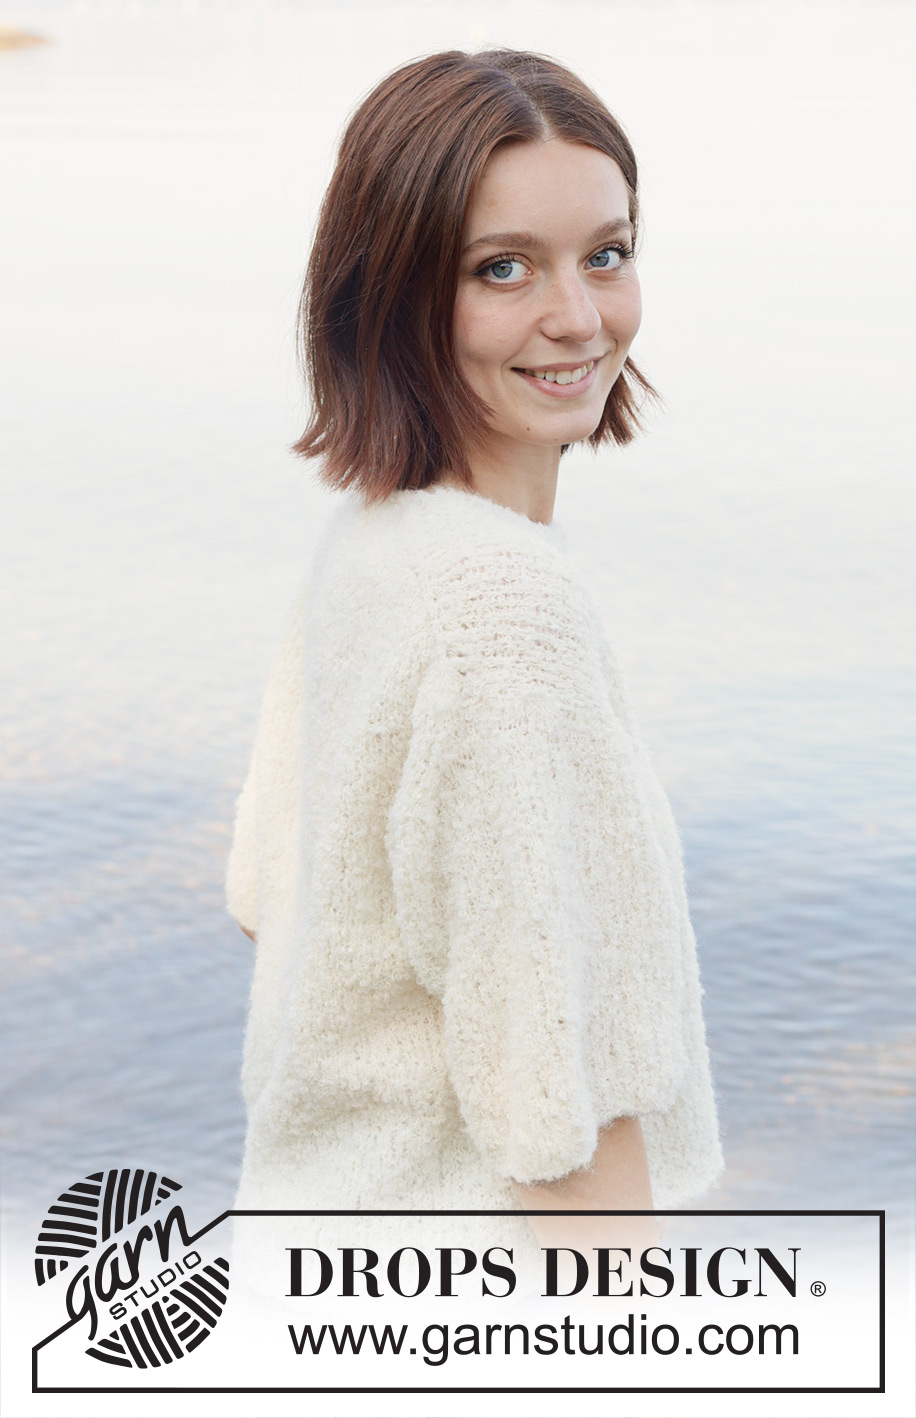
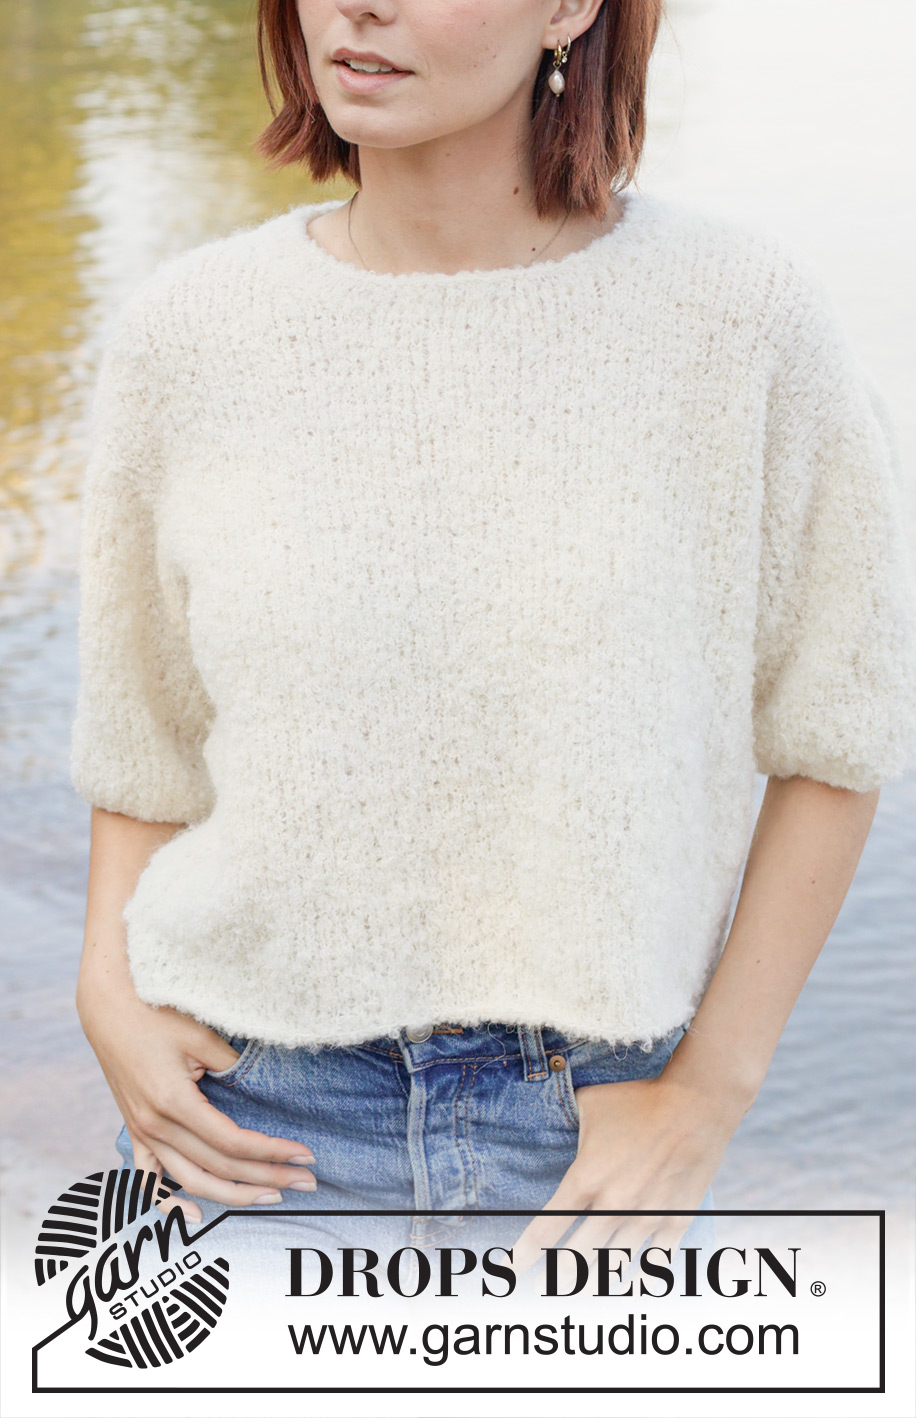
Pearl Mist#pearlmistsweater |
|
 |
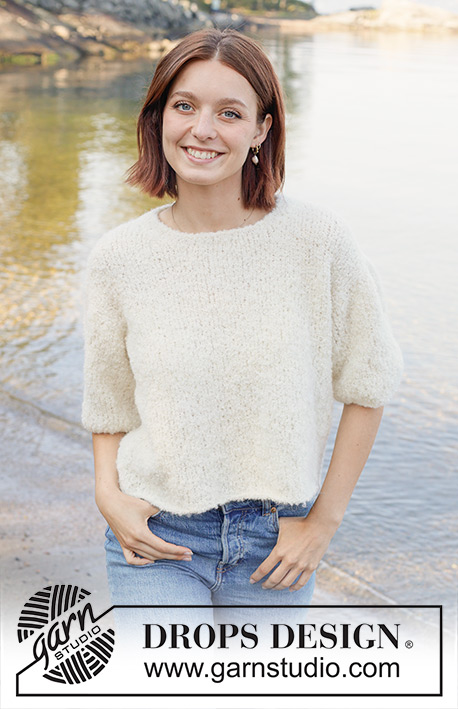 |
Knitted jumper in DROPS Alpaca Bouclé. The piece is worked top down with stocking stitch, European/diagonal shoulders and short sleeves. Sizes S - XXXL.
DROPS 258-20 |
|
|
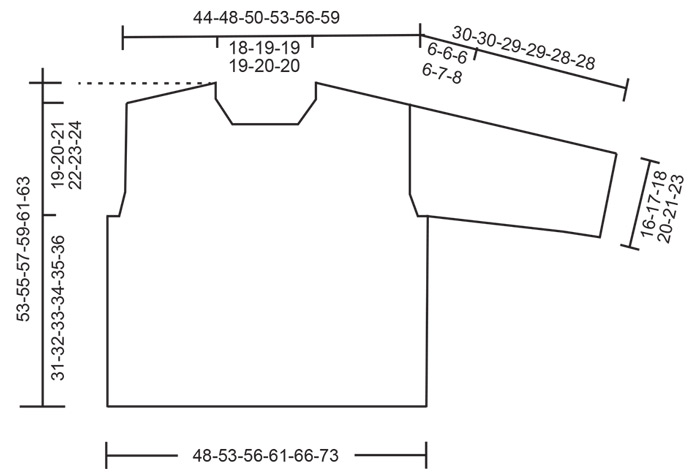
------------------------------------------------------- EXPLANATIONS FOR THE PATTERN: ------------------------------------------------------- INCREASE TIP-1: INCREASE 1 STITCH TOWARDS THE LEFT - from RIGHT SIDE: Use left needle to pick up yarn between 2 stitches from row below, pick up yarn from the front and knit in the stitch loop that is on the back of the needle. INCREASE 1 STITCH TOWARDS THE RIGHT - from RIGHT SIDE: Use left needle to pick up yarn between 2 stitches from row below, pick up yarn from the back and knit in the stitch loop that is on the front side of the needle. . INCREASE TIP-2: INCREASE 1 STITCH TOWARDS THE RIGHT - from WRONG SIDE: Use left needle to pick up yarn between 2 stitches from row below, pick up yarn from the back and purl in the stitch loop that is on the front side of the needle. INCREASE 1 STITCH TOWARDS THE LEFT - from WRONG SIDE: Use left needle to pick up yarn between 2 stitches from row below, pick up yarn from the front and purl in the stitch loop that is on the back side of the needle. KNITTING TIP: When working short rows, there will be a small hole after each turn. This hole can be closed by tightening the strand or using the technique German Short Rows as follows: Slip the first stitch purl-wise, take the strand over the right needle and tighten well from the back (2 loops on the needle). These loops are worked together on the next row. DECREASE TIP: Decrease 1 stitch on each side of the marker-thread as follows: Work until there are 3 stitches left before the marker-thread, knit 2 together, knit 2 (marker-thread sits between these 2 stitches), slip 1 stitch knit-wise, knit 1 and pass the slipped stitch over the knitted stitch (2 stitches decreased). ------------------------------------------------------- START THE PIECE HERE: ------------------------------------------------------- JUMPER – SHORT OVERVIEW OF THE PIECE: The pattern uses both long and short needles; start with the length which fits the number of stitches and change when necessary. The piece is started back and forth, casting on stitches at the back of the neck and working the back piece top down, while increasing stitches on each side for the shoulders, which become slightly diagonal. The back piece is worked as far as the armholes. The front piece is then worked in 2 sections, knitting up stitches along 1 back shoulder, working stocking stitch and increasing for the neckline. This is repeated on the other shoulder, the 2 front sections are joined when the neckline is finished and worked until the armholes are finished. The front and back pieces are joined on the same circular needle and the body worked in the round Stitches are knitted up around the armholes for the sleeves, which are started back and forth for the sleeve cap, then finished in the round. Stitches are knitted up around the neckline and the neck worked to finish. BACK PIECE: Piece is worked back and forth on circular needle. Cast on 30-32-32-32-34-34 stitches with circular needle size 5.5 mm and DROPS Alpaca Bouclé. ROW 1 (wrong side): Purl. ROW 2 (right side): Read INCREASE TIP-1. Knit 3, increase 1 stitch towards the left, knit until there are 3 stitches left, increase 1 stitch towards the right, knit 3. ROW 3 (wrong side): Read INCREASE TIP-2. Purl 3, increase 1 stitch towards the right, purl until there are 3 stitches left, increase 1 stitch towards the left, purl 3. Work ROWS 2 and 3 a total of 10-11-12-13-14-15 times (20-22-24-26-28-30 rows worked) = 70-76-80-84-90-94 stitches. Insert 1 marker outermost on one side. The piece is now measured from here! Continue with stocking stitch – remember the knitting tension - until the yoke measures 12-12-12-12-13-12 cm from the marker, measured along the armhole. Now increase for the armholes. INCREASE FOR ARMHOLES: ROW 1 (right side): Remember INCREASE TIP-1. Knit 3, increase 1 stitch towards the left, knit until there are 3 stitches left, increase 1 stitch towards the right, knit 3. ROW 2 (wrong side): Purl. Work ROWS 1 and 2 a total of 2-2-3-4-4-5 times = 74-80-86-92-98-104 stitches. Work until the piece measures 14-14-15-16-17-17 cm, measured along the armhole and finishing after a row from the wrong side. Cut the strand, place the stitches on a stitch holder and work the left front piece along the left back shoulder as follows. LEFT FRONT PIECE: Find the left back shoulder as follows: Lay the back piece flat, right side up, with the stitch holder towards you; left side of piece = left shoulder. Start from the right side by the neckline and knit up 1 stitch in each worked row (inside the outermost stitch) as far as the shoulder = 20-22-24-26-28-30 stitches. All lengths on the front piece are taken from this knitted-up row. Work stocking stitch (first row from the wrong side). When the piece measures 6-7-8-9-9-10 cm, increase for the neckline as follows: ROW 1 (right side): Remember INCREASE TIP-1, knit 3, increase 1 stitch towards the left, work to end of row. ROW 2 (wrong side): Purl. Work ROWS 1 and 2 a total of 4-4-4-4-5-5 times (8-8-8-8-10-10 worked rows) = 24-26-28-30-33-35 stitches (with the next row from right side). Cut the strand, place the stitches on a stitch holder and work the right front piece along the right back shoulder as follows. RIGHT FRONT PIECE: Start from the right side by the armhole on the right back shoulder and knit up 1 stitch in each worked row (inside the outermost stitch) as far as the neckline = 20-22-24-26-28-30 stitches. All lengths on the front piece are taken from this knitted-up row. Work stocking stitch (first row from the wrong side). When the piece measures 6-7-8-9-9-10 cm, increase for the neckline as follows: ROW 1 (right side): Work until there are 3 stitches left, increase 1 stitch towards the right, knit 3. ROW 2 (wrong side): Purl. Work ROWS 1 and 2 a total of 4-4-4-4-5-5 times (8-8-8-8-10-10 worked rows) = 24-26-28-30-33-35 stitches (next row from right side). Join the 2 front pieces as follows. FRONT PIECE: Work next row from the right side as follows: Knit the 24-26-28-30-33-35 stitches from the right front piece, cast on 22-24-24-24-24-24 stitches for the neckline, knit the 24-26-28-30-33-35 stitches from the left front piece = 70-76-80-84-90-94 stitches. Continue stocking stitch back and forth until the piece measures 22-24-24-24-25-26 cm. Now increase for the armholes. INCREASE FOR ARMHOLES: ROW 1 (right side): Remember INCREASE TIP-1. Knit 3, increase 1 stitch towards the left, knit until there are 3 stitches left, increase 1 stitch towards the right, knit 3. ROW 2 (wrong side): Purl. Work ROWS 1 and 2 a total of 2-2-3-4-4-5 times (4-4-6-8-8-10 rows worked) = 74-80-86-92-98-104 stitches. Work until the piece measures 24-26-27-28-29-31 cm, finishing after a row from the wrong side. Join the front and back pieces as follows. The piece is now measured from here! BODY: Knit the 74-80-86-92-98-104 stitches from the front piece, cast on 2-4-4-6-8-12 stitches (under the sleeve), knit the 74-80-86-92-98-104 stitches from the back piece, cast on 2-4-4-6-8-12 stitches (under the sleeve) = 152-168-180-196-212-232 stitches. Work stocking stitch in the round for a further 31-32-33-34-35-36 cm. Cast off with knit. The jumper measures approx. 53-55-57-59-61-63 cm, innermost by the neckline. SLEEVES: Lay the piece flat and insert 1 marker at the top of the armhole (NOTE! Mid-top of shoulder is not the same as the knitted-up row on the front piece but 5 to 7 cm down the front piece). Use circular needle size 5.5 mm. Start in the middle of the cast-on stitches under the sleeve and knit up 56-62-66-74-78-86 stitches around the armhole, with equal numbers of stitches on each side of the marker. Work short rows back and forth (to give the sleeve a better fit), starting mid-under the sleeve as follows: ROW 1 (right side): Knit to 4-5-6-6-7-7 stitches past the marker on the shoulder, turn – read KNITTING TIP. ROW 2 (wrong side): Purl to 4-5-6-6-7-7 stitches past the marker, turn. ROW 3 (right side): Knit to 3-3-3-4-4-4 stitches past the previous turn, turn. ROW 4 (wrong side): Purl to 3-3-3-4-4-4 stitches past the previous turn, turn. Repeat ROWS 3 and 4 until you have turned a total of 12-12-12-12-14-16 times (6-6-6-6-7-8 times each side and the last row was from the wrong side). After the last time of working row 4, turn and knit back to mid-under the sleeve (beginning of the round). Insert 1 marker-thread here (used when decreasing under the sleeve – allow this thread to follow your work onwards). Work stocking stitch in the round for 1 cm. Now decrease 2 stitches - read DECREASE TIP. Decrease like this every 10-5-5-4-4-3 cm a total of 2-4-4-5-5-6 times = 52-54-58-64-68-74 stitches. Work until the sleeve measures 30-30-29-29-28-28 cm from top of shoulder. Cast off with knit. NECK: Use circular needle size 5.5 mm. Start from the right side by one knitted up row and knit up 70 to 84 stitches around the neckline, inside 1 stitch. Knit 4 rounds. Cast off with knit AT THE SAME TIME as making 1 yarn over after each 4th stitch, which is cast off as a normal stitch (this avoids the neck becoming tight). |
|
 |
|
Have you finished this pattern?Tag your pictures with #dropspattern #pearlmistsweater or submit them to the #dropsfan gallery. Do you need help with this pattern?You'll find 32 tutorial videos, a Comments/Questions area and more by visiting the pattern on garnstudio.com. © 1982-2026 DROPS Design A/S. We reserve all rights. This document, including all its sub-sections, has copyrights. Read more about what you can do with our patterns at the bottom of each pattern on our site. |
|


With over 40 years in knitting and crochet design, DROPS Design offers one of the most extensive collections of free patterns on the internet - translated to 17 languages. As of today we count 325 catalogues and 12298 patterns translated into English (UK/cm). 12298
We work hard to bring you the best knitting and crochet have to offer, inspiration and advice as well as great quality yarns at incredible prices! Would you like to use our patterns for other than personal use? You can read what you are allowed to do in the Copyright text at the bottom of all our patterns. Happy crafting!
Post a comment to pattern DROPS 258-20
We would love to hear what you have to say about this pattern!
If you want to leave a question, please make sure you select the correct category in the form below, to speed up the answering process. Required fields are marked *.