
Popular categories
Looking for a yarn?


Comments / Questions (14)
![]() Lisa wrote:
Lisa wrote:
Bonjour , Est il possible d’avoir une réponse en français à ma demande du 11 février car mon ouvrage est en attente …. Je vous remercie .
16.02.2024 - 11:17DROPS Design answered:
Bonjour Lisa, montez ces mailles comme dans cette vidéo / cette leçon et tricotez uniquement les 8 mailles du bras_ pendant 20 rangs (10 côtes mousse), rabattez ces mailles et coupez le fil, tricotez maintenant les 10 mailles sur l'aiguille gauche, montez 4 mailles pour le 2ème bras et tricotez le 2ème bras sur les 20 mailles, rabattez et tricotez les 5 dernières mailles du corps. Bon tricot!
19.02.2024 - 15:49
![]() Louise Hedegaard wrote:
Louise Hedegaard wrote:
Hejsa! Jeg forstår ikke formuleringen “ Strik de første 9 masker fra hovedet ret, slå derefter 4 nye masker op på pinden til arm.”. Strikker man de første 9 masker og tager derefter 4m ud, eller tages de 4m ud yderst på pinden? Hvis jeg strikker 9 og tager 4 ud og så vender og strikker 20p over de første 8, er armen jo 5m inde på kroppen som ser meget forkert ud.
11.02.2024 - 22:14DROPS Design answered:
Hej Louise, jo det stemmer, du slår 4 nye masker op og strikker over de yderste 8 masker, hvor så armen er inde i kroppen.
22.02.2024 - 11:25
![]() Lisa wrote:
Lisa wrote:
Bonjour , J’ai tricoté sans problème la tête et les oreilles ainsi que le nez de l’ours , et maintenant je suis bloquée pour le corps et les bras ….il est dit qu’il faut tourner après avoir monté 4 mailles pour le bras. Je ne comprends pas comment il faut procéder ! Y a t-il une vidéo explicative ? Merci pour votre réponse ! Cordialement
11.02.2024 - 14:54
![]() Renée wrote:
Renée wrote:
Bij de naalden 4-6 bij de neus staat dat er aan het begin & eind van elke naald er een steek aan toegevoegd moet worden. Op welke manier gaat dit? Optie 1: Meerder na 1e steek & voor laatste steek, dus 1 stk recht, 1 omslag gedr., 30 stkn recht, 1 omslag gedr., 1 stk recht. Etc. Optie 2: Meerder voor 1e steek & na 1e steek, dus: Naald 4: meerder 1 stk, 31 stkn recht (incl extra stk), meerder 1 stk Naald 5: meerder 1 stk, 33 stken recht (incl extra stk), meerder 1 stk etc.
03.01.2024 - 12:35DROPS Design answered:
Dag Renée,
Op naald 3 brei je 11 steken recht voordat je een omslag maakt en op naald 4 worden dat er 12. Het zelfde geldt voor na de omslag, dan brei je ook 1 steek meer dan de naald ervoor.
07.01.2024 - 13:38
|
|||||||
Tiny Bear#dropstinybear |
|||||||
 |
 |
||||||
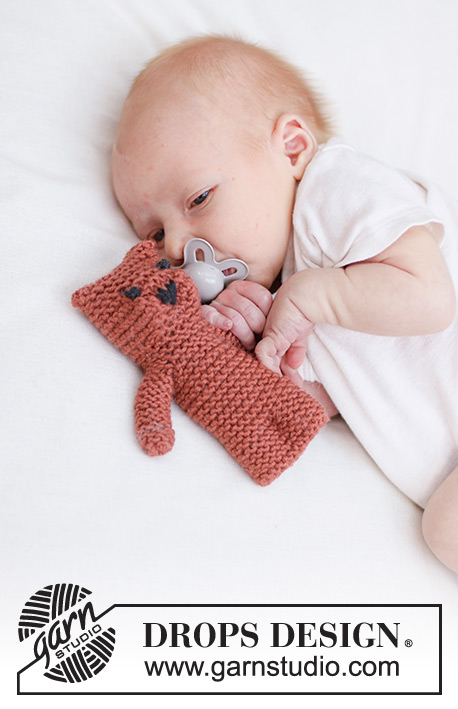
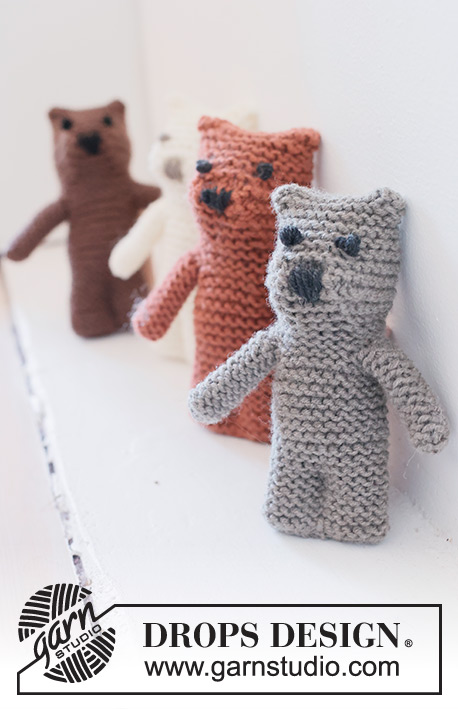
Knitted teddy bear for babies and children in DROPS Merino Extra Fine. The piece is worked top down, with garter stitch and embroidered eyes and nose. Theme: Soft toys.
DROPS Baby 46-17 |
|||||||
|
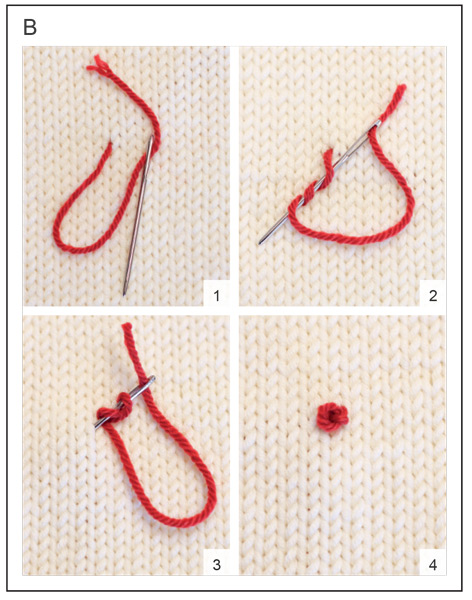
------------------------------------------------------- EXPLANATIONS FOR THE PATTERN: ------------------------------------------------------- GARTER STITCH (worked back and forth): Knit all rows. 1 ridge = knit 2 rows. PATTERN: See diagrams A and B. The diagrams show how to embroider the stitches. ------------------------------------------------------- START THE PIECE HERE: ------------------------------------------------------- TEDDY BEAR – SHORT OVERVIEW OF THE PIECE: The piece is worked back and forth in garter stitch, from the head to the legs. The arms are worked in as you go. The eyes and nose are embroidered, the teddy bear sewn together and filled with wadding. HEAD AND EARS: Cast on 36 stitches with needle size 3.5 mm and DROPS Merino Extra Fine. Work GARTER STITCH – read description above – AT THE SAME TIME decrease for the ears as follows: ROW 1: Knit 7, knit 2 together, knit 1, knit 2 together, knit 12, knit 2 together, knit 1, knit 2 together, knit 7 = 32 stitches. ROW 2: Knit. ROW 3: Knit. ROW 4: Knit 4, knit 2 together, knit 2 together, Knit 1, knit 2 together, knit 2 together, Knit 6, knit 2 together, knit 2 together, knit 1, knit 2 together, knit 2 together, knit 4 = 24 stitches. Work 2 ridges back and forth over all stitches. REMEMBER THE KNITTING TENSION! NOSE: Now increase for the nose as follows: ROW 1: Knit 10, 1 yarn over, knit 4, 1 yarn over, knit 10 = 26 stitches. ROW 2: Knit 10, knit the yarn over twisted (to avoid a hole), 1 yarn over, knit 4, 1 yarn over, knit the yarn over twisted, knit 10 = 28 stitches. ROW 3: Knit 11, knit the yarn over twisted, 1 yarn over, knit 4, 1 yarn over, knit the yarn over twisted, knit 11 = 30 stitches. ROWS 4-6: Work in the same way as row 3 but working 1 more knitted stitch at the beginning and end of the row, before/after the increase = 36 stitches. Work 1 ridge over all stitches. Now decrease for the nose as follows: ROW 1: Knit 14, knit 2 together, knit 4, knit 2 together, knit 14 = 34 stitches. ROW 2: Knit 13, knit 2 together, knit 4, knit 2 together, knit 13 = 32 stitches. ROWS 3-6: Work in the same way as row 2 but working 1 less knitted stitch at the beginning and end of the row, before/after the decrease = 24 stitches. Work 2 ridges over all stitches. BODY AND ARMS: Knit the first 9 head-stitches, cast on 4 stitches for the arm. Turn, work 10 ridges back and forth over the 8 outermost stitches, then cast off with knit from the right side. Cut the strand, leaving an end of 25 cm (to sew the arm-seam with). The first arm is finished Continue the body as follows: Knit the next 10 body-stitches, cast on 4 stitches for the arm. Turn, work 10 ridges back and forth over the 8 outermost stitches, then cast off with knit from the right side. Cut the strand, leaving an end of 25 cm. The second arm is finished. Knit the last 5 stitches. Work as follows from the wrong side: Knit 5 (body), fold the arm double and knit up 1 stitch in each of the 4 cast-on stitches, skip the last 4 arm-stitches, knit 6 (between the arms), fold the second arm double and knit up 1 stitch in each of the 4 cast-on stitches, skip the last 4 arm-stitches, knit 5 = 24 stitches. Insert 1 marker – the piece is now measured from here. BODY AND LEGS: Work garter stitch back and forth over all 24 stitches for 7 cm (= approx. 16 ridges). Cast off a little loosely, with knit from the right side. ASSEMBLY: Embroider the nose and eyes with left-over yarn. The nose has 4-5 vertical flat stitches, each 1 cm long - see diagram A and photo. The eyes are worked with French knots – see diagram B and photo. Sew the back seam – sewing edge to edge in the outermost loop of the outermost stitch so the seam is flat. Sew together the top of the head. Sew each arm seamy – sewing in the outermost loop of the outermost stitch. Tack a strand through the stitches as the bottom of each arm, tighten and fasten well. Fill the arms and body with wadding. Sew the bottom of the body together, then sew a leg-seam through both layers and wadding to separate the legs – leg-length = approx. 1/3 of body-length. |
|||||||
Diagram explanations |
|||||||
|
|||||||
 |
|||||||
 |
|||||||
Have you finished this pattern?Tag your pictures with #dropspattern #dropstinybear or submit them to the #dropsfan gallery. Do you need help with this pattern?You'll find 14 tutorial videos, a Comments/Questions area and more by visiting the pattern on garnstudio.com. © 1982-2026 DROPS Design A/S. We reserve all rights. This document, including all its sub-sections, has copyrights. Read more about what you can do with our patterns at the bottom of each pattern on our site. |
|||||||


With over 40 years in knitting and crochet design, DROPS Design offers one of the most extensive collections of free patterns on the internet - translated to 17 languages. As of today we count 324 catalogues and 12290 patterns translated into English (UK/cm). 12290
We work hard to bring you the best knitting and crochet have to offer, inspiration and advice as well as great quality yarns at incredible prices! Would you like to use our patterns for other than personal use? You can read what you are allowed to do in the Copyright text at the bottom of all our patterns. Happy crafting!
Post a comment to pattern DROPS Baby 46-17
We would love to hear what you have to say about this pattern!
If you want to leave a question, please make sure you select the correct category in the form below, to speed up the answering process. Required fields are marked *.