
Popular categories
Looking for a yarn?


Comments / Questions (82)
![]() Marlen Schets wrote:
Marlen Schets wrote:
Ik heb een fout geconstateerd in het rechter voorpand. Bij de 3e regel staat nieuwe steken bijmaken als volgt: 3 keer 1, 3 keer 2 en 10 keer 5 steken. Deze 5 is van 10-11-12-13-14-15, daar staat 11 in plaats van 15, want het totaal aan steken is 27-20 etc.
05.12.2012 - 21:41DROPS Design answered:
Hoi Marlen. Je hebt gelijk. Wij hebben het patroon aangepast. Bedankt voor de reactie.
12.12.2012 - 11:17
![]() Aud Martinsen wrote:
Aud Martinsen wrote:
Hei har strikket modellen den er dårlig forklart,jeg strikket hele lengden ned og målte 6cm etterpå når jeg strikket oppover
02.10.2012 - 23:31
![]() Ingrid Abrahamsson wrote:
Ingrid Abrahamsson wrote:
Jag håller på att sticka koftan Drops 140-4 och har kommit ner på det första framstycket. I beskrivningen står det: "SAMTIDIGT när arb mäter 6 cm från längst ner på framst (mätt upp längs sidan) stickas de 2 första m på v (från rätsidan) räta tills, upprepa avm med 3 cm mellanrum 4 ggr till = 22-24-26-29-33-37 m." Varifrån skall jag mäta 6 cm? Jag förstår inte den delen av beskrivningen och kommer nu inte vidare.
02.10.2012 - 10:01DROPS Design answered:
Det är samtidigt som du stickar vändningarna och arb mäter 6 cm du börjar med att sticka m tills.
04.10.2012 - 09:45
![]() Vibeke Hinge Nielsen wrote:
Vibeke Hinge Nielsen wrote:
Denne model er meget spændende og smart, i øvrigt syntes jeg at jeres modeller generelt er spændende at strikke jeg har strikket mindst 20 af dem og glæder mig altid til at gå i gang med en ny model Med venlig hilsen Vibeke
27.08.2012 - 15:51
![]() MB wrote:
MB wrote:
Har också problem med de 6 centimetrarna och de två maskorna som ska tas ihop. Om de ska göras från rätsidan blir det ju i nederkanten men den ska väl vara rak? Alternativet är att ta ihop två maskor av dem i mitten av V:t. Tacksam om någon kan förklara hur det är ska göras.
01.08.2012 - 22:13
![]() Aud Martinsen wrote:
Aud Martinsen wrote:
Jeg lurer på når det står samtidig arb måler 6cm fra nederst på forstykket er det ment 50cm?Hvor langt skal det måle før jeg strikker 2m sammen jeg str str S.Jeg skal jo gjenta fellingen 4 ganger det blir jo mer enn 6cm.På forhånd takk.Hilsen Aud
20.07.2012 - 00:02DROPS Design answered:
Du strikker ovenfra på skulderen (siden ut mot halsen, ikke mot skulder). Strikkes ned til mål der vendinger starter, strikk vendinger og samtidig når arb måler 6 cm målt nedenfra og opp langs yttersiden av jakken skal det startes å felle i yttersiden.
22.02.2013 - 10:46
![]() Judith Sørensen wrote:
Judith Sørensen wrote:
Er der nogle der er i gang med denne trøje? Har problemer med at forstå hvor de 6 cm og de 22 cm skal måles fra. Judith
13.07.2012 - 16:53DROPS Design answered:
SAMTIDIG når arb måler 6 cm fra nederst på rygstk (målt op langs siden). God fornøjelse!
18.07.2012 - 08:14
![]() Christina wrote:
Christina wrote:
Einfach schick!!!!
13.07.2012 - 16:05
![]() DROPS Design NL wrote:
DROPS Design NL wrote:
De link wordt geactiveerd als het patroon vertaald is en gepubliceerd. Dit patroon is nu beschikbaar.
02.07.2012 - 10:10
![]() Ella wrote:
Ella wrote:
Leuk vest, wil er graag an beginnen, maar kan het patroon nog niet openen.
02.07.2012 - 09:18
|
||||||||||
Loreen#loreencardigan |
||||||||||
 |
 |
|||||||||
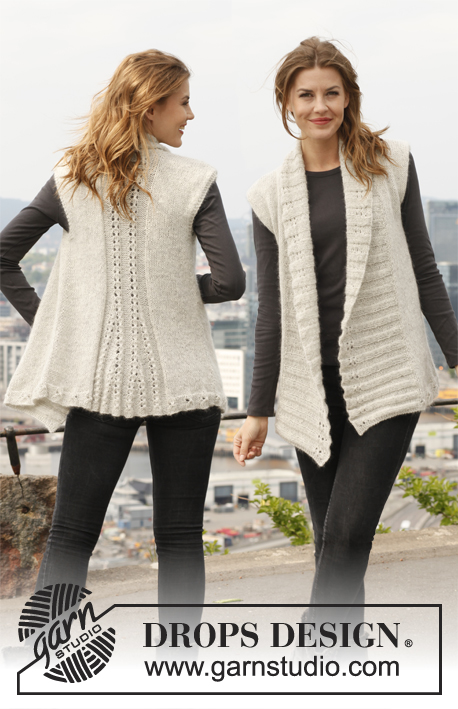
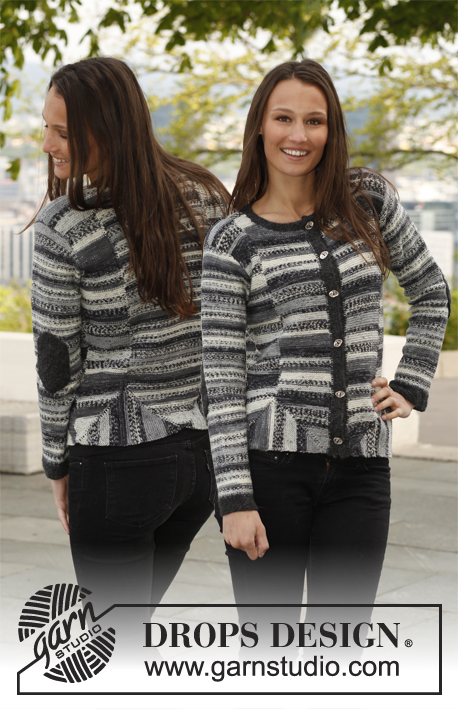
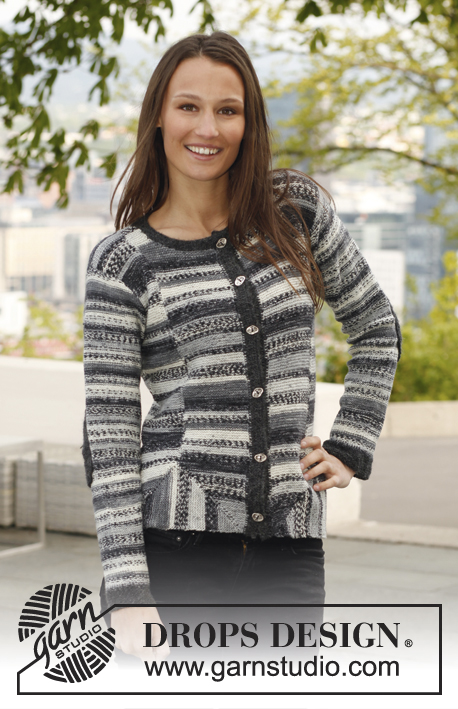
Knitted DROPS jacket with short rows in "Fabel".
DROPS 140-4 |
||||||||||
|
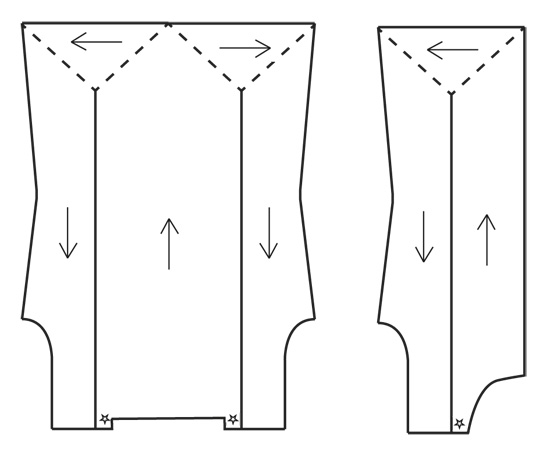
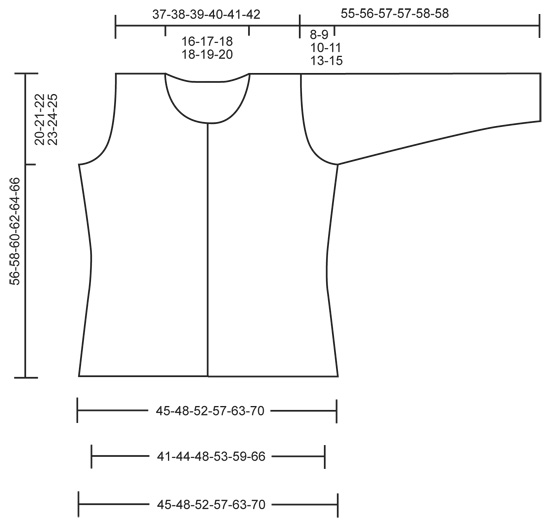
GARTER ST (back and forth on needle): K all rows. 1 ridge = 2 rows K. GARTER ST (in the round on circular needle): 1 ridge = 2 rounds * K 1 round and P 1 round *, repeat from *-*. SHORT ROWS: Work 1 row over the first 26-28-30-33-37-41 sts, turn and work back. Work 1 row over the first 25-27-29-32-36-40 sts, turn and work back. Continue with short rows, work one st less every time until two rows have been worked only over the first st. Then work 1 row over the first 2 sts, turn and work back, 1 row over the first 3 sts, turn and work back. Continue with short rows, work one st more every time, until 1 row has been worked over all sts, turn and work back. 1 repetition with short rows = 104-112-120-132-148-164 rows. BUTTONHOLES: Cast off for buttonholes on right band from RS. 1 buttonhole = K tog 3rd and 4th st from mid front, then make 1 YO. Cast off for buttonholes when piece measures: SIZE S: 3, 12, 21, 30, 39 and 48 cm. SIZE M: 3, 10, 18, 26, 34, 42 and 50 cm. SIZE L: 3, 11, 19, 27, 35, 43 and 52 cm. SIZE XL: 3, 11, 19, 27, 36, 45 and 54 cm. SIZE XXL: 3, 11, 20, 29, 38, 47 and 56 cm. SIZE XXXL: 3, 10, 18, 26, 34, 42, 50 and 58 cm. (NOTE: Work last buttonhole when 1 cm remains on neck edge.) ---------------------------------------------------------- LEFT FRONT PIECE: The entire piece is worked in GARTER ST - see explanation above. Work piece from shoulder down to bottom edge, then from bottom edge and back to shoulder. Cast on 8-9-10-12-15-18 sts on needles size 3 mm with Fabel. Work in garter st for 5 cm, then cast on new sts at the end of every row from WS as follows: 1 st 3 times, 2 sts 3 times and 10-11-12-13-14-15 sts 1 time = 27-29-31-34-38-42 sts. Continue in garter st until piece measures 45-46-47-47-48-49 cm. Work 2 repetitions with short rows – see explanation above, first row = from RS. AT THE SAME TIME when piece measures 6 cm from bottom on front piece (measured up along the side), K tog the first 2 sts on row (from RS), repeat dec every 3 cm 4 more times = 22-24-26-29-33-37 sts. When short rows have been worked, work in garter st over all sts. AT THE SAME TIME work the two stripes tog as follows - beg from WS: Pick up the outermost st in front loop from previous stripe, work first st from left needle, pass the new st over, work the rest of row. Repeat these two rows upwards until 1 st has been knitted up in every ridge along the entire side of previous stripe. AT THE SAME TIME when piece measures 22 cm from bottom edge, work 2 sts in first st on row (from RS), repeat inc every 2½-3-3-3½-3½-4 cm 4 more times = 27-29-31-34-38-42 sts. When piece measures 36-37-38-39-40-41 cm from bottom edge, cast off for armholes at the beg of every row from RS as follows: 3 sts 1-1-1-2-2-2 times, 2 sts 2-3-4-5-7-9 times and 1 st 3-3-4-4-7-10 times = 17-17-16-14-11-8 sts. Work until piece measures 56-58-60-62-64-66 cm, cast off. RIGHT FRONT PIECE: The entire piece is worked in garter st. Work piece from shoulder down to bottom edge, then from bottom edge and back to shoulder. Cast on 8-9-10-12-15-18 sts on needles size 3 mm with Fabel. Work in garter st for 5 cm, then cast on new sts at the end of every row from RS as follows: 1 st 3 times, 2 sts 3 times and 10-11-12-13-14-15 sts 1 time = 27-29-31-34-38-42 sts. Continue in garter st until piece measures 45-46-47-47-48-49 cm. Work 2 repetitions with short rows – see explanation above, first row = from WS. AT THE SAME TIME when piece measures 6 cm from bottom on front piece (measured up along the side), K tog the last 2 sts on row (from RS), repeat dec every 3 cm 4 more times = 22-24-26-29-33-37 sts. When short rows have been worked, work in garter st over all sts. AT THE SAME TIME work the two stripes tog as follows - beg from RS: Pick up the outermost st in front loop from previous stripe, work first st from left needle, pass the new st over, work the rest of row. Repeat these two rows upwards until 1 st has been knitted up in every ridge along the entire side of previous stripe. AT THE SAME TIME when piece measures 22 cm from bottom edge, work 2 sts in last st on row (from RS), repeat inc every 2½-3-3-3½-3½-4 cm 4 more times = 27-29-31-34-38-42 sts. When piece measures 36-37-38-39-40-41 cm, cast off for armholes at the beg of every row from WS as follows: 3 sts 1-1-1-2-2-2 times, 2 sts 2-3-4-5-7-9 times and 1 st 3-3-4-4-7-10 times = 17-17-16-14-11-8 sts. Work until piece measures 56-58-60-62-64-66 cm, cast off. BACK PIECE: The entire piece is worked in garter st. Work piece from shoulder down to bottom edge, then from bottom edge and back to shoulder. RIGHT SHOULDER: Cast on 8-9-10-12-15-18 sts on needles size 3 mm with Fabel. Work in garter st for 2 cm. Put piece aside. Work left shoulder the same way, keep sts on needle, cast on 38-40-42-44-46-48 new sts, and work sts from right shoulder back on needle = 54-58-62-68-76-84 sts. Work in garter st until piece measures 45-46-47-47-48-49 cm. Continue in garter st, AT THE SAME TIME on every other row slip 1 st in each side on a stitch holder. Continue until 2 sts remain on needle = 26-28-30-33-37-41 sts on each stitch holder. Slip the left of the 2 sts on stitch holder, then finish the right side of back piece. RIGHT SIDE OF BACK PIECE: = 1 st on needle. Continue in garter st, AT THE SAME TIME at the end of every row from RS work 1 st from stitch holder back on needle. Continue like this until all the sts have been worked back on to needle = 27-29-31-34-38-42 sts. Work 1 repetition with short rows – see explanation above, first row = from RS. AT THE SAME TIME when piece measures 6 cm from bottom on back piece (measured up along the side), K tog the first 2 sts on row (from RS), repeat dec every 3 cm 4 more times = 22-24-26-29-33-37 sts. When short rows have been worked, work in garter st over all sts. AT THE SAME TIME work the two stripes tog as follows - beg from WS: Pick up the outermost st in front loop from previous stripe, work first st from left needle, pass the new st over, work the rest of row. Repeat these two rows upwards until 1 st has been knitted up in every ridge along the entire side of previous stripe. AT THE SAME TIME when piece measures 22 cm, continue inc in the side and cast off for armhole as explained on left front piece. Work until piece measures 56-58-60-62-64-66 cm, cast off. LEFT SIDE OF BACK PIECE: Slip last st slipped on stitch holder back on needle size 3 mm = 1 st on needle. Continue in garter st, AT THE SAME TIME at the end of every row from WS work 1 st from stitch holder back on needle. Continue like this until all the sts have been worked back on to needle = 27-29-31-34-38-42 sts. Work 1 repetition with short rows – see explanation above, first row = from WS. AT THE SAME TIME when piece measures 6 cm from bottom on back piece (measured up along the side), K tog the last 2 sts on row (from RS), repeat dec every 3 cm 4 more times = 22-24-26-29-33-37 sts. When short rows have been worked, work in garter st over all sts. AT THE SAME TIME work the two stripes tog as follows - beg from RS: Pick up the outermost st in front loop from previous stripe, work first st from left needle, pass the new st over, work the rest of row. Repeat these two rows upwards until 1 st has been knitted up in every ridge along the entire side of previous stripe. AT THE SAME TIME when piece measures 22 cm, continue inc in the side and cast off for armhole as explained on right front piece. Work until piece measures 56-58-60-62-64-66 cm, cast off. SLEEVE: Worked in the round on double pointed needles. Cast on 56-58-60-62-64-68 sts on double pointed needles size 3 mm with Alpaca. Work in GARTER ST for 4 cm - see explanation above. Switch to Fabel, then work in stocking st (sleeve is sewn on with WS outwards). Insert 1 marker at the beg of round. When piece measures 8-8-8-8-6-6 cm, inc 1 st in each side of marker, repeat inc every 2½-2-2-1½-1½-1½ cm 14-16-18-20-22-23 more times = 86-92-98-104-110-116 sts. When piece measures 47-47-47-46-45-43 cm (shorter measurements in the larger sizes because of longer sleeve cap and broader shoulder width), cast off 6 sts mid under sleeve (= 3 sts on each side of marker). Then work back and forth and cast off for sleeve cap. Cast off at beg of every row in each side: 3 sts 1 time, 2 sts 5-6-6-6-6-6 times and 1 st 1-1-2-4-7-10 times, then cast off 2 sts in each side until piece measures 54-55-56-56-57-57 cm, then cast off 3 sts 1 time in each side. Cast off the remaining sts, piece measures approx. 55-56-57-57-58-58 cm in all sizes. LEFT BAND: Cast on 6 sts on needle size 3 mm with Alpaca. Work in garter st back and forth AT THE SAME TIME work them tog with front piece as follows - beg from RS: Pick up the outermost st in front loop from bottom of front piece, work first st from left needle, pass the new st over, work the rest of row. Repeat these two rows upwards until 1 st has been knitted up in every ridge along the entire front piece. Repeat on right front piece, first row = from WS. Cast off for BUTTONHOLES on right band - see explanation above. ASSEMBLY: Sew the shoulder seams. Sew side seams. Sew in sleeves, with WS outwards. NECK EDGE: Knit up approx. 120-130 sts around neck edge (also over bands) with Alpaca. Work in garter st for 2 cm, cast off. ELBOW PATCH: Work piece back and forth. Cast on 20 sts on needle size 3 mm with Alpaca. Work as follows: Row 1: K all sts. Row 2: K 1, 1 YO, K 1, 1 YO, K 6, 1 YO, K 1, 1 YO, K 2, 1 YO, K 1, 1 YO, K 6, 1 YO, K 1, 1 YO, K 1 = 28 sts. Row 3: K over all sts, K YO twisted. Row 4: K 1, 1 YO, K 2, 1 YO, K 8, 1 YO, K 2, 1 YO, K 2, 1 YO, K 2, 1 YO, K 8, 1 YO, K 2, 1 YO, K 1 = 36 sts. Row 5: K over all sts, K YO twisted. Row 6: K 1, 1 YO, K 3, 1 YO, K 10, 1 YO, K 3, 1 YO, K 2, 1 YO, K 3, 1 YO, K 10, 1 YO, K 3, 1 YO, K 1 = 44 sts. Row 7: K over all sts, K YO twisted. Row 8: K 1, 1 YO, K 4, 1 YO, K 12, 1 YO, K 4, 1 YO, K 2, 1 YO, K 4, 1 YO, K 12, 1 YO, K 4, 1 YO, K 1 = 52 sts. Row 9: K over all sts, K YO twisted. Row 10: K 1, 1 YO, K 5, 1 YO, K 14, 1 YO, K 5, 1 YO, K 2, 1 YO, K 5, 1 YO, K 14, 1 YO, K 5, 1 YO, K 1 = 60 sts. Row 11: K over all sts, K YO twisted. Row 12: K 1, 1 YO, K 6, 1 YO, K 16, 1 YO, K 6, 1 YO, K 2, 1 YO, K 6, 1 YO, K 16, 1 YO, K 6, 1 YO, K 1 = 68 sts. Row 13: K over all sts, K YO twisted. Row 14: K 1, 1 YO, K 7, 1 YO, K 18, 1 YO, K 7, 1 YO, K 2, 1 YO, K 7, 1 YO, K 18, 1 YO, K 7, 1 YO, K 1 = 76 sts. Row 15: K over all sts, K YO twisted. Row 16: K 1, 1 YO, K 8, 1 YO, K 20, 1 YO, K 8, 1 YO, K 2, 1 YO, K 8, 1 YO, K 20, 1 YO, K 8, 1 YO, K 1 = 84 sts. Row 17: Cast off all sts. Sew the elbow patch tog in the middle with neat little stitches. Knit another elbow patch. Sew an elbow patch at the back of each sleeve with stitches (try the jacket on for correct placing). |
||||||||||
Diagram explanations |
||||||||||
|
||||||||||
 |
||||||||||
 |
||||||||||
Have you finished this pattern?Tag your pictures with #dropspattern #loreencardigan or submit them to the #dropsfan gallery. Do you need help with this pattern?You'll find 15 tutorial videos, a Comments/Questions area and more by visiting the pattern on garnstudio.com. © 1982-2026 DROPS Design A/S. We reserve all rights. This document, including all its sub-sections, has copyrights. Read more about what you can do with our patterns at the bottom of each pattern on our site. |
||||||||||


With over 40 years in knitting and crochet design, DROPS Design offers one of the most extensive collections of free patterns on the internet - translated to 17 languages. As of today we count 324 catalogues and 12290 patterns translated into English (UK/cm). 12290
We work hard to bring you the best knitting and crochet have to offer, inspiration and advice as well as great quality yarns at incredible prices! Would you like to use our patterns for other than personal use? You can read what you are allowed to do in the Copyright text at the bottom of all our patterns. Happy crafting!
Post a comment to pattern DROPS 140-4
We would love to hear what you have to say about this pattern!
If you want to leave a question, please make sure you select the correct category in the form below, to speed up the answering process. Required fields are marked *.