
Popular categories
Looking for a yarn?


Comments / Questions (6)
![]() Sandrine wrote:
Sandrine wrote:
Bonjour ! Merci pour ce joli modèle. Y a-t-il un rang de maille serrées autour des petits carrés ?
02.01.2026 - 10:16DROPS Design answered:
Bonjour Sandrine, oui. 'Avec le crochet 4, crocheter 14 petits carrés (début + 6 tours) en suivant le diagramme A.1. Terminer par 1 tour en coloris gris (= 1 maille serrée dans chaque maille)'. Bon crochet!
02.01.2026 - 10:23
![]() Kristýna wrote:
Kristýna wrote:
Dobrý den, Měla bych otázku na obhačkování již hotových čtverců. Nejsem si jistá jestli se obloucek, který je tvořeny třemi oky v každém rohu hackuje tak, ze dělám 3 KS nebo jenom jeden? Při hackovani velkých čtverců na kapucu jsem se u toho kraje nějak ztratila. Děkuji za odpověď.
26.08.2025 - 16:00
![]() Agathe wrote:
Agathe wrote:
Bonjour, Je ne comprends pas l’indication suivante : « 1 ms dans chacune des 6 premières mailles / des 6 mailles suivantes ». Est-ce que ça signifie 1 ms dans les 12 premières mailles puis la diminution? Je ne comprends pas la signification du 6 premières mailles / 6 mailles suivantes. Merci pour votre aide
31.07.2025 - 10:00DROPS Design answered:
Bonjour Agathe, au début de la partie à répéter (soit de *à*) vous crochetez 1 mailles serrée dans chacune des 6 premières mailles, puis vous diminuez 1 maille serrée, puis vous allez crocheter *1 maille serrée dans chacune des 6 mailles serrées suivantes, puis diminuer 1 m*, et vous crochetez de *à* encore 1 fois = vous avez diminué 2 mailles. Bon crochet!
31.07.2025 - 16:05
![]() Jannie Kerkdijk wrote:
Jannie Kerkdijk wrote:
Hoe kan ik het patroon uitprinten??
20.01.2025 - 15:26DROPS Design answered:
Dag Jannie,
Al onze patronen zijn gratis af te drukken via de knop 'Afdrukken' onder de materialenlijst. Klik op de knop 'Afdrukken' en dan op 'Patroon'. In het pop-up venster dat vervolgens in beeld komt klik je rechts boven op de link 'Het patroon afdrukken'.
20.01.2025 - 20:11
![]() Gemma wrote:
Gemma wrote:
Liliana da ciò che ho capito sono 3 maglie alte nelle 3 catenelle sottostanti e poi si fa una maglia bassissima e si continua con 3 catenelle
16.01.2025 - 23:37
![]() Liliana wrote:
Liliana wrote:
Non riesco a capire nel punto in cui si dice di fare un punto alto sulle 3catenelle del giro precedente quando sul diagramma sono segnati 3 punti alti
16.01.2025 - 21:29DROPS Design answered:
Buonasera Liliana, a quale punto del modello sta facendo riferimento? Buon lavoro!
19.01.2025 - 15:25
|
|||||||||||||||||||||||||
Granny Square Hood#grannysquarehood |
|||||||||||||||||||||||||
 |
 |
||||||||||||||||||||||||
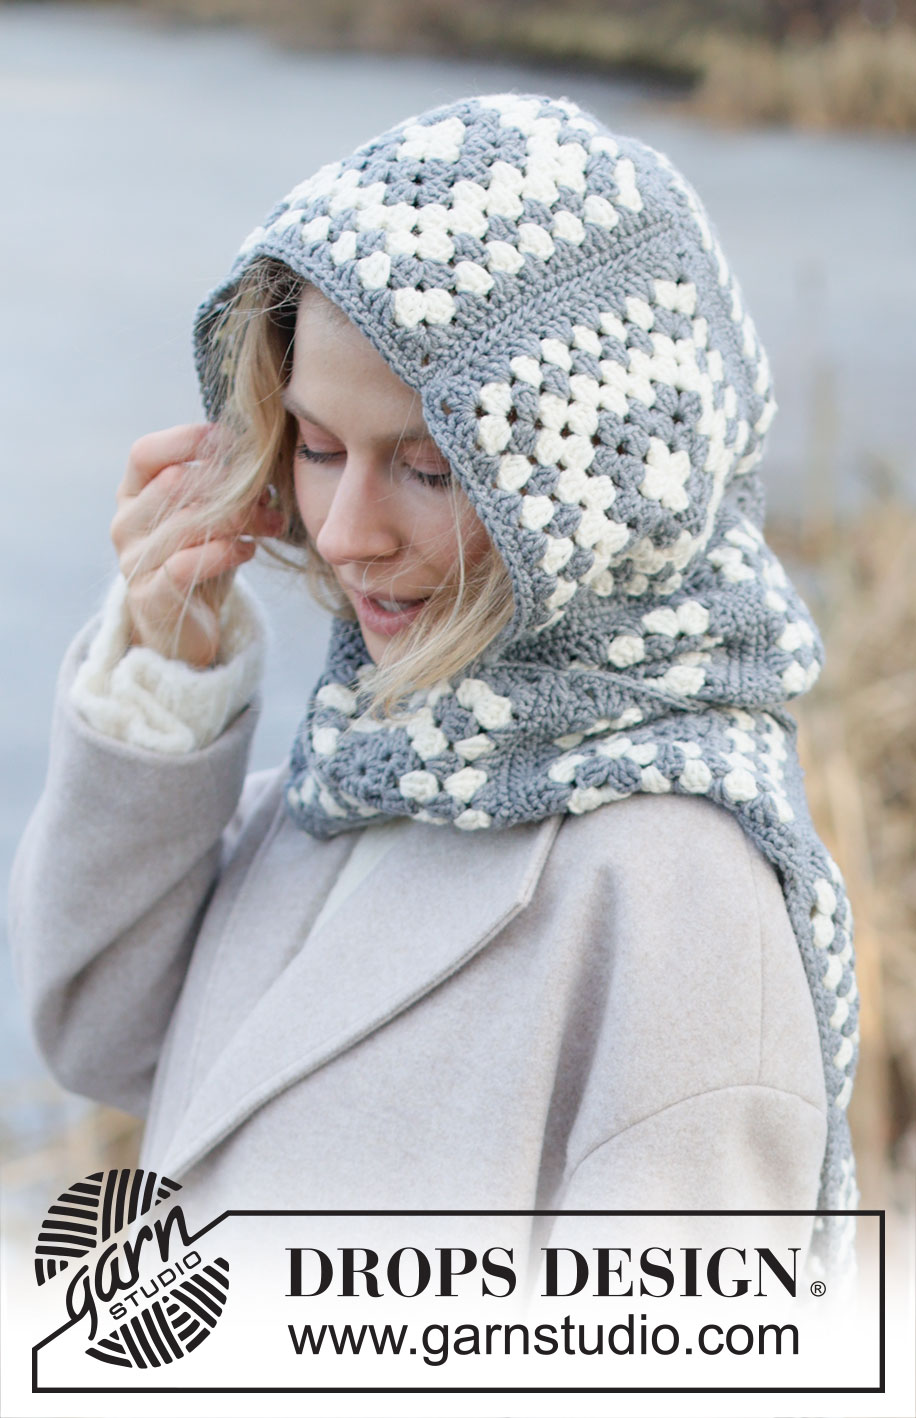
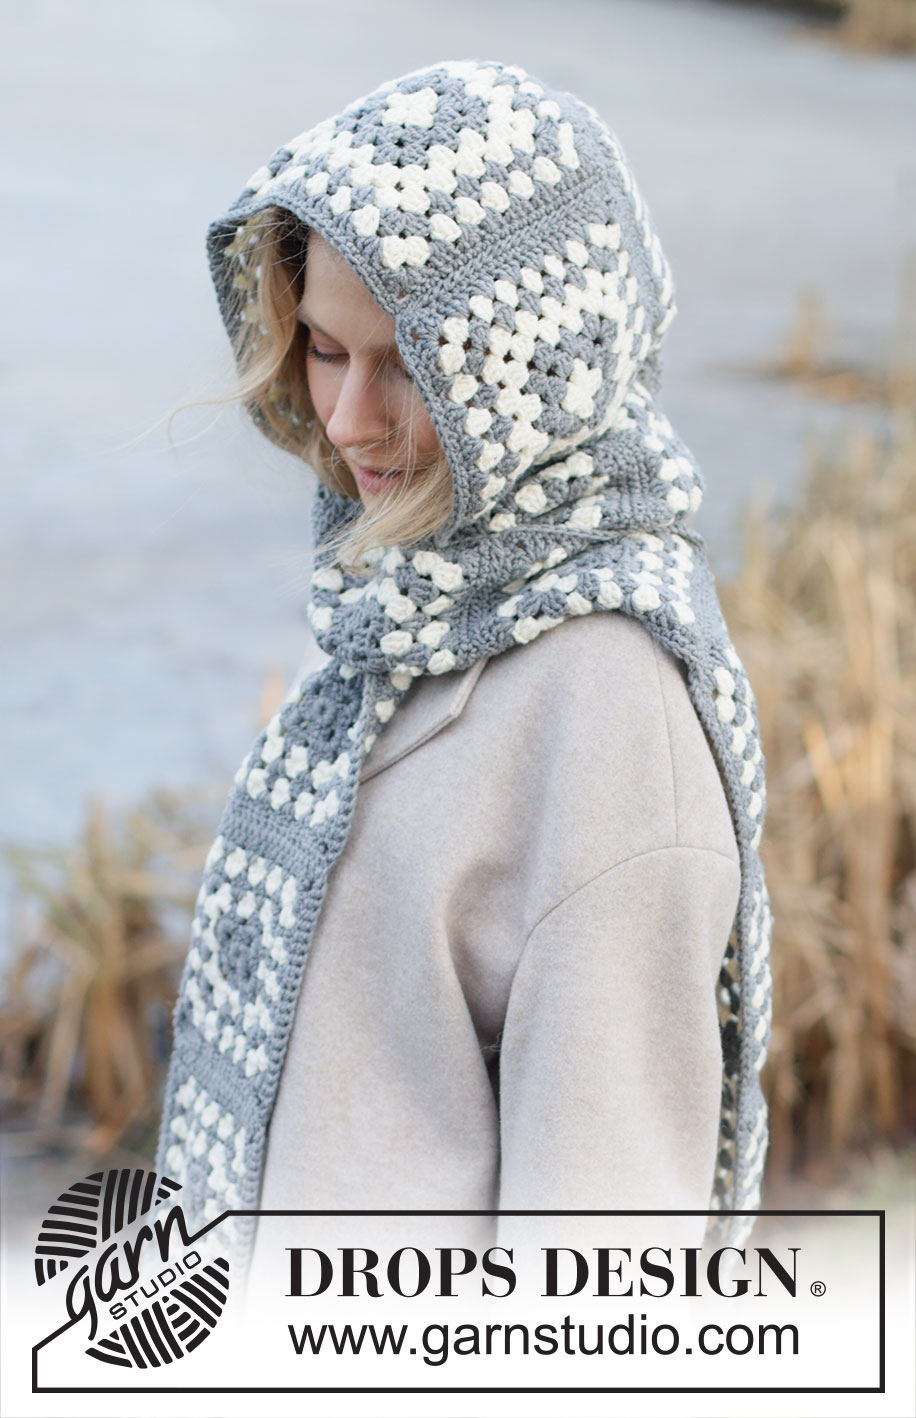
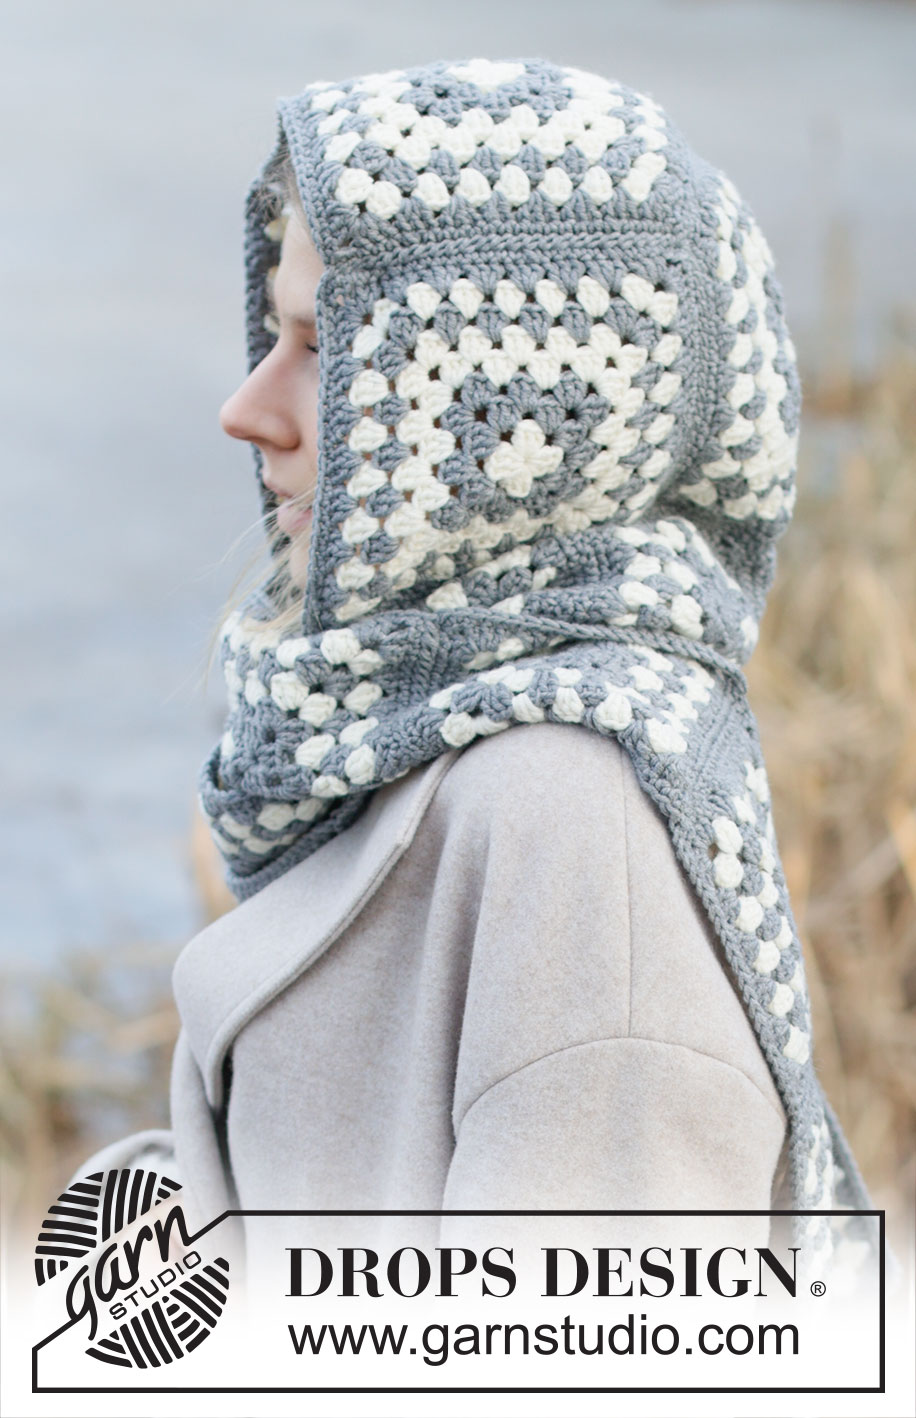
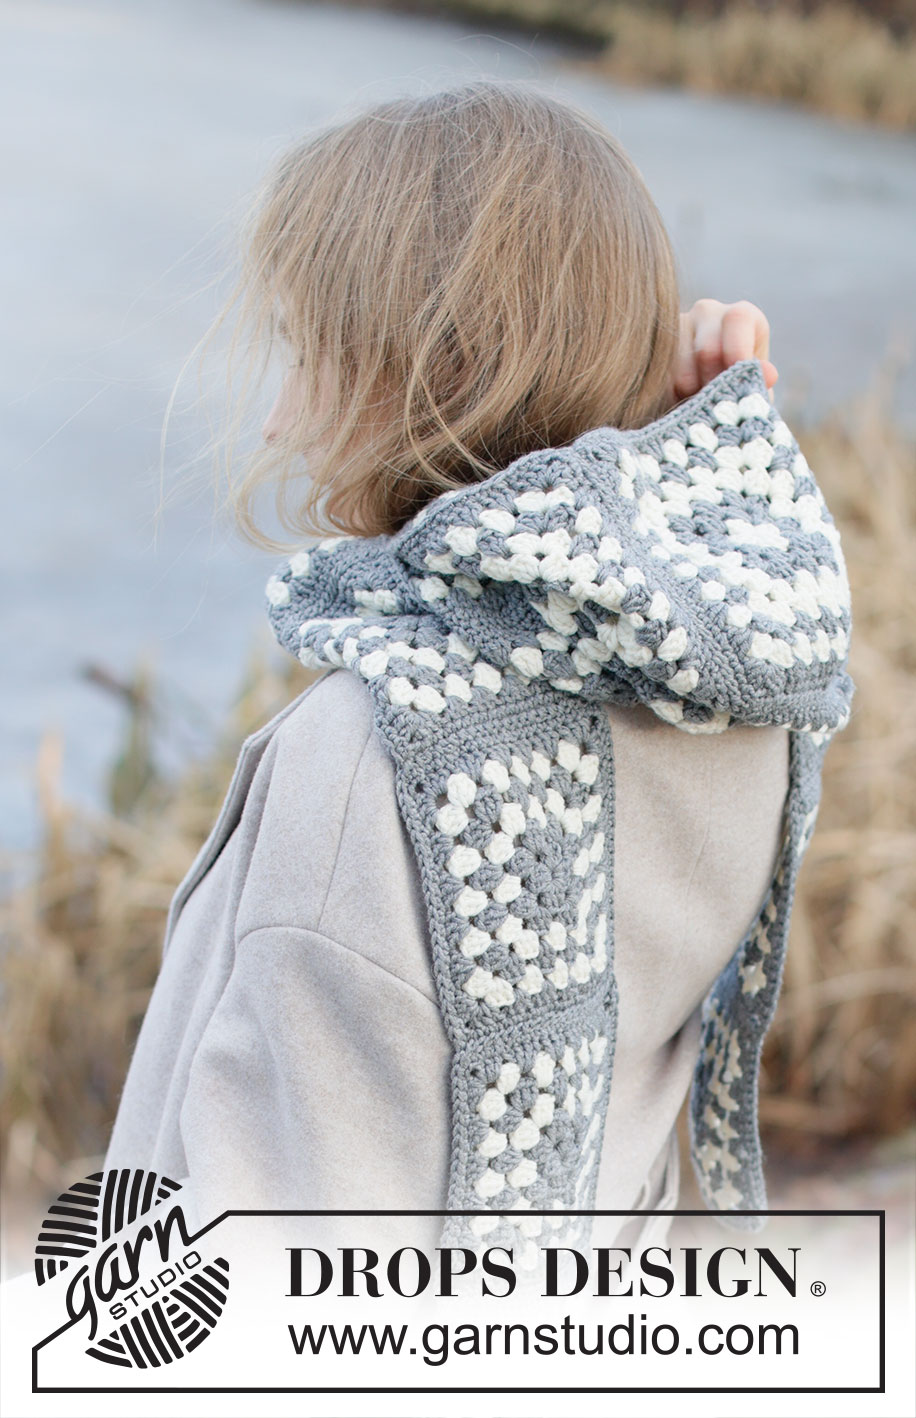
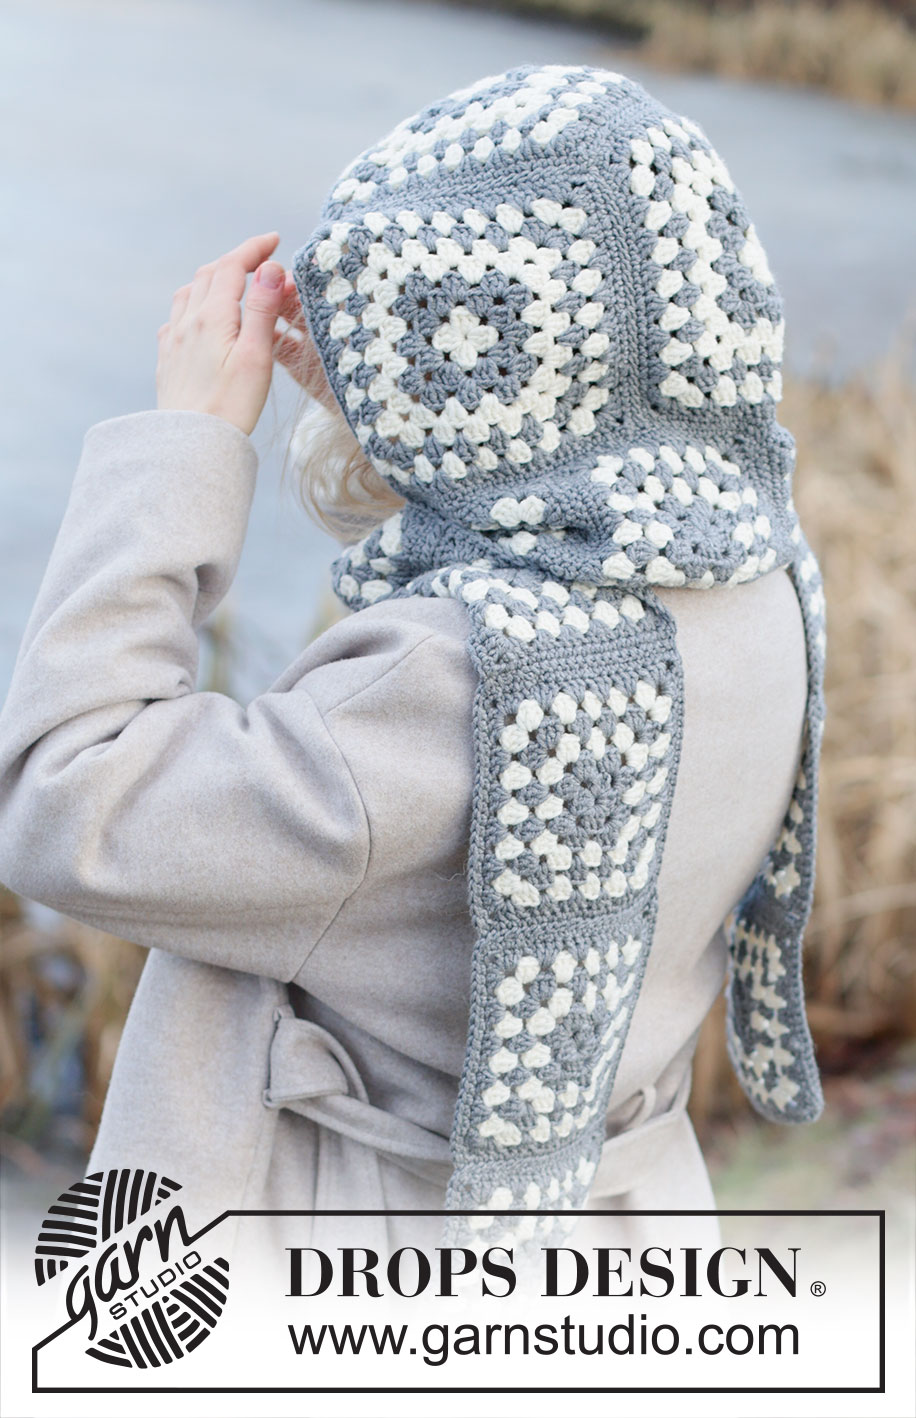
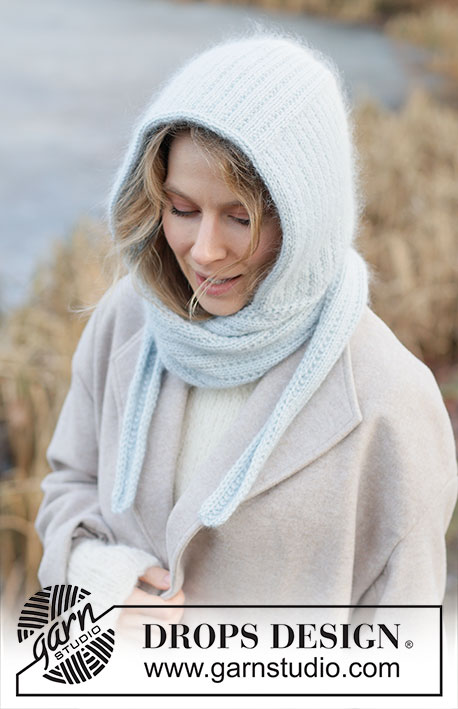
Crocheted hooded scarf in DROPS Big Merino. The piece is worked in Granny squares which are sewn together. One size.
DROPS 253-59 |
|||||||||||||||||||||||||
|
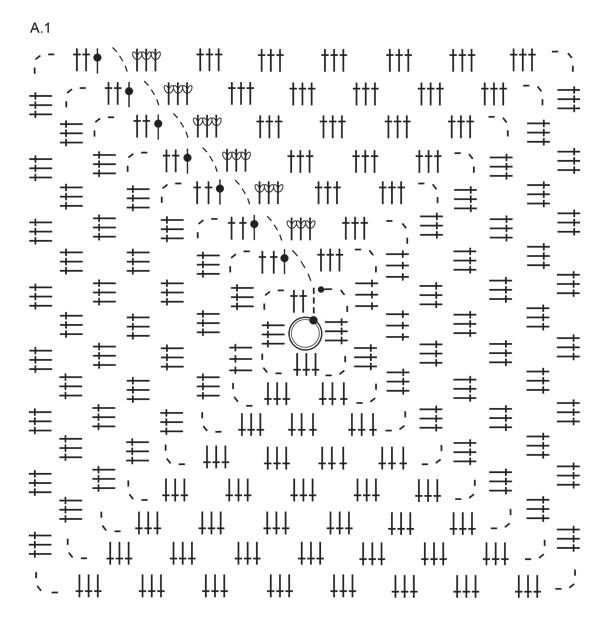
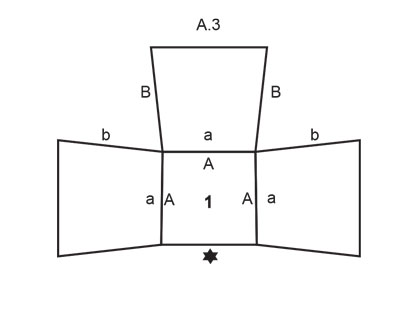
------------------------------------------------------- EXPLANATIONS FOR THE PATTERN: ------------------------------------------------------- PATTERN: See diagrams A.1 to A.3 (diagrams A.2 and A.3 are used for assembling). CHAIN STITCH: If you work outermost on the hook the chain stitch will often be too tight; 1 chain stitch should be as long as 1 double/treble/double-treble crochet is wide. 2 DOUBLE CROCHETS TOGETHER: Crochet 2 double crochets together into 1 stich as follows: Insert the hook through the first stitch, pick up strand, insert the hook through the next stitch, pick up strand (3 loops on hook), make 1 yarn over, pull it through all 3 loops (1 stitch decreased). COLOURS: A total of 14 small squares and 4 large squares worked as follows: Small square: Cast-on + 2 rounds colour grey, 1 round colour off white, 1 round colour grey, 1 round colour off white and 1 round colour grey (6 rounds). Large square: Cast-on + 1 round colour off white, 2 rounds colour grey, 2 rounds colour off white, 1 round colour grey, 1 round colour off white and 1 round colour grey (8 rounds). COLOUR-CHANGE: When changing colours, it is neatest if the last slip stitch on the round is worked with the new colour. ------------------------------------------------------- START THE PIECE HERE: ------------------------------------------------------- HOODED SCARF - SHORT OVERVIEW OF THE PIECE: The piece consists of Granny squares which are worked in the round. There are 2 different square-sizes: 4 large squares make the hood and 14 small squares make the scarf. The squares are sewn together and the hood is sewn to the scarf. HOODED SCARF: Read CHAIN STITCH, COLOURS and COLOUR CHANGE in explanations above. Use crochet hook size 4 mm and work 14 small squares (cast-on + 6 rounds) according to diagram A.1. Finish with 1 round of double crochets in each stitch using colour grey. Use colour grey and sew the squares together, stitch for stitch, in a long strip = 14 squares in length (see A.2). The scarf measures approx. 182 cm in length and 13 cm in width. HOOD: Work 4 large squares according to diagram A.1 (cast-on + 8 rounds). Finish the squares with a round of double crochets in colour grey as follows: SQUARE 1: Work along all 4 sides as follows: * 1 double crochet in each of the first/next 6 stitches, work 2 DOUBLE CROCHETS TOGETHER – read description above *, work from *-* (3 stitches decreased each side) = 24 double crochets on each side. SQUARES 2, 3 and 4: Work 1 double crochet in each of the 27 stitches along 3 sides. Along the 4th side work as follows: * 1 double crochet in each of the first/next 6 stitches, work 2 double crochets together *, work from *-* (3 stitches decreased) = 24 double crochets along the 4th side. ASSEMBLY: The large squares are sewn together with colour grey from the right side. Lay SQUARE 1 flat and the 3 other squares around SQUARE 1, so the sides with 3 decreased stitches are towards SQUARE 1 (the stitch count is then the same when sewing the squares together) - see A.3: sew A to a and B to b. Sew the hood to the scarf, laying the star in A.2 towards the star in A.3. Sew together so the bottom edge of the hood attached to the middle of the scarf, stitch to stitch. |
|||||||||||||||||||||||||
Diagram explanations |
|||||||||||||||||||||||||
|
|||||||||||||||||||||||||
 |
|||||||||||||||||||||||||
 |
|||||||||||||||||||||||||
 |
|||||||||||||||||||||||||
Have you finished this pattern?Tag your pictures with #dropspattern #grannysquarehood or submit them to the #dropsfan gallery. Do you need help with this pattern?You'll find 8 tutorial videos, a Comments/Questions area and more by visiting the pattern on garnstudio.com. © 1982-2026 DROPS Design A/S. We reserve all rights. This document, including all its sub-sections, has copyrights. Read more about what you can do with our patterns at the bottom of each pattern on our site. |
|||||||||||||||||||||||||


With over 40 years in knitting and crochet design, DROPS Design offers one of the most extensive collections of free patterns on the internet - translated to 17 languages. As of today we count 325 catalogues and 12298 patterns translated into English (UK/cm). 12298
We work hard to bring you the best knitting and crochet have to offer, inspiration and advice as well as great quality yarns at incredible prices! Would you like to use our patterns for other than personal use? You can read what you are allowed to do in the Copyright text at the bottom of all our patterns. Happy crafting!
Post a comment to pattern DROPS 253-59
We would love to hear what you have to say about this pattern!
If you want to leave a question, please make sure you select the correct category in the form below, to speed up the answering process. Required fields are marked *.