
Popular categories
Looking for a yarn?


Comments / Questions (7)
![]() Astrid wrote:
Astrid wrote:
Kann man die Verschiebungen beim Rückenteil nicht weglassen? Sie betonen ja nur die Brust und ändern nicht die Anzahl der Maschen, was ja nur beim Vorderteil sinnvoll ist.
25.07.2024 - 13:44DROPS Design answered:
Liebe Astrid, die Verschiebungen sollen auch am Rückenteil ein dekoratives Muster erzeugen, aber wenn Sie das nicht wünschen, können Sie sie auch weglassen. Das Muster ins insgesamt sehr elastisch und passt sich den Körperformen an. Viel Spaß beim Stricken!
26.07.2024 - 13:19
![]() Rania wrote:
Rania wrote:
„ Increase and decrease like this every 4th round“ in this part , is the 4th round with the first time purling the increased stitches or with the second time ? Is the counting from the row i start to decrease and increase in? Can you add more explanation for this part
15.07.2024 - 03:34DROPS Design answered:
Dear Rania, every 4th round means that you increase/decrease in 1 row and work 3 rows without increases/decreases. So, you worked all the decreases and increases in the same row, as stated in the above paragraph, and then count 3 rows from that one. After 3 normal rows, increase and decrease the stitches again. You work the yarn overs twisted in the first "normal" row in rib. Happy knitting!
16.07.2024 - 20:07
![]() Giulia wrote:
Giulia wrote:
Aumentare dopo il 2° e 6° segnapunti (lavorare gli aumenti a diritto le prime 2 volte, lavorare a rovescio le maglie le 2 volte successive etc.). Cosa vuol dire non capisco
15.05.2024 - 21:42DROPS Design answered:
Buonasera Giulia, gli aumenti vanno lavorati in seguito a diritto per le prime 2 volte, per le 2 volte successive a rovescio e così via. Buon lavoro!
16.05.2024 - 23:06
![]() Iulica wrote:
Iulica wrote:
Salve Sto facendo questa canotta ma non capisco quello che riguarda gli aumenti È scritto Aumentare dopo il 2 e 6 segna punti (lavorare gli aumenti a diritto le prime 2 volte,lavorare a rovescio le 2 volte successive etc)Non riesco a capire la parte tra le parentesi 2volte vuol dire per due righe ?
15.05.2024 - 20:43DROPS Design answered:
Buonasera Iulica, per 2 volte si intende il numero di aumenti. Buon lavoro!
16.05.2024 - 23:07
![]() Emily wrote:
Emily wrote:
River ridge
21.01.2024 - 14:05
![]() Lorraine wrote:
Lorraine wrote:
Curvy blue
20.01.2024 - 19:18
![]() Val wrote:
Val wrote:
Beauty Queen
18.01.2024 - 17:25
|
||||
Blue Sea Dream#blueseadreamtop |
||||
 |
 |
|||
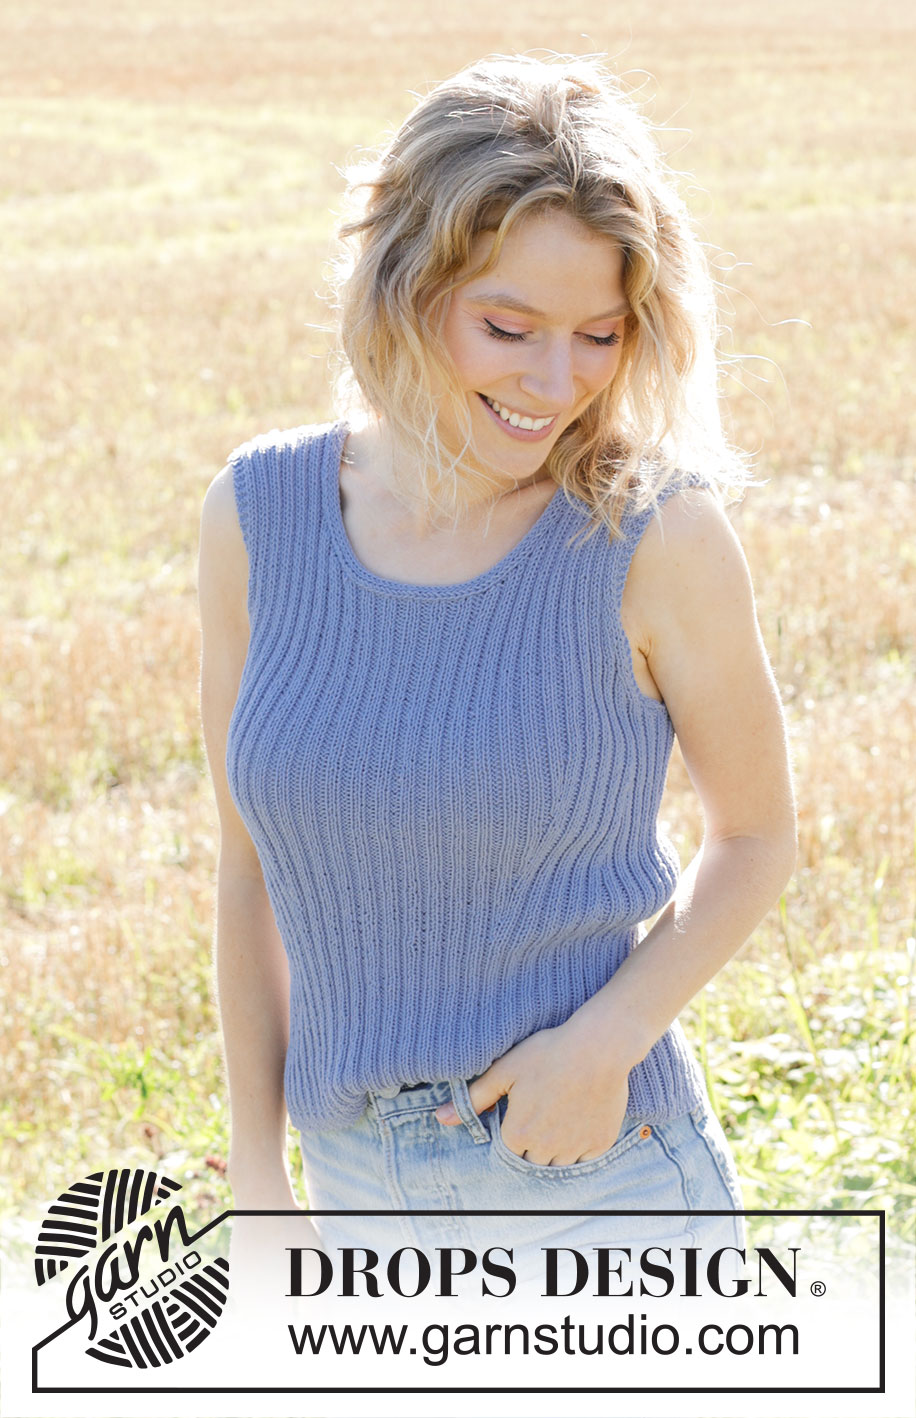
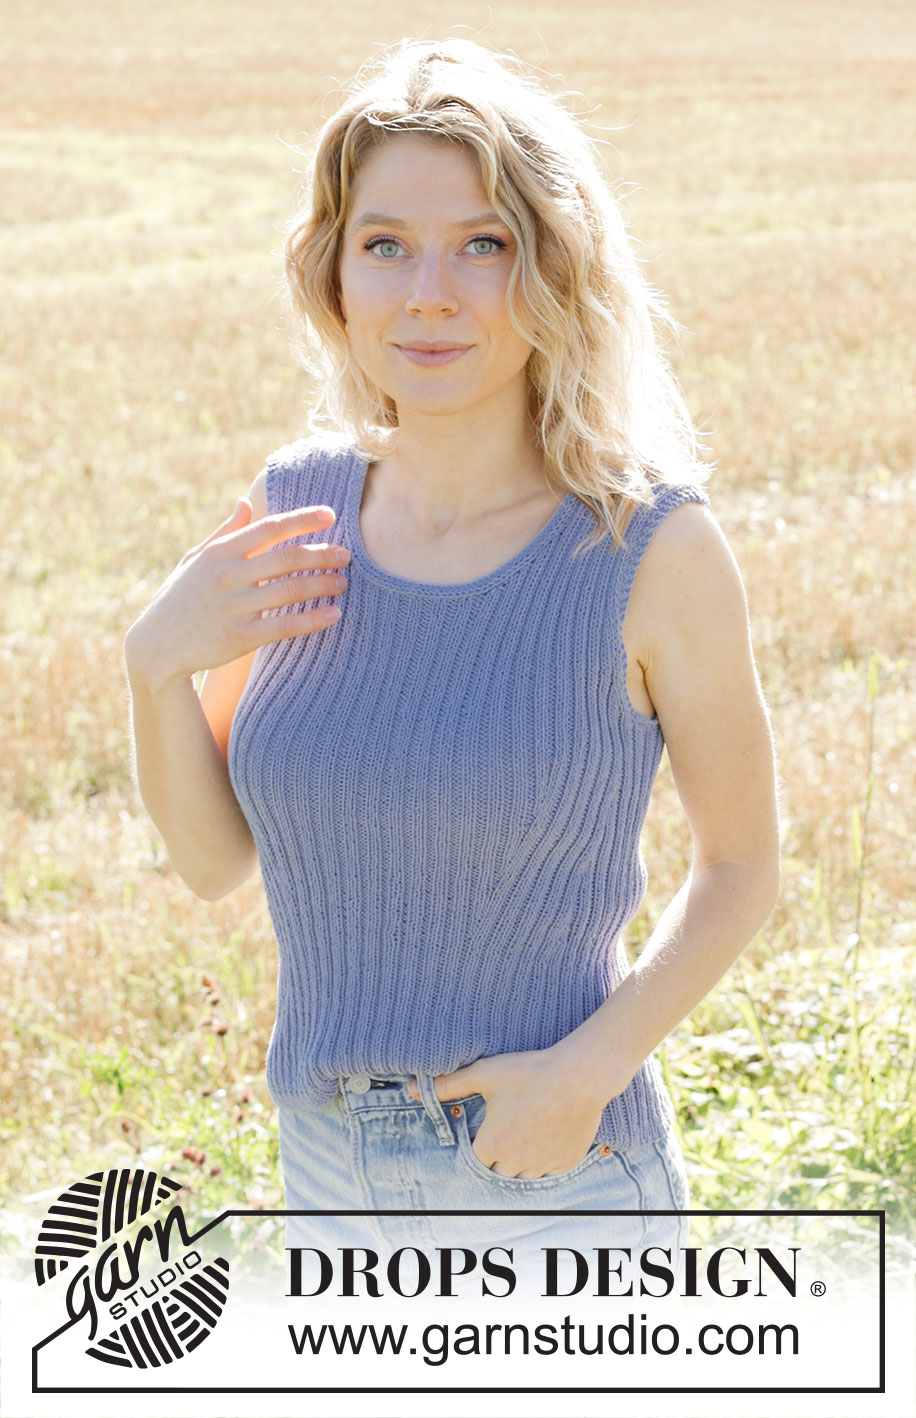
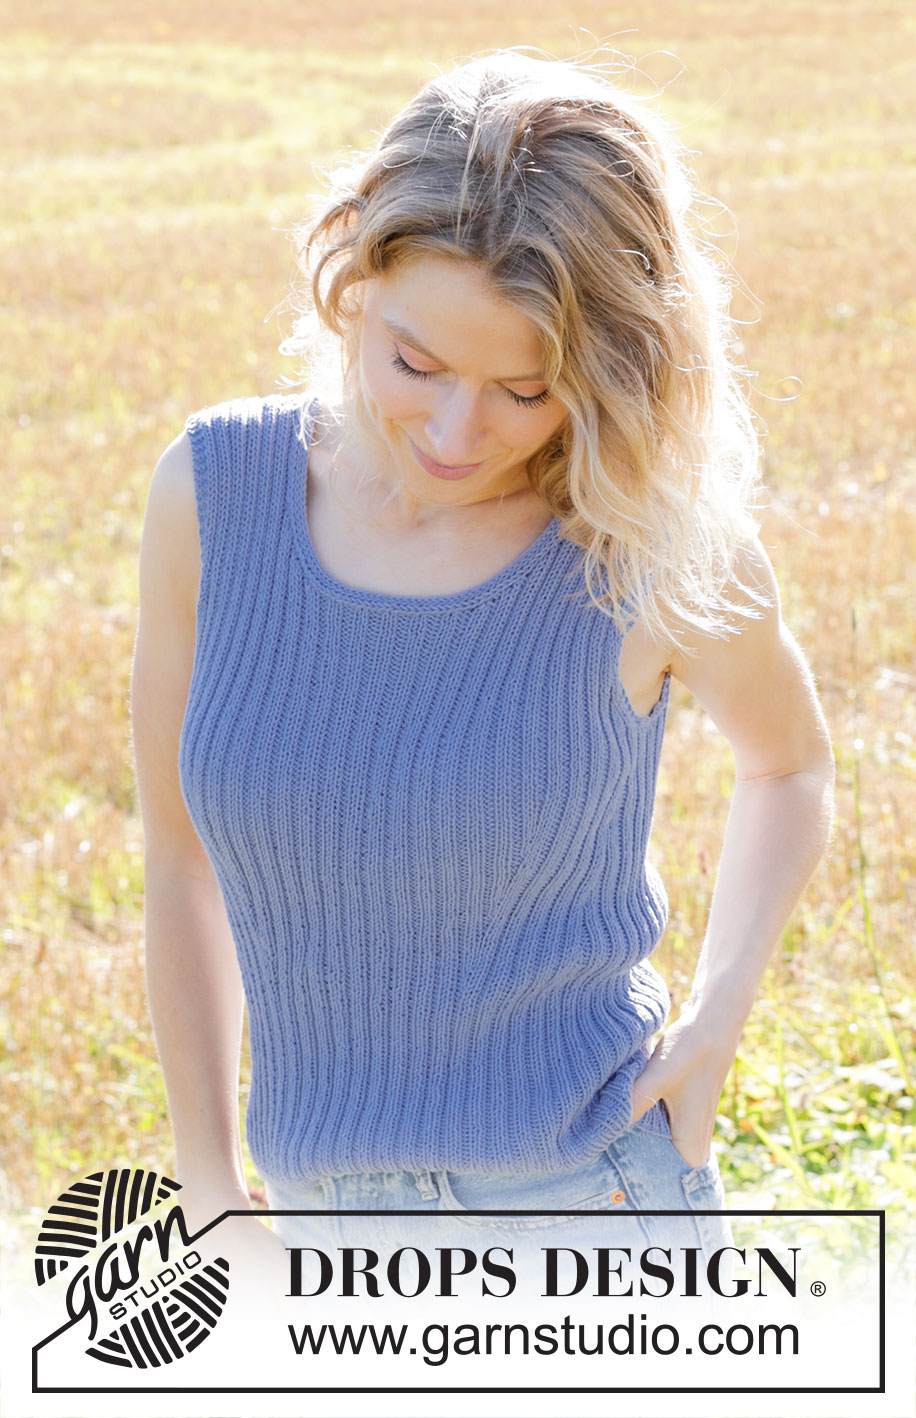
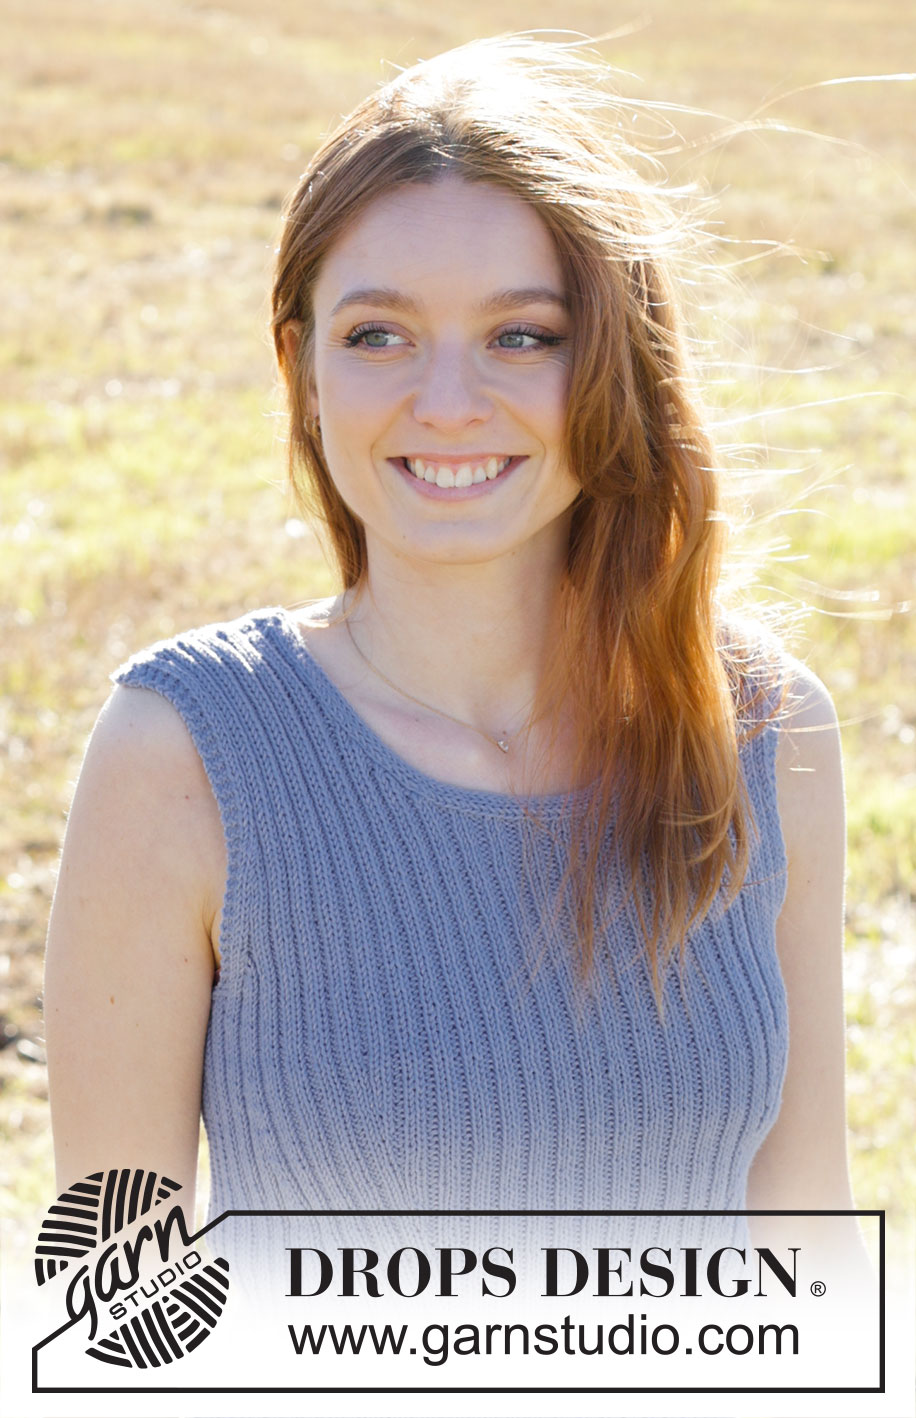
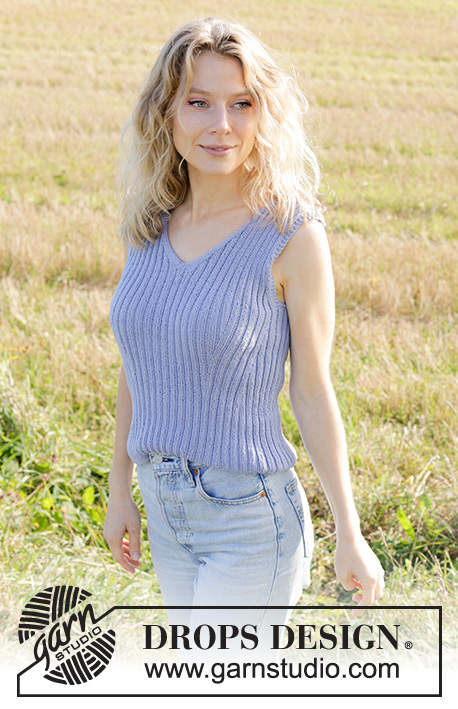
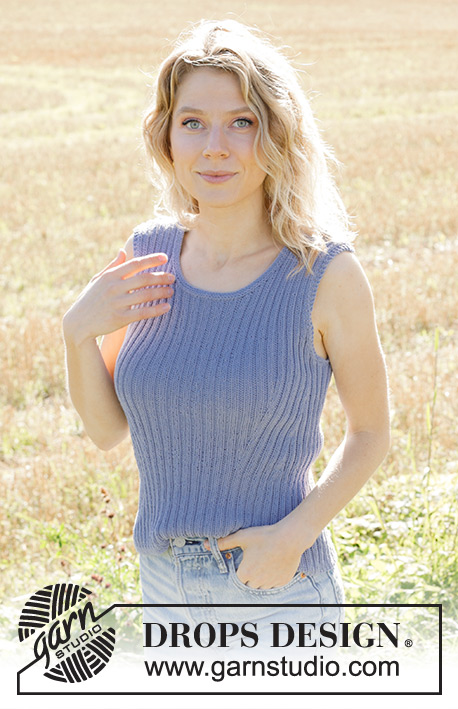
Knitted top in DROPS Safran. Piece is knitted bottom up in rib with displacements and round neck with I-cord. Size: S - XXXL
DROPS 250-27 |
||||
|
---------------------------------------------------------- EXPLANATION FOR THE PATTERN: ---------------------------------------------------------- GARTER STITCH (when working in the round): Alternately knit 1 round and purl 1 round. 1 ridge vertically = 2 rounds. GARTER STITCH (when working back and forth): Knit on all rows, i.e. knit from right side and knit from wrong side. 1 ridge vertically = knit 2 rows. MEASURING TIP: The rib will contract because of the rib. Lightly pull the garment in width when doing length measurements to avoid the garment being too short when worn. INCREASE TIP: Increase 1 stitch by making 1 yarn over. On next round work yarn over twisted to avoid hole. Work the increased stitches in rib. DECREASE TIP-1 (applies to decrease in rib): DECREASE TOWARDS THE RIGHT AS FOLLOWS: Work until 3 stitches remain before 1st/5th marker thread, knit 2 together, knit 1. DECREASE TOWARDS THE LEFT AS FOLLOWS: Work until 4th/8th marker thread, knit 1, slip 1 stitch knitwise, knit 1, pass slipped stitch over stitch worked. DECREASE TIP-2 (applies to decrease for armholes): All decreases are done from the right side! DECREASE AFTER 4 STITCHES AS FOLLOWS: Slip 1 stitch knitwise, knit 1, pass slipped stitch over stitch worked (1 stitch decreased). DECREASE BEFORE 4 STITCHES AS FOLLOWS: Work until 6 stitches remain on row, knit 2 together, finish with 4 stitches as explained in pattern. I-CORD CAST-OFF (neck edge): At the end of round when all stitches have been picked up around the neck: Cast on 5 stitches on right needle from right side. Slip the 5 new stitches from right needle on to left needle so that working yarn is 5 stitches in on left needle (the working yarn tightens the piece when working to form a little tube). ROW 1 (= right side): Knit 4, knit the next 2 stitches twisted together. ROW 2 (= right side): Slip the 5 stitches from right needle back on left needle, knit 4, knit the next 2 stitches twisted together. Repeat ROW 2 until 5 stitches remain on right needle. Slip the 5 stitches from right needle back on left needle. Cast off. Sew a little stitch that binds beginning/end of I-cord together. ---------------------------------------------------------- START THE PIECE HERE: ---------------------------------------------------------- TOP - SHORT OVERVIEW OF THE PIECE: In this pattern long and short needles have been used, begin with fitting length and switch as needed. Piece is worked in the round on circular needle, from the bottom and up to armholes. Divide the piece for front piece and back piece and finish each part separately back and forth. Sew the shoulder seams. Finish by picking up stitches around the neck and work an I-cord. BODY: Cast on 208-224-256-272-304-336 stitches on circular needle size 3.5 mm with DROPS Safran. Switch to circular needle size 3 mm (cast on on a larger needle to get an elastic cast-on edge). Work rib (knit 1/purl 1) for 2 cm. Insert 1 marker at beginning of round and 1 marker after 104-112-128-136-152-168 stitches. These markers mark the sides of body, move the marker upwards when working. Switch to circular needle size 3.5 mm and work rib as follows: * Knit 1, purl 2, knit 1 *, repeat from *-* the entire round. Continue rib like this. REMEMBER THE KNITTING TENSION! When piece measures 14-14-15-15-15-15 cm - read MEASURING TIP, insert 8 marker threads in piece as explained below. Insert marker threads in piece without working the stitches. Move the marker threads upwards when working - marker threads should be used for decrease and increase in rib to displace the stitches. Count 21-21-29-33-33-41 stitches, insert 1st marker thread before next stitch, count 16-16-16-16-20-20 stitches, insert 2nd marker thread before next stitch, count 30-38-38-38-46-46 stitches, insert 3rd marker thread before next stitch, count 16-16-16-16-20-20 stitches, insert 4th marker thread before next stitch, count 42-42-58-66-66-82 stitches, insert 5th marker thread before next stitch, count 16-16-16-16-20-20 stitches, insert 6th marker thread before next stitch, count 30-38-38-38-46-46 stitches, insert 7th marker thread before next stitch, count 16-16-16-16-20-20 stitches, insert 8th marker thread before next stitch. 21-21-29-33-33-41 stitches remain on round after last marker thread. Read INCREASE TIP and DECREASE TIP-1, continue rib while at the same time decreasing and increasing as follows at the marker threads: Decrease TOWARDS THE RIGHT before 1st and 5th marker thread. Increase after 2nd and 6th marker thread (knit the increased stitches the first 2 times, purl the stitches the next 2 times etc.). Increase before 3rd and 7th marker thread (knit the increase stitches the first 2 times, purl the stitches the next 2 times etc.). Decrease TOWARDS THE LEFT after 4th and 8th marker thread. Increase and decrease like this every 4th round 12-12-12-16-16-16 times in total vertically. When displacement has been done, continue with rib as before with knit over knit and purl over purl. When piece measures 32-33-34-35-36-37 cm - remember MEASURING TIP, work 2 ridges in GARTER STITCH - read explanation above, over the middle 14-14-14-22-22-22 stitches in each side (7-7-7-11-11-11 stitches in garter stitch on each side of markers in the sides). On round after the 2 ridges, cast off for armholes in each side, i.e. work next round as follows: Cast off 4-4-4-8-8-8 stitches for armhole, continue rib as before until 4-4-4-8-8-8 stitches remain before marker in the other side, cast off 8-8-8-16-16-16 stitches for armhole, continue rib as before until 4-4-4-8-8-8 stitches remain on round, cast off 4-4-4-8-8-8 stitches for armhole. Fasten off. Finish front piece and back piece back and forth separately. FRONT PIECE: = 96-104-120-120-136-152 stitches. Begin from wrong side and continue rib back and forth as before but work the outermost 3 stitches in each side in GARTER STITCH - read explanation above, decrease in addition for armholes and neck, so read the entire next section before continuing! On next row from right side, decrease 1 stitch in each side for armholes - read DECREASE TIP-2! Decrease for armhole on every 4th-4th-2nd-2nd-2nd-2nd row 4-4-12-12-16-20 times in total in each side. When piece measures 38-40-40-42-42-44 cm, slip the middle 22-22-22-22-26-30 stitches on 1 thread for neck and finish each shoulder separately. Continue rib as before with 3 stitches in garter stitch towards armhole. Continue decrease for armhole if the decrease is not done. In addition cast off for neck at the beginning of every row from the neck as follows: Cast off 2 stitches 3 times and 1 stitch 3 times. After all decreases for armholes and neck, 24-28-28-28-30-32 stitches remain on shoulder. Work until piece measures 50-52-54-56-58-60 cm. Knit 1 row from wrong side. Cast off knitting from right side. Work the other shoulder the same way. BACK PIECE: = 96-104-120-120-136-152 stitches. Begin from wrong side and continue rib as before with 3 stitches in garter stitch in each side, AT THE SAME TIME on next row from right side decrease for armhole in each side the same way as on front piece = 88-96-96-96-104-112 stitches. When piece measures 47-49-51-53-55-57 cm, cast off the middle 36-36-36-36-40-44 stitches for neck and finish each shoulder separately. Continue rib as before with 3 stitches in garter stitch towards armhole. In addition cast off 2 stitches for neck on next row from neck = 24-28-28-28-30-32 stitches remain for shoulder. Work until piece measures 50-52-54-56-58-60 cm. Knit 1 row from wrong side. Cast off knitting from right side. Work the other shoulder the same way. ASSEMBLY: Sew shoulder seams inside cast-off edge. NECK EDGE: Use circular needle size 3.5 mm, begin from right side at one shoulder seam, and pick up approx. 122-122-128-128-138-148 stitches inside 1 stitch around the neck (including stitches on thread). Then cast off with I-CORD - read explanation above. |
||||
Diagram explanations |
||||
|
||||
 |
||||
Have you finished this pattern?Tag your pictures with #dropspattern #blueseadreamtop or submit them to the #dropsfan gallery. Do you need help with this pattern?You'll find 27 tutorial videos, a Comments/Questions area and more by visiting the pattern on garnstudio.com. © 1982-2026 DROPS Design A/S. We reserve all rights. This document, including all its sub-sections, has copyrights. Read more about what you can do with our patterns at the bottom of each pattern on our site. |
||||


With over 40 years in knitting and crochet design, DROPS Design offers one of the most extensive collections of free patterns on the internet - translated to 17 languages. As of today we count 324 catalogues and 12290 patterns translated into English (UK/cm). 12290
We work hard to bring you the best knitting and crochet have to offer, inspiration and advice as well as great quality yarns at incredible prices! Would you like to use our patterns for other than personal use? You can read what you are allowed to do in the Copyright text at the bottom of all our patterns. Happy crafting!
Post a comment to pattern DROPS 250-27
We would love to hear what you have to say about this pattern!
If you want to leave a question, please make sure you select the correct category in the form below, to speed up the answering process. Required fields are marked *.