
Popular categories
Looking for a yarn?


Comments / Questions (25)
![]() Lolo wrote:
Lolo wrote:
Bonjour, si j’ai bien compris on augmente au 4ème rang de motif, c’est à dire au retour de la 4ème étoile en hauteur ? Merci de votre réponse !
10.12.2022 - 22:58DROPS Design answered:
Bonjour Lolo, c'est exact. Bon crochet!
12.12.2022 - 10:27
![]() Kelly wrote:
Kelly wrote:
I like this very much thank you for posting it. i found it easier and looks the same to skip the 2nd stitch in the star (I'm using a very bulky yarn) I went in the hole, then into the shared stitch at the bottom, and then in the next 2 chains. i found the 2nd stitch in the star quite awkward - if that helps anyone else Thanks again
05.12.2019 - 04:54Laetitia wrote:
Très belle réalisation, beau travail !
26.01.2017 - 01:36
![]() RoseMary wrote:
RoseMary wrote:
The gauge listed for the M hook and N hook seems to be in error. If 4 stars are 4" with 9mm hook then there would be less stars in 4" with the larger 10mm hook. Please advise. Thanks.
25.10.2016 - 03:02DROPS Design answered:
Dear RoseMary, thanks for your feedback - you should get 4.5 stars = 10 cm with crochet hook size 9 mm and 4 stars = 10 cm with crochet hook size 10 mm. Pattern will be edited. Happy crocheting!
03.11.2016 - 11:36
![]() Matia wrote:
Matia wrote:
Hej och tack för ett fint mönster! När jag läser igenom mönstret för halsvärmaren får jag det till 7 rader med stjärnor, men ni skriver 8. Är det något jag missar? /Maria
28.11.2015 - 00:29DROPS Design answered:
Hej Maria, När du har virkat varv 2 och 3 totalt 4 ggr har du 8 rader stjärnor, men du kan göra så många du vill så den passar dig. Lycka till!
30.11.2015 - 11:39
![]() Ina wrote:
Ina wrote:
Is het de bedoeling dat je bij het herhalen van tour 2 en 3 steeds meerdert? Op hoeveel sterren komt het dan in totaal aan het einde?
14.07.2015 - 13:11DROPS Design answered:
Hoi Ina. Haak je het hoofdband meerder je niet, maar haak je de halswarmer dan meerder je als volgt: Herhaal de 2e en 3e toer nog 2 keer (= 3 keer in totaal). Meerder door de 2e toer als hiervoor te haken, maar haak 3 hstk (in plaats van 2 hstk) in 5e en 6e sterrengaatje, geteld vanaf elke kant = 23-25 sterren.
29.07.2015 - 14:51
![]() Anger wrote:
Anger wrote:
Bonjour, concernant les augmentations pour le tour de cou : on ne fait qu'une fois une dB supplémentaire à la 5è et 6è étoiles. Ou bien est à partir de la 5ème étoile et cela à chaque rang 2? Merci de votre réponse et merci aussi pour votre site
11.02.2015 - 15:52DROPS Design answered:
Bonjour Mme Anger, et merci. On augmente dans la 5ème et la 6ème étoile à partir des côtés 1 seule fois, au moment où on crochète le rang 2 (après avoir répété 3 fois au total les rangs 2 et 3), vous avez 23-25 étoiles (cf taille). Bon crochet!
11.02.2015 - 18:07
![]() Monika Szabova wrote:
Monika Szabova wrote:
Dobry den, nerozumi co znamena nasledujici věta uvedena ve Vašem návodu: Háčkem č.9 VOLNĚ uháčkujeme přízí Eskimo 45-47 řo. A také nerozumím skratce "řo" - co to znamená? Děkuji za vysvětlení.
08.01.2015 - 20:09DROPS Design answered:
Dobrý den, zkratka "řo" znamená řetízková oka - jelikož pro zvolený model potřebujeme pružný, měkký okraj, háčkujeme počáteční řadu řetízkových ok volněji, tj. oka necháváme trochu větší, neutahujeme je. Hodně zdaru! Hana
14.01.2015 - 08:07
![]() Tiziana wrote:
Tiziana wrote:
Bellissimo....video chiarissimo....appena arriva la spedizione della lana lo faccio.....sito meraviglioso!😻
11.10.2014 - 14:39
![]() Diane T. Clark wrote:
Diane T. Clark wrote:
I made a bunch of these for christmas presents...huge hit!!
04.01.2014 - 21:57
|
|
Anemone#anemoneset |
|
|
|
|
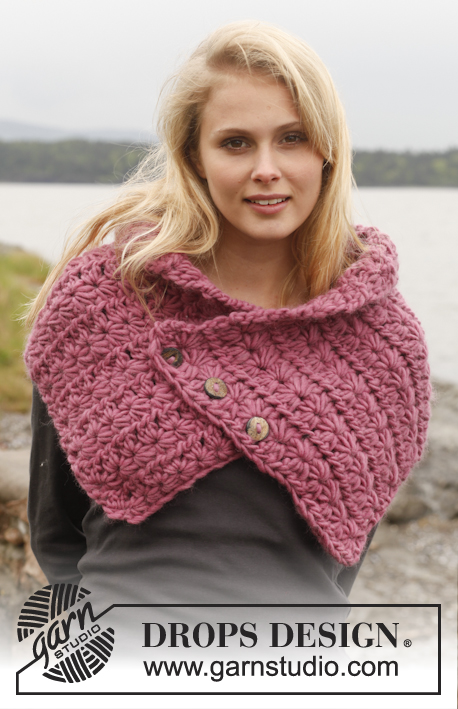
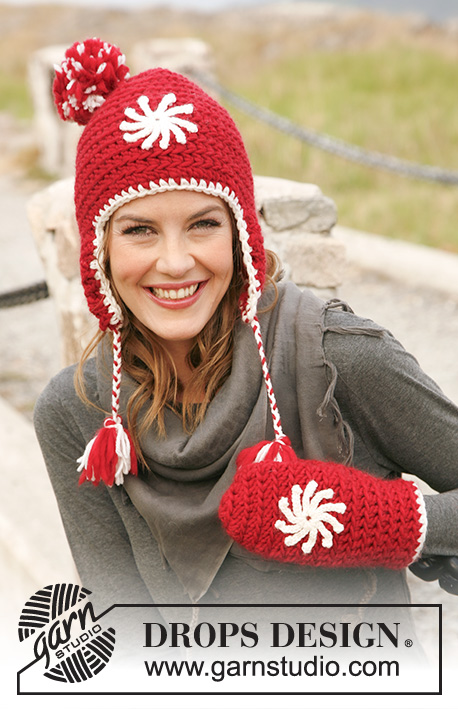
Crochet DROPS head band and neck warmer in "Snow".
DROPS 150-51 |
|
|
HEAD BAND: Worked back and forth. Work 45-47 LOOSE ch on hook size 9 mm with Snow. ROW 1 (RS): Pick up 5 sts, beg in 2nd ch from hook = 6 sts on hook, make a YO and pull through all 6 sts, work 1 ch to make a hole over the 6 sts, * pick up 1 st in the hole, pick up 1 st in the side on the last of the 6 sts, pick up 1 st in same ch as the last of the 6 sts was picked up in, 1 st in each of the next 2 ch = 6 sts on hook, make a YO and pull through all 6 sts, 1 ch *, repeat from *-* until last st. Work 1 htr in last ch. Turn. ROW 2 (WS): 2 ch (= 1 htr), work 2 htr in every "star hole", finish row with 1 htr in last st. Turn. There are now 20-21 stars on row and 1 htr in each side. ROW 3: 3 ch, pick up 1 st in 2nd and 3rd ch from hook, pick up 1 st in the first 3 sts on row = 6 sts on hook, make a YO and pull through all 6 sts, work 1 ch, * pick up 1 st in the hole, pick up 1 st in the side on the last of the 6 sts, pick up 1 st in same st as the last of the 6 sts was picked up in, pick up 1 st in each of the next 2 ch = 6 sts on hook, make a YO and pull through all 6 sts, 1 ch *, repeat from *-*. Work 1 htr in last ch. Turn. Repeat 2nd and 3rd row 1 more time and finish with 2nd row 1 time = 3 rows with stars. Cut the yarn (adjust so that it can be used for assembly) and pull it through last st. ASSEMBLY: Sew short sides tog edge to edge. Fasten off. NECK WARMER: Worked back and forth. Work 47-51 LOOSE ch on hook size 10 mm with Snow. ROW 1 (RS): Pick up 5 sts, beg in 2nd ch from hook = 6 sts on hook, make a YO and pull through all 6 sts, work 1 ch to make a hole over the 6 sts, * pick up 1 st in the hole, pick up 1 st in the side on the last of the 6 sts, pick up 1 st in same ch as the last of the 6 sts was picked up in, 1 st in each of the next 2 ch = 6 sts on hook, make a YO and pull through all 6 sts, 1 ch *, repeat from *-* until last st. Work 1 htr in last ch. Turn. ROW 2 (WS): 2 ch (= 1 htr), work 2 htr in every "star hole", finish row with 1 htr in last st. Turn. There are now 21-23 stars on row and 1 htr in each side. ROW 3: 3 ch, pick up 1 st in 2nd and 3rd ch from hook, pick up 1 st in the first 3 sts on row = 6 sts on hook, make a YO and pull through all 6 sts, work 1 ch, * pick up 1 st in the hole, pick up 1 st in the side on the last of the 6 sts, pick up 1 st in same st as the last of the 6 sts was picked up in, pick up 1 st in each of the next 2 ch = 6 sts on hook, make a YO and pull through all 6 sts, 1 ch *, repeat from *-*. Work 1 htr in last ch. Turn. Repeat 2nd and 3rd row 2 more times (= 3 times in total). Then inc by working 2nd row as before but work 3 htr (instead of 2 htr) in 5th and 6th star hole, counted from each side = 23-25 stars. Repeat 3rd and 2nd row 3 more times = 8 rows with stars in total. Cut the yarn (adjust so that it can be used for assembly) and pull it through last st. ASSEMBLY: Sew short sides tog edge to edge. Fasten off. |
|
Have you finished this pattern?Tag your pictures with #dropspattern #anemoneset or submit them to the #dropsfan gallery. Do you need help with this pattern?You'll find 3 tutorial videos, a Comments/Questions area and more by visiting the pattern on garnstudio.com. © 1982-2026 DROPS Design A/S. We reserve all rights. This document, including all its sub-sections, has copyrights. Read more about what you can do with our patterns at the bottom of each pattern on our site. |


With over 40 years in knitting and crochet design, DROPS Design offers one of the most extensive collections of free patterns on the internet - translated to 17 languages. As of today we count 324 catalogues and 12290 patterns translated into English (UK/cm). 12290
We work hard to bring you the best knitting and crochet have to offer, inspiration and advice as well as great quality yarns at incredible prices! Would you like to use our patterns for other than personal use? You can read what you are allowed to do in the Copyright text at the bottom of all our patterns. Happy crafting!
Post a comment to pattern DROPS 150-51
We would love to hear what you have to say about this pattern!
If you want to leave a question, please make sure you select the correct category in the form below, to speed up the answering process. Required fields are marked *.