
Popular categories
Looking for a yarn?


Comments / Questions (51)
![]() Murielle wrote:
Murielle wrote:
Buongiorno, sono abbastanza pratica co ferri dritti ma non ho mai usato ferri circolari né la tecnica dei ferri accorciati ; volevo iniziare imparando con questo modello, secondo voi è troppo complicato per imparare ferri circolari + ferri accorciati o meglio iniziare con un modello più semplice? Grazie del consiglio
22.01.2018 - 11:27DROPS Design answered:
Buongiorno Murielle, questo modello è lavorato avanti e indietro con i ferri circolari quindi potrebbe anche usare i ferri dritti con le stesse istruzioni. È una gonna lavorata a legaccio, quindi relativamente semplice per imparare i ferri accorciati. Se ha bisogno di ulteriore aiuto, ci scriva pure. Buon lavoro!
22.01.2018 - 11:34
![]() Mie wrote:
Mie wrote:
Jag börjar med att lägga upp maskor, sen stickar jag ett varv med Ocean Viewe och sätter ut markörer. Efter det stickar jag två hela varv med naturvit och därefter tio hela varv med OV. För mig blir det 13 varv efter upplägget och inte 12 som står i beskrivningen. Eller är jag helt ute och cyklar? Får inte ihop det.
20.09.2017 - 21:44DROPS Design answered:
Hej om du tänkar att fram och tillbaka alltid är 2 varv, och att du alltid stickar dina förkortade varv från nederste del av kjolen, så kan det inte gå fel. Lycka till!
21.09.2017 - 14:57Lisbeth wrote:
Jeg skal strikke dette skjørtet i str. L, men ønsker det 10 cm lengre. Skal altså legge opp 125m.+24. Spørsmålet da er hvordan jeg skal fordele de ekstra 24 maskene?
15.04.2017 - 20:39DROPS Design answered:
Hei Lisbeth. Du kan da øke disse 24 m jevnt fordel mellom alle merkene som strikkes på første pinne. Design avd har desverre ingen mulighet til å skrive/regne ut all tilleggsinformasjon et 10 cm lengre skjørt vil bli. Husk også at garnmengden vil øke. God fornøyelse!
20.04.2017 - 13:04
![]() Birgit Elmon wrote:
Birgit Elmon wrote:
Hej Jeg er lige startet og jeg forstår ikke hvordan det skal forstås det med at sætte mærker ? Skal alle mærker være på første pind? Første p strikkes således (fra taljen og ned): Strik 9-10-11-12-13-14 m, sæt mærke-1, strik 11-12-13-14-15-16 m, sæt mærke-2, strik 17-18-19-20-21-22 m, sæt mærke-3, strik 9-10-11-12-13-14 m, sæt mærke-4, strik 9-10-11-12-13-14 m, sæt mærke-5, MVH Birgit
15.12.2016 - 17:54DROPS Design answered:
Hej Birgit. Ja, du strikker en hel pind og saatter maerkerne, f.eks, str S bliver det saa: Strik 9 m, sæt mærke-1, strik 11 m, sæt mærke-2, strik 17 m, sæt mærke-3, strik 9 m, sæt mærke-4, strik 9 m, sæt mærke-5 osv. Du ender med at have 14 maerker paa pinden. Herefter fortsaetter du som beskrevet med de forkortede p.
22.12.2016 - 14:31
![]() Gunhild Andersen wrote:
Gunhild Andersen wrote:
Nå tror jeg at jeg forstår feilen: jeg trodde jeg skulle strikke 6 riller med ocean etter den første raden med natur. For å få til det havnet jeg på feil side og hadde merke 1 som det nærmeste merket å snu ifra, når det istedet skal ligge lengst bort. Michaela forstod dette før meg, men jeg var tydeligvis nødt til å stille spørsmålet selv for å finne svaret. Nå så!
19.09.2016 - 00:53
![]() Gunhild Andersen wrote:
Gunhild Andersen wrote:
Når jeg kommer til merke 14 forstår jeg ikke hvordan jeg skal kunne ha bare 6 masker å strikke over når jeg snur. Når jeg snur strikker jeg jo tilbake til begynnelsen av pinnen og de siste 6 maskene forblir da ustrikkede. Hva er det jeg misforstår her tro?
19.09.2016 - 00:36DROPS Design answered:
Hej Gunhild. Ja, det kan jeg godt forstaa. Jeg tror det er en tankefejl. Naar du vender efter MERKE-14 har du 6 m tilbage paa pinden - dem strikker du ikke, du snur og strikker tilbage. Som jeg ser det strikker du kun de sidste 6 masker efter MERKE-14 naar du strikker over alle masker. Jeg skal faa ordnet en rettelse. Tak
28.09.2016 - 14:37
![]() Kody Doisy wrote:
Kody Doisy wrote:
Bonsoir . Dans le placement des marqueurs n'y a t il pas une erreur SVP car pour moi après avoir tricote les 12 rangs mousse sur toutes les mailles je me trouve au niveau de la taille marqueur 1=9 mailles et le bas marqueur 14 =6 mailles donc pour moi la taille sera plus large que le bas de la jupe . Désolée du dérangement . Encore merci de l'aide que vous voulez bien m'apporter
03.06.2016 - 20:12Kody Doisy answered:
Eureka .Youpi. J'ai trouve a force de me creuser la cervelle et de retourner mon tricot de tous les cotes et dans tous les sens ben j'ai trouve la facon de faire . Desolee pour ma derniere question je vous presente toutes mes excuses . Merci encore et bonne semaine .
05.06.2016 - 16:45
![]() Kody Doisy wrote:
Kody Doisy wrote:
Ok merci de votre reponse Drops. Bon A M a vous .
01.06.2016 - 15:29
![]() Kody Doisy wrote:
Kody Doisy wrote:
Bonjour je n'aime pas couper les fils encours de tricot . Je suis entrain de tricoter cette jupe mais est ce qu'il n'y a pas une solution pour ne pas couper mon fil Ecru quand je fais les 2 rangs SVP ? Merci de votre réponse et bonne journée . A bientôt .
01.06.2016 - 11:12DROPS Design answered:
Bonjour Kody Doisy, vous pouvez faire suivre le fil sur l'envers (par ex croiser les 2 fils sur l'envers à 1-2 m du bord pour que ça ne se voit pas sur l'endroit), veillez bien à ne pas trop serrer quand vous reprenez l'autre couleur pour éviter de resserrer le bas de la jupe. Bon tricot!
01.06.2016 - 12:11Pauline Polko wrote:
Did anybody actually knit this skirt, i find it very strange that nobody noticed that the pattern is wrong, see my previous remark. It took a lot of adjusting to get a result that looks like the skirt in the picture.
29.05.2016 - 15:19DROPS Design answered:
Dear Mrs Polko, pattern is correct and has already be worked several times successfully, remember to check and keep your gauge to get same measurements as in chart. Happy knitting!
30.05.2016 - 09:56
|
||||
Rays in the Fog#raysinthefogskirt |
||||
 |
 |
|||
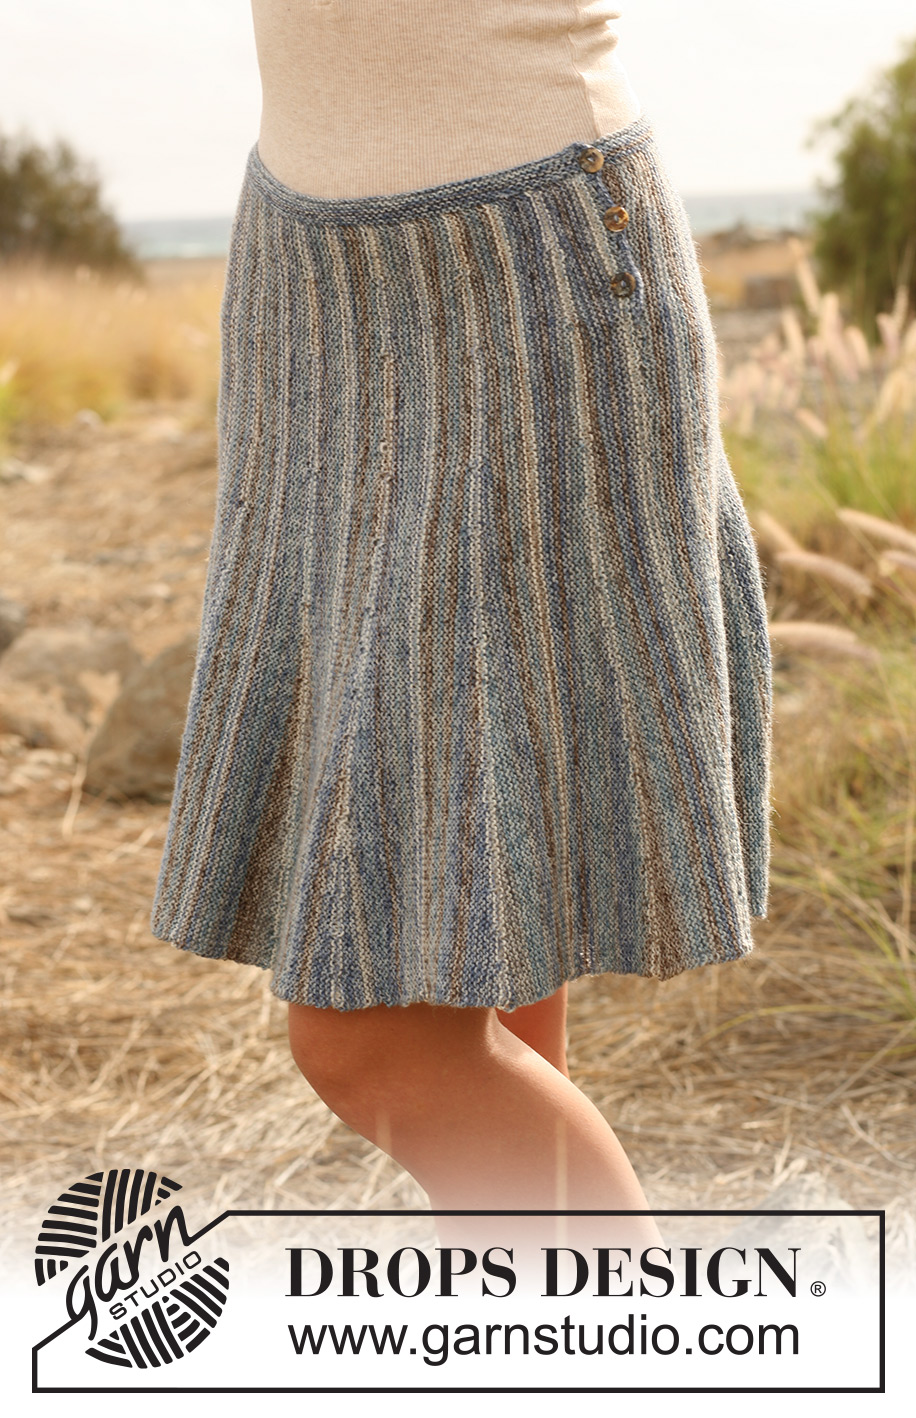
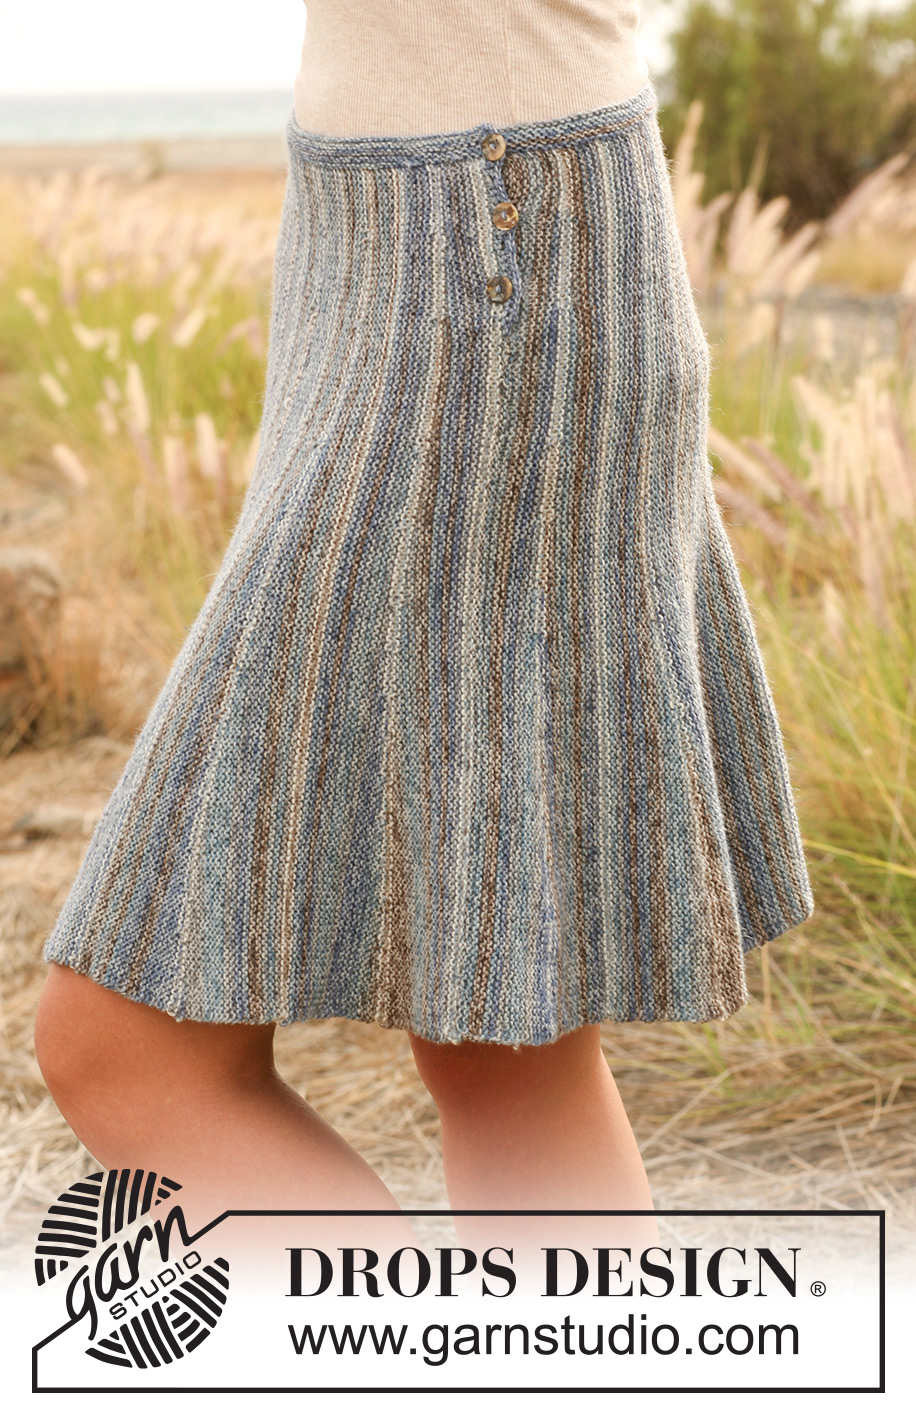
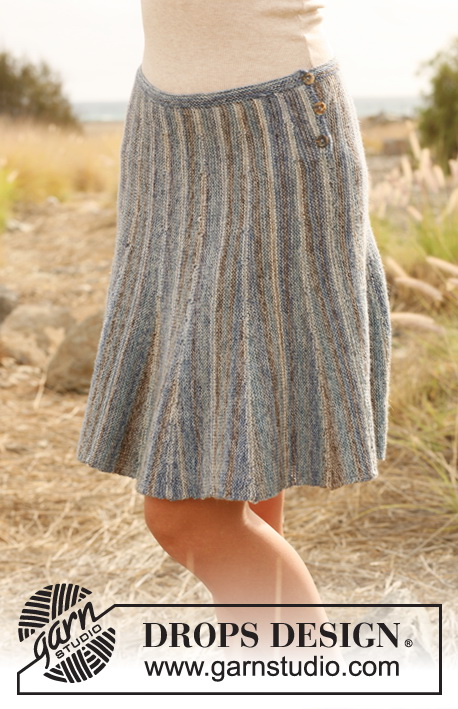
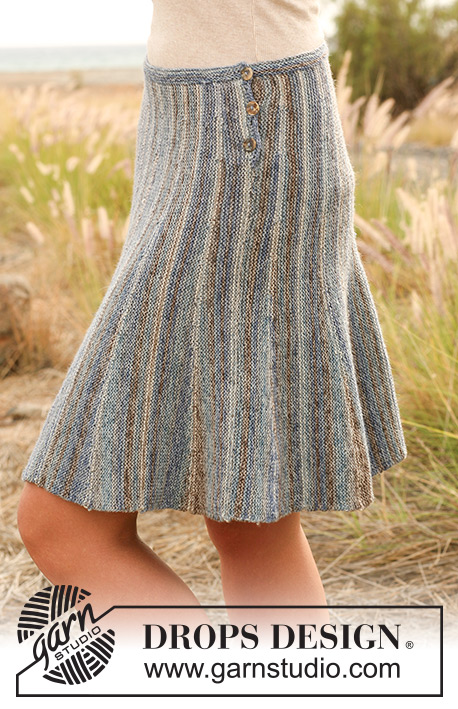
Knitted DROPS skirt with stripes worked from side to side with short rows in "Fabel". Size: S - XXXL.
DROPS 128-17 |
||||
|
SKIRT: Worked back and forth on circular needle from side to side. To give the skirt width at the bottom work with short rows. The piece is worked in garter st, i.e. K all rows. Cast on 115-120-125-130-135-140 sts on 2 circular needles size 3 mm (this is done to avoid a tight cast on edge) with ocean view. Pull out one of the needles and then work as explained below . Work first row as follows (from waist down): Work 9-10-11-12-13-14 sts, insert MARKER 1, work 11-12-13-14-15-16 sts, insert MARKER 2, work 17-18-19-20-21-22 sts, insert MARKER 3, work 9-10-11-12-13-14 sts, insert MARKER 4, work 9-10-11-12-13-14 sts, insert MARKER 5, work 6 sts, insert MARKER 6, work 6 sts, insert MARKER 7, work 6 sts, insert MARKER 8, work 6 sts, insert MARKER 9, work 6 sts, insert MARKER 10, work 6 sts, insert MARKER 11, work 6 sts, insert MARKER 12, work 6 sts, insert MARKER 13, work 6 sts, insert MARKER 14, work the remaining 6 sts. Move the markers upwards when working. Continue to work with short rows as follows (NOTE! Tighten the thread on every turn in mid of piece before continuing, to avoid holes): * Work 2 rows with off white back and forth over all sts (1st row = WS), work 10-10-10-10-12-12 rows with ocean view back and forth over all sts (= 12-12-12-12-14-14 rows in garter st over all sts). Then work until MARKER 1, turn and work back. Work until MARKER 2, turn and work back. Work until MARKER 3, turn and work back. Work until MARKER 4, turn and work back. Work until MARKER 5, turn and work back. Work until MARKER 6, turn and work back. Work until MARKER 7, turn and work back. Work until MARKER 8, turn and work back. Work until MARKER 9, turn and work back. Work until MARKER 10, turn and work back. Work until MARKER 11, turn and work back. Work until MARKER 12, turn and work back. Work until MARKER 13, turn and work back. Work until MARKER 14, turn and work back. Switch to off white and work 2 rows back and forth over all sts. Switch back to ocean view and work until MARKER 14, turn piece and work back. Then work until MARKER 13, turn and work back. Work until MARKER 12, turn and work back. Work until MARKER 11, turn and work back. Work until MARKER 10, turn and work back. Work until MARKER 9, turn and work back. Work until MARKER 8, turn and work back. Work until MARKER 7, turn and work back. Work until MARKER 6, turn and work back. Work until MARKER 5, turn and work back. Work until MARKER 4, turn and work back. Work until MARKER 3, turn and work back. Work until MARKER 2, turn and work back. Work until MARKER 1, turn and work back. Work 10-10-10-10-12-12 rows back and forth over all sts with ocean view *. Repeat from *-* until piece measures approx. 64-72-78-86-100-108 cm at the top, finish with 1 whole repetition so that the pattern fits when the skirt is sewn tog in the side. Then cast off VERY loosely from the bottom edge (= from WS), cast off until 27-27-27-35-35-35 sts remain at the top towards the waist. Work 10 rows back and forth over these sts with ocean view for button folding edge, then cast off. ASSEMBLY: Knit up from RS 1 st in every ridge (2 rows in garter st) along the entire top edge of the skirt on circular needle size 3 mm with ocean view. Work waistband back and forth as follows: K 1 row from WS while AT THE SAME TIME adjusting the no of sts to 154-174-188-208-240-260. Then K 10 rows back and forth over all sts before casting off LOOSELY. Sew the skirt tog edge to edge up to button folding edge. Crochet 3-3-3-4-4-4 button hole loops along the side without folding edge, on hook size 3 mm as follows: Beg at the top with 1 dc in each of the first 3 sts, * 3 ch, skip 2 sts, work 1 dc in each of the next 6 sts *, repeat from *-* a total of 3-3-3-4-4-4 times, turn and work back with 1 dc in each dc and 2 dc in every ch-loop. Sew the buttons on to the button folding edge. |
||||
Diagram explanations |
||||
|
||||
 |
||||
Have you finished this pattern?Tag your pictures with #dropspattern #raysinthefogskirt or submit them to the #dropsfan gallery. Do you need help with this pattern?You'll find 12 tutorial videos, a Comments/Questions area and more by visiting the pattern on garnstudio.com. © 1982-2026 DROPS Design A/S. We reserve all rights. This document, including all its sub-sections, has copyrights. Read more about what you can do with our patterns at the bottom of each pattern on our site. |
||||


With over 40 years in knitting and crochet design, DROPS Design offers one of the most extensive collections of free patterns on the internet - translated to 17 languages. As of today we count 324 catalogues and 12290 patterns translated into English (UK/cm). 12290
We work hard to bring you the best knitting and crochet have to offer, inspiration and advice as well as great quality yarns at incredible prices! Would you like to use our patterns for other than personal use? You can read what you are allowed to do in the Copyright text at the bottom of all our patterns. Happy crafting!
Post a comment to pattern DROPS 128-17
We would love to hear what you have to say about this pattern!
If you want to leave a question, please make sure you select the correct category in the form below, to speed up the answering process. Required fields are marked *.