
Popular categories
Looking for a yarn?


Comments / Questions (18)
![]() Susana wrote:
Susana wrote:
Ich möchte dieses Muster gerne machen, und in der Beschreibung, in der Anleitung, steht, dass zwei verschiedene Farben des Garns Royal verwendet werden. Sollen diese beiden zusammen verstrickt werden, oder bezieht sich das auf ein zweifarbiges Brioche-Muster? Denn das ist in der Anleitung nicht klar beschrieben.
30.12.2025 - 13:07
![]() James wrote:
James wrote:
Hello! I am trying to knit this sweater, but after beginning I have found an issue. The overview of this pattern says to use "pointed needles size 3 and 5 mm = US 11 and 8" (which is wrong in itself as 3mm is a US 2 not a US 11) while the pattern instructions then say to use 3mm (US 2.5) and 4.5 (US 7) needles. This is all very confusing, and it's causing my sweater to come out in a strange size. Could you clarify exactly what size of needles I should use for this pattern? Thank you!
01.12.2025 - 02:44DROPS Design answered:
Hi James, we have to correct it in the US version. The sweater is knitted on needles 3 and 5 (respectively US 2,5 and 8). Happy knitting!
01.12.2025 - 09:27
![]() Olga wrote:
Olga wrote:
Jakiej włóczki użyć do tego wzoru? Zależy mi na takim efekcie melanżu i 100%
19.11.2025 - 22:13DROPS Design answered:
Witaj Olgo, do tego wzoru powinnaś użyć włóczki z Grupy C, ale żadna z nich nie jest melanżowa. Dlatego proponuję użycie 2 nitek z włóczek z Grupy A w wybranych kolorach, np. DROPS Alpaca, która ma szeroką gamę kolorystyczną. Melanż nie jest jednolity, ja wzięłabym jakiś brąz, beż, ciemny szary i pracowała 2 nitkami różnych kolorów naprzemiennie, aby uzyskać pożądany efekt. Pozdrawiamy!
20.11.2025 - 08:55
![]() Gabrielle wrote:
Gabrielle wrote:
Bonjour, Je suis en train de réaliser ce modèle et je ne suis pas sûre de comprendre cette partie de l'explication : " Quand l'ouvrage mesure 59 cm de hauteur totale, rabattre les 20 m centrales pour l'encolure et terminer chaque côté séparément. Rabattre pour l'encolure tous les 2 rangs: 8 fois 1 m. Rabattre les mailles restantes pour l'épaule." Pouvez-vous apporter plus de précisions s'il vous plait? Merci d'avance
03.10.2025 - 12:26DROPS Design answered:
Bonjour Gabrielle, à 59 cm de hauteur totale, vous rabattez les 20 m centrales ainsi: tricotez 26 m (1ère épaule, mettez ces mailles en attente, elles seront tricotées après), rabattez les 20 m suivantes et tricotez les 26 dernières mailes. Rabattez maintenant au début de chaque rang à partir de l'encolure (sur l'endroit épaule gauche dos /épaule droite devant ou sur l'envers épaule droite dos/épaule gauche devant): 8 x 1 m = il reste 18 mailles. Rabattez ces 18 dernières mailles et coupez le fil. Reprenez les 26 m de l'autre épaule et procédez de la même façon. Bon tricot!
03.10.2025 - 16:43
![]() Vanessa wrote:
Vanessa wrote:
Is the model Richard Dean Anderson? I mean MacGyver?
05.08.2025 - 10:52
![]() Blue wrote:
Blue wrote:
Hi! I’m unsure about how to shape the neckline, could you explain what “1st 8 times” means? Thanks :)
05.06.2025 - 08:59DROPS Design answered:
Dear Blue, you will cast off at the beginning of each row from neck towards shoulder 1 stitch a total of 8 times = on right shoulder, front piece + on left shoulder back piece y ou will cast off these stitches at the beg of a row from the right side, and on left shoulder front piece + right shoulder back piece you will cast off these stitches at the beg of a row from the wrong side. Happy knitting!
05.06.2025 - 14:11
![]() Sam wrote:
Sam wrote:
Thank you for the pattern. Is there any chance that there is a size L for this pattern? I can only find size M. My chest size is 36 inches, so I was wondering if I made this pattern in size M, would it fit me snugly or is it going to be loose? I want it to look like in the picture. Thanks!
05.05.2025 - 22:10DROPS Design answered:
Dear Sam, this pattern is only available in size M with 55 cm in width measured flat, this means approx. 110 cm circumference which should be approx. 43,31 inches (convert here) - hope this can help. Happy knitting!
06.05.2025 - 09:43
![]() ES wrote:
ES wrote:
Goedendag, Eerder stelde ik al een vraag over de hoeveelheid wol. Ik heb 250 + 200 gram) wol gekocht met de zelfde looplengte en naalddikte. Na het breien van 1 pand en 1 mouw (dus de helft van de trui) had ik nog maar 2x halve bol over. Dus ik vermoed dat de voorgeschreven hoeveelheid niet klopt.
31.03.2025 - 21:22
![]() ES wrote:
ES wrote:
Goedendag, Ik heb wol gekocht van vergelijkbare dikte en lengte per 50 gram, in totaal 250 + 200 gram. Ik kom niet uit met de hoeveelheden. Ben nu bijna klaar met 1 pand en heb nu al ca 210 gram wol gebruikt. Kunt u aangeven wat ik totaal nodig heb, want met 450 gram kom ik niet uit.
10.03.2025 - 21:15DROPS Design answered:
Dag ES,
Om garen onderling te vervangen heb je dezelfde looplengte nodig. In dit patroon wordt in totaal 450 gram DROPS Royal gebruikt. Bij de niet meer leverbare garens kun je zien dat dit een looplengte heeft van 85 m per bol van 50 gram. Je hebt dus in totaal 765 meter nodig van een vervangend garen.
12.03.2025 - 10:19
![]() Mette Majgaard wrote:
Mette Majgaard wrote:
Hvilket alternativ kan bedst bruges til Drops Royal, så trøjen får det dame udtryk som på billedet? Og jeg går ud fra, at der strikkes med 2 tråde?!
03.03.2025 - 22:29DROPS Design answered:
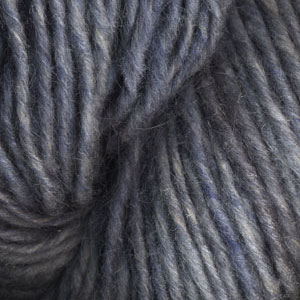
Hei Mette. Garnet DROPS Royal bestod av 40% Ull, 30% Silke og 30% Mohair og tilhørte garngruppe C, og hver farge hadde en enkel melering (en dus overgang mellom noen få fargetoner). Denne fargemeleringen har vi dessverre ikke i noen av kvalitetene du kan erstatte Royal med, slik at du ikke vil få det samme utrykket du ser på bildet. Men ta en titt på kvalitetene DROPS Alaska, DROPS Nepal og DROPS Big Merino, som har samme tykkelse / strikkefasthet. mvh DROPS Design
10.03.2025 - 10:18
|
|
Forest Glen |
|
|
|
|
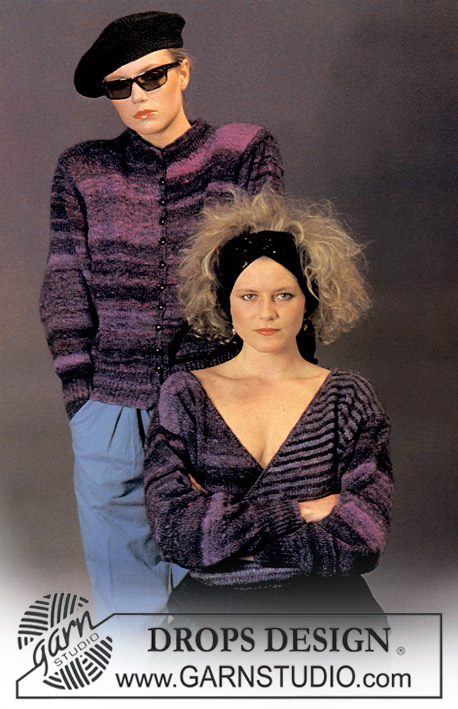
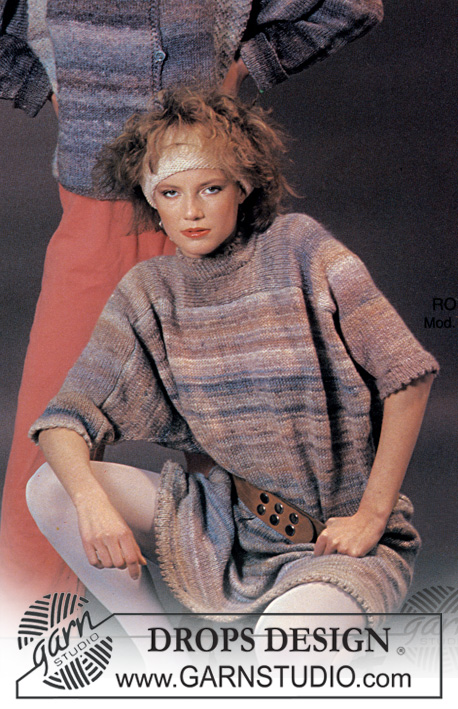
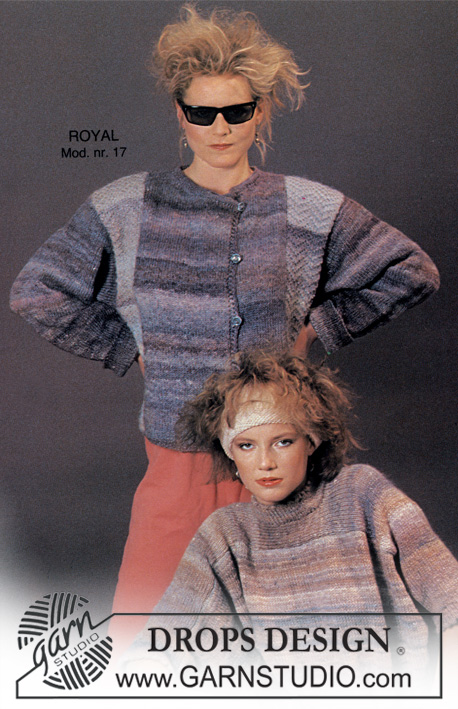
DROPS men ’s jumper in English rib in “Royal”. Size M.
DROPS 2-17 |
|
|
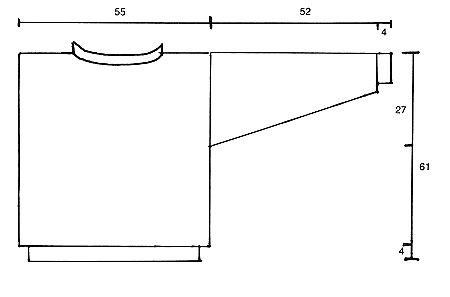
Rib: * K1 into back of loop, P1 *, repeat from *-*. English rib: Row 1: 1 edge st, * 1 YO, slip next st as if to P, K1 *, repeat from *-*, 1 edge st. Row 2: 1 edge st, * K tog next st and YO, 1 YO, slip next st as if to P *, repeat from *-*, 1 edge st. Repeat row 2. Front piece: Worked back and forth on needle. Cast on 72 sts on needle size 3 mm with colour 217 and work 4 cm rib. Change to needle size 5 mm and continue in English rib with 2 rows colour 217 and 2 rows colour 211 alternately. When piece measures 59 cm cast off the middle 20 sts for neck and complete each side separately. Cast off to shape the neckline on every other row: 1 st 8 times. Cast off remaining sts on shoulder. Back piece: Cast on and work like front piece. Sleeve: Worked back and forth on pointed needles. Cast on 40 sts on needle size 3 mm with colour no 217 and work 4 cm rib. Change to needle size 5 mm and continue in English rib with stripes as described for body pieces. At the same time inc 1 st each side on every 3 cm until there are 72 sts on row and cast off all sts when sleeve measures 52 cm. Assembly: Sew shoulder seams. Pick up approx 80 sts round neckline on needle size 3 mm with colour no 217 and work 6 cm rib. Cast off and fold edge double towards WS and fasten. Set in sleeves. Sew side and sleeve seams. |
|
 |
|
Have you finished this pattern?Tag your pictures with #dropspattern or submit them to the #dropsfan gallery. Do you need help with this pattern?You'll find 15 tutorial videos, a Comments/Questions area and more by visiting the pattern on garnstudio.com. © 1982-2026 DROPS Design A/S. We reserve all rights. This document, including all its sub-sections, has copyrights. Read more about what you can do with our patterns at the bottom of each pattern on our site. |


With over 40 years in knitting and crochet design, DROPS Design offers one of the most extensive collections of free patterns on the internet - translated to 17 languages. As of today we count 324 catalogues and 12290 patterns translated into English (UK/cm). 12290
We work hard to bring you the best knitting and crochet have to offer, inspiration and advice as well as great quality yarns at incredible prices! Would you like to use our patterns for other than personal use? You can read what you are allowed to do in the Copyright text at the bottom of all our patterns. Happy crafting!
Post a comment to pattern DROPS 2-17
We would love to hear what you have to say about this pattern!
If you want to leave a question, please make sure you select the correct category in the form below, to speed up the answering process. Required fields are marked *.