
Popular categories
Looking for a yarn?


Comments / Questions (43)
![]() Christina wrote:
Christina wrote:
Jag har aldrig stickat ärmar förut och undrar hur jag ska veta vad som är "mitt under armen" när jag bara stickar runt, runt på strumpstickor? Kanske en dum fråga....
07.05.2022 - 13:16DROPS Design answered:
Hei Christina. Du kan tenke at midt under er starten på omgangen og ermet på denne modellen økes det midt under. Dette er en gammel modell, slik at da ble det ofte ikke beskrevet hvor og hvordan det skulle økes. På dette ermet skal det økes midt under, så da kan du øke etter 1. maske og før siste maske på omgangen = 2 økte masker pr. omgang. Da vil du få 2 maske mellom økningene. Når du har strikket 6 cm setter du de 4 første maskene på 1 tråd, strikk til du har 4 masker igjen på omgangen og sett disse 4 maskene på samme tråd. Midten under ermet er midt mellom disse 8 maskene. mvh DROPS Design
09.05.2022 - 10:22
![]() Catriona wrote:
Catriona wrote:
Second email querying pattern! I knitted the stitches, placed on a holder which enabled me to carry on the round. However, as you knit on, add more stitches to the holder and finish the raglan, you are joining the knitting and the stitches on the holder are on a little loop below the body of the jumper. This cannot work! What am I doing wrong?
11.04.2022 - 10:28DROPS Design answered:
Dear Catriona, when you slip to the holder, you will see a small loop, but when you slip the stitches back to the needles, the stitches should be straight and regular; if they are not, then there might be something wrong with your gauge and they may be too loose. Happy knitting!
11.04.2022 - 22:32
![]() Catriona wrote:
Catriona wrote:
I am struggling with putting the middle front stitches on a stitch holder and continuing the knitting. Do I knit the stitches and then place them on a holder or place them on a holder and then pull the yarn across to continue the project? Do I need to break the yarn and restart on the other side?
03.04.2022 - 15:25DROPS Design answered:
Hi Catriona, To avoid having to cut the strand, it is best to work the stitches first. Happy knitting!
04.04.2022 - 07:00
![]() Annette Gillholm wrote:
Annette Gillholm wrote:
Hej jag behöver en förklaring till vad jag ska göra på vartannat varv och hur gör jag halsminskning denna texten förstår jag inte Halsavm: När det återstår 2 raglanminskn sätts de mittersta 15-17 m på en tråd till hals. Sedan sätts det m på tråden på vartannat v så här: 2 m x 2-2, 1 m x 2-2.
03.06.2021 - 12:55DROPS Design answered:
Hej Annette. När du har 2 minskningar till raglan kvar så sätter du de mittersta 15-17 maskorna på 1 tråd och arbetet stickas vidare fram och tillbaka. På vartannat varv sätter du sedan ytterligare maskor på tråden - först 2 maskor 2 gånger och sedan 1 maska 2 gånger. När du sedan är är färdig med minskning till raglan och har satt maskorna på tråd till halsen så sätter du tillbaka maskorna från tråden på stickan och arbetet stickas färdigt runt på strumpstickor. Mvh DROPS Design
04.06.2021 - 09:58
![]() Agneta wrote:
Agneta wrote:
Angående raglanminskning står det att man endast ska avmaska från rätsidan men alla varv är väl rätsida?
08.05.2021 - 15:06DROPS Design answered:
Hej Agneta, når du til sidst sætter maskerne på en tråd til hals, er du nødt til at strikke frem og tilbage :)
10.05.2021 - 09:19
![]() KTY wrote:
KTY wrote:
Merci pour votre réponse précédente. Je ne trouve pas le schéma avec les mesures de l'ouvrage terminé. J'aurais besoin de connaître celles pour la taille L afin d'être certaine que c est la bonne taille Merci!
01.04.2021 - 14:01DROPS Design answered:
Bonjour, dans ce vieux modele il n'y en a pas. Les mesures ne sont donnees que dans les explications. Et surtout je vous conseille de realiser un echantillon. Bon tricot!
01.04.2021 - 23:13
![]() KTY wrote:
KTY wrote:
Bonjour, est-ce que l'échantillon (21m 28 rgs) se fait avec les aiguilles circulaires? Ou les aiguilles doubles pointes? Si on prend les aiguilles doubles pointes c'est en aller retour? Metci beaucoup
01.04.2021 - 13:16DROPS Design answered:
Bonjour, utilisez les aiguilles doubles pointes n° 4. L'echantillon est fait en aller retour. Bon tricot!
01.04.2021 - 13:29
![]() Therese Kohli wrote:
Therese Kohli wrote:
Danke für Ihre Antwort. Bin aber noch nicht zufrieden. In Grösse L werden 212 M angeschlagen, weniger 2 M Abnahme = 210 M. 2 x Aermel zu 74 = 358 Total, weniger die Raglanabnahmen 14 * 16 = 224 = 134 Maschen. Somit habe ich eine Differenz von 32 M zu den geschrieben 102. Ich sehe meinen Fehler einfach nicht. Sorry und danke für Ihr Verständnis.
19.06.2020 - 12:58DROPS Design answered:
Liebe Frau Kroll, diese 32 Maschen unterschied sind die abgekettene Maschen für den Armausschnitt: es wird beim Rumpfteil sowie bei jeder Ärmel 8 Maschen für den Armausschnitt abgekettet = 194 M (97 M x 2 = Rumpfteil) und 66 M x 2 (Ärmel) = 326 M - dann werden 16 Maschen x 14 für Raglan abgenommen = 326-224= 102 M bleiben. Viel Spaß beim stricken!
19.06.2020 - 13:33
![]() Therese Kohli wrote:
Therese Kohli wrote:
Hallo, der Beschrieb ist mangelhaft, schwer verständlich und fehlerhaft! Sehr ärgerlich. Die Raglanabnahmen sind nicht 14 * 16 = 224 M. Sondern 16 * 4 um auf die Maschenanzahl von 102 für das Halsbündchen zu gelangen. Habe aber nur 14 Raglan gearbeitet. Somit habe ich 234 M. Frage: kann ich korrigieren und 32 M im Bündchen abnehmen oder besser noch 2 Raglan arbeiten? Besten Dank
17.06.2020 - 15:27DROPS Design answered:
Liebe Frau Kohli, die Anleitung wurde nochmals etwas sprachlich überarbeitet und die Maschenzahlen, die vorhanden sein müssen, zur besseren Kontrolle eingefügt. Ein Fehler lässt sich in der Anleitung nicht erkennen. Sie nehmen an jeder Markierung 4 Maschen ab, damit kommen Sie auf 16 Maschen pro Abnahme-Runde. Am Ende der Raglanabnahmen bleiben insgesamt 102 Maschen übrig. Weiterhin gutes Gelingen!
18.06.2020 - 11:09
![]() Patrizia wrote:
Patrizia wrote:
Buongiorno vorrei chiedere gentilmente perche non è possibile vedere le spiegazioni di questo modello in lingua italiana. Ringrazio e invio cordiali saluti Patrizia
23.04.2020 - 20:30DROPS Design answered:
Buonasera Patrizia, tradurremo questo modello in italiano quanto prima. Buon lavoro!
23.04.2020 - 22:57
|
|
DROPS Extra 0-59 |
|
|
|
|
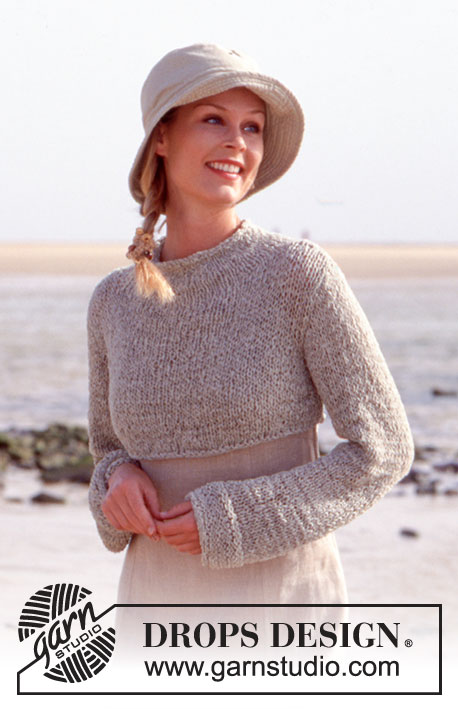
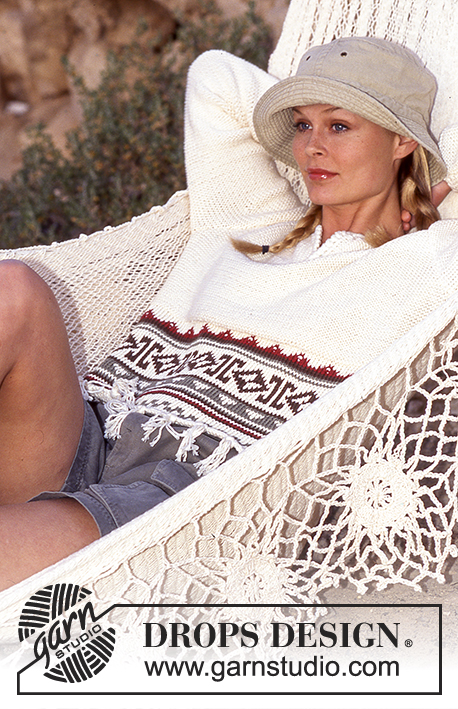
DROPS jumper with short sleeve in “Muskat”. Size S – L.
DROPS Extra 0-59 |
|
|
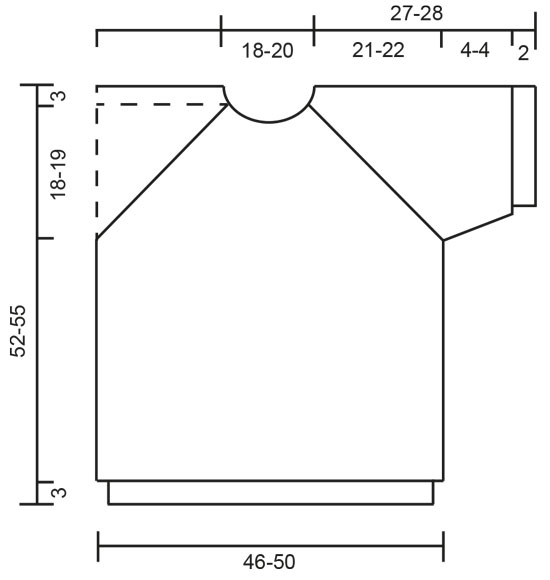
Rib: * K2, P2 *, repeat from *-*. Body piece: Worked in the round on circular needle. Cast on 196-212 sts on circular needle size 2.5 mm with Muskat and work 3 cm Rib – see above. Change to needle size 4 mm and continue in stocking st, on the first round adjusting the sts count to 194-210 sts. Remember the knitting tension! When piece measures 31-33 cm work next round as follows: 89-97 sts on front piece, slip 8 sts on a stitch holder for armhole, 89-97 sts on back piece, slip 8 sts on a stitch holder for armhole. Put piece aside and knit the sleeves. Sleeve: Cast on 60-68 sts on double pointed needles size 2.5 mm with Muskat and work 2 cm Rib. Change to needle size 4 mm and continue in stocking st, at the same time inc 2 sts mid under arm on every 3rd-4th round a total of 4-3 times = 68-74 sts. When piece measures 6 cm slip 8 sts mid under arm on a stitch holder = 60-66 sts left on round. Put piece aside and knit the other sleeve Yoke: Now slip sleeves on the same circular needle as body pieces where the 8 sts were put on stitch holders = 298-326 sts. Insert a marker in all transitions between sleeves and body pieces = 4 markers. Continue in stocking st on all sts, at the same time dec for raglan and then neck as follows – read all of the following before continuing: Raglan: Make all dec from RS. Work 5 rows without dec. Dec on each side of all markers with 4 stocking sts between the dec (= 2 sts on each side of marker) Dec 2 sts on each side of all markers (= 16 dec sts per row) on every 4th row 13-14 times (= 208-224 dec sts in total). Dec as follows after marker: slip 1 st on cable needle behind piece, K3 tog, K1 from cable needle. Dec as follows before marker: slip 3 sts on cable needle in front of piece, K1, work sts from cable needle as follows: slip 1 st as if to K, K2 tog into back of loop, psso. Neck: At the same time when 2 raglan dec remain slip the middle 15-17 sts on front piece on a stitch holder for neck and slip sts on stitch holder each side on every other row: 2 sts 2 times, 1 st 2 times. After raglan and neckline dec slip sts on stitch holder back on needle = 90-102 sts. Change to needle size 2.5 mm and work 2 cm rib, cast off. Assembly: Graft tog sts under arm. |
|
 |
|
Have you finished this pattern?Tag your pictures with #dropspattern or submit them to the #dropsfan gallery. Do you need help with this pattern?You'll find 26 tutorial videos, a Comments/Questions area and more by visiting the pattern on garnstudio.com. © 1982-2026 DROPS Design A/S. We reserve all rights. This document, including all its sub-sections, has copyrights. Read more about what you can do with our patterns at the bottom of each pattern on our site. |


With over 40 years in knitting and crochet design, DROPS Design offers one of the most extensive collections of free patterns on the internet - translated to 17 languages. As of today we count 324 catalogues and 12290 patterns translated into English (UK/cm). 12290
We work hard to bring you the best knitting and crochet have to offer, inspiration and advice as well as great quality yarns at incredible prices! Would you like to use our patterns for other than personal use? You can read what you are allowed to do in the Copyright text at the bottom of all our patterns. Happy crafting!
Post a comment to pattern DROPS Extra 0-59
We would love to hear what you have to say about this pattern!
If you want to leave a question, please make sure you select the correct category in the form below, to speed up the answering process. Required fields are marked *.