
Popular categories
Looking for a yarn?


Comments / Questions (31)
![]() Frogstwo wrote:
Frogstwo wrote:
I love this bucket hat
03.04.2026 - 01:24
![]() Karo wrote:
Karo wrote:
Zeigt das Diagramm alle Maschen von der Vorderseite oder sollen die Maschen auch in den Rückreihen rechts gestrickt werden, also links von der Vorderseite gesehen?
09.07.2025 - 23:43DROPS Design answered:
Liebe Karo, die Diagramme zeigen alle Reihen - Hinreihen lesen Sie rechts nach links und Rückreihen lesen Sie links nach rechts. Hier lesen Sie mehr. Viel Spaß beim Stricken!
23.07.2025 - 12:49
![]() Nancy S wrote:
Nancy S wrote:
Is there any way I can get this pattern in written format and not diagrams? I am horrible with diagrams and absolutely love this hat! Thank you
25.06.2025 - 23:06DROPS Design answered:
Dear Nancy, we only have diagrams to this pattern, but this lesson might help you understanding how to read diagrams. Happy knitting!
26.06.2025 - 16:14
![]() Nancy Symonds wrote:
Nancy Symonds wrote:
Is there anyway to get pattern in written format ,not diagram? I’m clueless with diagrams and very much want to make this hat
25.06.2025 - 23:04
![]() Guylaine Rondeau wrote:
Guylaine Rondeau wrote:
Bonjour, est ce l on tricote les 2 couleurs en même temps à chaque rang Il y a une couleur dominante pour le reste 1 et 2...puis on inverse pour 3 et 4 Est ce que je comprend bien ...sinon expliquer moi..merci
04.05.2025 - 03:27DROPS Design answered:
Bonjour Mme Rondeau, on ne tricote pas les 2 couleurs en même temps, mais on change de couleur après chaque côte mousse, autrement dit, on tricote 2 rangs de chacune des couleurs (en même temps, on glisse des mailles sans les tricoter). Bon tricot!
05.05.2025 - 07:43
![]() Christine wrote:
Christine wrote:
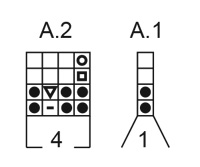
Bonjour, 1) Le A1 doit-il être exécuté au-dessus de la 1ère maille à l'endroit et au-dessus de la dernière à l'envers ? 2) Pourquoi 2 symboles différents (trait et carré d'une part et triangle et rond d'autre part) correspondent-ils à la même consigne ? S'agit-il d'une erreur ou leur présence ne s'explique-t'elle qu'en raison de l'emploi de couleurs différentes (rangs 1 et 2 en naturel/rangs 3 et 4 en vert) ? D'avance merci.
30.03.2025 - 11:13DROPS Design answered:
Bonjour Christine, tout à fait, c'est bien ainsi que l'on tricote A.1. Pour les symboles, probablement choix de styliste. Bon tricot!
31.03.2025 - 09:01
![]() Maria wrote:
Maria wrote:
I am struggling to get the pattern correct . Looks like there should be a cream stripe but mine doesn’t look like this . All slip stitches say with strand towards you - is this correct?
13.12.2024 - 09:32DROPS Design answered:
Dear Maria, yes, that's correct. It says towards you but, since you are working back and forth, one time the towards you is on the front of the piece and another time is on the back or inside of the piece. Remember that in A.2 you have 2 rows in lime and 2 rows in off-white. Happy knitting!
15.12.2024 - 22:26
![]() Wanda wrote:
Wanda wrote:
Witam, Nie wiem co źle robię przerabiając wzór A2 że mozaika wychodzi mi pionowo tzn zmiana koloru włóczki widoczna jest w poziomie a nie tak jak na zdjęciu kapelusza w pionie? Pozdrawiam Wanda
14.09.2024 - 11:14DROPS Design answered:
Witaj Wando, zrobiłam próbkę w rzędach i wychodzi mi jak we wzorze. Możliwe są 2 błędy: 1. na lewej stronie robótki czytamy schemat od lewej do prawej (a nie od prawej do lewej), 2. pamiętaj gdzie ma być nitka przy zdejmowaniu oczka, może tutaj jest coś nie tak. Pozdrawiamy!
17.09.2024 - 13:01
![]() Caroline Richter wrote:
Caroline Richter wrote:
I have verified motorcycles and cars 4 times now. When, oh when, can I see the cute hat pattern?
30.06.2024 - 15:56
![]() Caroline Richter wrote:
Caroline Richter wrote:
Please let me see the pattern
30.06.2024 - 15:54
|
|||||||||||||||||||
Beach Friend#beachfriendhat |
|||||||||||||||||||
 |
 |
||||||||||||||||||
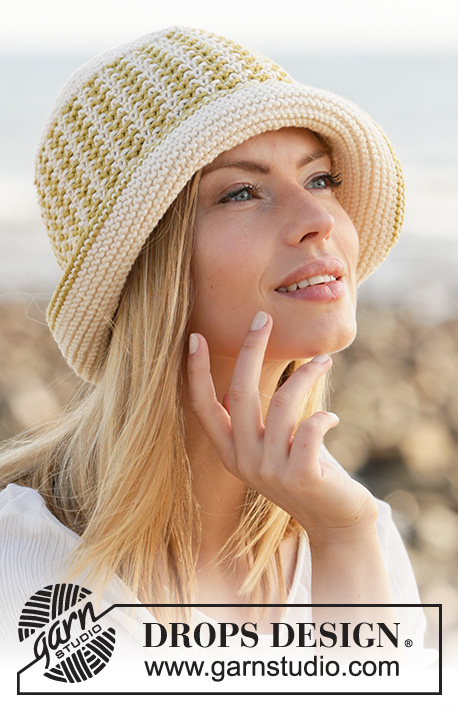
Knitted hat with raised stitches in DROPS Paris. The piece is worked back and forth with mosaic pattern from the brim upwards.
DROPS 209-9 |
|||||||||||||||||||
|
------------------------------------------------------- EXPLANATIONS FOR THE PATTERN: ------------------------------------------------------- RIDGE/GARTER STITCH (worked back and forth): Knit all rows. 1 ridge in height = Knit 2 rows. PATTERN: See diagrams A.1 and A.2. The diagrams show all the rows in the pattern seen from the right side. DECREASE TIP (evenly spaced): To work out how to decrease evenly, count the total number of stitches on needle (e.g. 132 stitches) and divide by the number of decreases to be made (e.g. 35) = 3.7. In this example decrease by knitting approx. each 3rd and 4th stitch together. ------------------------------------------------------- START THE PIECE HERE: ------------------------------------------------------- HAT – SHORT OVERVIEW OF THE PIECE: The piece is worked back and forth with circular needle from the brim upwards. Then the piece is sewn together mid-back. HAT: Cast on 132-136 stitches with circular needle size 3.5 mm and lime. Change to off-white and work back and forth with GARTER STITCH – read description above. When the piece measures 5 cm knit 1 row from the wrong side where you decrease 35-35 stitches evenly spaced READ DECREASE TIP above = 97-101 stitches. Now work pattern according to diagrams A.1 and A.2 as follows from the right side: Work diagram A.1 over 1 stitch and work A.2 to the end of the row. REMEMBER THE KNITTING TENSION! Work like this, according to the diagrams, until the piece measures a total of 17 cm; adjust so the next row is worked with off-white from the right side. Continue with garter stitch and off-white and on the first row decrease 7-11 stitches evenly spaced = 90-90 stitches. Work 1 row from the wrong side and then insert 10 markers in the piece with 9 stitches between each marker – marker 1 is inserted after 8 stitches so there is 1 stitch left after the last marker. Then decrease 1 stitch before each marker from the right side by knitting 2 stitches together. Decrease like this every 2nd ridge (= every 4th row) a total of 4 times = 50-50 stitches. Then decrease every ridge (= every 2nd row) a total of 4 times = 10-10 stitches. Knit all stitches together, 2 and 2 = 5-5 stitches. Cut the strand, pull it through the last stitches and pull tight. Sew the hat together mid-back; sew in the outermost loop of the outermost ridge so the seam is flat. The hat measures approx. 23 cm in height. |
|||||||||||||||||||
Diagram explanations |
|||||||||||||||||||
|
|||||||||||||||||||
 |
|||||||||||||||||||
Have you finished this pattern?Tag your pictures with #dropspattern #beachfriendhat or submit them to the #dropsfan gallery. Do you need help with this pattern?You'll find 9 tutorial videos, a Comments/Questions area and more by visiting the pattern on garnstudio.com. © 1982-2026 DROPS Design A/S. We reserve all rights. This document, including all its sub-sections, has copyrights. Read more about what you can do with our patterns at the bottom of each pattern on our site. |
|||||||||||||||||||


With over 40 years in knitting and crochet design, DROPS Design offers one of the most extensive collections of free patterns on the internet - translated to 17 languages. As of today we count 324 catalogues and 12291 patterns translated into English (UK/cm). 12291
We work hard to bring you the best knitting and crochet have to offer, inspiration and advice as well as great quality yarns at incredible prices! Would you like to use our patterns for other than personal use? You can read what you are allowed to do in the Copyright text at the bottom of all our patterns. Happy crafting!
Post a comment to pattern DROPS 209-9
We would love to hear what you have to say about this pattern!
If you want to leave a question, please make sure you select the correct category in the form below, to speed up the answering process. Required fields are marked *.