
Popular categories
Looking for a yarn?


Comments / Questions (40)
![]() Hildegard wrote:
Hildegard wrote:
Ist dieses Modell für nicht sehr geübte geeignet? Ich würde es gerne im Halbpatent stricken Viele Grüße
03.01.2026 - 16:55
![]() Josaphina wrote:
Josaphina wrote:
Hej Hvis jeg vil strikke den i Nepal str M, hvor meget garn skal jeg så bruge?
16.03.2025 - 16:58DROPS Design answered:
Hei. Da bruker du vår garnforbrug omregner. Du finner linken under all informasjon om PINDE til oppskriften. Brug vores garn-omregner her. Under/til høyre for bildene. mvh DROPS Design
17.03.2025 - 14:19
![]() Fabienne wrote:
Fabienne wrote:
Merci pour votre réponse rapide. J'ai suivi mon instinct et tricoté les mailles comme elles se présentaient et je suis retombée sur mes pattes ! Par contre la vidéo n'aide pas car sinon je me serais débrouillée avec . Les augmentations de la vidéo sont plus nombreuses et du coup au tour suivant il y a bien des jetés à tricoter. C'est donc "confusing". Voilà à bientôt et bonnes fêtes 🎄
03.12.2024 - 10:57
![]() Fabienne wrote:
Fabienne wrote:
Bonjour. J'ai fait les 7 premiers tours et j'ai fait les augmentations comme indiqué. Est-ce juste d'avoir 3 mailles avant le marqueur ? Et si oui comment dois-je les tricoter je ne comprends pas l'explication "Tricoter ensuite les nouvelles mailles en côtes anglaises (A.1) mais bien noter au premier tour après les augmentations que les mailles envers se tricotent à l'envers sans jetés, comme il n'y en a pas pour ces mailles." Merci d'avance
02.12.2024 - 17:13DROPS Design answered:
Bonjour Fabienne, vous devez décaler votre marqueur pour que la prochaine augmentation soit faite dans la maille de chaque côté de la maille envers du raglan; au tour suivant juste après l'augmentation, lorsque vous devez tricoter ensemble une maille et son jeté dans les côtes anglaises, tricotez les mailles augmentées seules (sans le jeté car il n'a pas été fait). Dans cette vidéo, nous montrons comment tricoter les mailles au tour suivant. Bon tricot!
03.12.2024 - 08:53
![]() Marie wrote:
Marie wrote:
Hei! Onko mitään lankaryhmän c lankaa, jolla paita kannattaisi neuloa?
08.07.2024 - 21:58DROPS Design answered:
Kokeile DROPS Air tai DROPS Brushed Alpaca Silk -lankaa.
09.07.2024 - 17:00
![]() Irene wrote:
Irene wrote:
Dag. Ik ben klaar met de raglan en nu moet ik de draad afknippen. Ik snap niet zo goed waarom. Kan het lijf niet vanaf daar verder gebreid? Wat doe ik met de steken op de naald? Met welke steek begin ik onder de arm? Ik hoop dat u kan helpen.
01.02.2024 - 12:00DROPS Design answered:
Dag Irene,
Je eindigt in het midden van het achterpand nadat je de raglan hebt gebreid en met het lijf begin je in het midden van de 5 opgezette steken onder de mouw. Vandaar dat je de draad af moet knippen. Je kunt na het afknippen de steken doorschuiven tot naar het midden onder de mouw. Je gaat verder met A.1 in de rondte.
07.02.2024 - 19:42
![]() Inge Nielsen wrote:
Inge Nielsen wrote:
Opskriften er med garngruppe C eller A+A. Hvordan påvirker det strikfastheden og garnforbrug, hvis jeg kun vil strikke med en tråd fra garngruppe A?
02.01.2024 - 13:01DROPS Design answered:
Hej Inge, for at få målene i måleskitsen er det vigtigt at du overholder strikkefastheden som står i opskriften. Hvis du kun bruger en tråd som er halv så tynd, så vil blusen jo blive meget løs. Lav en strikkeprøve først så du ser hvordan det ser ud med 14 masker i bredden i helpatent med 1 tråd :)
02.01.2024 - 15:01
![]() Claudia wrote:
Claudia wrote:
Hallo. Ich weiß nicht! Wo ich den Faden wieder anschlagen soll,nachdem ich ihn abschneiden sollte,nach der Reihe der Trennung der Ärmel. Nun wird die Passe für das Rumpfteil und die Ärmel aufgeteilt. Danach den Faden abschneiden. Und dann? LG Claudia
07.10.2023 - 00:22DROPS Design answered:
Liebe Claudia, dann stricken Sie Rumpfteil und beginnen Sie die Runden in der Mitte einer Seite. Viel Spaß beim stricken!
09.10.2023 - 08:25
![]() Françoise Lelarge wrote:
Françoise Lelarge wrote:
Au moment de partager mes mailles pour la taille XXL je me retrouve avec 4 mailles en trop. EN attente merci pour votre réponse.
02.10.2023 - 16:24
![]() FRANÇOISE LELARGE wrote:
FRANÇOISE LELARGE wrote:
Bonjour, J'ais un problème pour la répartition des mailles pour la taille XXL, j'ais mes 100 m et au moment de répartir mes mailles pour partagé dos manches et devant je me retrouve avec 4m en trop.. Merci pour votre réponse.
02.10.2023 - 16:06DROPS Design answered:
Bonjour Mme Lelarge, notez que les marqueurs doivent être mis dans une maille (et pas entre 2 mailles), c'est probablement les 4 mailles qui vous manquent. Bon tricot!
03.10.2023 - 07:46
|
||||||||||
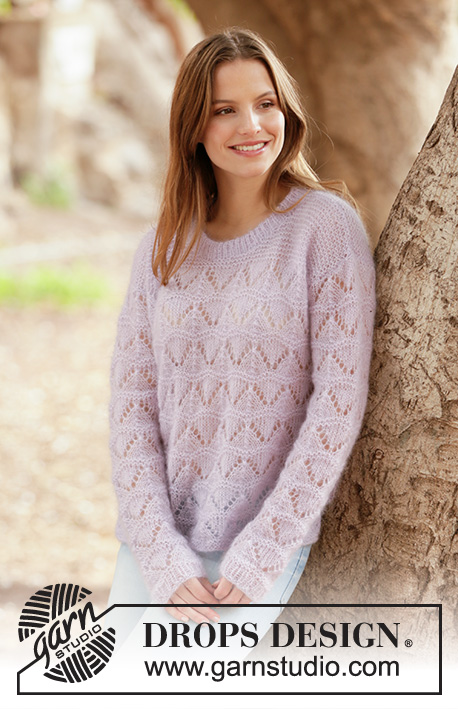
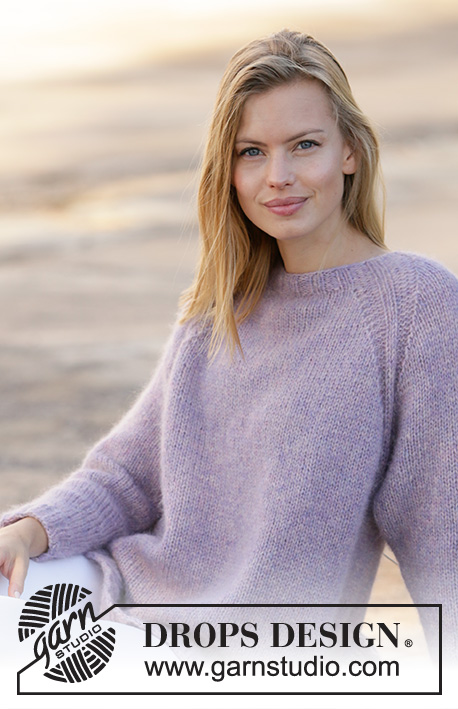
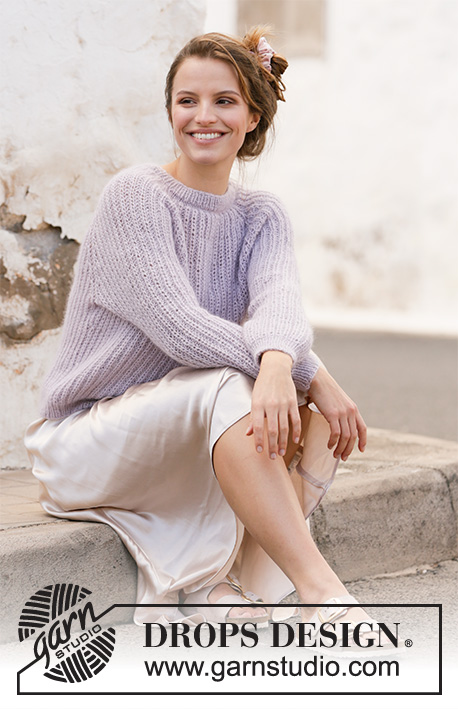
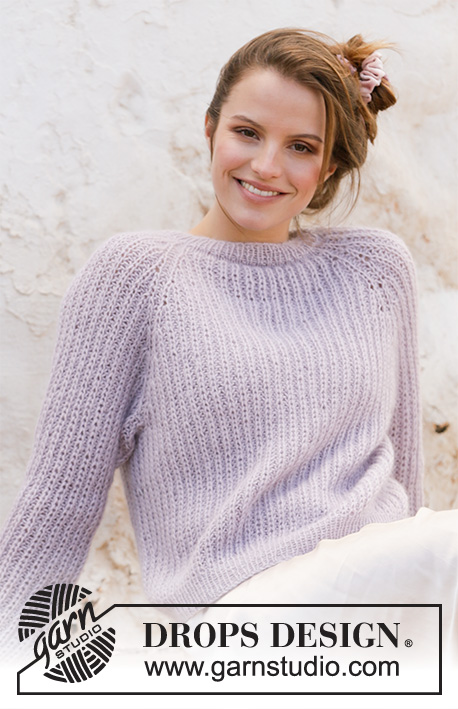
Lavender Puff#lavenderpuffsweater |
||||||||||
 |
 |
|||||||||
Knitted jumper in DROPS Alpaca and DROPS Kid-Silk. The piece is worked top down with English rib and raglan. Sizes XS - XXL.
DROPS 213-33 |
||||||||||
|
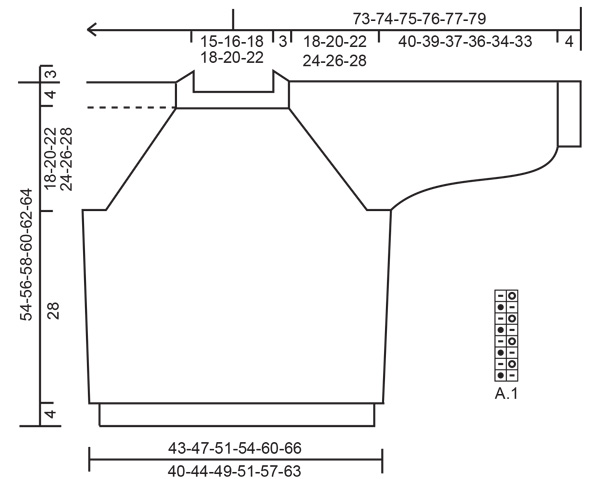
------------------------------------------------------- EXPLANATIONS FOR THE PATTERN: ------------------------------------------------------- PATTERN: See diagram A.1. INCREASE TO RAGLAN: Increase to raglan on each side of the purled stitch with marker (= raglan-stitch), i.e. increase in the knitted stitch and yarn over closest to the raglan-stitch. Increase 2 stitches on each side of all raglan-stitches (= 16 stitches increased on an increase-round). Increase 2 stitches in the knitted stitch by working 3 stitches in the stitch and yarn over as follows: Knit together the stitch and yarn over but do not slip them off the left needle, make 1 yarn over the right needle and knit together the stitch and yarn over 1 more time, then slip the knitted stitch and yarn over off the left needle (= 2 stitches increased). Then work the new stitches in English rib (A.1) but be aware that on the first round after the increase, the purled stitches are purled without yarn overs, as there are no yarn overs for these stitches. DECREASE TIP (for sides of body and mid under the sleeves): Decrease in stitches closest to the purled stitches with markers mid under the sleeve and in the sides of the body. All decreases are worked on a round where the knitted stitches and yarn overs are knitted together! DECREASE 2 STITCHES TOWARDS THE LEFT AS FOLLOWS (i.e. start after the purled stitch with marker): Slip the first knitted stitch and yarn over onto the right needle as if to knit together, knit the next 2 stitches together (i.e. 1 purled + knitted stitch and yarn over), then pass the slipped stitch and yarn-over over the knitted together stitches (= 2 stitches decreased). DECREASE 2 STITCHES TOWARDS THE RIGHT AS FOLLOWS (i.e. start 3 stitches + 2 yarn overs before the purled stitch with marker): Slip the first knitted stitch and yarn over onto the right needle as if to knit together, purl 1, pass the slipped stitch and yarn-over over the purled stitch, slip the stitch back onto the left needle, pass the stitch and yarn-over over the stitch which was slipped back onto the left needle, and finally slip the remaining stitch onto the right needle (= 2 stitches decreased). CASTING-OFF TIP: To avoid the cast-off edge being tight you can cast off with a larger size needle. If the edge is still tight, make 1 yarn over after approx. each 4th stitch at the same time as casting off and the yarn overs are cast off as normal stitches. ------------------------------------------------------- START THE PIECE HERE: ------------------------------------------------------- JUMPER – SHORT OVERVIEW OF THE PIECE: The neck and yoke are worked in the round with circular needle, from mid back and top down. The yoke is divided for body and sleeves and the body is continued in the round with circular needle. The sleeves are worked with short circular needle/double pointed needles, top down. NOTE: All stitch-counts given when working English rib are without the yarn overs, as they are counted together with their respective stitches. NECK: Cast on 78-82-86-88-96-100 stitches with short circular needle size 3.5 mm and 1 strand Alpaca and 1 strand Kid-Silk (= 2 strands). Beginning of round = mid-back. Knit 1 round then work rib in the round (= knit 1 / purl 1) for 3 cm. Knit 1 round where you decrease 2-2-6-4-0-0 stitches evenly spaced = 76-80-80-84-96-100 stitches. Insert 1 marker in the round, then work the yoke as described below. The yoke is measured from the marker. YOKE: Change to circular needle size 5 mm and knit 1 round. The next round is worked as follows: * Knit 1, 1 yarn over, slip 1 stitch as if to purl *, work from *-* to the end of the round. Now insert 4 markers in the piece as described below (without working the stitches). The markers will be used when increasing to raglan. Count 13-15-15-15-17-17 stitches (= ½ back piece), insert 1 marker in the next stitch (= raglan-stitch), count 9-9-9-9-13-13 stitches (= sleeve), insert 1 marker in the next stitch (= raglan-stitch), count 27-29-29-31-33-35 stitches (= front piece), insert 1 marker in the next stitch (= raglan-stitch), count 9-9-9-9-13-13 stitches (= sleeve), insert 1 marker in the next stitch (= raglan-stitch). There are 14-14-14-16-16-18 stitches left for the back piece after the last marker. Now work A.1 in the round. AT THE SAME TIME increase to RAGLAN as described below. REMEMBER THE KNITTING TENSION! RAGLAN: When you have worked 7 rounds of A.1 (and the next round begins with «knit the yarn over and slipped stitch together »), increase to RAGLAN – read description above (= 16 stitches increased on an increase-round). Increase like this every 8th round (i.e. every 4th round with visible English rib stitches in height) a total of 7-8-9-10-11-12 times = 188-208-224-244-272-292 stitches on the needle. Continue with A.1 without further increases until the piece measures 18-20-22-24-26-28 cm from the marker on the neck (the piece measures approx. 22-24-26-28-30-32 cm from the shoulder). Now divide the piece for body and sleeves on the next round as follows: Work 27-31-33-35-39-43 stitches as before (= ½ back piece), place the next 39-43-45-51-57-59 stitches on 1 thread for the sleeve, cast on 5 new stitches on the needle (= in side under the sleeve), work 55-61-67-71-79-87 stitches as before (= front piece), place the next 39-43-45-51-57-59 stitches on 1 thread for the sleeve, cast on 5 new stitches on the needle (= in side under the sleeve) and work the remaining 28-30-34-36-40-44 stitches as before (= ½ back piece). Cut the strand. Body and sleeves are finished separately. THE PIECE IS NOW MEASURED FROM HERE! BODY: = 120-132-144-152-168-184 stitches. Insert 1 marker in the middle of the 5 stitches cast on under each sleeve. Allow the markers to follow your work onwards; they will be used when decreasing in the sides of the body. Start the round at the stitch with the marker and continue with A.1 in the round as before. DECREASE IN SIDES: When the piece measures 8 cm from the division, decrease 2 stitches on the back piece by decreasing 2 stitches in the English rib stitch closest to the purled stitch with the marker on each side – read DECREASE TIP; i.e. decrease 2 stitches towards the left at the beginning of the back piece and 2 stitches to the right at the end of the back piece = 116-128-140-148-164-180 stitches. When the piece measures 18 cm from the division, decrease in the same way on the front piece (i.e. decrease 2 stitches towards the left at the beginning of the front piece and 2 stitches towards the right at the end of the front piece) = 112-124-136-144-160-176 stitches. Continue working until the piece measures 28 cm from the division in all sizes (there is 4 cm left to finished length. You can try the garment on and work to the desired length). Change to circular needle size 3.5 mm and work rib in the round (= knit 1 / purl 1) – on the first round the yarn-overs are knitted together with the knitted stitches. When the rib measures 4 cm, loosely cast off with knit over knit and purl over purl – read CASTING-OFF TIP! The jumper measures approx. 54-56-58-60-62-64 cm from the shoulder down. SLEEVE: Place the 39-43-45-51-57-59 stitches from the thread on the one side of the piece on double pointed needles or short circular needle size 5 mm and knit up 1 stitch in each of the 5 stitches cast on under the sleeve = 44-48-50-56-62-64 stitches. Insert a marker thread in the middle stitch of the 5 stitches cast on under the sleeve. Allow the thread to follow your work onwards; it will be used when decreasing under the sleeve. Work A.1 in the round. AT THE SAME TIME on round 8 (i.e. on the 4th round of visible English rib stitches), decrease 4 stitches mid under the sleeve – read DECREASE TIP (decrease 2 stitches towards the left after the stitch with the marker and decrease 2 stitches towards the right before the stitch with the marker). Decrease like this every 8th-8th-8th-8th-6th-6th round (i.e. every 4th-4th-4th-4th-3rd-3rd round of visible English rib stitches) a total of 2-2-2-3-3-3 times = 36-40-42-44-50-52 stitches. Continue working until the sleeve measures 40-39-37-36-34-33 cm from the division (there is 4 cm left to finished length. You can try the garment on a work to the desired length). NOTE: Shorter measurements in larger sizes due to wider neck and longer yoke. Change to double pointed needles size 3.5 mm. Work rib (= knit 1 / purl 1) – on the first round the yarn overs are knitted together with the knitted stitches. When the rib measures 4 cm, cast off with knit over knit and purl over purl – remember CASTING-OFF TIP! The sleeve measures approx. 44-43-41-40-38-37 cm from the division. Work the other sleeve in the same way. |
||||||||||
Diagram explanations |
||||||||||
|
||||||||||
 |
||||||||||
Have you finished this pattern?Tag your pictures with #dropspattern #lavenderpuffsweater or submit them to the #dropsfan gallery. Do you need help with this pattern?You'll find 16 tutorial videos, a Comments/Questions area and more by visiting the pattern on garnstudio.com. © 1982-2026 DROPS Design A/S. We reserve all rights. This document, including all its sub-sections, has copyrights. Read more about what you can do with our patterns at the bottom of each pattern on our site. |
||||||||||


With over 40 years in knitting and crochet design, DROPS Design offers one of the most extensive collections of free patterns on the internet - translated to 17 languages. As of today we count 324 catalogues and 12290 patterns translated into English (UK/cm). 12290
We work hard to bring you the best knitting and crochet have to offer, inspiration and advice as well as great quality yarns at incredible prices! Would you like to use our patterns for other than personal use? You can read what you are allowed to do in the Copyright text at the bottom of all our patterns. Happy crafting!
Post a comment to pattern DROPS 213-33
We would love to hear what you have to say about this pattern!
If you want to leave a question, please make sure you select the correct category in the form below, to speed up the answering process. Required fields are marked *.