
Popular categories
Looking for a yarn?


Comments / Questions (101)
![]() Majbritt wrote:
Majbritt wrote:
Jeg er lige begyndt på denne fine taske og som nybegynder er jeg meget spændt på at begynde på 2. farve. Jeg havde dog held med at starte med en magisk ring istedet for de 5 lm osv. som jeg startede med - For mit vedkommende blev resultatet meget flottere og helt tæt :-)
28.06.2017 - 22:21
![]() Ortuani wrote:
Ortuani wrote:
Pour le sac Népal 173-1 au niveau du rang 5-10 vous indiquez continuer les augmentations et le motif comme avant, c'est-à-dire tous les tours crocheter 1 b entre chaque augmentation. Vous voulez dire à chaque 3eème bride?
08.05.2017 - 12:35DROPS Design answered:
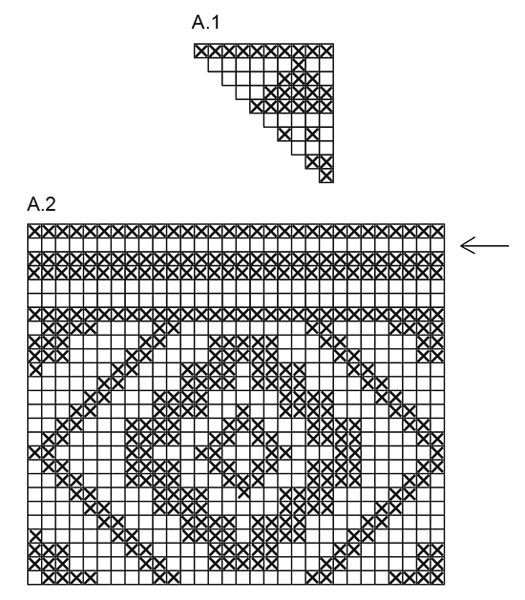
Bonjour Mme Ortuani, au 5ème tour, on va crocheter 2 B dans chaque 3ème bride, puis au 6ème tour 2 B dans chaque 4ème bride et ainsi de suite, en continuant le motif comme dans A.1. Bon crochet!
08.05.2017 - 16:05
![]() Dawn wrote:
Dawn wrote:
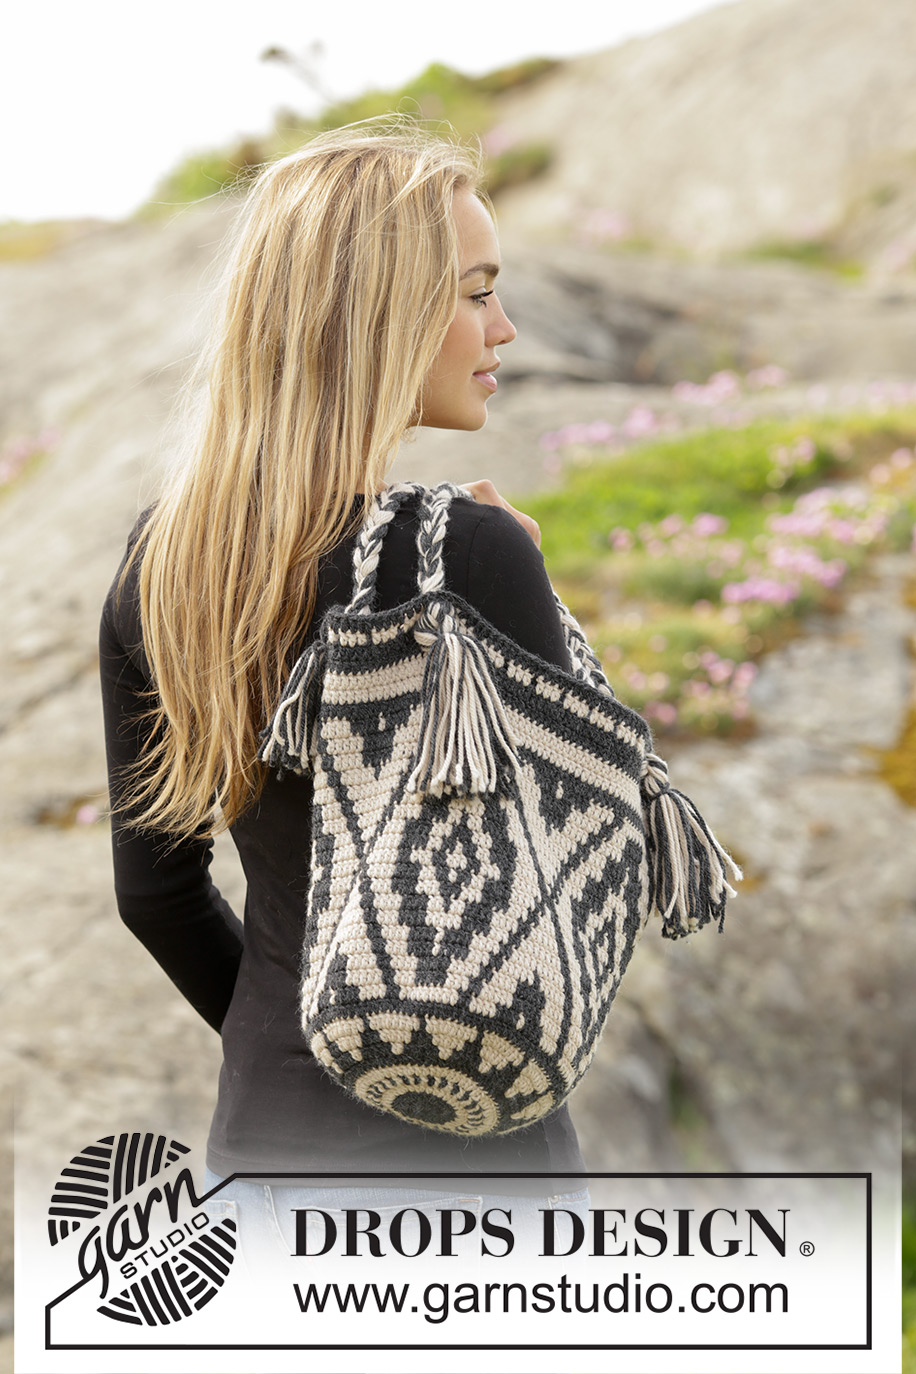
I am having difficulty understanding the straps. I made one strap 48 inches long. I braided it to 24 inches. I separated it into two strands. One strand weaved through the front of the bag and one strand through the back of the bag. Do I then take the braided section with the loose knot over to my strings that are hanging out the other end and tie them together? And then I do another long braid in the same way?
18.04.2017 - 13:33DROPS Design answered:
Hi Dawn, Once you have threaded the two sets of strands through the holes in one side, with 3 dc between them, you tie them together into a tog and let the fringes hang - see picture on pattern. The other end you thread and tie in a similar way on the opposite side = one strap. Then you do the same with the other strap on the far side of the bag. The picture shows this if it is difficult to understand the text. Kind regards, Deirdre
18.04.2017 - 15:08
![]() Michael wrote:
Michael wrote:
Regarding 1703-1: My counts keep coming up wrong! Do I count the ch 3 at the beginning of each round as the first stitch?
26.03.2017 - 19:46DROPS Design answered:
Dear Michael, that's correct, see also "CROCHET INFO" at the beg of written pattern. Happy crocheting!
27.03.2017 - 09:28
![]() Sue wrote:
Sue wrote:
This is the first time I have ordered your yarn and braved a pattern. This bag was SO much fun to make and the yarn is exquisite. I have been browsing your designs and yarn for years and it is all so beautiful!
24.02.2017 - 21:47
![]() Belinda Sprangers wrote:
Belinda Sprangers wrote:
Mijn tas is bijna klaar, tot zover helemaal gelukt en superleuk maar ik begrijp de één na laatste toer niet: (Haak op de toer met de pijl als volgt: * 1 stk in elke van de eerste/volgende 3 stk, 1 l, sla 1 stk over*, herhaal van *-*. ) Heb je niet maar 8 gaatjes nodig om de hengsels te bevestigen in plaats van rondom gaatjes te maken door de hele toer? Dat is toch alleen nodig wanneer eer een drawstring door de tas gaat, zoals bij patroon van tas 'Port Noir'?
25.01.2017 - 14:34DROPS Design answered:
Hoi Belinda. Nee, je moet het gaatjespatroon hebben over de hele rand, maar je bevestigt de hengsels in 8 van de gaatjes.
25.01.2017 - 16:33
![]() Pieta Vermeulen wrote:
Pieta Vermeulen wrote:
Hallo, Ik begrijp niet hoe ik de schouderbanden moet maken van patroon Santa fe . Ik begrijp de vlecht splitsing niet en het doorrijgen door de de tas . Ik kan op de foto ook niet zien dat hij door de gaatje rand is geregen zoals word beschreven .Groetjes Pieta
16.01.2017 - 08:25DROPS Design answered:
Hoi Pieta. Na het vlechten van het bandje, deel je de draden in twee strengen (in plaats van 3). Je steekt de 2 strengen door 1 gat van de bovenkant de bovenkant van de tas met 1 stk tussen (dus 1 streng in 1 gat met 1 stk tussen). Maak een knoop met de twee strengen aan de buitenkant van de de tas (de "franjes" die je ziet op de foto). Herhaal aan de andere kant van de tas (tel het aantal gaten langs de rand zodat je een gelijk aantal gaten hebt tussen de bandjes.
16.01.2017 - 15:01
![]() Coutarel wrote:
Coutarel wrote:
Je vous remercie pour votre aide si précieuse bonne journée
09.01.2017 - 10:21
![]() Coutarel wrote:
Coutarel wrote:
Mes motifs A2 ne tombent pas au bon endroit je pense que j'ai mal fait mes augmentations, rang 5 c'est bien 3 mailles avant l'augmentation, rang 6 4 m avant, rang 7 5 m, rang 8 6 m, etc.....
09.01.2017 - 09:04DROPS Design answered:
Bonjour Mme Coutarel, les augmentations se font bien ainsi: on a 1 B en plus avant l'augmentation à chaque rang, soit 3 B, 1 augm au rang 5, puis au rang 6: 4 B, 1 augm et ainsi de suite, mais quand on fait les augmentations, il faut suivre A.1 et non A.2. Bon crochet!
09.01.2017 - 09:53
![]() Coutarel Sandrine wrote:
Coutarel Sandrine wrote:
Au rang 4 on augmente aussi sur les mailles grises ? ou que sur les beiges ?
07.01.2017 - 18:48DROPS Design answered:
Bonjour Mme Coutarel, au rang 4, vous crochetez 1 B dans les 2 premières B, 2 B dans la suivante, soit en suivant le diagramme: 1 B en beige dans la B suivante, 1 B en gris dans la B suivante, 1 B en beige + 1 B en gris dans la B suivante. Bon crochet!
09.01.2017 - 09:13
|
|||||||
Santa Fe#santafebag |
|||||||
|
|
|||||||
Crochet DROPS bag with colour pattern in ”Nepal”.
DROPS 173-1 |
|||||||
|
PATTERN: See diagrams A.1 and A.2. Diagrams show colours in pattern. 1 square = 1 tr. COLOUR PATTERN (worked in the round): When changing colour work as follows: Work last tr with first colour but wait with last pull through, switch to next colour and work last pull through, then work next tr. When working with two colours place strands for the colour not worked over sts from previous round, work around the strands so that they is hidden and follows in the round. CROCHET INFO: Replace first tr at beg of every round with 3 ch, finish round with 1 sl st in third ch. --------------------------------------------------------- BAG: Worked in the round. Work 5 ch with dark grey on hook size 3.5 mm and form a ring with 1 sl st in first ch. Then work in the round and according to A.1 (work 12 repetitions of A.1 in width) - READ COLOUR PATTERN. ROUND 1: Work 12 tr in ring – read CROCHET INFO. ROUND 2: Work 2 tr in every tr = 24 tr. ROUND 3: Work * 1 tr in first tr, 2 tr in next tr *, repeat from *-* the entire round = 36 tr. ROUND 4: Work * 1 tr in each of the first 2 tr, 2 tr in next tr *, repeat from *-* the entire round = 48 tr. REMEMBER THE CROCHET TENSION! ROUNDS 5-10: Continue with inc and pattern as before, i.e. on every round work 1 more tr between inc = 120 tr. ROUND 11: Continue to work in the round but without inc and work according to A.2 (= 4 repetitions in width). On round with arrow work as follows: * 1 tr in each of the first/next 3 tr, 1 ch, skip 1 tr *, repeat from *-*. Continue until A.2 has been worked, fasten off. STRAPS: Cut 18 lengths of each colour of 120 cm = 36 strands. Place the strands tog and tie a loose knot, leave approx. 12 cm after knot. Distribute strands in 3 piles with 12 strands in each pile. Plait the three piles tog until plait measures approx. 68 cm. Divide strands into 2 piles. Thread the 2 halves through bag, 3 tr apart, in round with holes. Tie the tog into a knot on the front of bag. Take the knot at beg of plait and fasten the end to bag the same way but in the opposite side. Make another plait the same way - see photo. |
|||||||
Diagram explanations |
|||||||
|
|||||||
 |
|||||||
Have you finished this pattern?Tag your pictures with #dropspattern #santafebag or submit them to the #dropsfan gallery. Do you need help with this pattern?You'll find 7 tutorial videos, a Comments/Questions area and more by visiting the pattern on garnstudio.com. © 1982-2026 DROPS Design A/S. We reserve all rights. This document, including all its sub-sections, has copyrights. Read more about what you can do with our patterns at the bottom of each pattern on our site. |
|||||||


With over 40 years in knitting and crochet design, DROPS Design offers one of the most extensive collections of free patterns on the internet - translated to 17 languages. As of today we count 324 catalogues and 12290 patterns translated into English (UK/cm). 12290
We work hard to bring you the best knitting and crochet have to offer, inspiration and advice as well as great quality yarns at incredible prices! Would you like to use our patterns for other than personal use? You can read what you are allowed to do in the Copyright text at the bottom of all our patterns. Happy crafting!
Post a comment to pattern DROPS 173-1
We would love to hear what you have to say about this pattern!
If you want to leave a question, please make sure you select the correct category in the form below, to speed up the answering process. Required fields are marked *.