
Popular categories
Looking for a yarn?


Comments / Questions (27)
![]() Anna wrote:
Anna wrote:
Hoi, ik heb een probleem met teltekening M1. Ik heb een proefje gemaakt als volg: 1 toer-13 recht; 2de-13 av; 3de-4st r. samen, 6 omsl, 4 st gedraaid r. samen;4de-13 av;na derde verticale herhaling heb ik geconstanteerd dat mijn breiwerk niet op dat van de foto lijkt(ik krijg niet zo mooi ajour want tussen 3de toer zitten er averechte en rechte toeren, niet als op de beeld) Bestaat er foutje in de teltekening? Doe ik iets vekeerd?
19.04.2014 - 01:51DROPS Design answered:
Hoi Anna. Je moet de derde rij van de teltekening breien als volgt: brei 4 st recht samen, 1 omslag, 1 r, 1 omsl, 1 r, 1 omsl, 1 r, 1 omsl, 1 r, 1 omsl, 1 r, 1 omsl (= 6 omslagen en 5 r st), brei 4 st gedraaid recht samen.
25.04.2014 - 14:01
![]() Anna wrote:
Anna wrote:
Hallo, ik heb een vraag over de tip voor minderen 2. Ik moet door 2 st samenbrn in ieder recht deel(13 st) minderen, dus in totaal 9 keer in 1 naald. Wat betekent afwisselend links en recht van alle recht minderen? Eerst 1 steek aan het begin van die serie 13 st en daarna 1 steek aan het eind? Het is onduidelijk voor mij. Tweede vraag over de teltekening. Moet ik M1 van recht onderaan naar links aan de goede kant lezen? Alvast bedank voor een hulp.
16.04.2014 - 12:04DROPS Design answered:
Hoi Anna. Ja, eerst aan de rechterkant van het rechtgedeelte, dan aan de linkerkant enzovoort. En je leest de teltekening van onderaan rechts, en dan naar links (goede kant), verkeerde kant van links naar rechts - lees ook hier
16.04.2014 - 12:46
![]() Sylvia wrote:
Sylvia wrote:
Hallo, Ich habe bis zur Passe gestrickt, nun habe ich die erste Reihe des Diagramm's M1 gestrickt und komme nicht weiter. In der Strickschrift steht *das Muster 2 cm weiter stricken* - aber wie? wenn ich das Diagramm auf der Hinterseite mit linken Maschen weiter stricke passt es nicht ;-) Ich habe schon auf einem eigenen Stück probiert, komme aber leider nicht zurecht. Kann mir vllt. jemand helfen...bitte...danke! LG Sylvia
07.01.2014 - 11:12DROPS Design answered:
Liebe Sylvia, bitte erklären Sie uns das Problem etwas genauer. Ich verstehe im Moment nicht ganz, was die Rückreihe in links mit dem Aufgehen des Musters zu tun hat. Ist nicht klar, wo die Abnahmen gemacht werden?
08.01.2014 - 09:40
![]() Annette Van Helvoirt wrote:
Annette Van Helvoirt wrote:
Ik heb een vraag over de pas. Na 1 toer averechts gebreid te hebben moet je starten met telpatroon M1. De tekst kan ik niet rijmen met de teltekening. Mijn vraag is: Hoe moet ik teltekening M1 lezen? Bestaat deze uit 4 toeren? Daarna deze 4 toeren herhalen? Etc. Moet ik M1 van boven naar beneden lezen of van beneden naar boven?
18.11.2012 - 22:40DROPS Design answered:
1 herhaling van het telpatroon is 4 nld/toeren. Je leest de eerste rij (goede kant) van rechts naar links, en de tweede rij (verkeerde kant) van links naar rechts. Herhaal de teltekening over de hele nld en herhaal ook in de hoogte tot de vereiste afmetingen.
19.11.2012 - 15:08
![]() Anneli Anttila wrote:
Anneli Anttila wrote:
Tuleeko tähän malliin ohje.Olen odottanut.Tosi hieno
21.02.2011 - 07:30
![]() Tove Lindfjord wrote:
Tove Lindfjord wrote:
Veldig pen
31.01.2011 - 12:25
![]() Klara wrote:
Klara wrote:
Den var fin
23.01.2011 - 19:36Erika wrote:
BELLISSIMO
17.01.2011 - 21:34Daniela wrote:
Wunderschon, romantisch und kann auch in anderer Farbe gestrickt werden.
17.01.2011 - 15:18Nadija wrote:
Love it!
17.01.2011 - 03:34
|
|||||||||||||
Pretty Me#prettymecardigan |
|||||||||||||
 |
 |
||||||||||||
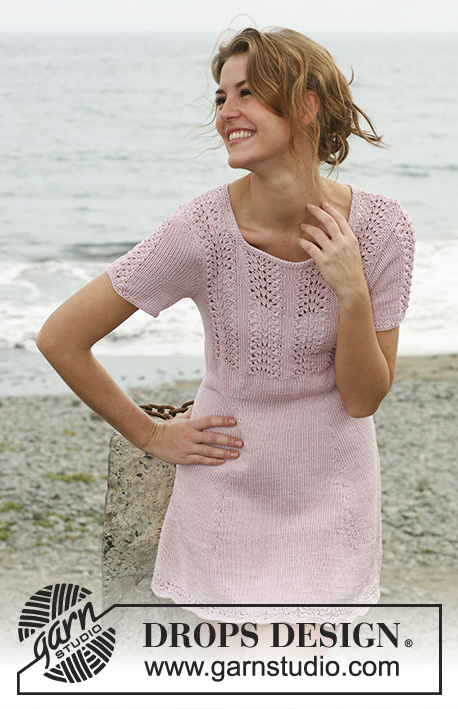
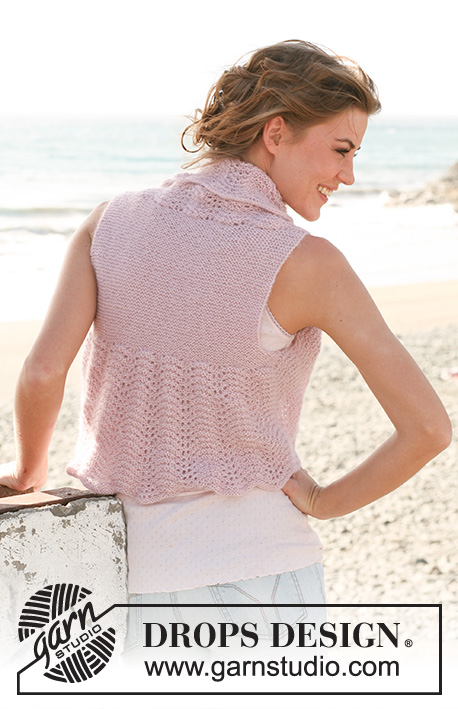
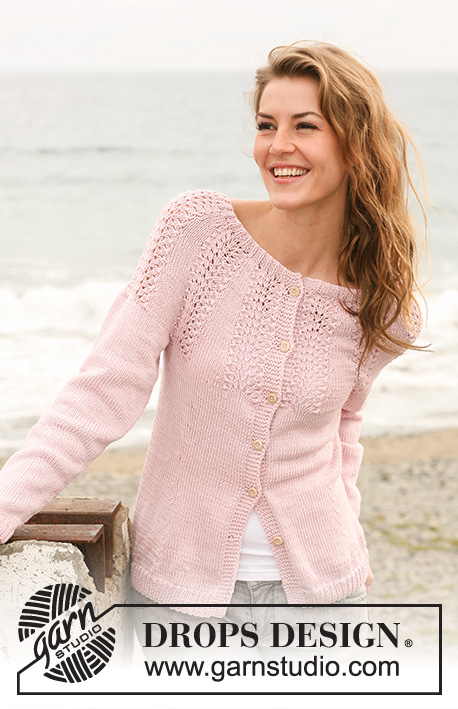
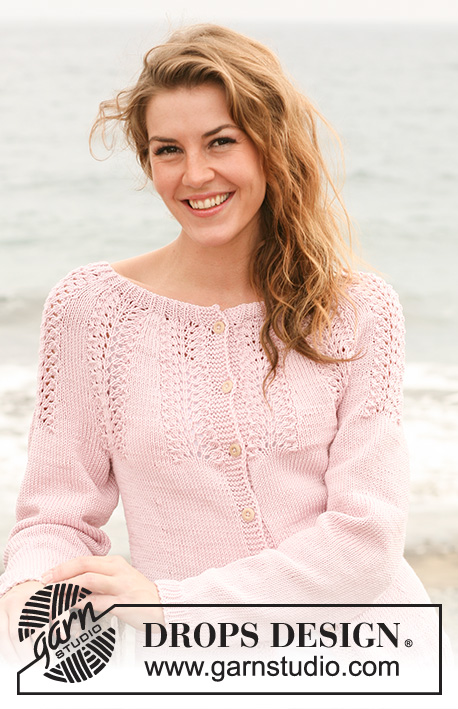
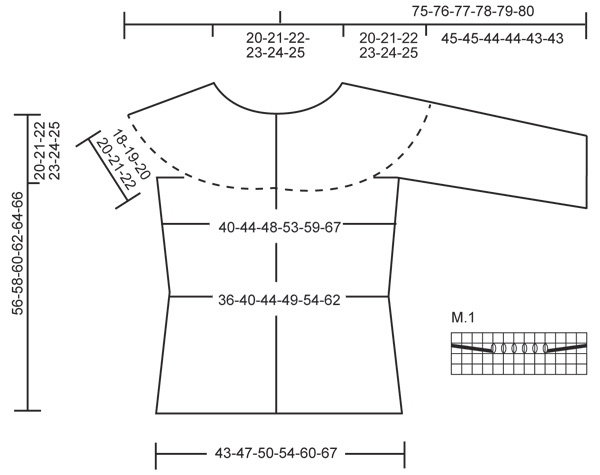
Knitted DROPS jacket with rounded yoke with lace pattern in "Muskat". Size: S - XXXL.
DROPS 127-41 |
|||||||||||||
|
GARTER ST (back and forth on needle): K all rows. PATTERN: See diagram M.1 (= 13 sts). The diagram shows the pattern from RS. DECREASE TIP 1 (applies to waist front and back): Dec as follows before 1st and 3rd marker: K 2 tog. Dec as follows after 2nd and 4th marker: Slip 1 st as if to K, K1, psso. DECREASE TIP 2 (applies to yoke): Dec 1 st by K 2 sts tog alternately in the right and left side of all K sections. BUTTON HOLES: Cast off for button holes on right front band. 1 button hole = cast off 4th st from mid front. On next row cast on 1 new st over the cast off st. Cast off for button holes when piece measures: SIZE S: 15, 23, 31, 39, 47, 55 cm SIZE M: 17, 25, 33, 41, 49 and 57 cm. SIZE L: 11, 19, 27, 35, 43, 51 and 59 cm. SIZE XL: 13, 21, 29, 37, 45, 53 and 61 cm. SIZE XXL: 15, 23, 31, 39, 47, 55 and 63 cm. SIZE XXXL: 17, 25, 33, 41, 49, 57 and 65 cm. -------------------------------------------------------- JACKET: Worked back and forth on circular needle. Cast on 241-259-280-301-331-367 sts on circular needle size 3.5 mm with Muskat. Work 1st row (= from RS) as follows: 6 sts in GARTER ST - see explanation above, rib K 1/P 2 until 7 sts remain, finish with K 1 and 6 sts in garter st (the 6 sts in garter st each side = bands). Work bands in garter st until finished measurements. Continue with rib until piece measures 4 cm. Switch to circular needle size 4 mm. K next row from RS while AT THE SAME TIME dec 49-51-56-61-67-75 sts evenly (do not dec over band sts) = 192-208-224-240-264-292 sts. Continue in stocking st vertically. AT THE SAME TIME when piece measures 6-6-6-7-7-7 cm, insert 4 markers in piece as follows (= for waist front and back): Work 28-28-30-30-32-33 sts, insert 1st marker before next st, work 47-54-59-66-74-86 sts, insert 2nd marker before next st, work 42-44-46-48-52-54 sts, insert 3rd marker before next st, work 47-54-59-66-74-86 sts, insert 4th marker before next st and work the remaining 28-28-30-30-32-33 sts on needle. On next row from RS dec as follows: 1 st before 1st and 3rd marker and 1 st after 2nd and 4th marker -READ DECREASE TIP 1! Repeat dec every 6th-6th-6th-6th-6th-8th row a total of 7-7-7-6-6-5 times = 164-180-196-216-240-272 sts. AT THE SAME TIME when piece measures 15-17-11-13-15-17 cm, cast off for BUTTON HOLES - see explanation above - on right front band. When piece measures 23 cm, inc on next row from RS as follows: 1 st before 1st and 3rd marker and 1 st after 2nd and 4th marker - inc 1 st by picking up st from previous row and work this in stocking st. Repeat inc every 8th-8th-8th-8th-8th-10th row a total of 4-4-4-5-5-5 times = 180-196-212-236-260-292 sts. When piece measures 36-37-38-39-40-41 cm, work next row from RS as follows: K 42-46-50-56-62-70 sts, cast off 12 sts (= armhole), work 72-80-88-100-112-128 sts (= back piece), cast off 12 sts (= armhole) and work the remaining 42-46-50-56-62-70 sts = 156-172-188-212-236-268 sts remain on needle. Put piece aside and knit the sleeves. SLEEVE: Worked in the round on double pointed needles. Cast on 60-63-63-66-69-72 sts on double pointed needles size 3.5 mm. Work rib K1/P2 over all sts. When rib measures 3 cm, switch to double pointed needles size 4 mm. Continue to K 1 round while AT THE SAME TIME dec 12-13-11-12-13-14 sts evenly = 48-50-52-54-56-58 sts. Insert a marker at beg of round (= mid under sleeve). Continue in stocking st. When piece measures 6-6-6-6-7-7 cm, inc 1 st each side of marker. Repeat inc every 3-2½-2½-2½-2-2 cm a total of 13-14-15-15-16-17 times = 74-78-82-84-88-92 sts. When piece measures 45-45-44-44-43-43 cm (NOTE! Shorter measurements in the larger sizes because of longer sleeve cap and broader shoulder width) cast off 12 sts mid under sleeve (i.e. cast off 6 sts each side of marker) = 62-66-70-72-76-80 sts remain on needle. Put piece aside and knit another sleeve. YOKE: Slip sleeves on to same circular needle as body where armholes were cast off = 280-304-328-356-388-428 sts. P 1 row from WS while AT THE SAME TIME dec 21-19-17-19-25-39 sts evenly (dec 1 st by P 2 sts tog, do not dec over band sts) = 259-285-311-337-363-389 sts. On next row from RS continue as follows: 6 sts in garter st, * M.1 - see explanation above, K 13 sts *, repeat from *-* a total of 9-10-11-12-13-14 times, finish with M.1 and 6 sts in garter st. Continue with the pattern vertically. When piece measures 2 cm from beg of pattern, on next row from RS dec 1 st in every K section - READ DECREASE TIP 2! Repeat dec from RS on every 8th row a total of 4-4-5-5-5-6 times, then on every 4th row a total of 5-5-4-5-5-4 times = 178-195-212-217-233-249 sts. When pattern measures 20-21-22-23-24-25 cm - finish after 1 repetition vertically - K 1 row from RS while AT THE SAME TIME dec 39-47-55-54-64-74 sts evenly = 139-148-157-163-169-175 sts. Work next row from RS as follows: 6 sts in garter st, * rib P 1, K 2 *, repeat from *-* until 7 sts remain, finish with P 1 and 6 sts in garter st. Continue working an elevation in the neck with short rows with K over K and P over P as follows (1st row = from RS): Work until 33-34-36-38-39-40 sts remain on needle, turn piece, work back until 33-34-36-38-39-40 sts remain on the other side. Turn piece, work until 41-42-46-48-50-51 sts remain, turn piece and work back until 41-42-46-48-50-51 sts remain on the other side. Turn piece, work until 49-51-56-58-61-63 sts remain, turn piece and work back until 49-51-56-58-61-63 sts remain on the other side. Turn piece, work until 57-60-66-69-72-75 sts remain, turn piece and work back until 57-60-66-69-72-75 sts remain on the other side. Turn piece, work the rest of the row. Turn piece. Work 5 rows with K over K and P over P over all sts (work bands as before), then cast off with K over K and P over P. ASSEMBLY: Sew the openings under the sleeves tog. Sew on buttons. |
|||||||||||||
Diagram explanations |
|||||||||||||
|
|||||||||||||
 |
|||||||||||||
Have you finished this pattern?Tag your pictures with #dropspattern #prettymecardigan or submit them to the #dropsfan gallery. Do you need help with this pattern?You'll find 20 tutorial videos, a Comments/Questions area and more by visiting the pattern on garnstudio.com. © 1982-2026 DROPS Design A/S. We reserve all rights. This document, including all its sub-sections, has copyrights. Read more about what you can do with our patterns at the bottom of each pattern on our site. |
|||||||||||||


With over 40 years in knitting and crochet design, DROPS Design offers one of the most extensive collections of free patterns on the internet - translated to 17 languages. As of today we count 324 catalogues and 12290 patterns translated into English (UK/cm). 12290
We work hard to bring you the best knitting and crochet have to offer, inspiration and advice as well as great quality yarns at incredible prices! Would you like to use our patterns for other than personal use? You can read what you are allowed to do in the Copyright text at the bottom of all our patterns. Happy crafting!
Post a comment to pattern DROPS 127-41
We would love to hear what you have to say about this pattern!
If you want to leave a question, please make sure you select the correct category in the form below, to speed up the answering process. Required fields are marked *.