
Popular categories
Looking for a yarn?


Comments / Questions (56)
![]() Sophie wrote:
Sophie wrote:
Bonjour, je ne comprends pas cette phrase au début de l'explication du devant gauche :"augm 1 m côté milieu devant ". Doit-on augmenter au milieu ou sur un côté ? Merci pour votre aide
11.04.2026 - 23:50DROPS Design answered:
Bonjour Sophie, le milieu du devant est la partie qui se trouve au milieu du devant du gilet, autrement dit, le côté "ouverture" du gilet; pour le devant gauche, vous augmenterez alternativement tous les 2 et 3 rangs, soit en fin de rang sur l'endroit soit en début de rang sur l'envers pour former la pointe du devant - pour le devant droit, vous augmenterez soit en début de rang sur l'endroit, soit en fin de rang sur l'envers. Bon tricot!
13.04.2026 - 09:41
![]() Els wrote:
Els wrote:
Hoe kun je iedere 2e en dan 3e naald meerderen?
16.03.2026 - 09:53DROPS Design answered:
Dag Els,
Je meerdert de ene keer na 2 naalden en daarna na 3 naalden en dit herhaal je steeds. Dus de ene keer zit er 1 naald tussen zonder dat je meerdert en de andere keer zitten er 2 naalden tussen zonder dat je meerdert.
17.03.2026 - 20:48
![]() Ingeborg wrote:
Ingeborg wrote:
Hei, jeg lurte på hva som menes når det står legge opp 1 m vekselsvis på hver 2.p og 3.p. Da blir det jo økning på venstre side ut mot erme også. Jeg startet bare med og kun legge til en maske hvert gang jeg kom tilbake til oppleggstråden, altså annenhver pinne.
12.02.2026 - 15:39DROPS Design answered:
Hei Ingeborg, Du legger opp (for eksempel) på begynnelsen av 1. pinnen og 3. pinnen, deretter på enden av 6. pinnen og 8. pinnen, så på begynnelsen av 11. og 13. pinnen, osv. Hilsen Drops Team.
13.02.2026 - 06:43
![]() Sandra wrote:
Sandra wrote:
Ik brei in maat 0-3. Heb het linkervoorpand gebreid tot en met de laatste mindering (27 x) en mouwopzet. Er staat dan, ‘zet bij een hoogte van 26 cm 2 nieuwe steken op’. Als ik dan doorbrei tot 36 cm hoogte, dan minder ik niet meer en gaat het werk recht omhoog (3 cm). Dat zie ik niet op de foto/tekening. Moet ik blijven minderen?
20.01.2026 - 20:27DROPS Design answered:
Dag Sandra,
Je zet deze nieuwe steken op aan de halszijde op schouderhoogte en je mindert niet meer. De schoudernaad zit als het ware een beetje op het achterpand en met het opzetten van deze steken begin je met de ronding voor de hals op het achterpand.
15.03.2026 - 19:18
![]() Anne Marie Mørstad wrote:
Anne Marie Mørstad wrote:
Hvordan strikke ermer?
24.10.2025 - 11:10DROPS Design answered:
Hei Anne Marie. Det strikkes samtidig som forstykket, det legges ut masker til erm. Først strikkes det ene forstykket, så det legges det ut masker til ermet og det strikkes opp til skulderen. Det andre forstykke strikkes likt. Så settes forstykkene sammen på samme pinne og ryggen strikkes nedover. mvh DROPS Design
27.10.2025 - 11:44
![]() Helen wrote:
Helen wrote:
Sorry another question when you count increases alternately on row 2 and 3 does that mean you knit in groups of 3 rows and increase on both rows 2 and 3 or one time on row 2 then knit another block of 3 row ms increase on row 3. I hav got to the point where decreasing starts and only have 7 cm not 12 cm thank
27.06.2025 - 13:31DROPS Design answered:
Dear Helen, you will increase like this: *work 1 row without increase, work 1 row with increase, work 2 rows without increase, work 1 row with increase*, and repeat from *-* until you have increased the number of requested stitches. Make sure you get the correct tension = 48 rows garter stitch = 10 cm; and adjust length/increase if needed if your tension is not the same. Happy knitting!
27.06.2025 - 16:46
![]() Helen wrote:
Helen wrote:
You said increase mid front in rows 2 and 2 I have been doing this in the dead middle off the row but the shape doesn’t seem to fit with the placement of the button hole. Could you explain what you mean by mid front? Please?
26.06.2025 - 08:40DROPS Design answered:
Dear Helen, on left front piece you will increase towards mid front alternately every 2nd and every 3rd row, this means either at the end of a row from RS or at the beg of a row from WS. When all decreases are done, work a buttonhole at the beginning of a row from WS, after the first 3 sts. Then you will decraese for neck on every row (end of row from RS/beg of row from WS) then on every 2nd row (end of row from RS). Hope this can help. Happy knitting!
26.06.2025 - 17:03
![]() Santier wrote:
Santier wrote:
Bonjour, pour les chaussettes, je ne comprends pas pour la longueur du pied (10cm) par rapport aux diminutions (jusqu'à la fin ?) Merci
22.05.2025 - 10:39DROPS Design answered:
Bonjour Mme Santier, les 10 cm de longueur de pied correspondent au nombre de mailles avant les diminutions, soit les 54 mailles/2,6/2 pour la longueur du pied = environ 10 cm. Les diminutions jusqu'à la fin correspondent à la hauteur du chausson = le côté du pied jusque sous le pied. À titre d'exemple, cette vidéo montre comment réaliser ce type de chaussons. Bon tricot!
22.05.2025 - 10:49
![]() Janet Mauza wrote:
Janet Mauza wrote:
When I assemble the two front pieces on one needle , with right sides up, one side is on a different row of garter stitch knitting , so that I would get a stockinette effect at shoulder row on one side. Only solution I can see is that last row of first piece should have been a continuation from neck stitches, to extra 2 cast on there and knit across
19.02.2025 - 01:04DROPS Design answered:
Dear Mauza, if you continue working both pieces from the right side, make sure that last row on both front pieces was worked from the wrong side so that the garter stitch will continue the same way as before. Happy knitting!
20.02.2025 - 14:25
![]() Pam Hartman wrote:
Pam Hartman wrote:
Is the left side piece on the actual left side of the garment or is it the piece on the left side of the picture (actual right side of the garment)?
03.02.2025 - 23:55DROPS Design answered:
Hi Pam, The left front piece is also the left front piece when the garment is worn. Happy crafting!
04.02.2025 - 06:40
|
|
Criss Cross#crisscrossjacket |
|
 |
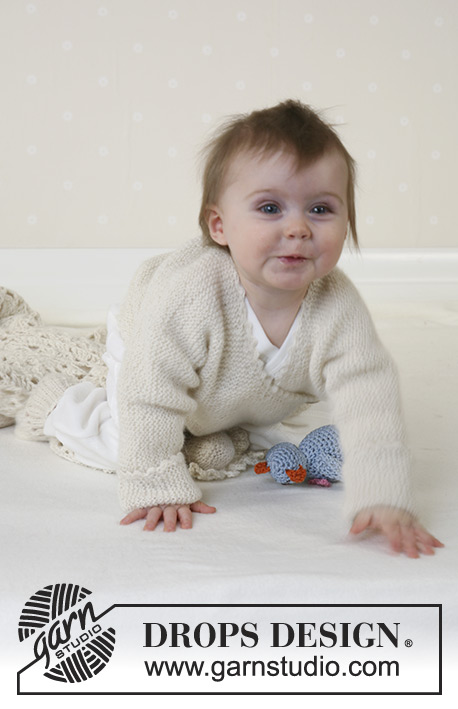 |
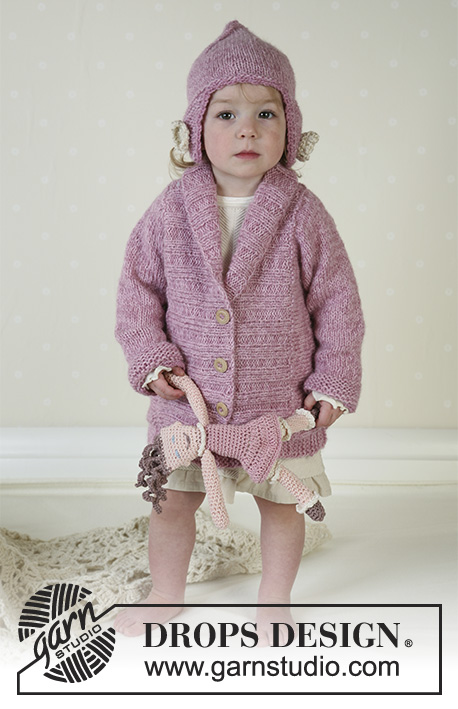
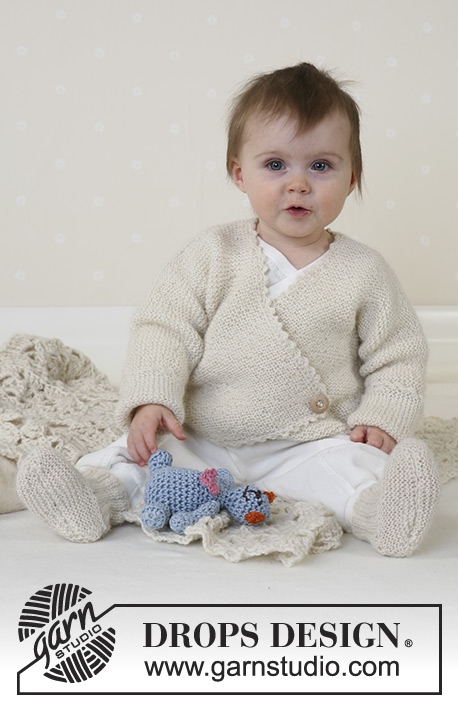
Jacket, socks, soft toy and blanket in Alpaca
DROPS Baby 13-3 |
|
|
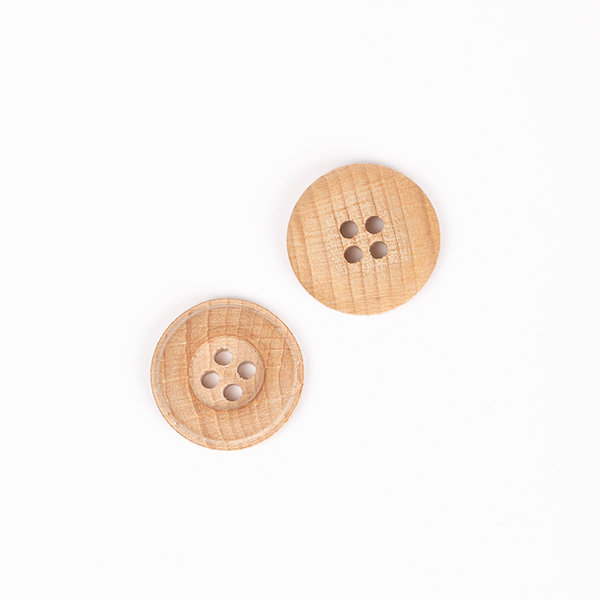
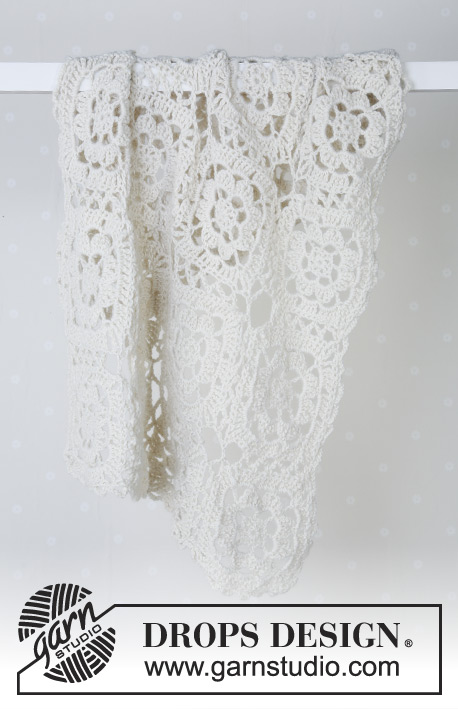
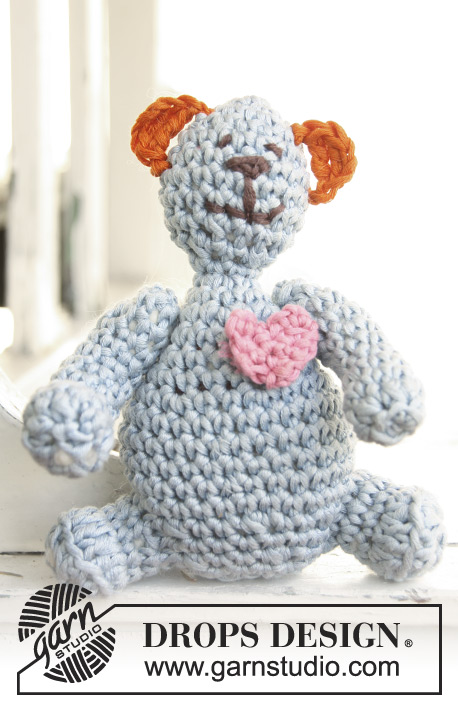
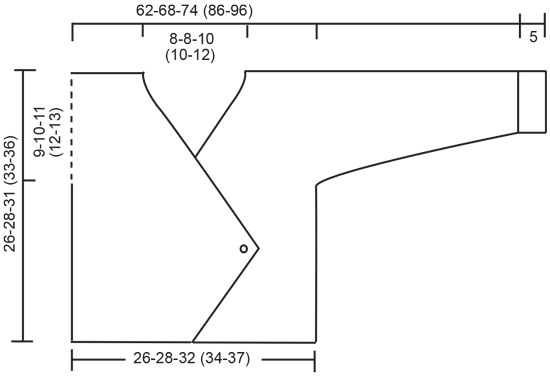
JACKET: Knitting tension: 24 sts x 48 rows on needle size 3mm in garter sts = 10 x 10 cm. Garter sts(back and forth on needle): Knit all rows Decreasing tips (applies to sloping edge): Dec 1 st as follows: K2 tog. All pieces are knitted back and forth on circular needle. Begin with left front piece, inc for sleeves and knit to shoulder. Knit right front piece in the same way and put both front pieces on the same needle. Now knit back from top down. Left front piece: Loosely cast on 31-34-38 (41-44) sts with Alpaca on circular needle size 3mm and knit garter sts. At the same time inc 1 st towards mid front on 2nd and 3rd row alternately a total of 18-20-24 (28-30) times = 49-54-62 (69-72) sts. After the last inc knit 4 rows garter sts. On next row make buttonhole from the wrong side as follows: Knit 3 sts, K2 tog, yo, knit remaining sts. Knit yo on next row. Knit another 4 rows garter sts = 10 rows of garter sts after the last inc. Piece measures approx 11-12-15 (17-18) cm. Read all of the following section before knitting it! On next row, dec 1 st towards mid front by knitting tog the first 2 sts (to ensure the edge doesn’t become too loose). Now dec for sloping front edge towards mid front as follows – see Decreasing tips: 1 st on every row a total of 0-0-7 (19-12) times and then 1 st on every other row a total of 27-30-28 (20-21) times. At the same time when piece measures 17-18-20 (21-23) cm cast on new sts on every other row for sleeve: 7-6-4 (8-4) sts 1-2-2- (1-4) times, 8-8-6 (6-6) sts 3-3-5 (7-7) times and 24 sts 1 times. After all dec and inc are complete there are 76-83-88 (103-112) sts on shoulder/sleeve. When piece measures 26-28-31 (33-36) cm (= measure up till shoulder) cast on 2 new sts towards the neck. Knit 2 rows garter sts and cast on another 2 new sts towards the neck = 80-87-92 (107-116) sts. Put all sts on a thread. Right front piece: Cast on and knit as left front, but mirrored. Back piece: Put both front pieces in on the same circular needle as follows: 80-97-92 (107-116) sts from one front piece, loosely cast on 12-12-16 (16-20) sts for neck, 80-87-92 (107-116) sts from the other front piece = 172-186-200 (230-252) sts on row. Insert a marking thread and measure piece from here from now on. Knit garter sts. When piece measures 6-7-7 (7.5-7.5) cm cast off sts each side on every other row – i.e. at the beginning of each row – as follows: 24 sts 1 time, 8-8-6 (6-6) sts 3-3-5 (7-7) times and 7-6-4 (8-4) sts 1-2-2 (1-4) times = 62-66-76 (82-88) sts. Continue until piece measures 25-27-30 (32-35) cm from marking thread and cast off loosely. Assembly: Sew side and sleeve seams in the outer loops of sts. Sew the last 6 cm towards sleeve edge very neatly, and fold approx 5 cm against the right side. Sew on button to fit buttonhole and sew on flat button on the wrong. Crochet border: Crochet a border round all edges using Alpaca and crochet hook size 2.5 as follows: 1 dc in 1st st, *3 ch, 1 tr in the 1st of the 3 ch just crochet, 1 dc in the each of the next 3 sts*, repeat from *-* and finish with 1 sl st in 1st dc from beginning of round. SOCKS: Size: 1/3 – 6/9 – 12/18 months (2 years) To fit foot length: 10-11-12 (14) cm Knitting tension: 26 sts x 52 rows on needle size 2.5mm in garter sts = 10 x 10 cm Rib: *K2, P2*, repeat from *-* The sock is knitted back and forth from mid back. Cast on 48-52-56 (56) sts with 2 strands of Alpaca and needles size 2.5mm. Remove 1 strand and knit 5-6-6- (7) cm Rib – adjust so that next row is from the wrong side. Knit 1 row from the wrong side, at the same time dec 14-14-18 (14) sts evenly on row = 34-38-38 (42) sts. With row of holes: Knit next row from the right side as follows: K1, *K2 tog, yo*, repeat from *-* and finish with K1. Knit 1 row from wrong side. Without row of holes: Knit 1 row from right side and 1 row from wrong side. Now put the outermost 12-13-13 (15) sts each side on a thread. Knit 4-4.5-5.5 (6.5) cm garter sts over the middle 10-12-12 (12) sts. Put sts from thread back on needle and pick up 10-11-13 (16) sts on each side of middle piece = 54-60-64 (74) sts. Knit 3-4-5 (5) cm garter sts over all sts, at the same time after 1.5-2-2.5 (3) dec on every other row until finished measurements as follows: Dec 1 st at the beginning and at the end of row and K2 tog on each side of the 2 middle sts. Cast off when foot measures 10-11-12 (14) cm and sew seam under foot and mid back. Pull a silk ribbon or similar through holes. SOFT TOY: see pattern 13-28 BLANKET: see pattern 13-20 |
|
 |
|
Have you finished this pattern?Tag your pictures with #dropspattern #crisscrossjacket or submit them to the #dropsfan gallery. Do you need help with this pattern?You'll find 18 tutorial videos, a Comments/Questions area and more by visiting the pattern on garnstudio.com. © 1982-2026 DROPS Design A/S. We reserve all rights. This document, including all its sub-sections, has copyrights. Read more about what you can do with our patterns at the bottom of each pattern on our site. |
|


With over 40 years in knitting and crochet design, DROPS Design offers one of the most extensive collections of free patterns on the internet - translated to 17 languages. As of today we count 324 catalogues and 12290 patterns translated into English (UK/cm). 12290
We work hard to bring you the best knitting and crochet have to offer, inspiration and advice as well as great quality yarns at incredible prices! Would you like to use our patterns for other than personal use? You can read what you are allowed to do in the Copyright text at the bottom of all our patterns. Happy crafting!
Post a comment to pattern DROPS Baby 13-3
We would love to hear what you have to say about this pattern!
If you want to leave a question, please make sure you select the correct category in the form below, to speed up the answering process. Required fields are marked *.