Comments / Questions (50)
![]() Nathalie A wrote:
Nathalie A wrote:
Bonjour, peut-on tricoter ce modèle avec des fils du groupe A ? Merci pour votre reponse
14.01.2026 - 18:16DROPS Design answered:
Bonjour Nathalie A., pas vraiment car vous n'aurez pas la bonne tension, ou alors une texture plus serrée. Retrouvez tous les modèles équivalents avec une laine du groupe de fils A (avec 1 fil ou plus) ici. Bon tricot!
15.01.2026 - 10:24
![]() Cathy wrote:
Cathy wrote:
Bjr Je ne vois rien concernant les boutonnières dans vos explications !
14.12.2025 - 19:32
![]() Jean Bawcutt wrote:
Jean Bawcutt wrote:
How do i do the I CORD Edge? Is it just a rib pattern?
09.12.2025 - 17:15DROPS Design answered:
Hi Jean, Here is a link to a video showing you how to work the I-cord edge: https://www.garnstudio.com/video.php?id=1343&lang=en Regards, Drops Team.
10.12.2025 - 07:02
![]() Diane Crevier wrote:
Diane Crevier wrote:
Is there away to download this pattern to knitCompanion?
19.11.2025 - 22:24DROPS Design answered:
Hi Diane, Right click on the pattern and you get a drop-down meny where you can click on Save As and save the pattern to the file of your choosing. Regards, Drops Team.
20.11.2025 - 06:23
![]() Arwen wrote:
Arwen wrote:
Bonjour, Je voudrais bien réaliser ce modèle, mais je ne sais pas ce que veut dire I-cord ??? Merci pour votre réponse
16.11.2025 - 20:20DROPS Design answered:
Bonjour Mme Arwen, c'est une technique qui consiste à former un petit tube tel un tricotin ici, en bordure, retrouvez dans cette vidéo comment on tricote ce type de bordure I-cord avec des mailles point mousse après/avant. Bon tricot!
17.11.2025 - 08:31
![]() Martina wrote:
Martina wrote:
Hej igen Ignorera min fråga, jag upptäckte nu att det bara är prydnadsknappar!
30.10.2025 - 15:01
![]() Martina wrote:
Martina wrote:
Hej! När, var och hur stickar man knapphålen?
30.10.2025 - 12:04DROPS Design answered:
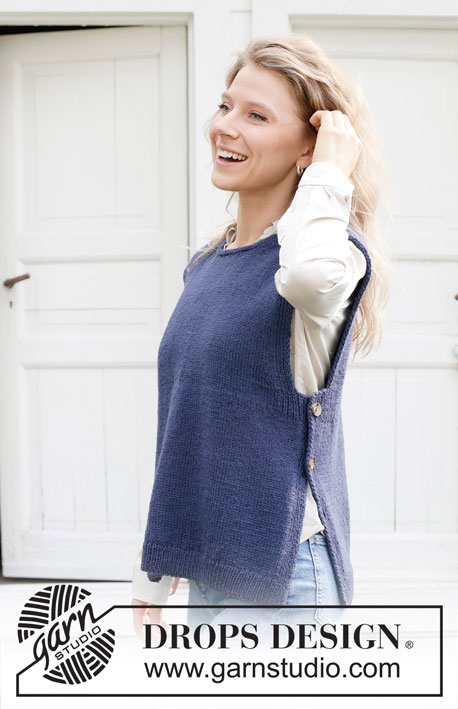
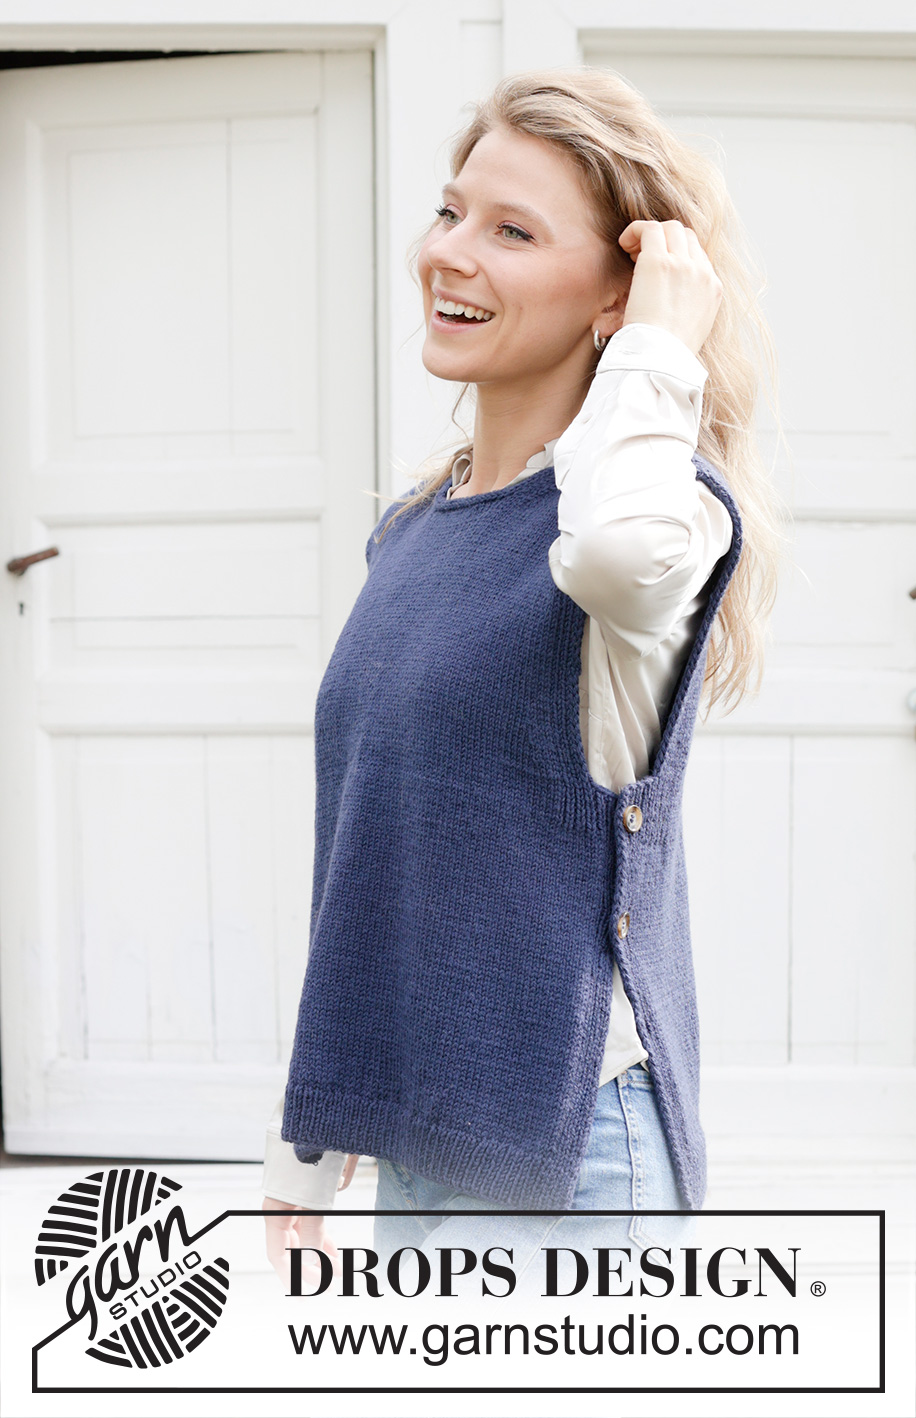
Hei MArtina. Det sys 2 pyntknappar i var sida om västen, kantmaskorna från framstycket läggs över kantmaskorna från bakstycket, sedan sys knapparna fast genom båda lager. Placera översta knappen ca 1 cm från ärmhålet och placera den nästa ca 9-10 cm nedanför. mvh DROPS Design
03.11.2025 - 14:21
![]() HALA wrote:
HALA wrote:
Vill gärna ha förklaring för axel minskning, är minskningen utaxeln eller inne axeln?
29.10.2025 - 19:23
![]() Leclerc wrote:
Leclerc wrote:
Bonjour. Je vois le nombre de pelotes les aiguilles mais pas l\'explication du modèle...je cherche où. Désolée de vois déranger mais ce débardeur avec boutons me plaît bcp. Bonne journée et merci
24.10.2025 - 14:21DROPS Design answered:
Bonjour Mme Leclerc, faites défiler la page vers le bas, après la liste des fournitures, vous trouverez des photos (modèles que vous pourriez aimer), puis les liens pour acheter la laine selon le pays, la pelote, les boutons et les aiguilles, les explications commencent juste après Explications. Bon tricot!
29.10.2025 - 14:49
![]() Blampain Agnès wrote:
Blampain Agnès wrote:
Bonjour, comment réaliser le modèle Blue Night Vest avec deux aiguilles et NON une aiguille circulaire? J'attends votre réponse avec impatience pour vous commander le nécessaire. Merci d'avance, Agnès
17.10.2025 - 09:08DROPS Design answered:
Bonjour Agnès, le pull est realise en allers et retours, donc vous pouvez le tricoter avec les aiguilles droites. L'aiguille circulaire peut etre utile pour relever les mailles autour de l'encolure. Pour rabattre les mailles avec I-cord, vous pouvez utiliser 1 aiguille double pointes (est plus courte) ou 1 aiguille droite. Bon tricot!
17.10.2025 - 09:35
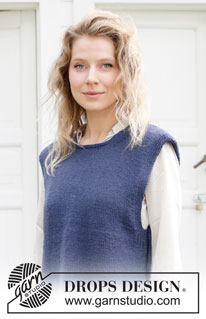
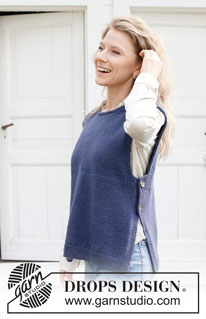
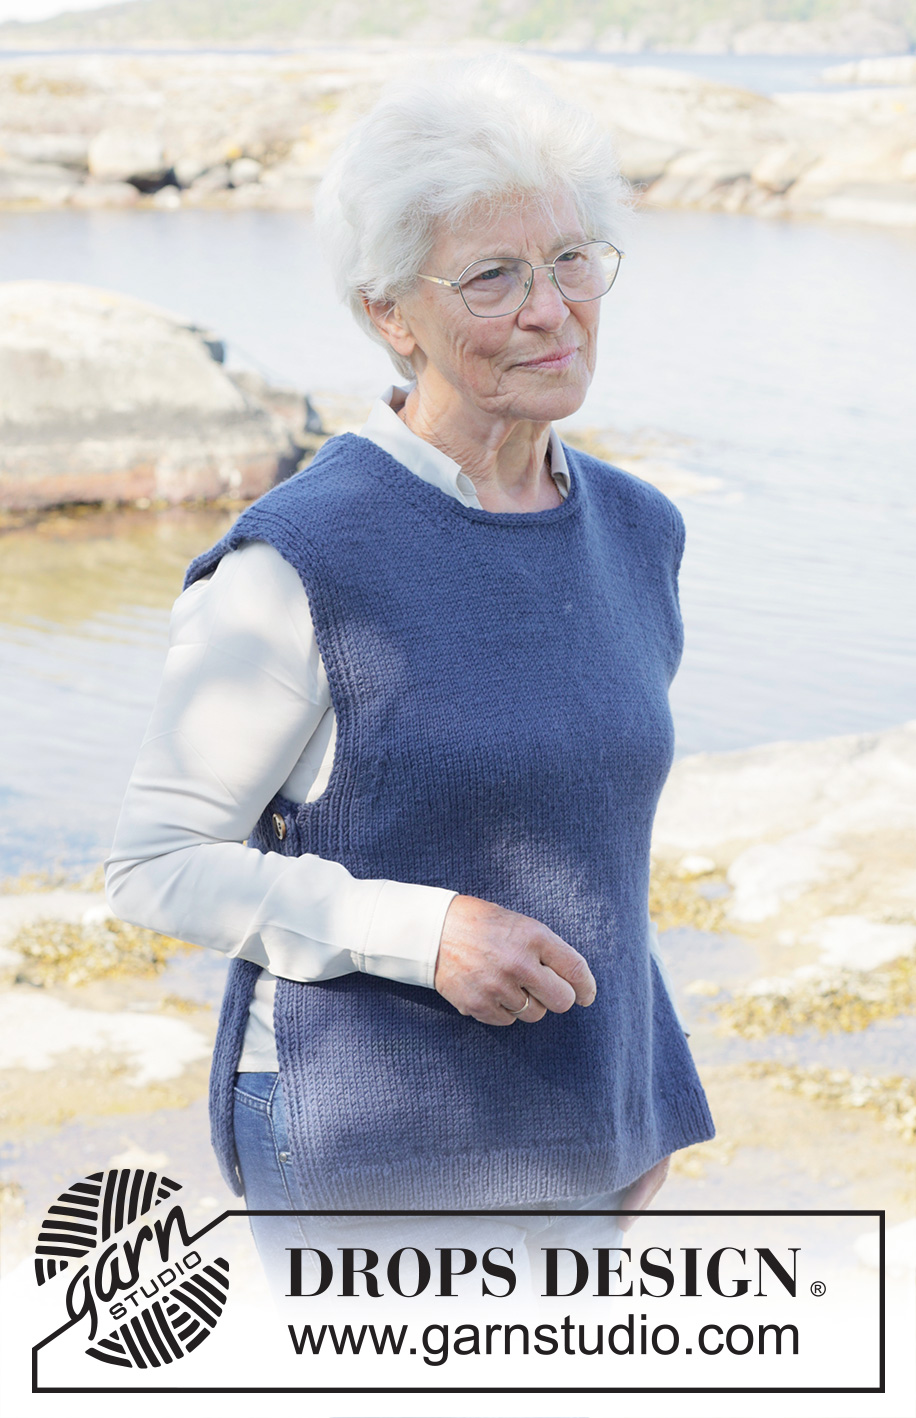
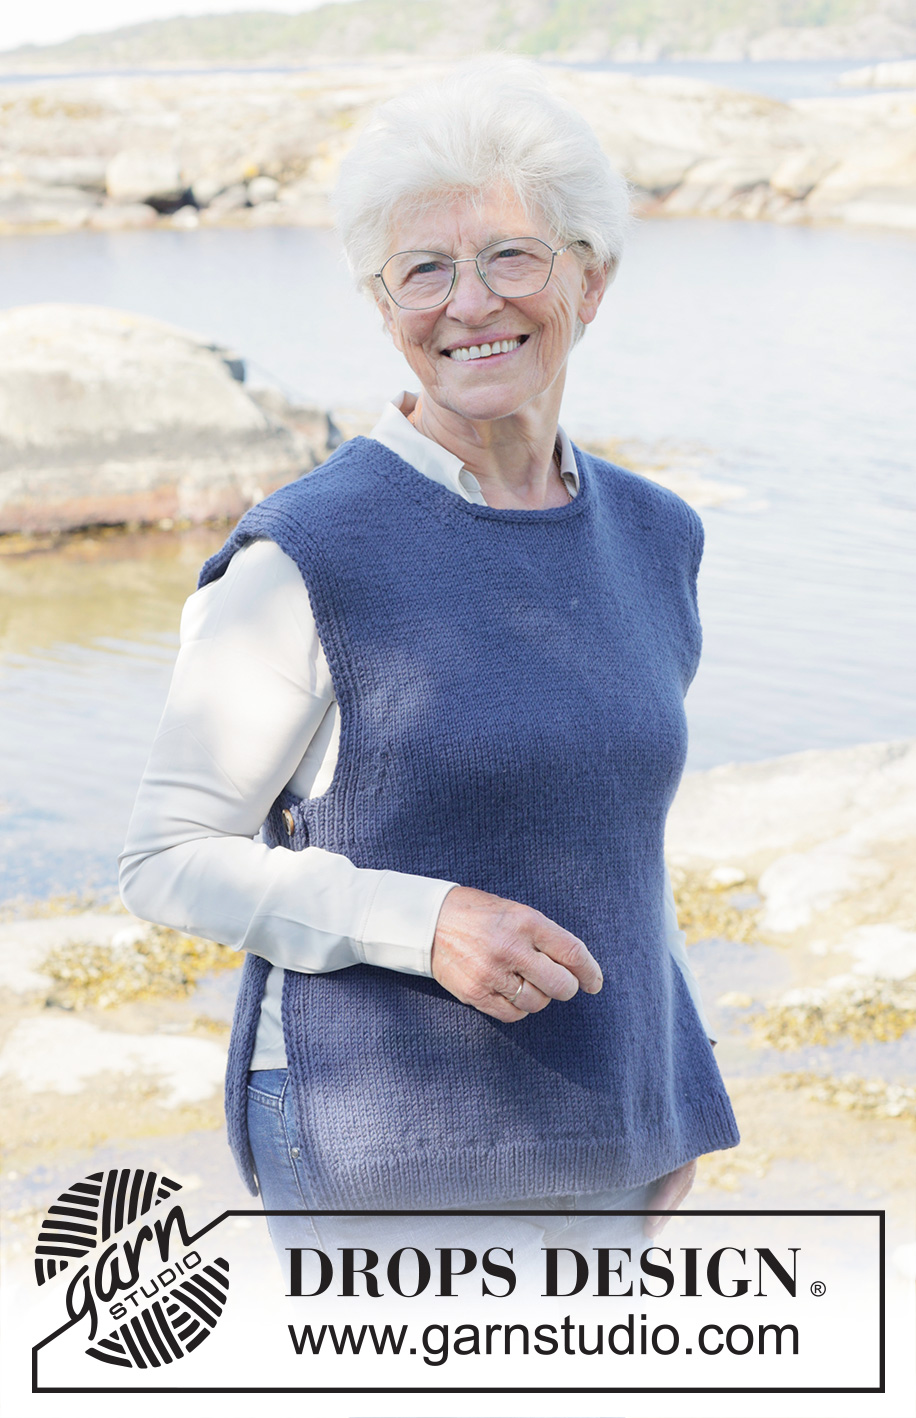
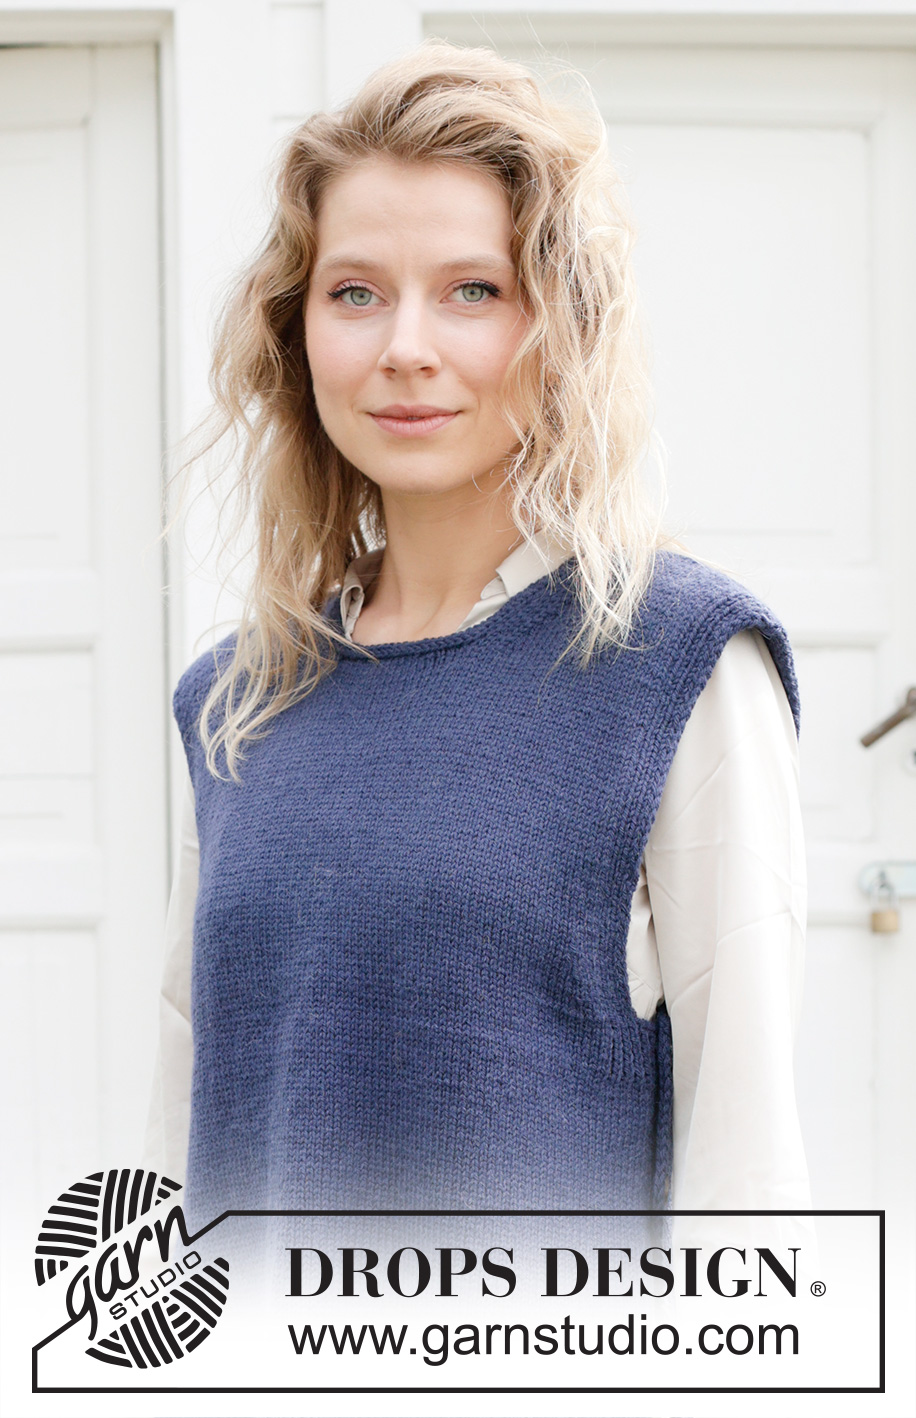
Blue Night Vest#bluenightvest |
|||||||
 |
 |
||||||
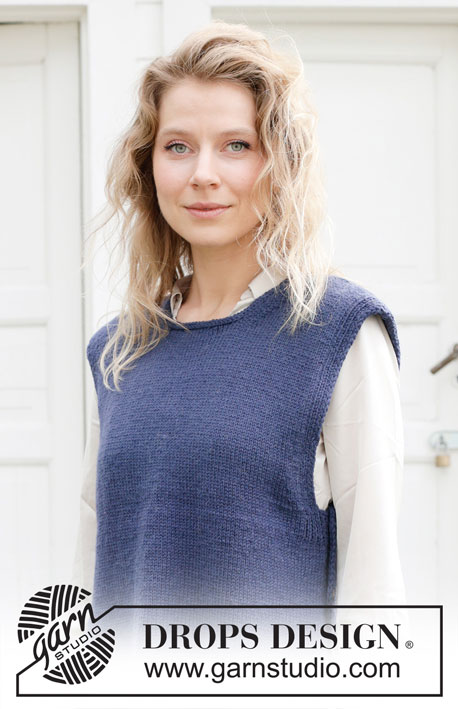
Knitted vest in DROPS Lima. The piece is worked bottom up with round neck, split in sides and I-cord. Sizes S - XXXL.
DROPS 254-34 |
|||||||
|
------------------------------------------------------- EXPLANATIONS FOR THE PATTERN: ------------------------------------------------------- PATTERN: See diagrams A.1 and A.2. The diagrams show the pattern from the right side. EDGE WITH I-CORD: BEGINNING OF ROW: Slip 1 stitch purl-wise with the strand in front, knit 1, work 6 stitches A.1. END OF ROW: Work until there are 8 stitches left on the row, work 6 stitches A.2, slip 1 stitch purl-wise with the strand in front, knit 1. DECREASE TIP-1 (for armholes): All decreases worked from right side! BEGINNING OF ROW: Work the first 10 stitches as before, slip 1 stitch purl-wise with the strand in front, knit 1, pass the slipped stitch over the knitted stitch (= 1 stitch decreased). END OF ROW: Work until there are 12 stitches left on the row, knit 2 together (= 1 stitch decreased), work to end of row as before. DECREASE TIP-2 (for neckline): All decreases worked from right side! BEGINNING OF ROW: Work the first 3 stitches as before, slip 1 stitch purl-wise with the strand in front, knit 1, pass the slipped stitch over the knitted stitch (= 1 stitch decreased). END OF ROW: Work until there are 5 stitches left on the row, knit 2 together (= 1 stitch decreased), knit 3. CAST OFF WITH I-CORD: Cast 3 stitches on to the right needle from the right side. Do not turn. Slip the 3 stitches onto the left needle, so the strand is 3 stitches in on the needle (the strand tightens when working to form a small tube). ROW 1 (right side): Knit 2, knit 2 twisted together. Slip the 3 stitches on the right needle onto the left needle, knit 2, knit 2 twisted together. Do not turn. Repeat ROW 1 until there are 3 stitches left on the right needle. Slip these 3 stitches onto the left needle. Cast off. Sew a small stitch, joining the beginning and the end of the I-cord. ------------------------------------------------------- START THE PIECE HERE: ------------------------------------------------------- VEST - SHORT OVERVIEW OF THE PIECE: The piece is worked back and forth with circular needle, bottom up. The front and back pieces are worked separately, then sewn together at the shoulders. Decorative buttons are sewn onto each side. Stitches are knitted up around the neckline, then cast off with I-cord. FRONT PIECE: Cast on 117-127-137-149-163-177 stitches with circular needle size 3.5 mm and DROPS Lima. Work EDGE WITH I-CORD – read description above, rib (knit 1, purl 1) until there are 9 stitches left, knit 1 and work EDGE WITH I-CORD. Continue the rib and edges for 5-5-5-6-6-6 cm. Change to circular needle size 4 mm. From the right side, work the edge as before (8 stitches), work stocking stitch and decrease 9-11-13-13-15-17 stitches evenly over the next 100-110-120-132-146-160 stitches, work the edge as before (8 stitches) = 108-116-124-136-148-160 stitches. Continue back and forth with stocking stitches and 8 edge-stitches on each side. Remember to maintain the knitting tension. When the piece measures 28-29-30-31-32-33 cm, work in addition 9-9-11-15-19-23 ribbed stitches (= A.1/A.2) inside the 8 edge-stitches, giving an edge of 17-17-19-23-27-31 stitches on each side. When the piece measures 32-33-34-35-36-37 cm, start to work the armholes as follows: Cast off 9-9-11-15-19-23 stitches each side (now working EDGE WITH I-CORD over 8 stitches as before on each side to finished length). The continue decreasing for armholes as follows every 4th row – read DECREASE TIP-1: 1 stitch 3-5-6-7-8-9 times each side = 84-88-90-92-94-96 stitches. When the piece measures 48-50-51-53-54-56 cm, place the middle 18 stitches on a thread for the neckline and finish each shoulder separately. SHOULDERS: = 33-35-36-37-38-39 stitches. Read DECREASE TIP-2 and decrease for neck 1 stitch every 2nd row 6-6-7-7-8-8 times = 27-29-29-30-30-31 shoulder-stitches. Cast off when the piece measures 56-58-60-62-64-66 cm. BACK PIECE: Cast on 117-127-137-149-163-177 stitches with circular needle size 3.5 mm and DROPS Lima. Work EDGE WITH I-CORD, rib (purl 1, knit 1) until there are 8 stitches left, EDGE WITH I-CORD. Continue this rib and the edges for 5-5-5-6-6-6 cm. Change to circular needle size 4 mm and work as follows from the right side: Work the edge as before (8 stitches), stocking stitch and decrease 9-11-13-13-15-17 stitches evenly over the next 100-110-120-132-146-160 stitches, work the edge as before (8 stitches) = 108-116-124-136-148-160 stitches. Continue back and forth with stocking stitches and 8 edge-stitches on each side. When the piece measures 28-29-30-31-32-33 cm, work in addition 9-9-11-15-19-23 ribbed stitches (= A.1/A.2) inside the 8 edge-stitches, giving an edge of 17-17-19-23-27-31 stitches on each side. When the piece measures 32-33-34-35-36-37 cm, start to work the armholes as follows: Cast off 9-9-11-15-19-23 stitches each side (now working EDGE WITH I-CORD over 8 stitches as before on each side to finished length). The continue decreasing for armholes as follows every 4th row – remember DECREASE TIP-1: 1 stitch 3-5-6-7-8-9 times each side = 84-88-90-92-94-96 stitches. When the piece measures 52-54-56-58-60-62 cm, cast off the middle 26-26-28-28-30-30 stitches for the neckline and finish each shoulder separately. SHOULDERS: = 29-31-31-32-32-33 stitches. Remember DECREASE TIP-2 and decrease for neck 1 stitch every 2nd row 2 times = 27-29-29-30-30-31 shoulder-stitches. Cast off when the piece measures 56-58-60-62-64-66 cm. ASSEMBLY: Sew the shoulder seams. Sew 2 buttons onto each side of the vest; the edge stitches from the front piece are placed over the edge stitches from the back piece and the buttons sewn on through both layers. Position the top button 1 cm below the armhole and the bottom button 9-10 cm further down. NECKLINE: Using circular needle size 3.5 mm and DROPS Lima, start on one shoulder and knit up 84-84-90-90-96-96 stitches from the right side, (including the 18 stitches from the thread mid-front). CAST OFF WITH I-CORD– read description above. |
|||||||
Diagram explanations |
|||||||
|
|||||||
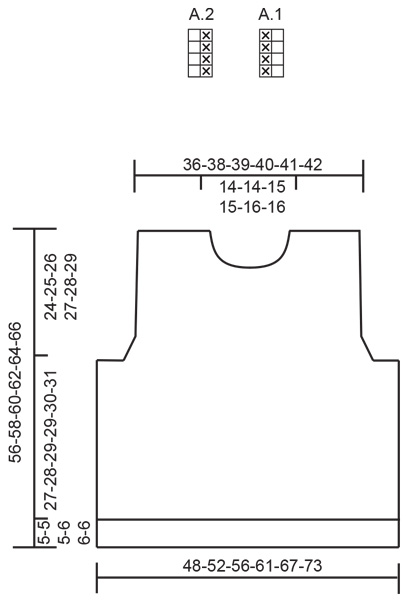 |
|||||||
 |
|||||||
Have you finished this pattern?Tag your pictures with #dropspattern #bluenightvest or submit them to the #dropsfan gallery. Do you need help with this pattern?You'll find 20 tutorial videos, a Comments/Questions area and more by visiting the pattern on garnstudio.com. © 1982-2026 DROPS Design A/S. We reserve all rights. This document, including all its sub-sections, has copyrights. Read more about what you can do with our patterns at the bottom of each pattern on our site. |
|||||||







Post a comment to pattern DROPS 254-34
We would love to hear what you have to say about this pattern!
If you want to leave a question, please make sure you select the correct category in the form below, to speed up the answering process. Required fields are marked *.