Comments / Questions (27)
![]() Chardavoine wrote:
Chardavoine wrote:
Bonjour,Je ne vois pas le a3 dans vos explications. Pouriez vous Me le communiquer Merci
23.01.2026 - 18:30DROPS Design answered:
Bonjour Mm Chardavoine, vous trouverez le diagramme A.3 juste au-dessus du schéma, décomposé en: A.3A (début du motif sur l'endroit), A.3B (motif à répéter), et A.3C (fin du motif sur l'endroit). Bon tricot!
26.01.2026 - 07:49
![]() Anni wrote:
Anni wrote:
Ohjeessa ei näy kuvat. Saisiko ne korjattua näkyviin?
09.11.2025 - 14:53DROPS Design answered:
Nyt nämäkin piirrokset näkyvät.
10.11.2025 - 17:23
![]() Godinas wrote:
Godinas wrote:
Bonjour, Depuis plusieurs jours, malgré plusieurs essais, je n'ai pas le diagramme ni la légende de ce modèle. Il n'y a que des " ? " dans des rectangle. Pouvez-vous me les transmettre d'une autre manière ? Merci d'avance. Cordialement, Blandine
26.10.2025 - 09:34DROPS Design answered:
Bonjour Mme Goldinas, les diagrammes et la légende des symboles est de nouveau disponible, merci pour votre patience. Bon tricot!
28.10.2025 - 19:15
![]() Hanna wrote:
Hanna wrote:
Hallo, Ich bin beim rechten Ärmel. Ist es der rechte von vorne drauf schauenden oder vom Träger? Und wo genau muss der makierfaden hin? Und wie soll das 6 Maschen Muster bei 100 Maschen aufgehen? Wie soll man den Ärmel Stricken? also von vorne oder von hinten mit den hin und rückreihen beginnen?
17.10.2025 - 19:37DROPS Design answered:
Liebe Hanna, der rechte Ärmel bezieht sich auf das Tragen des Pulllovers. Den Markierungsfaden setzen Sie nach dem Auffassen der Maschen in die Mitte der Reihe (nach der Hälfte der Maschen). Sie fassen die Maschen in einer Hin-R auf und beginnen das Muster (A.4) mit der 2. Reihe, also mit der Rück-R. Das Muster geht in den 100 Maschen nicht auf, daher müssen Sie ab dem Markierungsfaden abzählen, wo Sie das Muster an der unteren Ärmelmitte beginnen, der Markierungsfaden muss sich zwischen der 5. und 6. Masche des Musters (betrachtet von der Hin-Reihe aus) befinden. Gutes Gelingen!
22.10.2025 - 12:05
![]() Hanna wrote:
Hanna wrote:
Hallo, Ich bin beim rechten Ärmel. Ist es der rechte von vorne drauf schauenden oder vom Träger? Und wo genau muss der makierfaden hin? Und wie soll das 6 Maschen Muster bei 100 Maschen aufgehen? Wie soll man den Ärmel Stricken? also von vorne oder von hinten mit den hin und rückreihen beginnen?
08.10.2025 - 15:16
![]() Henriette wrote:
Henriette wrote:
Jeg strikker str. L og er nået til ærmerne, som starter med A4. Jeg har strikket de 100 masker op, men da mønstret går over 6 masker, kommer mønstret jo ikke til at passe, når det sættes sammen under ærmet, da 6 ikke går op i 100. Er det en fejl eller skal det være sådan?
18.05.2025 - 21:53DROPS Design answered:
Hej Henriette, nej mønsteret vil ikke passe under ærmet, da det også er her du tager ind for at forme ærmet. Sørg for at mønsteret passer over hinanden på selve ærmet :)
21.05.2025 - 14:36
![]() Sadhana Hardikar wrote:
Sadhana Hardikar wrote:
Hello, Thanks for the reply for my last question. I am starting the sleeve now. Do I pick up the 6 cast on stitches inside under sleeve while knitting up the 40+52 stitches? Or 92 stitches are excluding the cast on stitches? Thanks
17.04.2025 - 12:14DROPS Design answered:
Hi Sadhana, You do not pick up stitches across the cast-off stitches under the sleeve. The sleeve is worked back and forth to begin with, either side of these stitches, then joined (after the correct length for your size) and continued in the round. The hole under the sleeve is sewn together to finish. Happy Easter!
19.04.2025 - 17:22
![]() Sadhana Hardikar wrote:
Sadhana Hardikar wrote:
Hello, I am making a small size. While starting to work A4, first row there is no increase in stitches. From next to last round 30 stitches to be increased. That means 2 stitches per row. Am I correct? If yes How do I adjust the increased stitches in pattern? Thanks Or
30.03.2025 - 13:08DROPS Design answered:
Dear Sadhana, in the first round you have no increases for size S. In the next-to-last round (that is, the round right before the last one, and not all rounds until the last one) you increase 30 stitches on that same round. You had 210 stitches so: 210/30 = 7. So you increase all 30 stitches evenly on the same round by working 1 yarn over after every 7th stitch on the round. Happy knitting!
30.03.2025 - 20:14
![]() Hanne Raahauge wrote:
Hanne Raahauge wrote:
Vedr. forstykket på trøjen rammer jeg ikke A2 på bagstykket efter kontrolmål ved ombuk 4 cm yderst langs ærmegabet hvor der blev strikket masker op. Forstykket måler 18 cm men jeg kommer ned over A3 på bagstykket med A1. Jeg strikker str xl.
13.03.2025 - 08:25DROPS Design answered:
Hej Hanne, du strikker A.1 til du når ned til A.1 på bagstykket og først nu fortsætter du med A.2 :)
14.03.2025 - 14:15
![]() Sandrine wrote:
Sandrine wrote:
Merci pour votre réponse rapide. J'ai encore une question : le 1er rang du dos sur le diagramme A.1 ce sont des mailles endroit, sans augmentation, les augmentations commencent au 2ème rang, envers donc. Or vous parlez d'abord d'augmentations sur l'endroit. Je ne comprends pas bien pourquoi. Merci
20.02.2025 - 22:14DROPS Design answered:
Bonjour Sandrine, les mailles augmentées figurent dans les diagrammes A.1A et A.1C mais pas les augmentations elles-mêmes, autrement dit, au 1er rang, vous augmentez 1 m avant A.1A et 1 m après A.1C, au 2ème rang, vous avez donc 1 m en plus dans A.1A et A.1C + vous augmentez aussi 1 maille avant A.1A et 1 maille après A.1C comme indiqué dans les explications. On augmente tous les rangs dans ces diagrammes au début du dos, autrement dit aussi bien sur l'endroit que sur l'envers; les cases blanches sont des mailles jersey endroit (à tricoter à l'envers sur l'envers) ,et les croix vont se tricoter à l'envers sur l'endroit. Bon tricot!
21.02.2025 - 08:38
Variety#varietysweater |
||||||||||||||||||||||||||||||||||||||||
 |
 |
|||||||||||||||||||||||||||||||||||||||
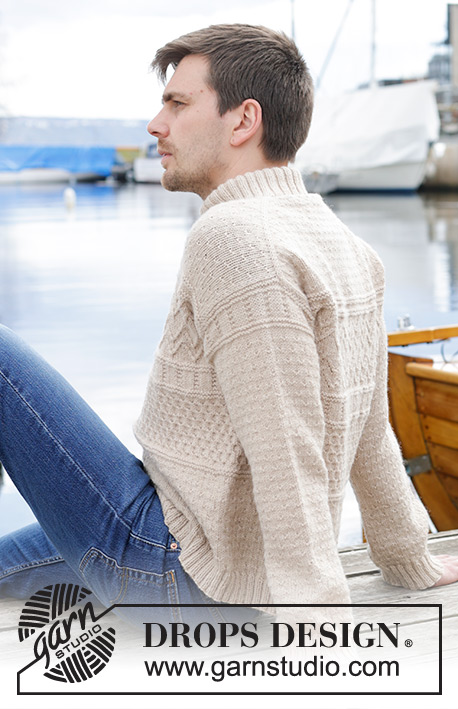
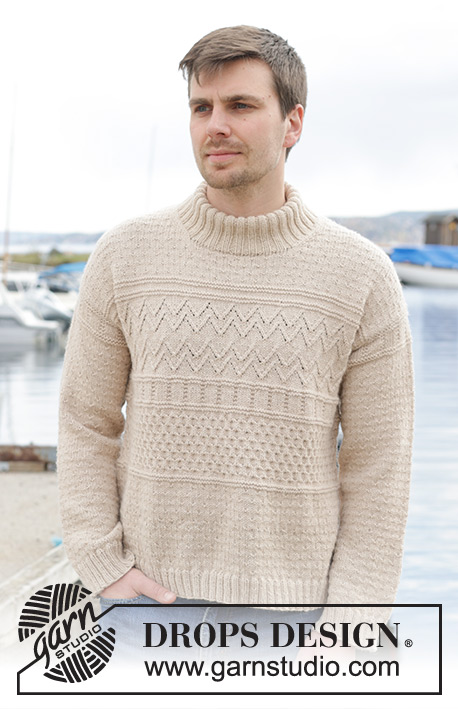
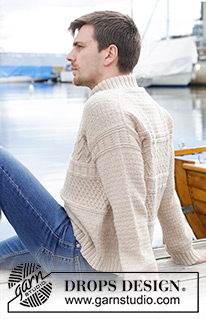
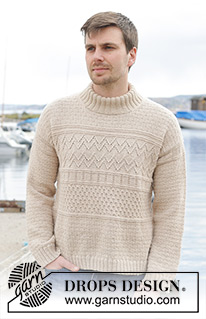
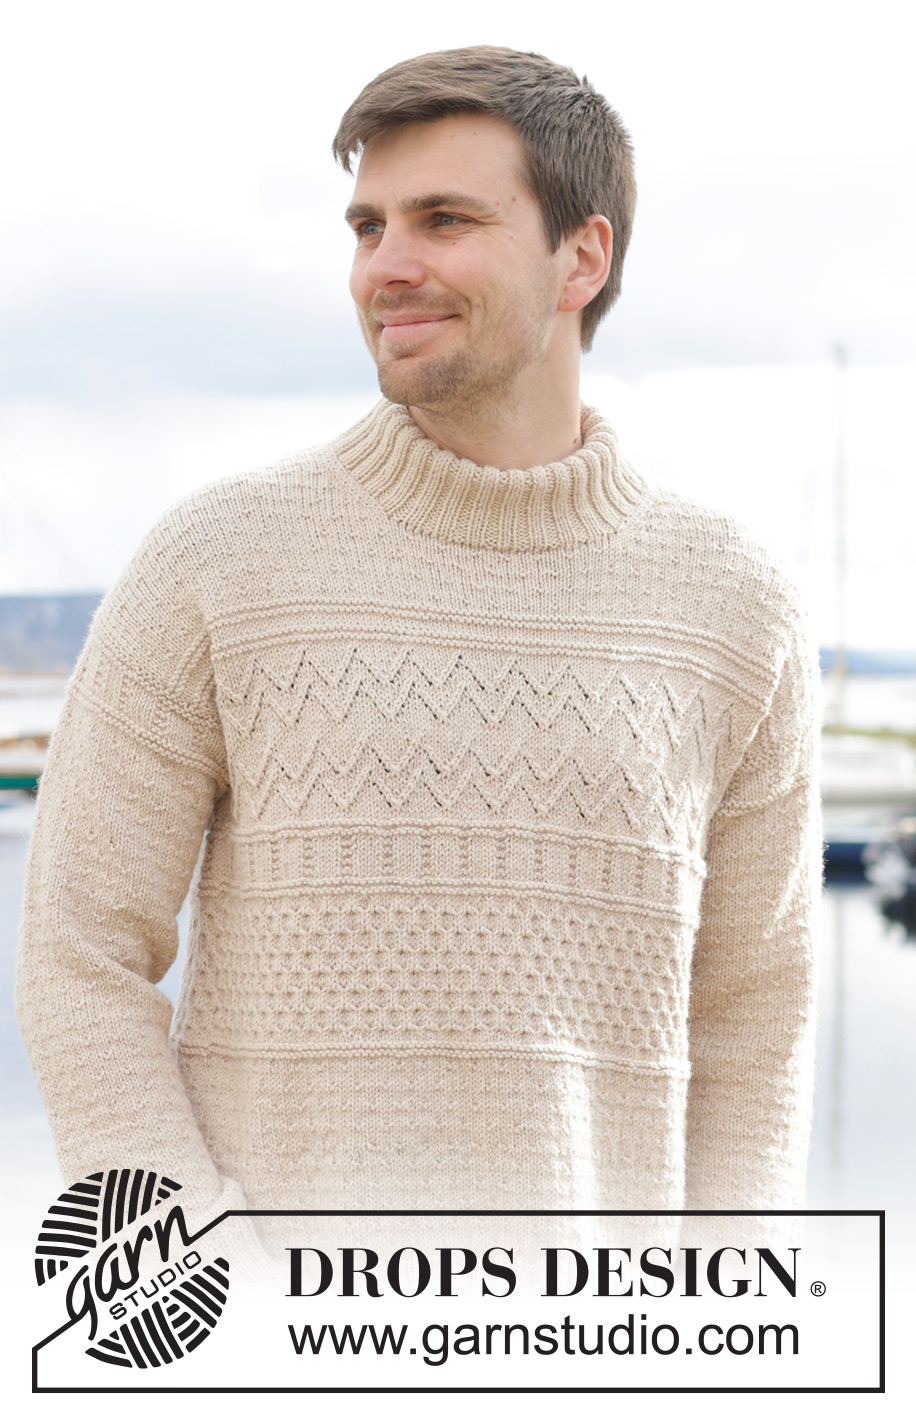
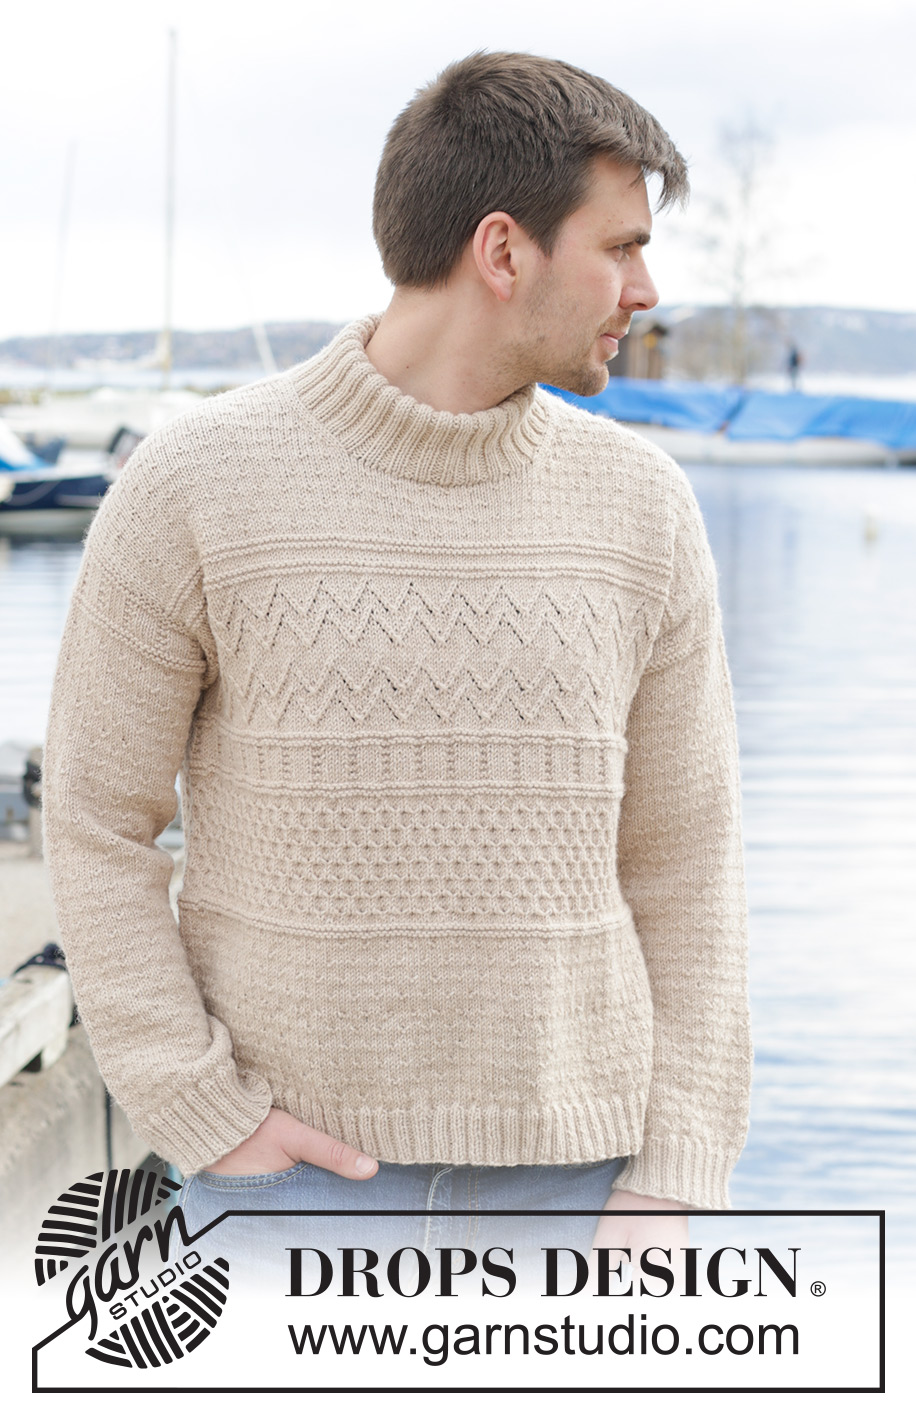
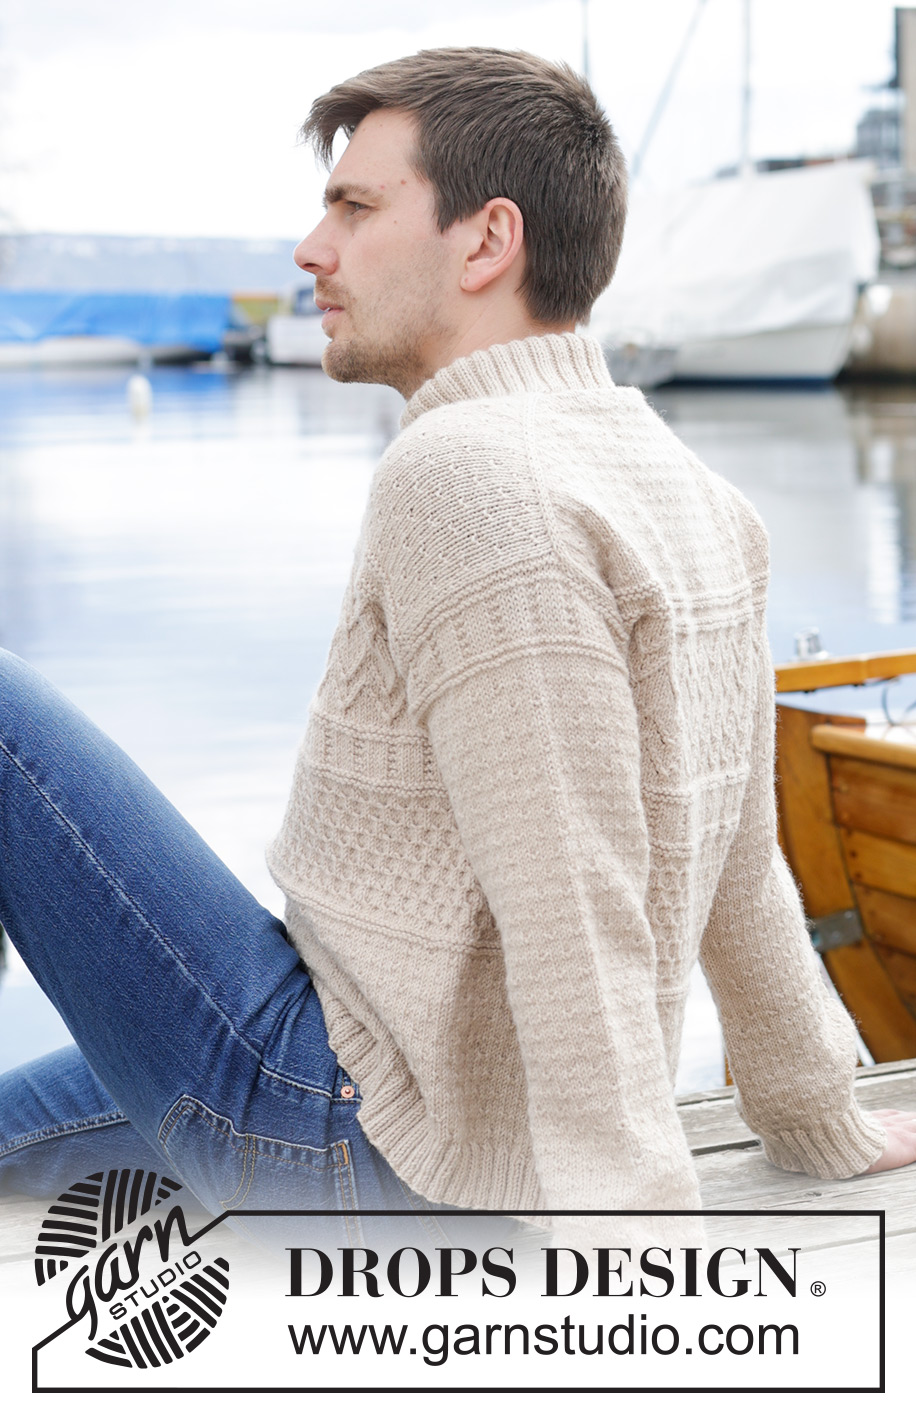
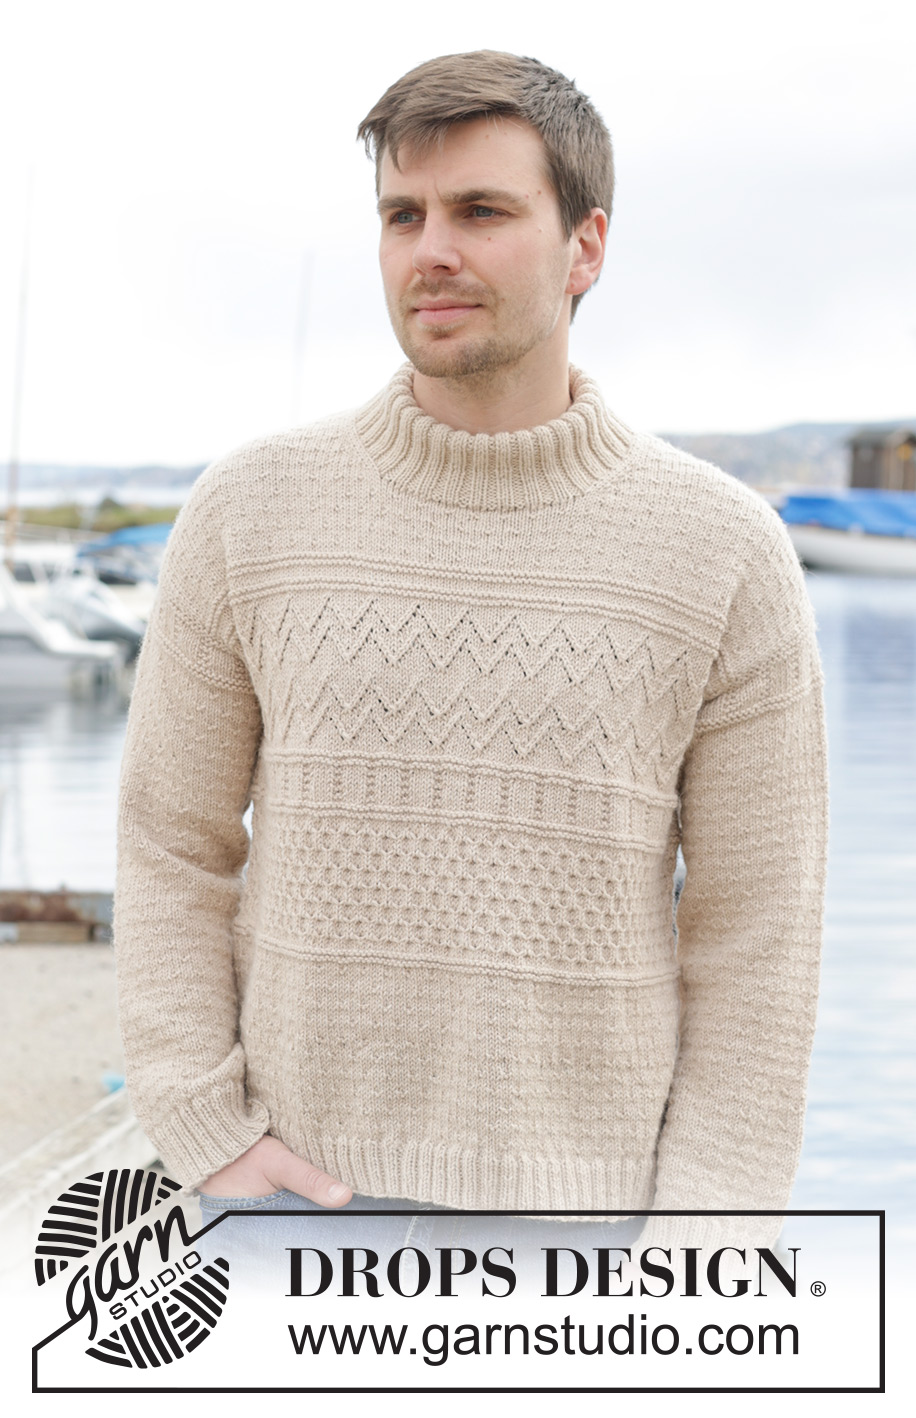
Knitted jumper for men in DROPS Lima or DROPS Karisma. The piece is worked top down, with European/diagonal shoulders, relief pattern and double neck. Sizes S - XXXL.
DROPS 233-24 |
||||||||||||||||||||||||||||||||||||||||
|
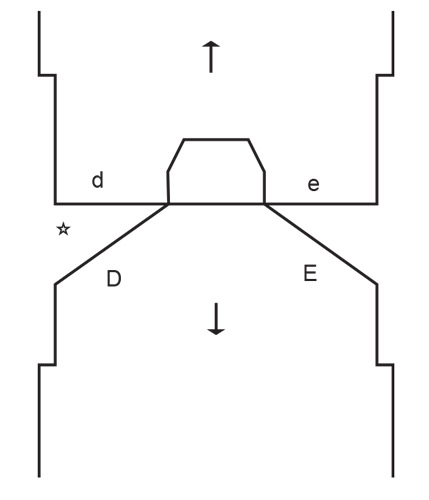
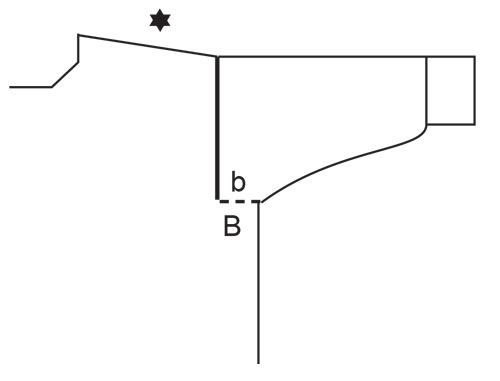
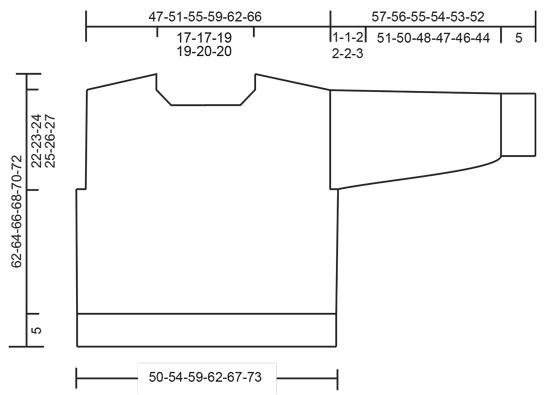
------------------------------------------------------- EXPLANATIONS FOR THE PATTERN: ------------------------------------------------------- PATTERN: See diagrams A.1 to A.6. The diagrams show all rows in the pattern from the right side. INCREASE TIP FROM THE RIGHT SIDE: Increase towards the left AFTER MARKER: Use left needle to pick up yarn between 2 stitches from row below, pick up yarn from the front and knit in the stitch loop that is on the back of the needle. Increase towards the right BEFORE MARKER: Use left needle to pick up yarn between 2 stitches from row below, pick up yarn from the back and knit in the stitch loop that is on the front side of the needle. INCREASE TIP FROM THE WRONG SIDE: Increase towards the right AFTER MARKER: Use left needle to pick up yarn between 2 stitches from row below, pick up yarn from the back and purl in the stitch loop that is on the front side of the needle. Increase towards the left BEFORE MARKER: Use left needle to pick up yarn between 2 stitches from row below, pick up yarn from the front and purl in the stitch loop that is on the back side of the needle. DECREASE TIP (for sleeves): Decrease 1 stitch on either side of the marker-thread as follows: Work until there are 3 stitches left before the marker-thread, knit 2 together, knit 2 (marker-thread sits between these 2 stitches), slip 1 stitch knit-wise, knit 1 and pass the slipped stitch over the knitted stitch. ------------------------------------------------------- START THE PIECE HERE: ------------------------------------------------------- JUMPER – SHORT OVERVIEW OF THE PIECE: The upper part of back piece is worked back and forth with circular needle, top down until the armholes are finished. Stitches are knitted up along each shoulder for the front piece, then cast on for the neck and the front piece continued back and forth with circular needle until the armholes are finished. The front and back pieces are joined and the body is continued in the round with circular needle. Stitches are knitted up around the armholes, the sleeve caps worked back forth, then the sleeves are continued in the round with short circular needle/double pointed needles. The neck is worked to finish. BACK PIECE: Cast on 39-39-43-43-47-47 stitches with circular needle size 4 mm and DROPS Lima or DROPS Karisma. Purl 1 row from the wrong side. Insert 1 marker, inside the outermost 3 stitches on each side. The markers remain inside these 3 stitches onwards. Work the first row from the right side as follows: Work A.1A, increase AFTER the marker at the beginning of the row – read INCREASE TIP FROM THE RIGHT SIDE, work A.1B 8-8-9-9-10-10 times, A.1C and increase BEFORE the marker at the end of the row – remember INCREASE TIP FROM THE RIGHT SIDE. On the next row (wrong side) increase in the same way – read INCREASE TIP FROM THE WRONG SIDE. Continue the pattern and increase both from the right and wrong side a total of 30-34-36-40-42-46 times – work the increased stitches into A.1B, making sure there are at least 3 stocking stitches outermost on each side. REMEMBER THE KNITTING TENSION! NOTE: When A.1A, A.1B and A.1C are finished in height, repeat A.1 in height, with room for 4 more repeats of A.1B in width each time A.1 is repeated. After the last increase there are 99-107-115-123-131-139 stitches and the piece measures approx. 11-12-13-14-15-16 cm from the cast-on edge. Continue the pattern until the armholes measure 10-10-10-10-11-12 cm (the piece measures approx. 21-22-23-24-26-28 cm from the cast-on edge mid-back) – finish after a row from the wrong side. Work A.2 back and forth over all stitches. When A.2 is finished, work as follows from the right side: 1 stocking stitch, A.3A, A.3B 11-12-13-14-15-16 times, A.3C, 1 stocking stitch. Continue this pattern. When the armhole measures 19-20-20-21-22-23 cm, cut the strand and place the stitches on an extra needle or thread. The armholes are finished (A.3 is continued on the body). FRONT PIECE: Start on the right shoulder (when the garment is worn). Knit up from the right side 30-34-36-40-42-46 stitches inside 1 stitch along the right shoulder on back piece (i.e. knit up 1 stitch in each row along the top edge). Purl 1 row from the wrong side. Work the next row from the right side as follows (from the armhole): S, M, XXL and XXXL: 3 stocking stitches, work A.1B until there are 3 stitches left, 3 stocking stitches. L and XL: 3 stocking stitches, work A.1B until there are 5 stitches left, work the first 2 stitches in A.1B, 3 stocking stitches. ALL SIZES: Continue the pattern back and forth. When the piece measures 5 cm from the shoulder, increase 1 stitch for the neck before the 3 last stitches on each row from the right side, remember INCREASE TIP FROM THE RIGHT SIDE! Increase like this a total of 6-6-7-7-8-8 times – work the increased stitches into A.1B, making sure you have at least 3 stocking stitches outermost by the neck. After the last increase there are 36-40-43-47-50-54 stitches. Cut the strand after the final increase from the right side. Place the stitches on an extra needle or thread and work the left front shoulder. Knit up from the right side 30-34-36-40-42-46 stitches inside 1 stitch along the left back shoulder (i.e. knit up 1 stitch in each row along the top edge). Purl 1 row from the wrong side. Work the next row from the right side as follows (from the neck): S, M, XXL and XXXL: 3 stocking stitches, work A.1D until there are 3 stitches left, 3 stocking stitches. L and XL: 3 stocking stitches, work A.1E until there are 5 stitches left, work the first 2 stitches in A.1E, 3 stocking stitches. ALL SIZES: Continue the pattern back and forth. When the piece measures 5 cm from the shoulder, increase 1 stitch for the neck after the 3 first stitches on each row from the right side, remember INCREASE TIP FROM THE RIGHT SIDE! Increase like this a total of 6-6-7-7-8-8 times – work the increased stitches into A.1D/A.1E, making sure you have at least 3 stocking stitches outermost by the neck. After the last increase there are 36-40-43-47-50-54 stitches. Work the next row from the wrong side as follows: Work pattern as before over the 36-40-43-47-50-54 stitches from the left front piece, cast on 27-27-29-29-31-31 stitches for the neck, work pattern as before over the 36-40-43-47-50-54 stitches from the right front piece = 99-107-115-123-131-139 stitches. Continue A.1 back and forth until the piece measures 16-16-18-18-19-20 cm from the shoulder – finish after a row from the wrong side as on the back piece. Insert 1 marker outermost on the armhole, 3-3-4-4-4-4 cm below the knitted up stitches on the shoulder. Control the length of the garment by folding it at the longest point, innermost on the shoulder and the marker on the armhole, to make sure A.1 matches in length on the front and back pieces. This is important so the pattern matches at the sides when the pieces are joined. Adjust the length of A.1 if necessary. Work A.2 back and forth over all stitches. When A.2 is finished, work the next row from the right side as follows: 1 stocking stitch, A.3A, A.3B 11-12-13-14-15-16 times, A.3C, 1 stocking stitch. Continue this pattern until the piece measures 25-26-28-29-30-31 cm, measured along the armhole (A.3 is continued on the body, finish on the same row as on the back piece so the pattern matches when the pieces are joined). The pieces are now joined for the body as described below. BODY: Work pattern as before over the 99-107-115-123-131-139 stitches on the front piece, cast on 6-6-8-8-10-14 stitches (in side under sleeve), work pattern as before over the 99-107-115-123-131-139 stitches from the back piece, cast on 6-6-8-8-10-14 stitches (in side under sleeve) = 210-226-246-262-282-306 stitches. Finish A.3 in the round – the cast-on stitches under each sleeve are worked in stocking stitch until A.3 is finished. Work A.4 – AT THE SAME TIME, on the first round increase 0-2-0-2-0-0 stitches evenly spaced = 210-228-246-264-282-306 stitches. On the next-to-last round in A.4, increase 30-32-34-36-38-38 stitches evenly spaced = 240-260-280-300-320-344 stitches (this is because the pattern contracts the piece). When A.4 is finished, work A.5 over all stitches. Repeat A.5 in height until the piece measures 41-43-45-46-46-48 cm from the highest part of the shoulder by the neck (A.5 is worked approx. 3-4-4-4-4-4 times in height and the body measures approx. 19-21-21-20-20-20 cm from the cast-on stitches in each side). On the last round in A.5, decrease 28-32-36-36-40-40 stitches evenly spaced = 212-228-244-264-280-304 stitches. Work A.6 over all stitches. When A.6 is finished, work A.1B over all stitches and until the piece measures 57-59-61-63-65-67 cm from the highest part of the shoulder by the neck – finish after 2 or 3 rounds of stocking stitch after a purled round. Knit 1 round and increase 40-44-48-52-60-60 stitches evenly spaced = 252-272-292-316-340-364 stitches. Change to circular needle size 3 mm. Work rib (knit 2, purl 2) for 5 cm. Cast off a little loosely. The jumper measures approx. 62-64-66-68-70-72 cm, measured from the highest point on the front piece. RIGHT SLEEVE: Use circular needle size 4 mm and knit up, from the right side, 40-42-42-44-46-48 stitches from the bottom of the armhole, up the back piece to the top of the shoulder and 52-54-58-60-62-64 stitches from the shoulder, down the front piece to the bottom of the armhole = 92-96-100-104-108-112 stitches. Insert 1 marker-thread in the middle of the row – this is used when counting out for the start of the pattern and also to measure from. Start on the wrong side with row 2 in A.4, work back and forth – the marker-thread should match the symbol in A.4. When the sleeve measures 1-1-2-2-2-3 cm, join the piece and finish the sleeve in the round with short circular needle/double pointed needles. When A.4 is finished, work A.1B. When the sleeve measures 3-5-3-6-5-2 cm from the join, decrease 2 stitches mid-under the sleeve – read DECREASE TIP. Decrease like this every 2½-2-2-1½-1½-1½ cm a total of 19-21-22-23-25-26 times = 54-54-56-58-58-60 stitches. Work until the sleeve measures 51-50-48-47-46-44 cm from the join. There is 5 cm left; try the jumper on and work to desired length before the rib. Knit 1 round and increase 18-18-20-18-18-20 stitches evenly spaced = 72-72-76-76-76-80 stitches. Change to double pointed needles size 3 mm. Work rib (knit 2, purl 2) for 5 cm. Cast off a little loosely. The sleeve measures approx. 57-56-55-54-53-52 cm from the knitted-up stitches. Sew the bottom of the armhole – see sketch. LEFT SLEEVE: Use circular needle size 4 mm and knit up from the right side 52-54-58-60-62-64 stitches from the bottom of the armhole and up the front piece, then 40-42-42-44-46-48 stitches from the shoulder down the back piece = 92-96-100-104-108-112 stitches. Insert a marker-thread in the middle of the row. Now work the sleeve in the same way as the right sleeve. NECK: Start on one shoulder and knit up from the right side, inside 1 edge stitch, 116 to 136 stitches with short circular needle size 3 mm. The stitch-number should be divisible by 4. Work rib in the round (knit 2, purl 2) for 12 cm. Fold the neck double to the inside and fasten with 1 stitch at each shoulder. |
||||||||||||||||||||||||||||||||||||||||
Diagram explanations |
||||||||||||||||||||||||||||||||||||||||
|
||||||||||||||||||||||||||||||||||||||||
 |
||||||||||||||||||||||||||||||||||||||||
 |
||||||||||||||||||||||||||||||||||||||||
 |
||||||||||||||||||||||||||||||||||||||||
 |
||||||||||||||||||||||||||||||||||||||||
 |
||||||||||||||||||||||||||||||||||||||||
Have you finished this pattern?Tag your pictures with #dropspattern #varietysweater or submit them to the #dropsfan gallery. Do you need help with this pattern?You'll find 28 tutorial videos, a Comments/Questions area and more by visiting the pattern on garnstudio.com. © 1982-2026 DROPS Design A/S. We reserve all rights. This document, including all its sub-sections, has copyrights. Read more about what you can do with our patterns at the bottom of each pattern on our site. |
||||||||||||||||||||||||||||||||||||||||







Post a comment to pattern DROPS 233-24
We would love to hear what you have to say about this pattern!
If you want to leave a question, please make sure you select the correct category in the form below, to speed up the answering process. Required fields are marked *.