
Popular categories
Looking for a yarn?


Comments / Questions (11)
![]() Giuditta wrote:
Giuditta wrote:
Buonasera, vorrei sapere come mai il campione deve essere misurato in stockinette stitch se il progetto si sviluppa con un punto differente, 1x1 rib? quando lavoro le coste uso ferri molto più piccoli, non vorrei che rimanesse una maglia troppo larga…qualche suggerimento?
06.03.2024 - 21:58DROPS Design answered:
Buonasera Giuditta, non ci sono errori nella spiegazione del campione. Buon lavoro!
11.03.2024 - 23:46
![]() Patricia G Corbett-Labatt wrote:
Patricia G Corbett-Labatt wrote:
Hello I am curious what is mean by "rib fits knits1/purl1 the entire round , piece measures approx. 7 cm from cast on edge" and how it is different from the next line/instruction: "Then work rib (K1/P1) until piece measures 33 cm from cast on edge".
01.02.2023 - 16:25DROPS Design answered:
Dear Mrs G Corbett-Labatt, while you are increasing, the rib will not fit in the round on every round because of the increases; but when all increases are done, you can now work K1/P1 all the round. Continue working in rib until piece measures 33 cm from the cast on edge = from the stitches you cast on at the beginning of the hat. Happy knitting!
01.02.2023 - 17:09
![]() Pili Gabriella wrote:
Pili Gabriella wrote:
Ho visto che su questo modello sono state fatte delle correzioni ma non riesco a trovarle . Potreste aiutarmi per favore ? Grazie
28.01.2023 - 18:01DROPS Design answered:
Buonasera Gabriella, le correzioni vengono incorporate direttamente nel modello: le istruzioni online sono corrette. Buon lavoro!
28.01.2023 - 23:01
![]() Lene wrote:
Lene wrote:
Hei. Står det noe om hva man gjør med de 16 maskene man begynte med? Skal disse snurpes sammen til slutt? Virker mange masker å snurpe...
10.01.2023 - 19:43DROPS Design answered:
Hej Lene, ja du snurper de 16 masker sammen, det skal vi få lagt ind i opskriften :)
12.01.2023 - 14:13
![]() Ida wrote:
Ida wrote:
Hei! Tips til forbetring: Inkludere svaret til Ola i oppskrifta. Nyttig info om korleis ein skal fullføre siste montering. Takk!
18.12.2022 - 08:53
![]() Anna wrote:
Anna wrote:
Wskazówki są opisane błędnie. Wskazówka 1 dotyczy przerabiania narzutu za markerem, a wskazówka 2 przed markerem.
10.11.2022 - 21:31DROPS Design answered:
Witaj Anno, dziękujemy za zwrócenie uwagi. Korekta została naniesiona. Pozdrawiamy!
30.11.2022 - 19:45
![]() Catarina Fors wrote:
Catarina Fors wrote:
Enligt Tips1, är det före markören och Tips2 efter markören, men i beskrivningen varv 2 står det tvärt om. Vilket är rätt?
09.11.2022 - 18:26DROPS Design answered:
Hej Catarina, jeg tror du har ret, se videoen nederst i opskriften hvordan vi gør, så skal vi få rettet i opskriften :)
16.11.2022 - 13:38
![]() Ola wrote:
Ola wrote:
Czy na koniec czapka na górze jest zszywana? Jakim ściegiem?
06.11.2022 - 16:54DROPS Design answered:
Witaj Olu, końcówkę nitki (tę z początku robótki, czyli na górze czapki) nawlekasz na igłę i przeciągasz igłę z nitkę przez skrajne pętelki 16 oczek początkowych i zaciskasz nitkę. Zabezpieczasz nitkę po lewej stronie robótki i wrabiasz ją. Pozdrawiamy!
07.11.2022 - 08:56
![]() Anna wrote:
Anna wrote:
Obydwie wskazówki dotyczą przerabiania narzutów przed markerem.
21.10.2022 - 23:25
![]() Rozemarijn Hessels wrote:
Rozemarijn Hessels wrote:
What type of cast on is used? A turkish cast on? Jury’s magic cast on?
02.10.2022 - 21:23DROPS Design answered:
Dear Rozemarijn, for this hat, you can cast on as explained in either of these videos: https://www.garnstudio.com/video.php?id=384&lang=en https://www.garnstudio.com/video.php?id=42&lang=en Happy knitting!
03.10.2022 - 00:19
|
|
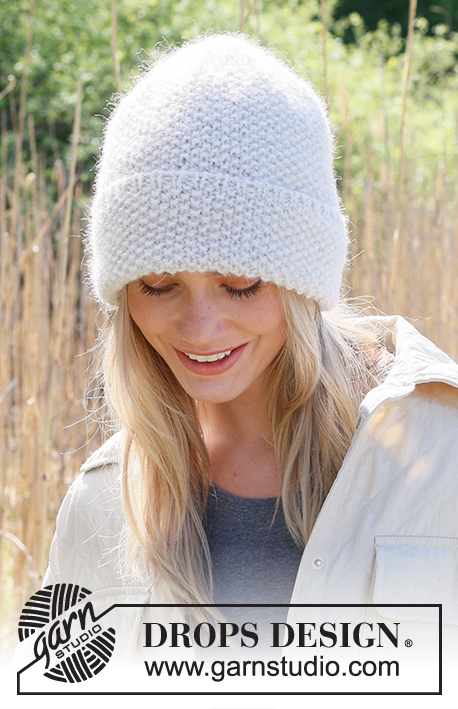
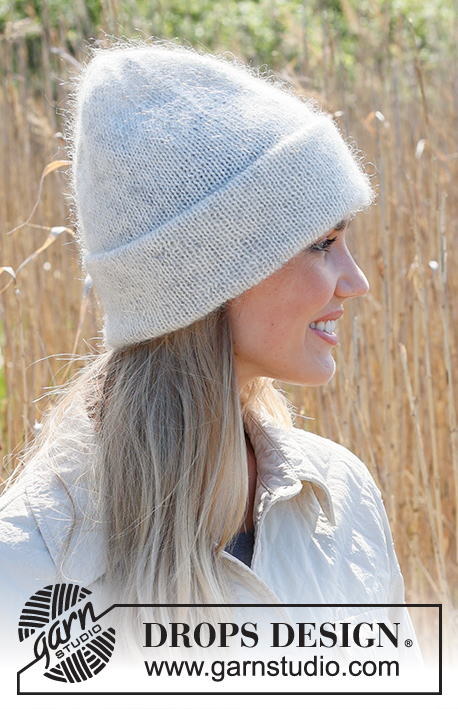
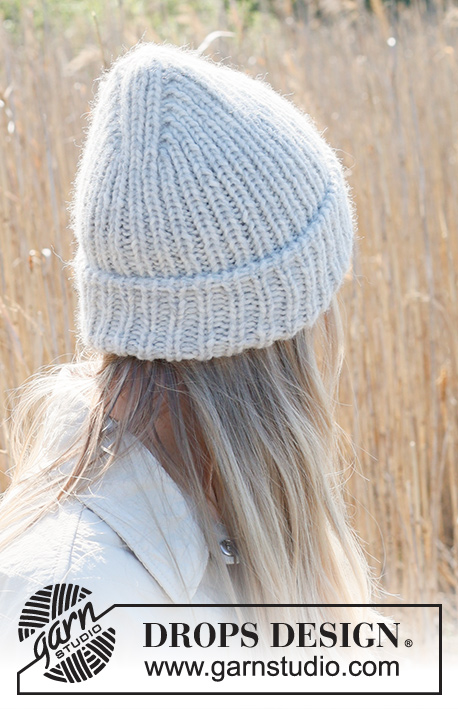
Winter Crown#wintercrownhat |
|
 |
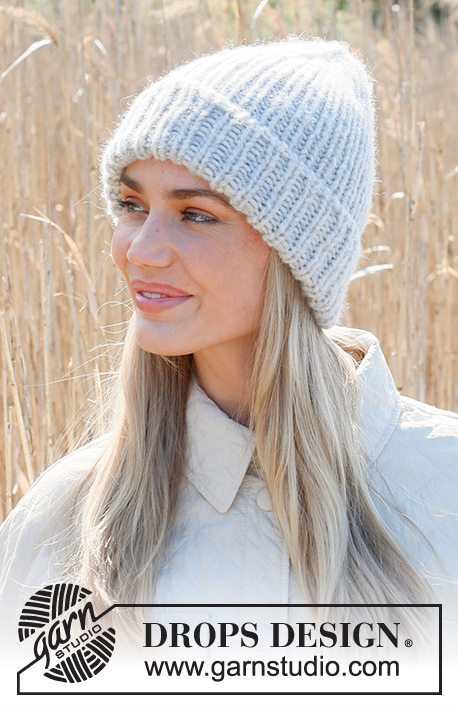 |
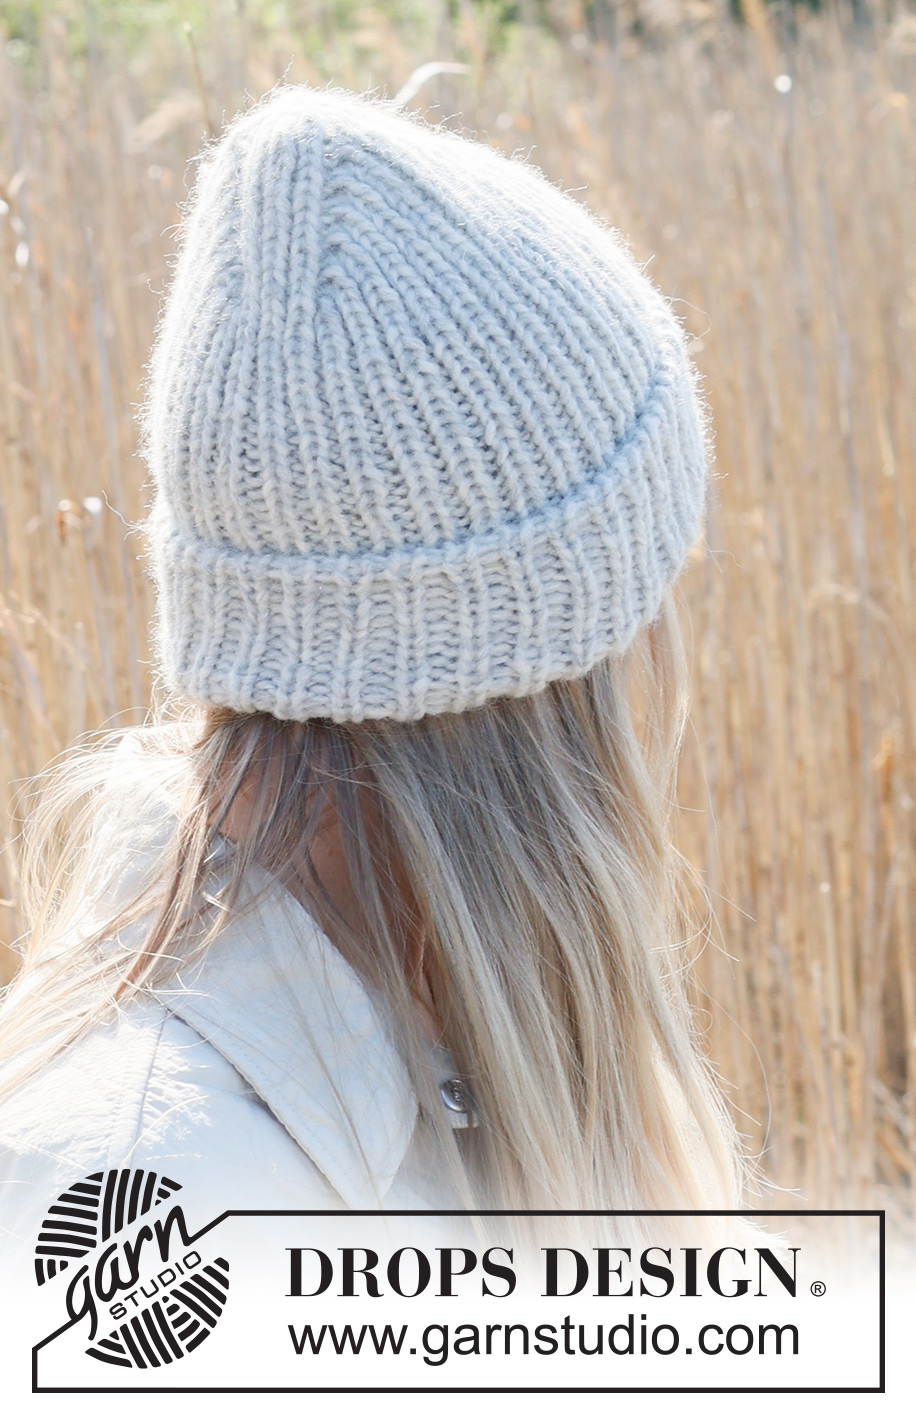
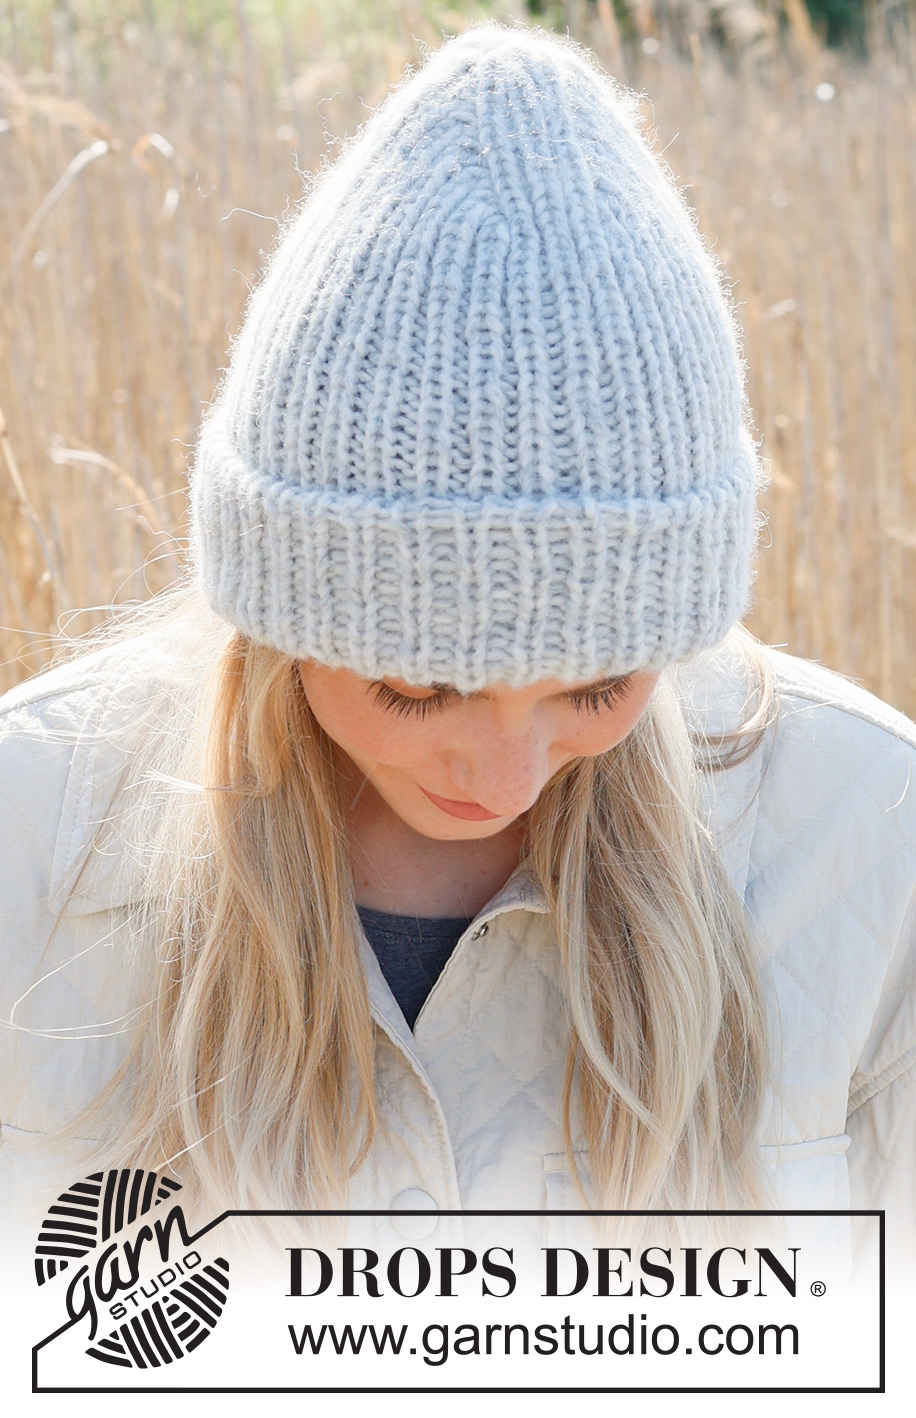
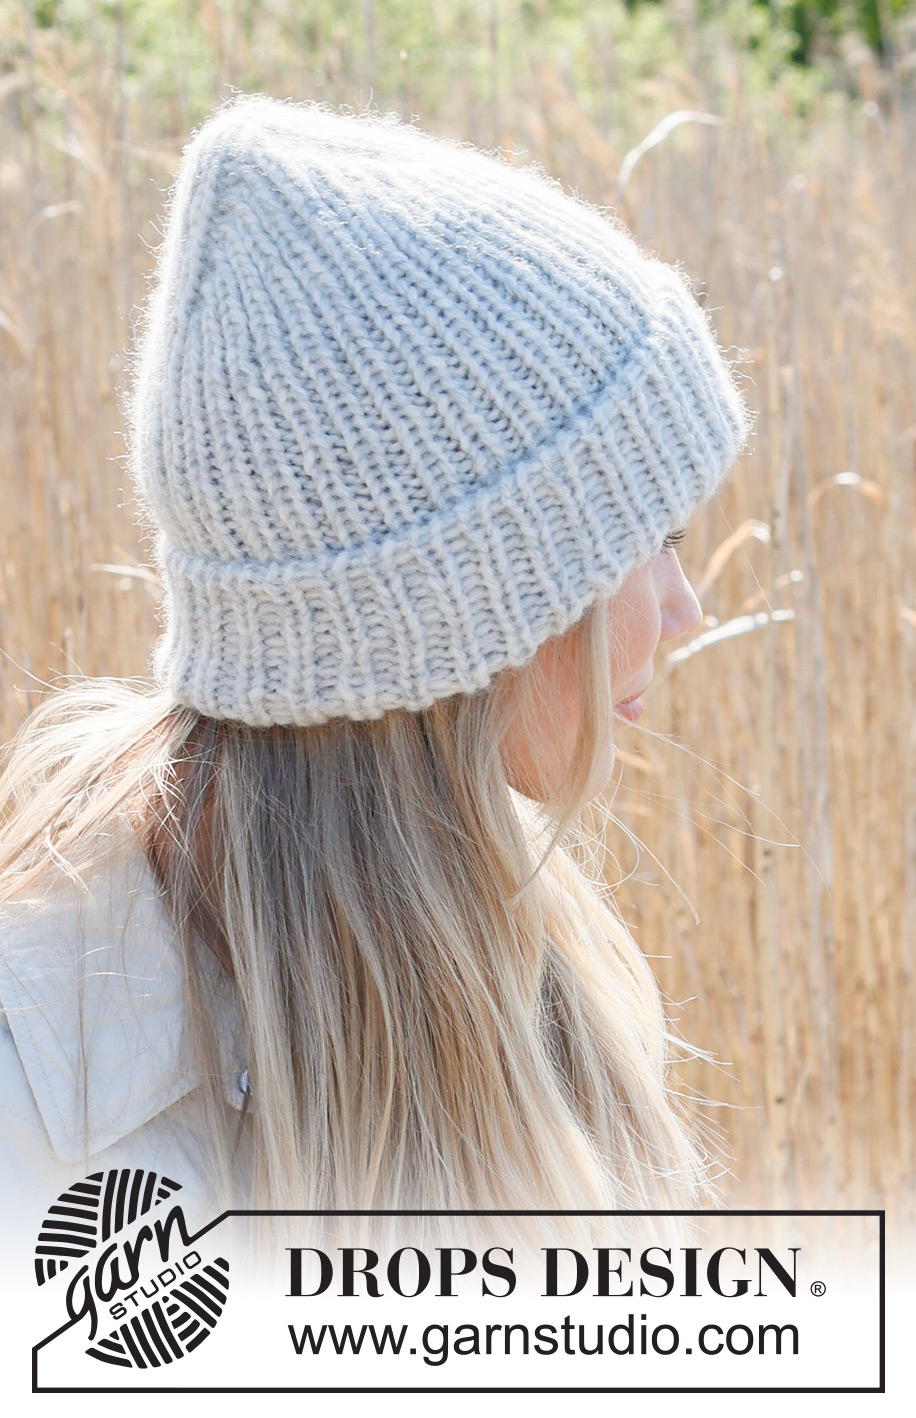
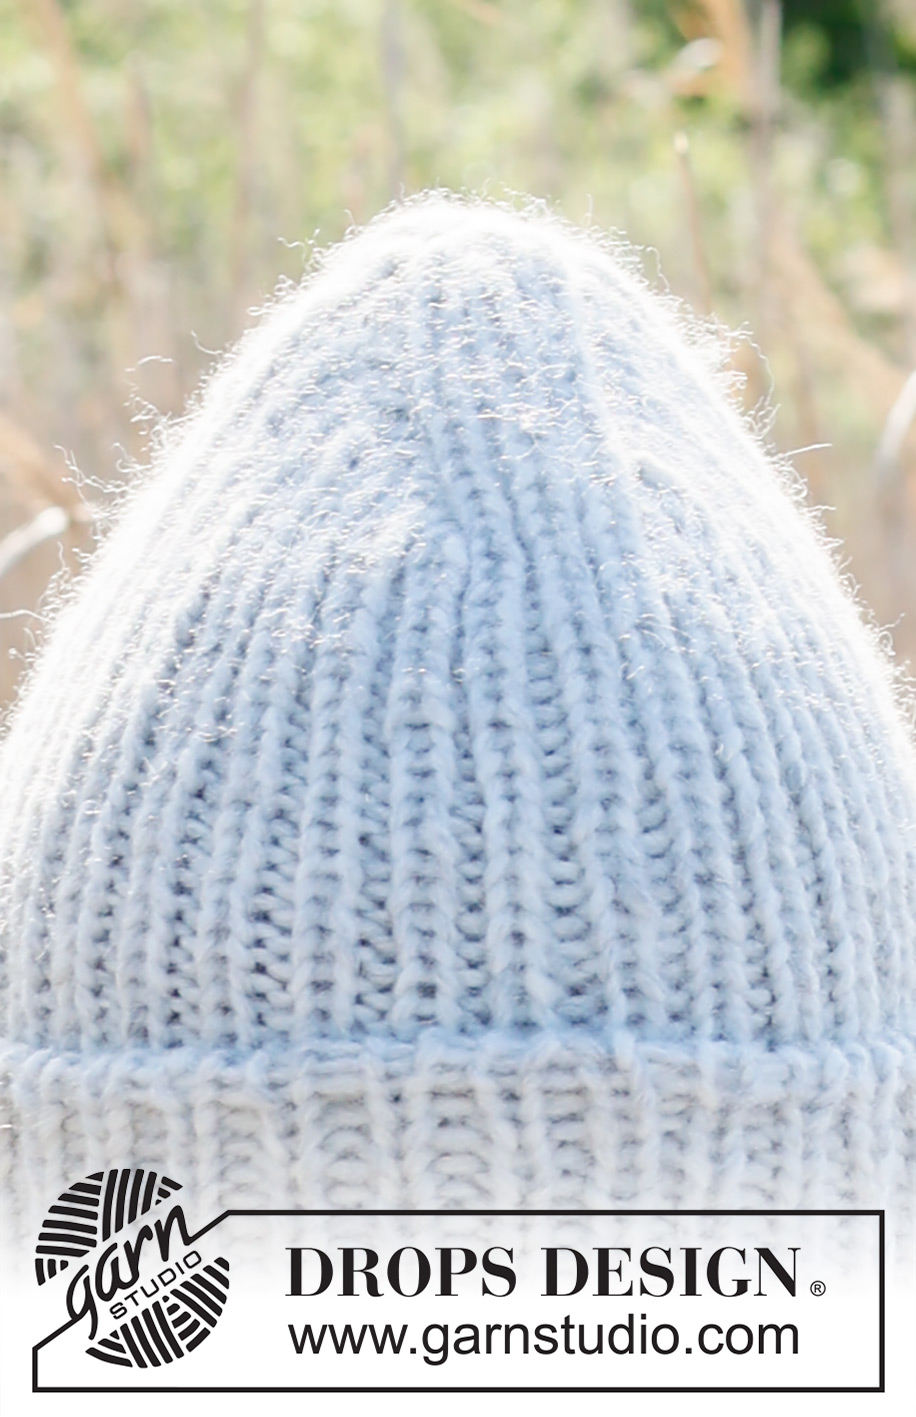
Knitted hat/hipster hat in 1 strand DROPS Wish or 2 strands DROPS Air. Piece is knitted top down with rib and folding edge.
DROPS 234-42 |
|
|
---------------------------------------------------------- EXPLANATION FOR THE PATTERN: ---------------------------------------------------------- INCREASE TIP: Make 1 yarn over after 1st and 3rd marker and make 1 yarn over before 2nd and 4th marker. On next round work yarn overs so that they lean towards the right and left as follows: TIP-1 (after marker): Slip yarn over off the needle and put back the opposite way, and then work in front loop of stitch, stitch is twisted towards the left. It should not make a hole! TIP-2 (before marker): Work yarn over in back loop of stitch, stitch is twisted towards the right. It should not make a hole! CAST-OFF TIP: You can cast off with Italian cast off, then work the last 2 round before cast off as explained below: ROUND 1: * Knit 1, pass next stitch on to right needle knitwise *, work from *-* the entire round. ROUND 2: * Slip first/next stitch on to right needle knitwise, purl 1 *, work from *-* the entire round. ---------------------------------------------------------- START THE PIECE HERE: ---------------------------------------------------------- HAT - SHORT OVERVIEW OF THE PIECE: Piece is worked top down in the round on double pointed needles. Change to circular needle when needed. HAT: Cast on 16 stitches on double pointed needles size 6 mm with 1 strand DROPS Wish or 2 strands DROPS Air. Work 1 round rib (knit 1/purl 1). Now insert 4 markers in the piece and move markers upwards when working. Insert 1st marker in 4th stitch (purl stitch), insert 2nd marker in 6th stitch (purl stitch), insert 3rd marker in 12th stitch (purl stitch) and insert 4th marker in 14th stitch (purl stitch). Then work rib while AT THE SAME TIME increasing - read INCREASE TIP in explanation above and work as follows: ROUND 1: Work rib as before to and with 1st marker - make 1 yarn over after 1st marker, knit 1, make 1 yarn over before 2nd marker, work rib as before from 2nd marker and to and with 3rd marker, make 1 yarn over after 3rd marker, knit 1, make 1 yarn over before 4th marker, work rib as before from 4th marker and the rest of round. 4 stitches have been increased on round. ROUND 2: Work rib as before to and with 1st marker - make 1 yarn over after 1st marker, purl yarn over from previous round as explained in TIP-1, knit 1, purl yarn over as explained in TIP-2, make 1 yarn over before 2nd marker, work rib as before from 2nd marker to 3rd marker, make 1 yarn over after 3rd marker, purl yarn over from previous round as explained in TIP-1, knit 1, purl yarn over from previous round as explained in TIP-2, make 1 yarn over before 4th marker, work rib as before from 4th marker and the rest of round. 4 stitches have been increased on round. REMEMBER THE KNITTING TENSION! Continue in rib and increase on every round - work yarn overs from previous round in rib that is between 1st and 2nd marker / 3rd and 4th marker. Repeat increase on every round until increase has been done 12 times, and there are 64 stitches on round. Rib fits knit 1/purl 1 the entire round, piece measures approx. 7 cm from cast-on edge. Then work rib (knit 1/purl 1) until piece measures 33 cm from cast-on edge. Read CAST-OFF TIP in explanation above, or cast off with knit over knit and purl over purl. Fold the bottom 8 cm of hat. Pull a thread through the 16 stitches from the cast-on edge, tighten and secure the thread firmly. |
|
Have you finished this pattern?Tag your pictures with #dropspattern #wintercrownhat or submit them to the #dropsfan gallery. Do you need help with this pattern?You'll find 19 tutorial videos, a Comments/Questions area and more by visiting the pattern on garnstudio.com. © 1982-2026 DROPS Design A/S. We reserve all rights. This document, including all its sub-sections, has copyrights. Read more about what you can do with our patterns at the bottom of each pattern on our site. |
|


With over 40 years in knitting and crochet design, DROPS Design offers one of the most extensive collections of free patterns on the internet - translated to 17 languages. As of today we count 324 catalogues and 12290 patterns translated into English (UK/cm). 12290
We work hard to bring you the best knitting and crochet have to offer, inspiration and advice as well as great quality yarns at incredible prices! Would you like to use our patterns for other than personal use? You can read what you are allowed to do in the Copyright text at the bottom of all our patterns. Happy crafting!
Post a comment to pattern DROPS 234-42
We would love to hear what you have to say about this pattern!
If you want to leave a question, please make sure you select the correct category in the form below, to speed up the answering process. Required fields are marked *.