
Popular categories
Looking for a yarn?


Comments / Questions (95)
Ria wrote:
I have started the pattern for small size but i can't understand what we do when we finish the chart vertically (20 rows). Which are 21 and 22 row? And then i begin the patern from the row1? I have to replace A2 pattern with A1 and A1over the A2 when i start the pattern for second time?
20.02.2016 - 15:25DROPS Design answered:
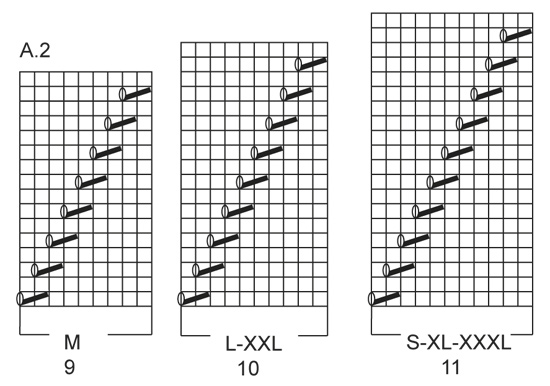
Dear Ria, on next row after diagram, work 2 more rows with displacing YO,K2 tog as before and then after row 22 you can start a new repetition of diagram on each side (there are not enough sts before to work row 1 in diagram for the new repetitions). Happy knitting!
22.02.2016 - 09:35
![]() Rosalind Neville-Smith wrote:
Rosalind Neville-Smith wrote:
Do we use two strands f yarn all the way throughout the jumper or just for a specific part? If we do use two strands all the way through, why do I need so much less of the silk, compared to the alpaca? Thanks
17.01.2016 - 21:15DROPS Design answered:
Dear Mrs Neville-Smith, that's correct you will have to work entire jumper with 2 strands of yarn (= 1 each quality) held tog as just one. A ball Alpaca is approx 167 m/50 g while a ball Kid-Silk is approx 200 m/25g, that's why you don't need same weight of each yarn. Happy knitting!
18.01.2016 - 15:08
![]() Dilianne wrote:
Dilianne wrote:
Dames, jullie kunnen mijn berichten welke ik op 27 en 28 december jl. heb geschreven vergeten c.q. als niet verzonden beschouwen. Ik heb zelf een fout gemaakt en ben hier in de tussentijd achter gekomen (verkeerde patroon bij de verkeerde maat gebruikt). Sorry voor al het ongemak en alvast de beste wensen voor 2016!
28.12.2015 - 13:32
![]() Dilianne wrote:
Dilianne wrote:
Foutje in mijn vorige bericht; ik brei maat XXL!
28.12.2015 - 13:26
![]() Dilianne wrote:
Dilianne wrote:
Ik brei maat XL en kom in de eerste naald van het patroongedeelte al niet uit met mijn steken (6 herhalingen van 11 st. zijn toch 66 st?)? Als ik dit alles bij elkaar tel; 2 tricotst., 6 herhalingen (= 66), 1 stricotst., 6 herhalingen (66 st.), 2 tricotst. dan moet ik toch veel meer steken opzetten of zie ik dit nu verkeerd?
27.12.2015 - 20:03DROPS Design answered:
Hoi Dilianne. Mooi om te horen dat je verder bent!
04.01.2016 - 14:28
![]() Dilianne wrote:
Dilianne wrote:
Kan ik deze trui ook alleen met Drops You breien of moet hier een ander soort garen nog bij?
21.12.2015 - 14:19DROPS Design answered:
Hoi Dilianne. Nee, de laatste DLY is categorie A, en brei je deze alleen , dan wordt dat te los. Je moet kijken op de garencategorie en stekenverhouding. Kijk ook hier om een juiste garen te kiezen
21.12.2015 - 15:43
![]() Gabriele wrote:
Gabriele wrote:
Liebes Dropsteam. Ich stricke die Größe XXL. In der Anleitung steht, in jeder 22 R. einen neuen Raport stricken. Der Raport hat nur 20 R.Wie stricke ich die 21.R? Lieben Dank im voraus
26.11.2015 - 00:05DROPS Design answered:
Am besten orientieren Sie sich daran, dass immer 8 M re zwischen den Lochmustermaschen (= Umschlag + 2 zusammengestrickte M) sind. Dadurch ergibt sich dann automatisch, wann Sie mit einem neuen Lochmusterrapport beginnen. Um das Lochmuster stricken zu können, müssen Sie ja 10 M re haben, damit Sie 2 M re zusammenstricken können und 8 M re bis zu den nächsten Lochmustermaschen vorhanden sind. Dadurch ergibt sich die zusätzliche Reihe.
29.11.2015 - 22:14
![]() Gabriele wrote:
Gabriele wrote:
Lieben Dank für die schnelle Antwort. Ich wünsche dem Drops Team, ein schönes Wochenende L.G. Gabi
02.10.2015 - 20:30
![]() Heling wrote:
Heling wrote:
Liebes Drops Team Stricke Gr. S-XXXL. Mustersatz 20.R fertig. Fange ich wieder mit der 1. Reihe von den Mustersätzen an?
30.09.2015 - 18:57DROPS Design answered:
Ja genau. Achten Sie dabei darauf, dass sich die diagonalen Lochstreifen weiter folgerichtig fortsetzen, außerdem beginnen Sie mit einem neuen Lochstreifen. Der Abstand zwischen den Lochstreifen beträgt immer 9 M glatt rechts, dann kommen der Umschlag und die beiden zusammengestrickten M. Kontrollieren Sie also einfach zwischendurch, ob immer diese 9 M zwischen dem Lochmuster liegt, dann sollte alles passen.
02.10.2015 - 11:27
![]() Shirley wrote:
Shirley wrote:
This pattern looks great,so I have started with the back using the recommended yarns. My knitting is curling up. Has anyone a remedy to stop this? I made a cowl in a similar pattern. It always curled up. Even after I had pressed it down lightly with my steam iron it showed the wrong side of my knitting.
30.09.2015 - 18:53DROPS Design answered:
Dear Shirley, you can block it with pins to keep edge in place - or add a crochet edge at the bottom. Your DROPS store will also give you tips & advices. Happy knitting!
01.10.2015 - 09:04
|
|||||||||||||
Eva Sweater#evasweater |
|||||||||||||
 |
 |
||||||||||||
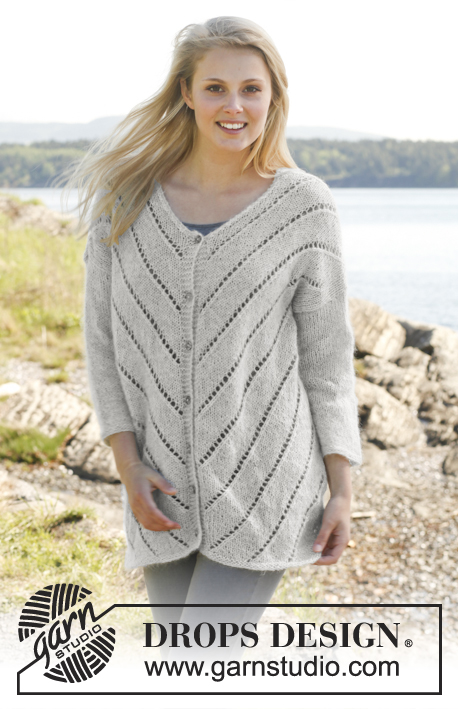
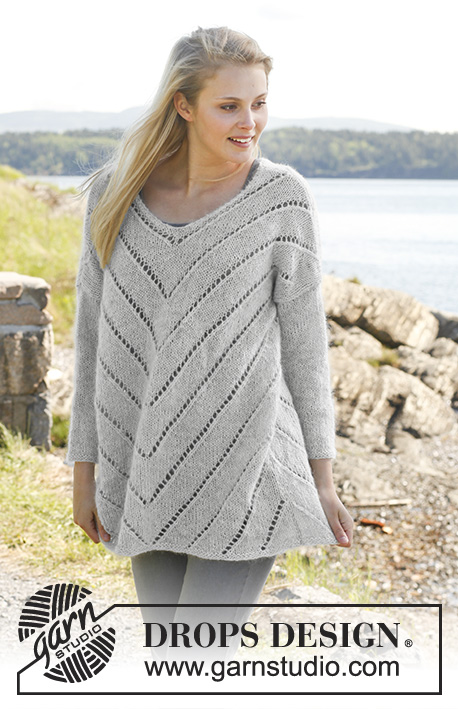
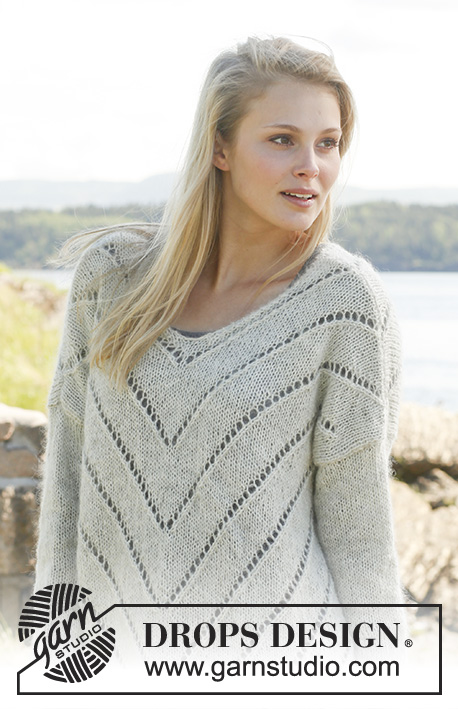
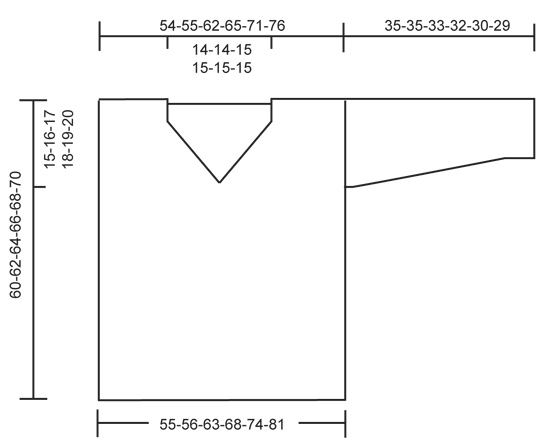
Knitted DROPS jumper with lace pattern and ¾ sleeves in "Alpaca" and "Kid-Silk". Size: S - XXXL.
DROPS 149-3 |
|||||||||||||
|
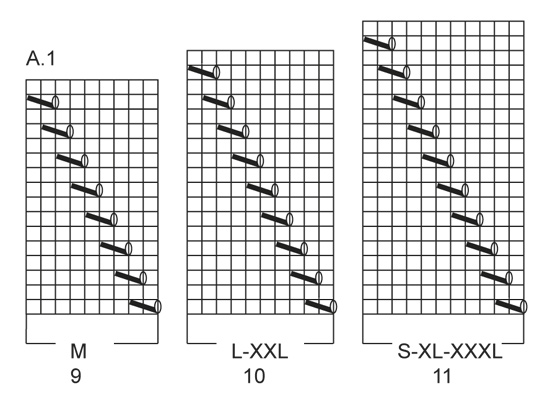
GARTER ST (back and forth on circular needle): K all rows. 1 ridge = 2 rows K. PATTERN: See diagrams A.1 and A.2. The diagrams show all rows in pattern seen from RS. NOTE! See diagram for size! KNITTING TIP: When neck dec beg, continue lines with holes that have been started, but do not beg new lines with holes. NOTE: Adjust to not dec for neck on the first 4 rows of diagram A.1/A.2. DECREASE TIP (applies to neck dec): Dec inside 2 sts in garter st. All dec are done from RS! Dec before 2 sts as follows: K 2 tog. Dec after 2 sts as follows: Slip 1 st as if to K, K 1, psso. ---------------------------------------------------------- BACK PIECE: Worked back and forth on circular needle. Cast on 93-95-107-115-125-137 sts on circular needle size 4 mm with 1 strand of each yarn (= 2 strands). Work 2 ridges in GARTER ST - see explanation above. Switch to circular needle size 5 mm. Work as follows from RS: 2-2-3-2-2-2 sts in stocking st, diagram A.2 - see explanation above - over the next 44-45-50-55-60-66 sts (= 4-5-5-5-6-6 repetitions in width), 1 st in stocking st, diagram A.1 over the next 44-45-50-55-60-66 sts (= 4-5-5-5-6-6 repetitions in width) and finish with 2-2-3-2-2-2 sts in stocking st. Pattern A.1/A.2 is displaced out to the 2-2-3-2-2-2 sts in the side worked in stocking st until finished measurements. Work 1 new repetition of A.1/A.2 vertically every 22nd-18th-20th-22nd-20th-22nd row. Work like this until piece measures 45-46-47-48-49-50 cm. Then cast off 1-1-1-2-2-4 sts for armhole in each side = 91-93-105-111-121-129 sts. Continue pattern but work the outermost 5 sts in each side in stocking st until finished measurements. When piece measures 57-59-61-63-65-67 cm – read KNITTING TIP, work 1 ridge in garter st over the middle 27-27-29-29-29-29 sts (= 32-33-38-41-46-50 sts on each side), work the other sts as before. Then cast off the middle 23-23-25-25-25-25 sts for neck = 34-35-40-43-48-52 sts remaining on each shoulder. Now finish each shoulder separately. Continue with garter st over the 2 outermost sts towards neck, pattern and 5 sts in stocking st. When piece measures 59-61-63-65-67-69 cm, work 2 rows in stocking st with 2 sts in garter st in each side of neck. Cast off. Piece measures 60-62-64-66-68-70 cm. FRONT PIECE: Worked back and forth on circular needle. Cast on and work as back piece. When piece measures 47-49-50-52-54-55 cm, work 1 ridge in garter st over the middle 5 sts (= 43-44-50-53-58-62 sts on each side), work the other sts as before. Then cast off the middle st in garter st and finish each shoulder separately - Remember Knitting tip. Continue to work in garter st over the 2 outermost sts towards the neck, pattern and 5 sts in stocking st, AT THE SAME TIME on next row from RS dec 1 st for neck inside the 2 sts in garter st - read DECREASE TIP, repeat dec on every row from RS 10-10-11-11-11-11 more times (= 11-11-12-12-12-12 times in total) = 34-35-40-43-48-52 sts remain on the shoulder. Cast off when piece measures 60-62-64-66-68-70 cm. SLEEVE: Worked back and forth on circular needle. Cast on 42-42-44-48-48-50 sts on circular needle size 4 mm with 1 strand of each yarn (= 2 strands). Work 2 ridges in garter st. Switch to circular needle size 5 mm and work in stocking st. When piece measures 3 cm, inc 1 st in each side, repeat inc every 7-6-4-4-3-3 cm 4-5-6-6-8-8 more times (= 5-6-7-7-9-9 times in total) = 52-54-58-62-66-68 sts. Work in stocking st until piece measures 35-35-33-32-30-29 cm. Cast off. Knit another sleeve. ASSEMBLY: Sew the shoulder seams. Sew in sleeves. Sew sleeve and side seam in front loop of outermost sts. |
|||||||||||||
Diagram explanations |
|||||||||||||
|
|||||||||||||
 |
|||||||||||||
 |
|||||||||||||
 |
|||||||||||||
Have you finished this pattern?Tag your pictures with #dropspattern #evasweater or submit them to the #dropsfan gallery. Do you need help with this pattern?You'll find 16 tutorial videos, a Comments/Questions area and more by visiting the pattern on garnstudio.com. © 1982-2026 DROPS Design A/S. We reserve all rights. This document, including all its sub-sections, has copyrights. Read more about what you can do with our patterns at the bottom of each pattern on our site. |
|||||||||||||


With over 40 years in knitting and crochet design, DROPS Design offers one of the most extensive collections of free patterns on the internet - translated to 17 languages. As of today we count 324 catalogues and 12290 patterns translated into English (UK/cm). 12290
We work hard to bring you the best knitting and crochet have to offer, inspiration and advice as well as great quality yarns at incredible prices! Would you like to use our patterns for other than personal use? You can read what you are allowed to do in the Copyright text at the bottom of all our patterns. Happy crafting!
Post a comment to pattern DROPS 149-3
We would love to hear what you have to say about this pattern!
If you want to leave a question, please make sure you select the correct category in the form below, to speed up the answering process. Required fields are marked *.