Comments / Questions (37)
![]() Katarzyna wrote:
Katarzyna wrote:
Pierwsze dodawanie oczek na lewy przód rozmiar M - czy tu na pewno trzeba dodawać oczka z obu stron? Wychodziło by wtedy, że po dodaniu jest 51 oczek (43+8) a w opisie jest 47
23.01.2026 - 10:06DROPS Design answered:
Witaj Kasiu, zdecydowanie jest coś nie tak. Zgłaszam korektę. Na ten moment wydaje mi się, że powinny być dodawane oczka z jednej strony, czyli od strony dekoltu. Proszę o chwilę cierpliwości. Korekta powinna pojawić się lada moment. Pozdrawiamy!
23.01.2026 - 15:22
![]() Johanne wrote:
Johanne wrote:
Ich habe ein Problem bei der Zunahme des rechten Oberteils. Hier steht "2-6-2-2-6-2-6 Maschen links, 2 Maschen rechts, Rippenmuster (= 2 Maschen rechts/2 Maschen links/2 Maschen rechts/6 links) bis noch 3 Maschen übrig sind." Wenn ich das so stricke, habe ich auf der Vorderseite vier rechte Maschen nebeneinander. Kann es sein, dass hier ein Fehler in der Anleitung ist? Ich komme hier leide rnicht weiter Viele Grüße und vielen Dank für die vielen tollen Anleitungen
13.01.2026 - 18:46
![]() Natalie wrote:
Natalie wrote:
Knitting back piece in XL and have followed the chart to where I have 124 stitches on needle. The next paragraph is confusing me. If I start at the beginning of A1, A2 X5 then A3 I won't be working all the stitches on the needle. Is there a mistake on how many times A2 is repeated or should I be starting the pattern somewhere else?
12.01.2026 - 16:41DROPS Design answered:
Dear Nathalie, just continue working A.1, A.2 and A.3 as before and at the same time, continue increase 6 more times incorporating the new stitches into pattern just as you did before in A.1/A.3. Happy knitting!
14.01.2026 - 08:51
![]() Pat wrote:
Pat wrote:
Hi I have sorted out my previous question and found that the fronts match. I have another query about joining the front to the back. The pattern says I should make the front 26 cm long . If I do this my front will not match into the back with the cable correct. I have to choose between making it 24 cm or 28 cm as the pattern repeat is 4 cm. Would this work for fitting the sleeve? Which length would you suggest? Thanks Pat
12.01.2026 - 14:15DROPS Design answered:
Dear Pat, you can adjust the length as you rather get it, but note that 2 cm difference will be only approx. 3 sts so that the number of sts should still work in both cases. Happy knitting!
14.01.2026 - 07:51
![]() Pat wrote:
Pat wrote:
I have picked up 35 stitches for the left front and worked the first row from the wrong side and then row 1 and 2 following the pattern. On row 1 should I start each one with 6 knit stitch and then 2 purl and should I cable these 6 knit stitches when I cable the others in the A4 pattern? It does not seem to match the pattern for the right front. Thanks Pat
10.01.2026 - 22:42DROPS Design answered:
Dear Pat, after you have worked the first 2 rows on left shoulder, start with Row 1 from RS as follows: 2 sts in stocking sttich (edge) + 4 sts in stocking stitch, P2 (knit these stitches from WS), then repeat A.4 until 3 sts remain (repeat 2 times the 12 sts and work the first 2 sts in diagram) and finish with 3 sts in stocking stitch. Or do I misunderstand your question?
12.01.2026 - 16:30
![]() Johanne wrote:
Johanne wrote:
Ich habe ein Problem bei der Zunahme des rechten Oberteils. Hier steht "2-6-2-2-6-2-6 Maschen links, 2 Maschen rechts, Rippenmuster (= 2 Maschen rechts/2 Maschen links/2 Maschen rechts/6 links) bis noch 3 Maschen übrig sind." Wenn ich das so stricke, habe ich auf der Vorderseite vier rechte Maschen nebeneinander. Kann es sein, dass hier ein Fehler in der Anleitung ist? Ich komme hier leide rnicht weiter Viele Grüße und vielen Dank für die vielen tollen Anleitungen
04.01.2026 - 22:52
![]() Markét wrote:
Markét wrote:
Dobrý den, právě pracuji levý přední díl (velikost M) a nevychází mi počet ok u přidávání ok u tvarování průkrčníku. Díl jsem začala nabráním 43 ok a po 8cm mám nabrat každou lícovou řadu 2 oka a to 4x. To mi vychází na konečný počet 43+8=51 ok, ale v návodu mi má vyjít jen 47 ok - 4 přidaná oka místo mých 8. Nechápu tedy, jestli je návod špatně napsaný a mám přidávat jen každou 2. lícovou řadu nebo nevím. Děkuji
03.01.2026 - 18:10
![]() Evie wrote:
Evie wrote:
Tip: kabel over twee steken zonder kabelnaald. Brei de kabel over twee steken als volgt: brei eerst de tweede steek voorlangs recht (zonder af te halen) en brei dan de eerste steek recht en laat beide steken afglijden.
27.12.2025 - 07:12
![]() Mila wrote:
Mila wrote:
Met alle respect maar dit patroon klopt toch helemaal niet hoor. Als je zegt dat ik de telpatronen niet moet vermeerderen naargelang de meerderingen dan krijg je op den duur meer recht gebreid dan het patroon gebreid. Bij de voorpanden moet je ook anders meerderen waardoor het ene voorpand langer is dan het andere voorpand. Ik zie hier de logica niet van in.
18.12.2025 - 22:52
![]() Pia wrote:
Pia wrote:
Guten Tag, ich hätte eine Frage bezüglich der Armkugel: In der Anleitung steht "Dann je 4-4-4-4-5-5-6 Maschen beidseitig abketten, bis der Ärmel eine Länge von 52-50-49-50-48-46-45 cm hat." Wie viele Maschen bleiben nach diesen Abnahmen noch übrig? Also wie oft muss ich diesen Schritt des abketten wiederholen?
15.12.2025 - 15:25DROPS Design answered:
Liebe Pia, die restliche Maschenanzahl kann verschieden sein, je nach der Reihenanzahl, das wichtigste ist hier die Höhe bzw Länge, und daß Sie genauso viele Maschen am Anfang den Hin- sowie den Rückreihen abgekettet haben, damit die Armkugel symmetrisch wird. Viel Spaß beim Stricken!
16.12.2025 - 08:48
Winter Sketch Sweater#wintersketchsweater |
||||||||||||||||
 |
 |
|||||||||||||||
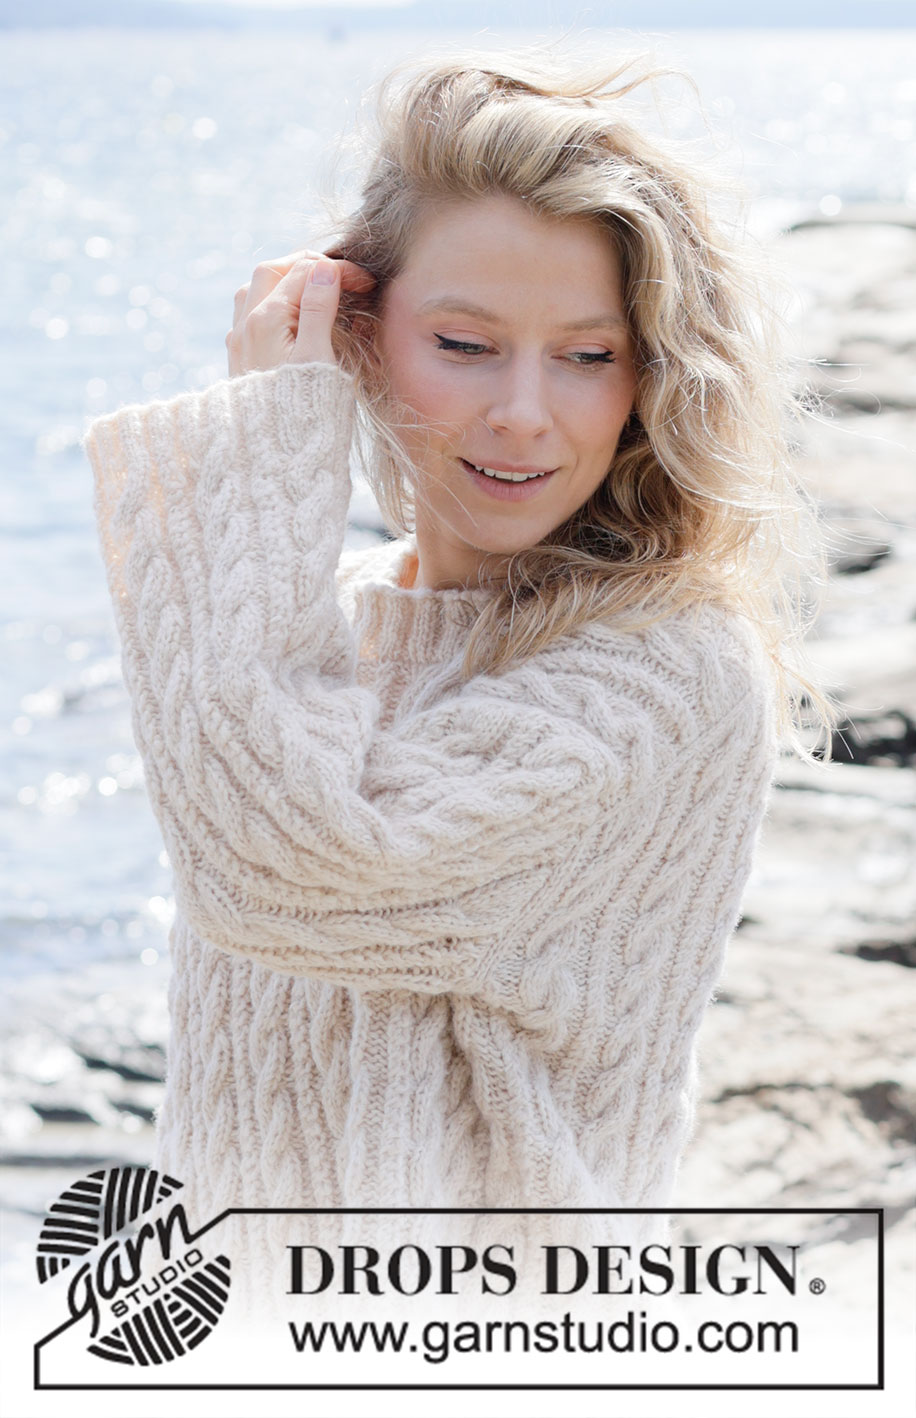
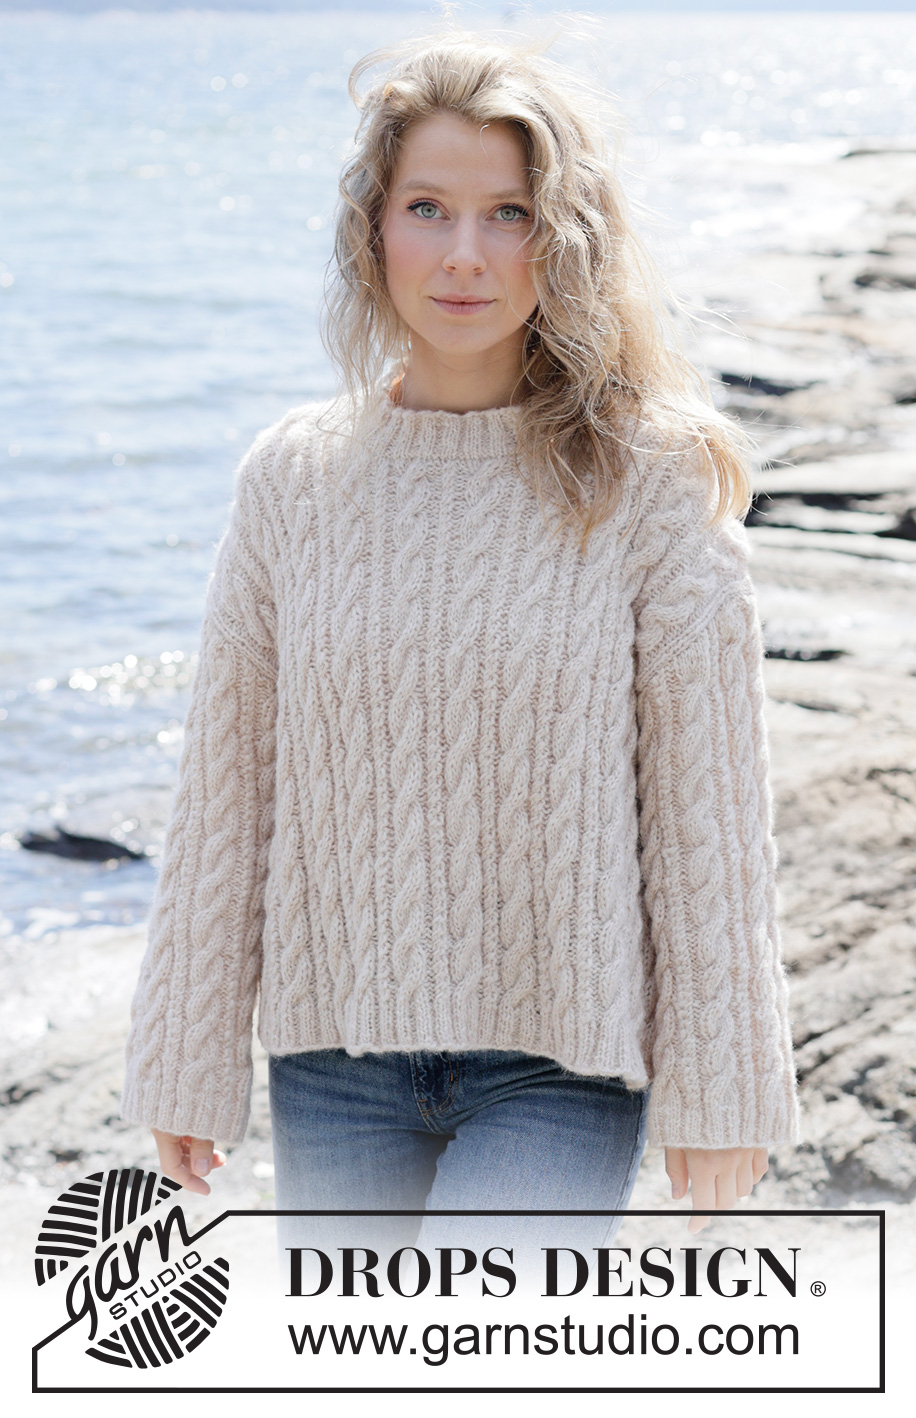
Knitted jumper in DROPS Air. The piece is worked top down with European/diagonal shoulders and cables. Sizes XS - XXXL.
DROPS 264-1 |
||||||||||||||||
|
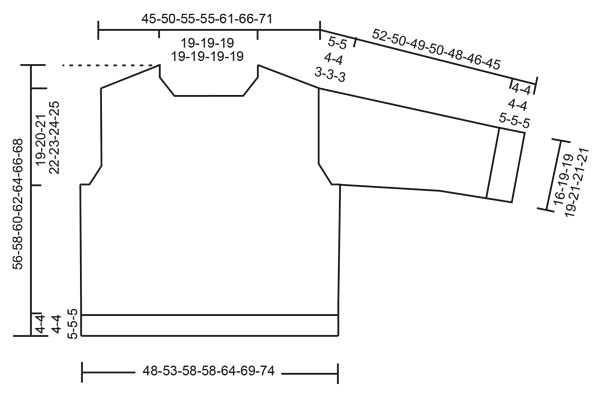
------------------------------------------------------- EXPLANATIONS FOR THE PATTERN: ------------------------------------------------------- PATTERN: See diagrams A.1 to A.4. Start at the arrow for your size (applies to A.1 and A.3). If there are not enough stitches for a cable, work in stocking stitch. The diagrams show the pattern from the right side. INCREASE TIP-1: INCREASE 1 STITCH TOWARDS THE LEFT - from RIGHT SIDE: Use left needle to pick up yarn between 2 stitches from row below, pick up yarn from the front and knit in the stitch loop that is on the back of the needle. INCREASE 1 STITCH TOWARDS THE RIGHT - from RIGHT SIDE: Use left needle to pick up yarn between 2 stitches from row below, pick up yarn from the back and knit in the stitch loop that is on the front side of the needle. . INCREASE TIP-2: INCREASE 1 STITCH TOWARDS THE RIGHT - from WRONG SIDE: Use left needle to pick up yarn between 2 stitches from row below, pick up yarn from the back and purl in the stitch loop that is on the front side of the needle. INCREASE 1 STITCH TOWARDS THE LEFT - from WRONG SIDE: Use left needle to pick up yarn between 2 stitches from row below, pick up yarn from the front and purl in the stitch loop that is on the back side of the needle. ------------------------------------------------------- START THE PIECE HERE: ------------------------------------------------------- JUMPER – SHORT OVERVIEW OF THE PIECE: The pattern uses both long and short needles; start with the length which fits the number of stitches and change when necessary. The piece is started back and forth, casting on stitches at the back of the neck and working top down with pattern, while increasing stitches on each side for the back shoulders, which become slightly diagonal. The back piece is worked as far as the armholes. The front piece is then worked in 2 sections, knitting up stitches along 1 back shoulder, working pattern and increasing for the neckline. This is repeated on the other shoulder, the 2 front sections are joined when the neckline is finished and worked as far as the armholes. The front and back pieces are joined on the same circular needle and the body worked in the round. The sleeves are worked in the round, bottom up as far as the sleeve cap, which is finished back and forth. Stitches are knitted up around the neckline and the neck worked in the round. If there is a «0» in your chosen size, skip the information and go straight to the next instruction. BACK PIECE: The piece is started back and forth. Cast on 34-34-34-34-34-34-34 stitches with circular needle size 5 mm and DROPS Air. Purl 1 row from the wrong side, increasing 6-10-6-6-10-6-10 stitches evenly on this row = 40-44-40-40-44-40-44 stitches. Now work PATTERN, starting at the arrow for your size in diagrams A.1 and A.3: ROW 1 (right side): Read INCREASE TIP-1. Work A.1, then A.2 2-1-2-2-1-2-1 times (= 24-12-24-24-12-24-12 stitches), work A.3 – increase leans towards the left at the beginning of the row and towards the right at the end of the row. ROW 2 (wrong side): Read INCREASE TIP-2. Purl 3, increase 1 stitch towards the right, knit above knit and purl above purl until there are 3 stitches left, increase 1 stitch towards the left, purl 3. The increases should fit into the pattern inside 3 stocking stitches on each side. Work ROWS 1 and 2 a total of 12-8-12-12-8-12-8 times (24-16-24-24-16-24-16 rows worked) = 88-76-88-88-76-88-76 stitches. Now work as follows, all sizes beginning on the first row in the diagrams: ROW 1 (right side): Remember INCREASE TIP-1. Work A.1, then A.2 6-5-6-6-5-6-5 times (= 72-60-72-72-60-72-60 stitches), work A.3. ROW 2 (wrong side): Remember INCREASE TIP-2. Purl 3, increase 1 stitch towards the left, knit above knit and purl above purl until there are 3 stitches left, increase 1 stitch towards the right, purl 3. Work ROWS 1 and 2 a total of 3-9-9-9-12-12-12 times (6-18-18-18-24-24-24 rows worked) = 100-112-124-124-124-136-124 stitches. The increases are finished in sizes XS, S, M and L and the pattern has been established. Skip the next paragraph in these sizes. Continue as follows in sizes XL, XXL and XXXL: ROW 1 (right side): Work A.1, then A.2 0-0-0-0-5-6-5 times (0-0-0-0-60-72-60 stitches), work A.3. ROW 2 (wrong side): Purl 3, increase 1 stitch towards the left, knit above knit and purl above purl until there are 3 stitches left, increase 1 stitch towards the right, purl 3. Work ROWS 1 and 2 a total of 0-0-0-0-3-3-9 times (0-0-0-0-6-6-18 rows worked) = 100-112-124-124-136-148-160 stitches. The pattern is now established. From the right side the pattern ends with the first 10 stitches in A.2 before the 3 stocking stitches. Insert 1 marker outermost on one side. The piece is now measured from here! Continue pattern A.2 with 3 stocking stitches on each side (remember to maintain the knitting tension) until the piece measures 6-6-5-6-6-5-6 cm from the marker, down the armhole and with the last row from the wrong side. Now increase for the armholes. INCREASE FOR ARMHOLES: ROW 1 (right side): Remember INCREASE TIP-1. Knit 3, increase 1 stitch towards the left, work pattern as before until there are 3 stitches left, increase 1 stitch towards the right, knit 3. ROW 2 (wrong side): Knit above knit and purl above purl– work the new stitches into A.2 as you go. Work ROWS 1 and 2 a total of 4 times = 108-120-132-132-144-156-168 stitches. The piece measures 10-10-9-10-10-9-10 cm from the marker and down the armhole. Make a note of the last row worked in A.2 so you can match the back and front pieces later on, before joining them together. Cut the strand, place the stitches on a stitch holder/thread. Work the left front piece along the left back shoulder as follows: LEFT FRONT PIECE: Find the left back shoulder as follows: Lay the back piece flat, right side up, with the stitch holder towards you; left side of piece = left shoulder. Start from the right side by the neckline on the left back shoulder and knit up 1 stitch in each row worked, inside the outermost stitch (= 30-34-42-42-46-54-58 stitches), then knit up 1 stitch outermost on the shoulder = 31-35-43-43-47-55-59 shoulder-stitches. All length-measurements on the front piece are taken from this knitted up row. Work the first row from the wrong side as follows: Purl 3, then work rib (knit 2, purl 6, knit 2, purl 2) to end of row – the pattern reflects the outermost stitches on the back piece. Continue the pattern back and forth as follows: ROW 1 (right side): Knit 2, knit 0-4-0-0-4-0-4, purl 2, work A.4 until there are 3 stitches left, knit 3. ROW 2 (wrong side): Knit above knit and purl above purl. Work until the piece measures 6-7-8-9-10-11-12 cm, with the last row from the wrong side. Make a note of the last row worked in A.4, so the two front pieces match before they are increased for the neckline. Increase as follows: ROW 1 (right side): Remember INCREASE TIP-1. Knit 2, increase 1 stitch towards the left, work pattern as before until there are 3 stitches left, increase 1 stitch towards the right, knit 3. ROW 2 (wrong side): Knit above knit and purl above purl– work the new stitches into A.4 as you go. Work ROWS 1 and 2 a total of 4 times (8 rows worked) = 35-39-47-47-51-59-63 stitches, with the next row from the right side. Cut the strand, place the stitches on a stitch holder/thread. Work the right front piece along the right back shoulder as follows: RIGHT FRONT PIECE: Start from the right side by the armhole on the right back shoulder and knit up 1 edge stitch in the outermost stitch, then 1 stitch in each row worked inside the outermost stitch as far as the neckline = 31-35-43-43-47-55-59 shoulder-stitches. All length-measurements on the front piece are taken from this knitted up row. Work the first row from the wrong side as follows: Purl 2-6-2-2-6-2-6, knit 2, work rib (knit 2, purl 2, knit 2, purl 6) until there are 3 stitches left, purl 3 - the pattern reflects the outermost stitches on the back piece. Now work pattern back and forth as follows: ROW 1 (right side): Knit 3, work A.2 until there are 2 stitches left, knit 2. ROW 2 (wrong side): Knit above knit and purl above purl. Work until the piece measures 6-7-8-9-10-11-12 cm, make sure the pattern has been worked to the same row as on the left front piece. Increase for the neckline as follows: ROW 1 (right side): Knit 3, continue the pattern until there are 2 stitches left, increase 1 stitch towards the right, knit 2 – remember INCREASE TIP-1. ROW 2 (wrong side): Knit above knit and purl above purl – work the new stitches into A.2 as you go. Work ROWS 1 and 2 a total of 4 times (8 rows worked) = 35-39-47-47-51-59-63 stitches, with the next row from the right side. The 2 front pieces are now joined as follows – make sure the pattern matches on both front pieces. FRONT PIECE: From the right side, work pattern as before across the right front piece, then cast on 30-34-30-30-34-30-34 stitches, work pattern across the left front piece as before until there are 3 stitches left, knit 3 = 100-112-124-124-136-148-160 stitches. The cast-on stitches for the neckline will fit into pattern A.2, continue the pattern on the next row from the wrong side. From the right side the pattern finishes with the first 10 stitches in A.2 before the 3 knitted stitches. Continue A.2 back and forth with 3 stocking stitches on each side until the piece measures 24-26-29-30-32-35-36 cm, making sure you finish on the same row as on the back piece before increasing for the armholes. INCREASE FOR ARMHOLES: ROW 1 (right side): Remember INCREASE TIP-1. Knit 3, increase 1 stitch towards the left, continue the pattern until there are 3 stitches left, increase 1 stitch towards the right, knit 3. ROW 2 (wrong side): Knit above knit and purl above purl– work the new stitches into A.2 as you go. Work ROWS 1 and 2 a total of 4 times = 108-120-132-132-144-156-168 stitches. The front piece measures 28-30-33-34-36-39-40 cm, with the last row from the wrong side, finishing on the same row as on the back piece. Now join the front and back pieces for the body. BODY: From the right side, continue the pattern across the front piece, then across the back piece and knit the first 3 stitches on the front piece = 216-240-264-264-288-312-336 stitches. Insert 1 marker (beginning of round). The piece is now measured from here! Continue the pattern in the round (the pattern fits under each sleeve). Make sure the cables are worked on the same round. Work until the body measures 26-26-25-26-25-24-25 cm from the marker. Change to circular needle size 3 mm. Work rib (knit 2, purl 2), which should neatly match the pattern. When the rib measures 4-4-4-4-5-5-5 cm, cast off with rib. The jumper measures approx. 56-58-60-62-64-66-68 cm, from by the neckline. The front piece is approx. 2 cm longer because some of the front piece is on the back. SLEEVES: The sleeves are worked in the round as far as the sleeve cap, then finished back and forth. Cast on 72-84-84-84-96-96-96 stitches with double pointed needles size 3 mm. Work rib in the round (knit 2, purl 2) for 4-4-4-4-5-5-5 cm. Change to double pointed needles size 5 mm and work A.4 6-7-7-7-8-8-8 times on the round. Insert 1 marker-thread at the beginning of the round; this is used when increasing under the sleeve. Allow the thread to follow your work onwards. Work pattern until the sleeve measures 20 cm. Now increase in purled stitches on each side of the marker-thread as follows: Work until there is 1 stitch left on the round, make 1 yarn over, work 4 stitches as before (the cable sits in the middle of these 4 stitches), make 1 yarn over (= 2 increased stitches, which are purled and lie on each side of 2 cabled stitches). Increase like this every 10-0-10-8-10-10-5 cm a total of 3-0-2-4-2-3-5 times = 78-84-88-92-100-102-106 stitches. When the sleeve measures 47-45-45-46-45-43-42 cm, work the sleeve cap as follows, with the next row an odd row in A.4 so all cables are still worked from the right side. SLEEVE CAP: On the next round cast off 16 stitches under the sleeve but, to avoid cutting the strand, begin the round 7 stitches before the marker-thread, cast off 16 stitches (the 2 cable-stitches are in the middle of these 16 stitches) and work to end of round = 62-68-72-76-84-86-90 stitches. Continue the pattern back and forth, casting off for the sleeve cap at the beginning of each row as follows: Cast off 4-4-4-4-5-5-6 stitches 2 times on each side, then 3-3-3-3-4-4-4 stitches 1 time on each side = 40-46-50-54-56-58-58 stitches. Cast off 4-4-4-4-5-5-6 stitches on each side until the sleeve measures 52-50-49-50-48-46-45 cm. Cast off the remaining stitches at the same time as knitting together all knitted stitches, 2 and 2. NECK: Use circular needle size 3 mm. Start from the right side on one shoulder-line and knit up 96-100-100-104-104-108-108 stitches, inside 1 stitch around the neckline. The stitch count must be divisible by 4. Work rib in the round (knit 2, purl 2) for 4-4-4-4-5-5-5 cm. Cast off a little loosely. ASSEMBLY: Sew the sleeves into the armholes, inside 1 stitch. |
||||||||||||||||
Diagram explanations |
||||||||||||||||
|
||||||||||||||||
 |
||||||||||||||||
 |
||||||||||||||||
 |
||||||||||||||||
 |
||||||||||||||||
Have you finished this pattern?Tag your pictures with #dropspattern #wintersketchsweater or submit them to the #dropsfan gallery. Do you need help with this pattern?You'll find 29 tutorial videos, a Comments/Questions area and more by visiting the pattern on garnstudio.com. © 1982-2026 DROPS Design A/S. We reserve all rights. This document, including all its sub-sections, has copyrights. Read more about what you can do with our patterns at the bottom of each pattern on our site. |
||||||||||||||||





Post a comment to pattern DROPS 264-1
We would love to hear what you have to say about this pattern!
If you want to leave a question, please make sure you select the correct category in the form below, to speed up the answering process. Required fields are marked *.