
Categorías populares
¿Buscas un hilo?


Comentarios / Preguntas (16)
![]() Maria Saginario escribió:
Maria Saginario escribió:
Don't know if I put this question in the right place. I have been trying to replace with worsted wool in this skirt. Any help would be most appreciated. I really want to start this project; please answer asap. Thanks and Happy New Year - God willing.
30.12.2021 - 21:33DROPS Design respondió:
Hello Maria Saginario! Please knit a swatch to make sure you get the right knitting tension. Also, if using bigger needles, you could try making a smaller size. Measure your hip measurement and calculate how many stitches you need. Happy knitting!
30.12.2021 - 22:41
![]() Maria escribió:
Maria escribió:
I have been trying to figure out how to use worsted weight in this skirt. Any help would be appreciated.
30.12.2021 - 21:30
![]() Maria Saginario escribió:
Maria Saginario escribió:
When using needles to work in the round, do I need to use a longer cable size? Also, I am assuming the measurements given are of the front of the piece which would mean I need to double the measurement so the skirt fits around the waist? Is this correct? I am anxious to start and want to be sure I understand. Thanks for your help.
23.12.2021 - 17:46DROPS Design respondió:
Hi Maria, We recommend a circular needle length 24 and 32 inches when working the skirt. The measurement chart shows the width of the skirt, so you double the measurement for the waist. Happy knitting!
24.12.2021 - 08:05
![]() Knit1 escribió:
Knit1 escribió:
Can I make this skirt longer?
17.09.2021 - 04:16DROPS Design respondió:
Dear Knit1, we are unfortunately not able to adjust every pattern to every single request, feel free to contact your DROPS store or a knitting forum for any individual assistance. Thanks for your comprehension. Happy knitting!
17.09.2021 - 07:25
![]() Whitepaw escribió:
Whitepaw escribió:
For increase tip 2 it says that I am to have a knit stitch on each side of the stockinette stitch, but I only have 1 stitch that I worked the first stitch of A1 for. Am I supposed to increase on each side of this A1 stitch or am I supposed to increase on just the first and last stitch of the stockinette sections ?
28.05.2021 - 14:30DROPS Design respondió:
Dear Whitepaw, you will increase after A.1 + 1 stitch in stocking stitch at the beg of front/back piece and before 1 stitch + A.1 at the end of front/back piece. Happy knitting!
28.05.2021 - 15:18
![]() Whitepaw escribió:
Whitepaw escribió:
How do I increase every 3rd round 8 times and every 6th round twice ? Is it not the same as increasing every third round you knit?
09.05.2021 - 15:07DROPS Design respondió:
Dear Whitepaw, yes, you increase first every 3rd. round you knit 8 times, then every 6th round you knit 2 times. Happy Knitting!
09.05.2021 - 15:23
![]() Myriam De Meyer escribió:
Myriam De Meyer escribió:
Voor de kleinste maat heb ik na de boord 138 steken. Dan moet ik 6 x 4 ( om de drie naalden) en 2 x 4 (om de zes naalden merderen. Als ik goed kan rekenen komt dit op 174 steken. In het patroon staat echter 170 steken. Wat doe ik verkeerd?
06.05.2021 - 18:19DROPS Design respondió:
Dag Myriam,
Je meerdert inderdaad in totaal 8 keer 4 steken, dat zijn in totaal 32 steken gemeerderd. 32 + 138 = 170 steken.
07.05.2021 - 10:49
![]() Whitepaw escribió:
Whitepaw escribió:
When you switch over to the bigger sized needles and have completed the sectioning off and have 176 stitches and you "continue the pattern in the round" does this mean you increase every round ? Example for the first 22 stitches (18+4 for the large size) you add another 4 stitches again or do you only add the stitches every third round ?
02.05.2021 - 15:12DROPS Design respondió:
Dear Whitepaw, you d not have to repeat the increases (evenly), only increase what is stated in the text. Happy Knitting!
02.05.2021 - 17:16
![]() Laila Sandaas escribió:
Laila Sandaas escribió:
Det skal økes fire masker pr omgang, men det står man skal øke ,1 maske etter første maske i det glattstrikkede stykke foran og bak, det blir bare to masker, skal det ikke også økes sist på det glattstrikkede stykket?
24.03.2021 - 14:56DROPS Design respondió:
Hei Laila, Ja, du har rett og det skal økes 1 maske på begge sider av glattstrikket partiet foran og bak (se Øketips 2 på toppen av oppskriften). God fornøyelse!
25.03.2021 - 08:49
![]() Devine escribió:
Devine escribió:
Hej! Efter första varvet (precis efter resåren) med ökningar står det att man ska fortsätta i 3 varv. Ska man öka likadant i tre varv då så man ökar som på första varvet, ytterligare 3 varv till?
01.02.2021 - 13:34DROPS Design respondió:
Hej Devine. Nej, du stickar inga ökningar på de 3 varven du stickar mönster dvs A.1 där du tidigare stickade A.1 och slätstickning där du tidigare stickade slätstickning. Efter de varven börjar ökningar enligt beskrivningen. Mvh DROPS Design
02.02.2021 - 10:40
|
||||||||||
Swing Time#swingtimeskirt |
||||||||||
 |
 |
|||||||||
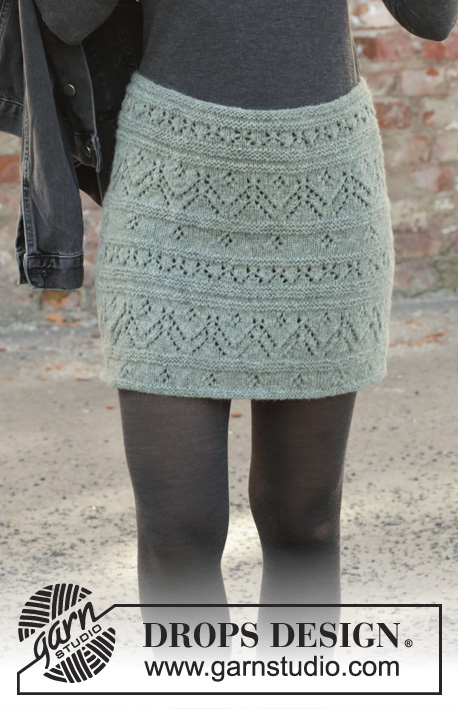
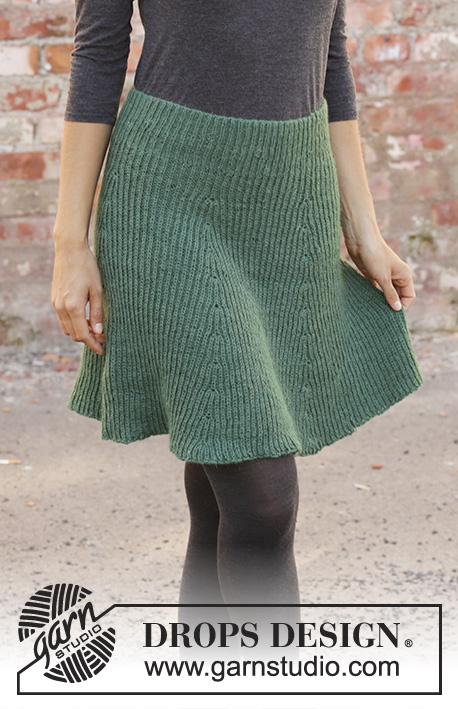
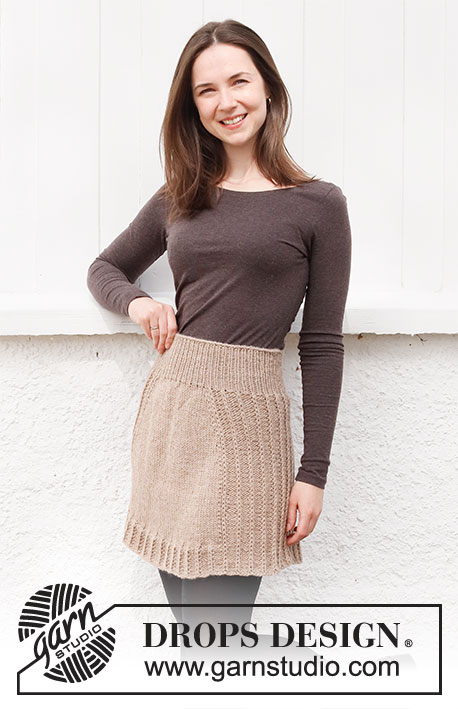
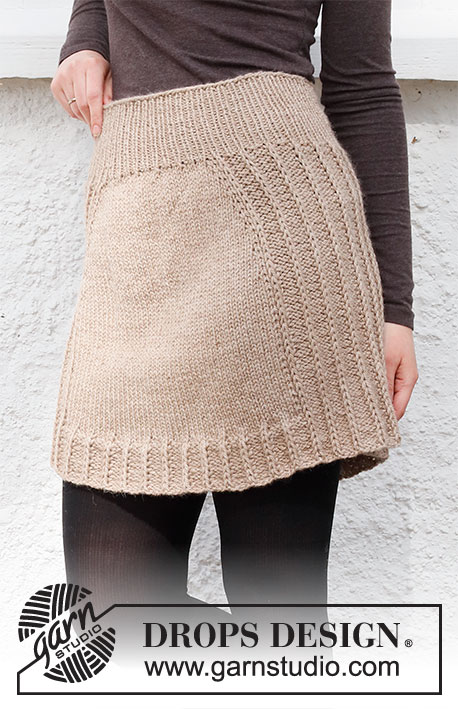
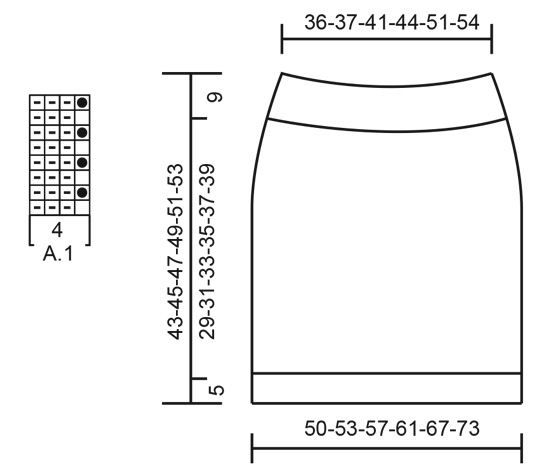
Falda de punto en DROPS Nepal. La pieza está tejida de arriba para abajo con punto inglés en los lados. Tallas S – XXXL.
DROPS 218-24 |
||||||||||
|
EXPLICACIONES PARA REALIZAR EL PATRÓN: ------------------------------------------------ PATRÓN: Ver diagrama A.1. TIP-1 PARA AUMENTAR (distribuidos equitativamente): Para calcular cómo aumentar equitativamente, contar el número total de puntos en la aguja (p. ej. 12 puntos) y dividirlo entre el número de aumentos a hacer (p. ej. 3) = 4. En este ejemplo, aumentar haciendo 1 lazada después de cada 4º punto. En la vuelta siguiente, tejer las lazadas retorcidas para evitar que se formen agujeros. TIP-2 PARA AUMENTAR (aplicar a los lados): Aumentar haciendo 1 lazada en el interior de 1 punto derecho a cada lado de las secciones en punto jersey de la falda (frente y espalda = 4 puntos aumentados en la vuelta). En la vuelta siguiente, tejer las lazadas retorcidas de derecho para evitar que se formen agujeros. Después tejer los puntos nuevos en punto jersey. TIP PARA REMATAR: Para evitar que la orilla de remate quede apretada, se puede rematar con una aguja de tamaño más grande. Si la orilla aún estuviese apretada, hacer 1 lazada después de aprox. cada 4º punto al mismo tiempo que se rematan los puntos; rematar las lazadas como puntos normales. ------------------------------------------------ COMENZAR LA PIEZA AQUÍ: ------------------------------------------------ FALDA – RESUMEN DE LA PIEZA: La pieza se teje en redondo con aguja circular, de arriba para abajo. FALDA: Montar 128-132-148-160-184-196 puntos con aguja circular tamaño 3.5 mm y Nepal. Tejer 1 vuelta de derecho. Insertar un marcador al principio de la vuelta (= centro de la espalda). Después tejer el resorte (= 1 derecho, 1 revés) en redondo durante 9 cm. Cambiar a aguja circular tamaño 5 mm. Tejer el patrón de la manera siguiente: Tejer de derecho sobre los primeros 12-12-14-18-22-24 puntos y aumentar al mismo tiempo 3-3-3-4-4-5 puntos distribuidos equitativamente – leer TIP-1 PARA AUMENTAR, tejer A.1 sobre los 40-40-44-44-48-48 puntos siguientes (= 10-10-11-11-12-12 repeticiones), tejer el primer punto de A.1, tejer de derecho sobre los 23-25-29-35-43-49 puntos siguientes y aumentar al mismo tiempo 5-6-7-8-8-10 puntos distribuidos equitativamente, tejer A.1 sobre los 40-40-44-44-48-48 puntos siguientes (= 10-10-11-11-12-12 repeticiones), tejer el primer punto de A.1, tejer de derecho sobre los últimos 11-13-15-17-21-25 puntos y aumentar 2-3-4-4-4-5 puntos distribuidos equitativamente = 138-144-162-176-200-216 puntos. ¡RECORDAR MANTENER LA MISMA TENSIÓN DE TEJIDO DE LA MUESTRA! Continuar este patrón en redondo. Cuando se han tejido 3 vueltas, comenzar a aumentar a cada lado de las secciones tejidas de derecho en el frente y en la espalda de la falda – leer TIP-2 PARA AUMENTAR. Aumentar así a cada 3ª vuelta 6-7-8-8-9-10 veces y a cada 6ª vuelta 2-2-2-2-2-2 veces = 170-180-202-216-244-264 puntos (= 44-49-56-63-73-83 puntos en las 2 secciones tejidas de derecho). Continuar con el patrón y punto jersey hasta que la falda mida 38-40-42-44-46-48 cm a partir de la orilla de montaje y en dirección hacia abajo del centro de la espalda. La vuelta siguiente se teje de la manera siguiente: Tejer el patrón como antes y aumentar 7-6-7-8-6-8 puntos distribuidos equitativamente sobre los 44-49-56-63-73-83 puntos en punto jersey en el frente y la espalda de la falda (= 51-55-63-71-79-91 puntos) = 184-192-216-232-256-280 puntos. Tejer hasta el primer punto en punto inglés en uno de los lados; este es ahora el principio de la vuelta. Tejer una orilla de la manera siguiente: Tejer A.1 hasta el fin de la vuelta (= 46-48-54-58-64-70 repeticiones). Continuar este patrón durante 5 cm – ajustar para terminar después de la penúltima vuelta del diagrama (para rematar en una vuelta con puntos en punto inglés). Rematar de la manera siguiente – leer TIP PARA REMATAR: * Insertar la aguja derecha a través del punto debajo del punto siguiente, tejer 1 punto derecho y rematar este punto, después rematar los 3 puntos siguientes de revés *, tejer de *a* hasta el fin de la vuelta. La falda mide aprox. 43-45-47-49-51-53 cm. |
||||||||||
Explicaciones del diagrama |
||||||||||
|
||||||||||
 |
||||||||||
¿Terminaste este patrón?Entonces, etiqueta tus fotos con #dropspattern #swingtimeskirt o envíalas a la galería #dropsfan. ¿Necesitas ayuda con este patrón?Encontrarás 17 videos tutoriales, un espacio para comentarios/preguntas y más visitando la página del patrón en garnstudio.com © 1982-2026 DROPS Design A/S. Todos los derechos reservados. Este documento, incluyendo todas sus sub-secciones, está protegido por los derechos de autor (copyright). Lee más acerca de lo que puedes hacer con nuestros patrones en la parte de abajo de cada patrón de nuestro sitio. |
||||||||||


Con más de 40 años en el diseño de modelos de punto y de ganchillo, DROPS Design ofrece una de las más vastas colecciones de patrones gratuitos en el internet - traducidos en 17 idiomas. Al día de hoy, contamos con 324 catálogos y 12290 patrones - de los cuales 11673 están traducidos en español.
Nosotros trabajamos con mucho esmero para brindarte lo mejor que las labores de punto y ganchillo tienen para ofrecer,inspiración y consejos, así como hilos de magnífica calidad a precios increíbles! Te gustaría usar nuestros patrones para otro fin además del uso personal? Puedes leer acerca de lo que estás permitida a hacer en el texto de Copyright en la parte de abajo de todos nuestros patrones. Felices labores!
Escribe un comentario sobre DROPS 218-24
¡Nos encantaría saber qué piensas acerca de este patrón!
Si quieres escribir una pregunta referente al patrón, por favor asegúrate de elegir la categoría correcta en el formulario debajo, para acelerar el proceso de respuesta. Los campos obligatorios están marcados con un *.