
Categorías populares
¿Buscas un hilo?


Comentarios / Preguntas (14)
![]() Anna escribió:
Anna escribió:
Ich habe einen Absatz überlesen, als ich die Anleitung auf dem Handy durchgescrollt habe! So erklärt sich das Problem, das ich mit der Abnahme hatte! Das ist mir ja nun peinlich... Vielen Dank trotzdem für die Möglichkeit, hier Fragen zu den Anleitungen zu stellen.
01.01.2026 - 19:12
![]() Anna escribió:
Anna escribió:
Ich komme leider am Ende des Vollpatent-Teils nicht weiter. Egal, was ich versuche: Ich komme beim Folgen der Anleitung bei der Abnahme nicht auf die gewünschten 80M. Wenn ich 3M zusammenstricke, ende ich bei deutlich mehr als 80M. Zählen die noch auf der Nadel befindlichen Umschläge aus der letzten Patentrunde als Maschen im Sinne der Abnahme oder nicht? Muss ich also ggf. 5M zusammenstricken? Liegt da mein Denkfehler?
01.01.2026 - 19:02
![]() John Bland escribió:
John Bland escribió:
It seems more natural to use an odd number of stitches when doing the English Rib as then you don't do two stitches the same at the start/end of the round. Why use an even number of stitches?
10.07.2022 - 09:06DROPS Design respondió:
Dear Mrs Bland, the hat is worked in the round, so that you need an even number of stitches to get the pattern fit in the round. This video might help you to understand how to work English Rib in the round. Happy knitting!
11.07.2022 - 08:37
![]() John Bland escribió:
John Bland escribió:
I knit English style (yarn in right hand) and it took my quite a bit to work out how to knit English rib this way. I share it here in case anyone else would benefit. The rows are: - Knit Row -- *Yarn to front; Slip 1; Knit 1 with yarn in front* repeat Pearl Row -- *(Yarn in front) Slip 1; Yarn over; Pearl 1 Experts might want to double check this
10.07.2022 - 09:03
![]() Diana Parkhomovskaya escribió:
Diana Parkhomovskaya escribió:
My daughter-in-law really likes the picture of your beret, but the yarn she likes is a bit thicker, medium, US 4 (lion brand Heartland). Would you be able recommend for needle sizes and initial number of stitches (size small) to adjust for thicker yarn? Thank you
23.01.2022 - 23:48DROPS Design respondió:
Dear Diana, please understand that our patterns are made available to support DROPS yarns. Therefore we cannot help you with other brands' yarns.
24.01.2022 - 00:36
![]() Karen Haag escribió:
Karen Haag escribió:
I tried to make this beret and gave up. But I really wanted to make it and am trying again. But I’ve figured out the problem or what I think might be the problem. The instructions in the pattern for the English Rib do not match what is written in your tutorial for English rib. In the pattern, row 2 says to purl the yo and slipped st together. In your tutorial row 2 says to knit them together. The US needle equivalent to 3 mm is a 2 the pattern says 2,5:
18.01.2022 - 22:10DROPS Design respondió:
Dear Mrs Haag, English rib in the round are worked the same way in the pattern and in the video, you first work round 1 to 3 then repeat only round 2, but the video starts with (make 1 yarn over, slip 1 then work Knit 1) while the pattern starts with (Knit 1, make 1 yarn over, slip 1), but then you work the stitches the same way. Hope it will help, happy knitting!
19.01.2022 - 09:06
![]() Tawni escribió:
Tawni escribió:
So i dont have cable needles or double pointed needles for this i only have straight needles. Also my needle sizes are 8 & 11 can this still be done on straight needles?
29.11.2020 - 03:17DROPS Design respondió:
Dear Tawni, you can't work this hat with straight needles, since you need to work in the round. You need to use either circular needles or double pointed needles. Also, to work with that thickness of yarn you'd need the sizes indicated in the pattern. Happy knitting!
29.11.2020 - 18:35
![]() Susan Berlin escribió:
Susan Berlin escribió:
I am knitting the Lagoon Beret pattern. In part, the instructions say "When hat measures 16-18 cm = 6 1/4”-7” but it's not clear whether you measure from the beginning of the knitting, or from above the K1P1 brim. Could you please clarify? Thank you!
16.05.2020 - 14:48DROPS Design respondió:
Dear Susan, the measurement is for whole garment, so from the beginning. Happy knitting!
17.05.2020 - 16:27
![]() Yveline Candau escribió:
Yveline Candau escribió:
Bonjour à part les augmentations à 3cm du bord n y a t il pas d autres augmentations cela me parait impossible vu l ampleur du modèle
14.03.2020 - 16:31DROPS Design respondió:
Bonjour Mme Candeau, c'est pourtant cette différence + la largeur des côtes anglaises qui vont donner l'ampleur du béret, on va ainsi augmenter 20 ou 22 m après les côtes 1/1 et continuer ensuite en côtes anglaises jusqu'à 16-18 cm de hauteur totale. Pensez à bien vérifier votre tension (= échantillon) - plus d'infos ici. Bon tricot!
16.03.2020 - 09:46
![]() Evelin escribió:
Evelin escribió:
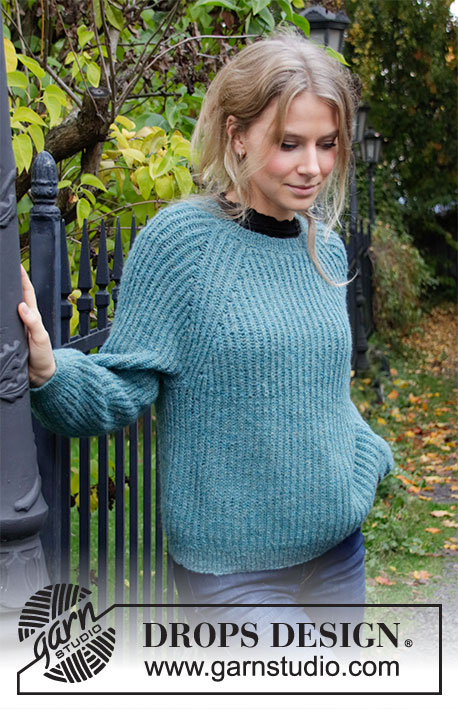
Hola, hay patrón del chal o bufanda que lleva la muchacha en sus hombros?
15.10.2019 - 14:56DROPS Design respondió:
Hola Evelin. Este modelo no está en esta colección. Puede ser que vaya a estar publicado como extras. Sigue las noticias de Drops en Facebook o Instagram.
17.10.2019 - 19:27
|
|
Lagoon Beret#lagoonberet |
|
|
|
|
Boina de punto en punto inglés con DROPS Sky.
DROPS 204-17 |
|
|
EXPLICACIONES PARA REALIZAR LA LABOR: ---------------------------------------------------------- TIP PARA LOS AUMENTOS: Para calcular cómo aumentar puntos repartidos, usar el número total de puntos en la vuelta ( p.e 100 puntos) y dividir los puntos entre el número de aumentos a trabajar (p.e 20) = 5. En este ejemplo aumentar recogiendo el hilo entre cada 2 puntos y trabajar este hilo retorcido para evitar que se formen agujeros. Aumentar de esta manera cada 5 puntos. PUNTO INGLÉS: VUELTA 1: * 1 derecho, hacer 1 hebra, deslizar 1 punto como de revés*, trabajar desde * a * la vuelta entera. VUELTA 2: * Hacer 1 hebra, deslizar 1 punto como de revés, trabajar la hebra y el punto deslizado juntos de revés*, repetir de * a * la vuelta entera. VUELTA 3: * Trabajar la hebra y el punto deslizado juntos de derecho, 1 hebra, deslizar 1 punto como de revés*, repetir de * a * la vuelta entera. Repetir las vueltas 2 y 3. ---------------------------------------------------------- COMENZAR LA LABOR AQUÍ: ---------------------------------------------------------- BOINA - RESUMEN DE LA LABOR: Trabajada en redondo con una aguja circular. Cambiar a agujas de doble punta cuando sea necesario. BOINA: Montar 100-104 puntos en una aguja circular de 3 mm con Sky. Trabajar 1 vuelta de derecho, después trabajar el elástico = 1 derechos/ 1 revés 3 cm. Trabajar 1 vuelta de derecho y a la vez aumentar 20-22 puntos repartidos - leer TIP PARA LOS AUMENTOS = 120-126 puntos. Cambiar a una aguja circular de 4.5 mm. Después trabajar el PUNTO INGLÉS - leer explicación arriba. RECORDAR MANTENER LA TENSIÓN DEL TEJIDO! Cuando el gorro mida 16-18 cm - ajustar para finalizar después de la 2ª vuelta en punto inglés, cambiar a una aguja circular de 3 mm. Trabajar la siguiente vuelta como sigue: * Trabajar la hebra y el punto deslizado juntos de derecho, 1 revés*, trabajar de * a * la vuelta entera. Las hebras ya se han trabajado junto con puntos y ahora hay 120-126 puntos en la vuelta. Continuar con el elástico = 1 derechos/ 1 revés 3 cm. Ahora disminuir en las diferentes tallas como sigue: TALLA S-M: VUELTA 1: * 1 derechos, 1 revés.. trabajar los siguientes 3 puntos juntos de derecho (= 2 puntos disminuidos), 1 revés*, trabajar de * a * la vuelta entera (= 40 puntos disminuidos) = 80 puntos. VUELTAS 2- 4: Derecho sobre derecho y revés sobre revés. VUELTA 5: * 1 derecho, 1 revés, trabajar los siguientes 3 puntos juntos de derecho (= 2 puntos disminuidos), 1 revés, 1 derecho, 1 revés*, trabajar de * a * la vuelta entera (= 20 puntos disminuidos) = 60 puntos. VUELTAS 6- 8: Derecho sobre derecho y revés sobre revés. VUELTA 9: * 1 derecho, 1 revés trabajar los siguientes 3 puntos juntos de derecho (= 2 puntos disminuidos), 1 revés*, trabajar de * a * la vuelta entera (= 20 puntos disminuidos) = 40 puntos. TALLA M/L: VUELTA 1: * 1 derecho, 1 revés, trabajar los siguientes 3 puntos juntos de derecho (= 2 puntos disminuidos), 1 revés*, trabajar de * a * la vuelta entera (= 42 puntos disminuidos) = 84 puntos. VUELTAS 2- 4: Derecho sobre derecho y revés sobre revés. VUELTA 5: * 1 derecho, 1 revés, trabajar los siguientes 3 puntos juntos de derecho (= 2 puntos disminuidos), 1 revés*, trabajar de * a * la vuelta entera (= 28 puntos disminuidos) = 56 puntos. VUELTAS 6- 8: Derecho sobre derecho y revés sobre revés. VUELTA 9: * 1 derecho, 1 revés, trabajar los siguientes 3 puntos juntos de derecho (= 2 puntos disminuidos), 1 revés, 1 derecho, 1 revés*, trabajar de * a * la vuelta entera (= 14 puntos disminuidos) = 42 puntos. AMBAS TALLAS: VUELTA 10: Derecho sobre derecho y revés sobre revés. VUELTA 11: Trabajar los puntos juntos de derecho de 2 en 2 la vuelta entera = 20-21 puntos. Cortar el hilo y pasarlo por los puntos restantes, estirar y asegurar. La boina mide aprox. 22-24 cm. |
|
¿Terminaste este patrón?Entonces, etiqueta tus fotos con #dropspattern #lagoonberet o envíalas a la galería #dropsfan. ¿Necesitas ayuda con este patrón?Encontrarás 13 videos tutoriales, un espacio para comentarios/preguntas y más visitando la página del patrón en garnstudio.com © 1982-2026 DROPS Design A/S. Todos los derechos reservados. Este documento, incluyendo todas sus sub-secciones, está protegido por los derechos de autor (copyright). Lee más acerca de lo que puedes hacer con nuestros patrones en la parte de abajo de cada patrón de nuestro sitio. |


Con más de 40 años en el diseño de modelos de punto y de ganchillo, DROPS Design ofrece una de las más vastas colecciones de patrones gratuitos en el internet - traducidos en 17 idiomas. Al día de hoy, contamos con 324 catálogos y 12290 patrones - de los cuales 11675 están traducidos en español.
Nosotros trabajamos con mucho esmero para brindarte lo mejor que las labores de punto y ganchillo tienen para ofrecer,inspiración y consejos, así como hilos de magnífica calidad a precios increíbles! Te gustaría usar nuestros patrones para otro fin además del uso personal? Puedes leer acerca de lo que estás permitida a hacer en el texto de Copyright en la parte de abajo de todos nuestros patrones. Felices labores!
Escribe un comentario sobre DROPS 204-17
¡Nos encantaría saber qué piensas acerca de este patrón!
Si quieres escribir una pregunta referente al patrón, por favor asegúrate de elegir la categoría correcta en el formulario debajo, para acelerar el proceso de respuesta. Los campos obligatorios están marcados con un *.