
Categorías populares
¿Buscas un hilo?


Comentarios / Preguntas (30)
![]() Agnes Nilssen escribió:
Agnes Nilssen escribió:
Hei! Er en av dem som fikk for mange masker, men fikk hjelp i svarene over. Ønsker at dere skal skrive i diagramforklaring at felling av masker betyr strikk 2 sm i denne oppskriften!
09.01.2016 - 14:03
![]() Florence escribió:
Florence escribió:
Bonjour, pouvez-vous me dire dans quel sens se lit le diagramme (sens vertical et sens horizontal). Merci
12.01.2015 - 19:28DROPS Design respondió:
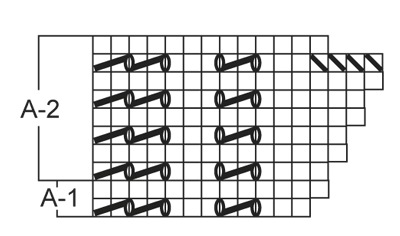
Bonjour Florence, le diagramme se lit de bas en haut, en commençant par le coin de droite (= début de rang) et tous les rangs sur l'endroit se lisent de droite à gauche - tous les rangs sur l'envers de gauche à droite - 1 case = 1 m x 1 rang. Bon tricot!
13.01.2015 - 09:14
![]() Linda escribió:
Linda escribió:
I looked at the comments before starting this pattern and every one must be smarter than me! because no one made any note ( nor was there any indication in the pattern) about how the right side of the chart is actually the TOP of the wristlet. It took me 4-5 starts to figure it out... This should have been included in the instructions. But once I figured it out, I've made four pairs. They are very cute and knit up quickly.
04.01.2015 - 03:36
![]() Sara escribió:
Sara escribió:
Hej! Ska omslaget stickas i främre eller bakre maskbågen på nästkommande varv?
20.09.2013 - 17:31DROPS Design respondió:
Hej. Det ska stickas i den främre maskbågen. Lycka till! Mvh DROPS Design
24.09.2013 - 09:57
![]() Ines escribió:
Ines escribió:
Hola, podrian explicar mejor el patron, quisiera saber de donde empiezan ya que ustedes muestran solo el diagrama y creo que no esta bien explicado, gracias de antemano
22.02.2013 - 23:09
![]() Maria Lindbäck escribió:
Maria Lindbäck escribió:
Hej! Har stickat 1 handledsvärmare nu, och sitter med ca 70 maskor (började med 36). I mönster A2 så gör man ju 4 omslag varje varv, men bara 3rm tills. Hur undviker man då att öka det totala antalet maskor? Tacksam för hjälp. Mvh Maria
20.02.2013 - 15:02DROPS Design respondió:
På varv 7 i diagrammet stickar du ihop 2 m ggr 4 och minskar då antal m igen.
12.03.2013 - 10:53
![]() Roberta Sanders escribió:
Roberta Sanders escribió:
On this project the rows that are all knit are knitted on the wrong side and the yo and k 2 tog are on the rs is that correct. because I was doing the knit row on rs and the yo and the k 2 tog on the ws let me know
11.01.2013 - 22:36DROPS Design respondió:
Dear Mrs Sanders, the rows with k2 tog and yo are worked from RS. the rows with only K are worked from WS. Happy knitting!
16.01.2013 - 15:05
![]() Roberta M Sanders escribió:
Roberta M Sanders escribió:
Regarding the second yarn over do you mean to YO knit two together knit three then YO knit two together YO knit two together then knit the rest?
11.01.2013 - 07:08DROPS Design respondió:
Dear Mrs Sanders, A1, row 1 is worked : K3, yo, K2 tog, yo, K3, yo, K2 tog, yo, K2 tog. In A2, the K3 at the beg of row from RS will be K4 (R1), K5 (R3) and K6 (R5), on R7, you cast off 4 sts and K3. Happy knitting!
11.01.2013 - 08:58
![]() Roberta Sanders escribió:
Roberta Sanders escribió:
When I get to the bind off does the first stitch I knit count as the a bind off or do I knit then bind off 4 stitches. as I go on the knit two together stitches does not seem to line up after doing each bind off triangle please let me know
11.01.2013 - 02:30DROPS Design respondió:
Dear Mrs Sanders, on the last RS row in A2, bind off 4 sts, then K3 (you have 4 sts on the needle before the first yo). On next row from RS, first row in A2 is K4, yo, K2 tog, yo etc... so it should be lined up. Happy knitting!
11.01.2013 - 09:04
![]() Susan Samata escribió:
Susan Samata escribió:
Error: that second YO is wrong!
10.01.2013 - 14:06
|
|||||||||||||
Ellie's Gloves#elliesgloveswristwarmers |
|||||||||||||
 |
 |
||||||||||||
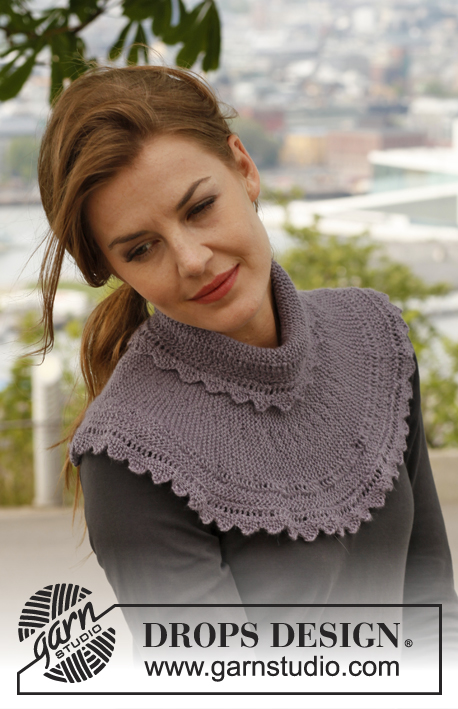
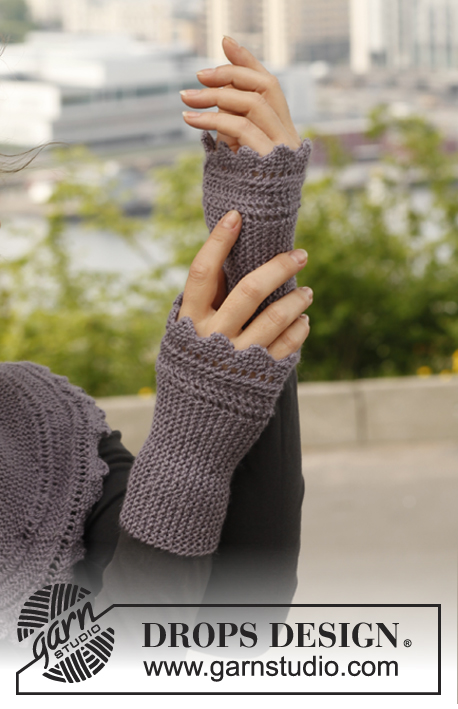
Muñequeras DROPS, de punto, con punto musgo y orillas zigzag en “BabyAlpaca Silk”.
DROPS 141-3 |
|||||||||||||
|
PATRÓN: Ver diagramas A.1 y A.2. Los diagramas muestran todas las hileras en el patrón, vistas por el LD. ------------------------------------------------------ MUÑEQUERA: Tejida de ida y vuelta en la ag. Mon 36 pts en ag tamaño 3 mm con BabyAlpaca Silk. Tejer 1 hilera de derecho por el LR. Continuar de la manera sig: Diagrama A.1 sobre los primeros 12 pts, después tejer de derecho los pts restantes. Cuando A.1 ha sido tejido una vez, continuar con A.2 hasta el fin y tejer los otros pts de derecho en todas las hileras (= pt musgo). El número de pts variará de 37 a 40 dependiendo de donde se encuentre usted en el diagrama. Tejer hasta que la pieza mida aprox 15 cm, ajustar para que reste 1 hilera de A.2 para tejer, y rem flojamente en la última hilera de A.2. Unir la muñequera con una costura en el centro de la parte de atrás, orilla de montaje contra orilla de remate para evitar que se forme una costura abultada. Tejer la otra muñequera. |
|||||||||||||
Explicaciones del diagrama |
|||||||||||||
|
|||||||||||||
 |
|||||||||||||
¿Terminaste este patrón?Entonces, etiqueta tus fotos con #dropspattern #elliesgloveswristwarmers o envíalas a la galería #dropsfan. ¿Necesitas ayuda con este patrón?Encontrarás 4 videos tutoriales, un espacio para comentarios/preguntas y más visitando la página del patrón en garnstudio.com © 1982-2026 DROPS Design A/S. Todos los derechos reservados. Este documento, incluyendo todas sus sub-secciones, está protegido por los derechos de autor (copyright). Lee más acerca de lo que puedes hacer con nuestros patrones en la parte de abajo de cada patrón de nuestro sitio. |
|||||||||||||


Con más de 40 años en el diseño de modelos de punto y de ganchillo, DROPS Design ofrece una de las más vastas colecciones de patrones gratuitos en el internet - traducidos en 17 idiomas. Al día de hoy, contamos con 324 catálogos y 12290 patrones - de los cuales 11673 están traducidos en español.
Nosotros trabajamos con mucho esmero para brindarte lo mejor que las labores de punto y ganchillo tienen para ofrecer,inspiración y consejos, así como hilos de magnífica calidad a precios increíbles! Te gustaría usar nuestros patrones para otro fin además del uso personal? Puedes leer acerca de lo que estás permitida a hacer en el texto de Copyright en la parte de abajo de todos nuestros patrones. Felices labores!
Escribe un comentario sobre DROPS 141-3
¡Nos encantaría saber qué piensas acerca de este patrón!
Si quieres escribir una pregunta referente al patrón, por favor asegúrate de elegir la categoría correcta en el formulario debajo, para acelerar el proceso de respuesta. Los campos obligatorios están marcados con un *.