
Categorías populares
¿Buscas un hilo?


Comentarios / Preguntas (34)
![]() Joana escribió:
Joana escribió:
Hi! I can’t understand this part: Continuing bind off for armhole on every other row: 3 sts 1 (1-2) times, 2 sts 2 (2-2) times, 1 st 1 (2-3) times = 56 (59-59) sts. I work only with the two pieces of front side? How? Sorry and thank you so much for your answers
21.04.2019 - 14:16DROPS Design respondió:
Hi Joanna, You are working each front piece separately and at the armhole end of every second row on each front piece bind off as follows, depending on the size you are working; so for example in size S you bind off 3 stitches one time, then 2 stitches 2 times and 1 stitch 1 time with a row between each bind-off row where you do not bind off. Hope this helps and happy knitting!
21.04.2019 - 15:04
![]() Joana Dinis escribió:
Joana Dinis escribió:
When you said : work the first 64 (68-72) sts, bind off the next 4 sts, it means a decrease? in the 4 sts? like knitting 2 sts together? for four times? thank uu
12.04.2019 - 23:35DROPS Design respondió:
Dear Joana, you have to cast off these 4 sts for the armhole, so you have to work them not as a decrease but as when you finish the work. Happy knitting!
13.04.2019 - 09:12
![]() Joana Dinis escribió:
Joana Dinis escribió:
Sorry i cant understand this part, 64 (68-72) sts front piece, bind off 4 sts for armhole, 126 (134-142) sts back piece, bind off 4 sts for armhole, 64 (68-72) sts front piece.
31.03.2019 - 13:15DROPS Design respondió:
Dear Mrs Dinis, on this row you will bind off the stitches for armhole dividing front and back pieces: work the first 64 (68-72) sts, bind off the next 4 sts for armhole, work the next 126 (134-142) sts for back piece, bind off the next 4 sts for armhole = 64 (68-72) sts remain for 2nd front piece, work these stitches and continue now each piece separately. Happy knitting!
01.04.2019 - 13:08
![]() Joana Dinis escribió:
Joana Dinis escribió:
When i need to do the hole for the buttons? and im starting with 262 sts, and its look like the whole body (front and back) is it right? i dont understand because you divide each part, and my work with 262 points looks like the whole body except the sleeves...
27.03.2019 - 23:03DROPS Design respondió:
Dear Mrs Dinis, buttonholes will be created when you will work the right front edge - see Assembly at the bottom of the pattern. You are right, you are first working whole body (= front pieces + back piece) in one piece until armholes, then you will divide and work each front piece and back piece separately. Happy knitting!
01.04.2019 - 09:14
![]() Joana Dinis escribió:
Joana Dinis escribió:
But what means 1 edge stitch? how i work an edge stich? sorry im begginer
11.03.2019 - 20:02DROPS Design respondió:
Dear Mrs Dinis, you can work the edge stitches in stocking stitch or in garter stitch. Happy knitting!
12.03.2019 - 09:41
![]() Joana Dinis escribió:
Joana Dinis escribió:
Which means this: (...) and continue knitting pattern with 1 edge sts on each side mid front ?
05.03.2019 - 16:43DROPS Design respondió:
Dear Mrs Dinis, you work as follows: 1 edge stitch, *K4, P4*, repeat from *-* until 1 stitch remains, 1 edge stitch. Happy knitting!
06.03.2019 - 08:47
![]() Heather escribió:
Heather escribió:
I am using the recommended Safron Cotton yarn but am struggling with the ribbing. It\'s not stretchy or springing closed. I know this can be an issue with cotton vs animal fibers but mine so far doesn\'t look nearly as tight as even the photo in the pattern. I\'ve even gone down a needle size (using #3 vs #4 in order to get gauge) yet my ribbing still looks flat. Do you have any tips to fix this....or know how the person who knitted the sweater in the photo achieved this tighter rib?
20.05.2018 - 05:46
![]() Micheline Girarad escribió:
Micheline Girarad escribió:
What does MID UNDER ARM mean? I do not understand that term. Thanks
03.04.2018 - 16:40DROPS Design respondió:
Dear Mrs Girarad, this is the place where there should be a seam when working sleeve back and forth, and that's the transition of round when working in the round. Happy knitting!
03.04.2018 - 17:08
![]() Micheliine Girard escribió:
Micheliine Girard escribió:
I have trouble understand the term NCREASE MID UNDER ARM . Also, 2 sts 33 times alternating on every 3rd and 4th round. Does that mean on both sides of the needle?
03.04.2018 - 01:25DROPS Design respondió:
Dear Mrs Girard, see increase mid under arm in previous answer - increase 33 times alternately on every 3rd and 4th round as follows: work 1 round with inc, *2 rounds without inc, 1 round with inc, 3 rounds without inc, 1 round with inc*, and repeat from *-* until you have inc a total of 33 times and you get 116 sts. Happy knitting!
03.04.2018 - 10:10
![]() Micheline Girard escribió:
Micheline Girard escribió:
Need help understanding the term in the Sleeve pattern: ''at the same time, inc. MID UNDER ARM. What does that mean exactly? I wait till I am half way to the end of the sleeve or what? Also, do I increase both sides of the sleeve, when it says 2 sts. 33 times alternating on every 3rd and 4th round.
03.04.2018 - 01:23DROPS Design respondió:
Dear Mrs Girard, you will increase mid under arm by working until 1 st remain before beg of round, inc 1 st, work last st on round, (marker beg of round), work 1 st and inc 1 st = you have inc 2 sts mid under arm (ie on each side of beg of round). Happy knitting!
03.04.2018 - 10:09
|
|
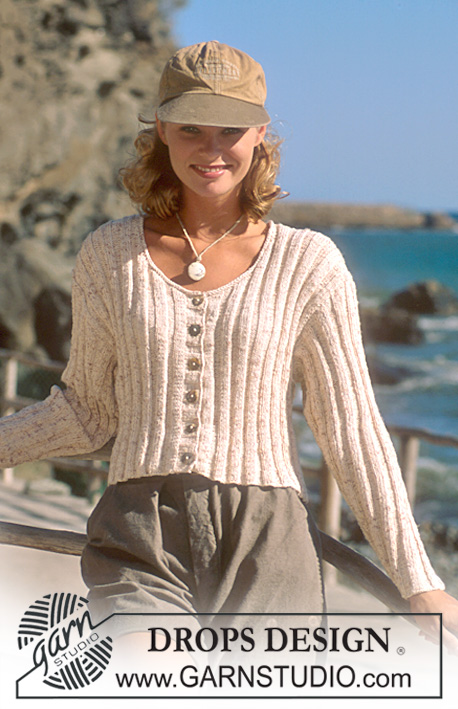
Sandy Beach |
|
 |
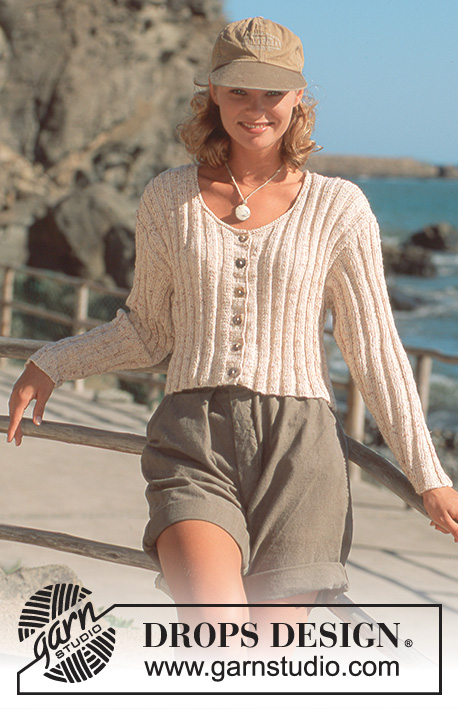 |
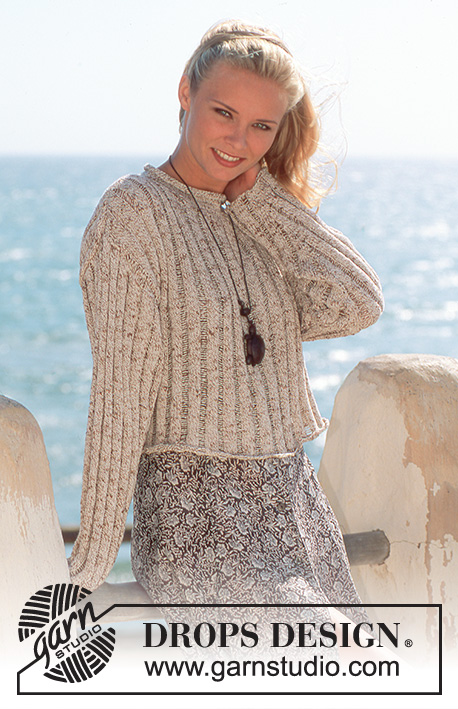
Chaqueta en DROPS Safran trabajada en punto elástico
DROPS 41-23 |
|
|
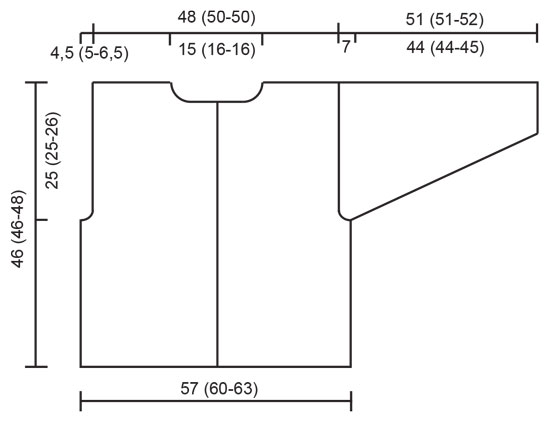
Tensión: 23 pts x 30 filas con aguja de 3.5 mm con punto jersey = 10 x 10 cm Recordar que el tamaño de la aguja es orientativo! Ver Nota!!! bajo las tallas. Patrón: * 4d, 4r *, repetir de * a *. -------------------------------------------------------------------- Cuerpo: Trabajar la chaqueta de ida y vuelta en la aguja con una aguja circular. Montar 262 (278-294) pts (incluyendo 2 pts orillo) con una aguja circular de 3.5 mm y continuar trabajando el patrón con 1 pt orillo a cada lado en el centro del delantero. Recordar mantener la tensión del tejido. Cuando la labor mida 21 (21-22) cm trabajar la siguiente fila como sigue: 64 (68-72) pts del delantero, cerrar 4 pts para la sisa, 126 (134-142) pts espalda, cerrar 4 pts para la sisa, 64 (68-72) pts del delantero. Completar cada parte por separado. Delantero: = 64 (68-72) pts. Continuar cerrando para la sisa cada 2ª fila: 3 pts 1 (1-2) veces, 2 pts 2 (2-2) veces, 1 pt 1 (2-3) veces = 56 (59-59) pts. Cuando la labor mida 29 (29-31) cm cerrar para el escote cada 2ª fila: 2 pts 7 veces y después cada 4ª fila: 1 pt 4 (5-5) veces. Cerrar cuando la labor mida 46 (46-48) cm. Espalda: = 126 (134-142) pts. Continuar cerrando para la sisa como en el delantero = 110 (116-116) pts. Cuando la labor mida 44 (44-46) cm cerrar los 30 (32-32) pts centrales para la forma de la línea del escote. Después cerrar 2 pts a cada lado en la siguiente fila para la forma de la línea del escote. Cerrar cuando la labor mida 46 (46-48) cm. Manga: Montar 50 (50-50) pts con agujas de doble punta de 3.5 mm y continuar trabajando el Patrón (asegurarse de centrar los 4d en el centro de la manga). Al mismo tiempo aum en el centro bajo la manga: 2 pts 33 (33-35) veces alternando entre cada 3ª y cada 4ª vuelta = 116 (116-120) pts. Cuando la labor mida 44 (44-45) cm cerrar 6 pts en el centro bajo la manga y completar de ida y vuelta en la aguja. Continuar cerrando para la forma de la copa de la manga a cada lado cada 2ª fila: 4 pts 9 veces, cerrar. La labor mide aprox. 51 (51-52) cm. Terminación: Hacer las costuras de los hombros. Recoger aprox. 84 pts (divisible entre 8 pts + 4 pts) por el delantero izquierdo con una aguja circular de 3 mm y trabajar 3 cm del Patrón de ida y vuelta en la aguja. Repetir por la cenefa del delantero derecho, pero después de 1 cm trabajar ojales repartidos en la fila - 1 ojal = cerrar 3 pts y montar 3 pts nuevos sobre los pts cerrados en la siguiente fila. Recoger aprox. 110-120 pts alrededor de la línea del escote con una aguja circular de 3 mm y trabajar 2 filas de derecho de ida y vuelta en la aguja, cerrar. Coser las mangas y los botones. |
|
 |
|
¿Terminaste este patrón?Entonces, etiqueta tus fotos con #dropspattern o envíalas a la galería #dropsfan. ¿Necesitas ayuda con este patrón?Encontrarás 17 videos tutoriales, un espacio para comentarios/preguntas y más visitando la página del patrón en garnstudio.com © 1982-2026 DROPS Design A/S. Todos los derechos reservados. Este documento, incluyendo todas sus sub-secciones, está protegido por los derechos de autor (copyright). Lee más acerca de lo que puedes hacer con nuestros patrones en la parte de abajo de cada patrón de nuestro sitio. |
|


Con más de 40 años en el diseño de modelos de punto y de ganchillo, DROPS Design ofrece una de las más vastas colecciones de patrones gratuitos en el internet - traducidos en 17 idiomas. Al día de hoy, contamos con 324 catálogos y 12290 patrones - de los cuales 11685 están traducidos en español.
Nosotros trabajamos con mucho esmero para brindarte lo mejor que las labores de punto y ganchillo tienen para ofrecer,inspiración y consejos, así como hilos de magnífica calidad a precios increíbles! Te gustaría usar nuestros patrones para otro fin además del uso personal? Puedes leer acerca de lo que estás permitida a hacer en el texto de Copyright en la parte de abajo de todos nuestros patrones. Felices labores!
Escribe un comentario sobre DROPS 41-23
¡Nos encantaría saber qué piensas acerca de este patrón!
Si quieres escribir una pregunta referente al patrón, por favor asegúrate de elegir la categoría correcta en el formulario debajo, para acelerar el proceso de respuesta. Los campos obligatorios están marcados con un *.