
Categorías populares
¿Buscas un hilo?


Comentarios / Preguntas (147)
![]() Charlotte Baltsen escribió:
Charlotte Baltsen escribió:
Jeg glæder mig til at komme igang
16.01.2026 - 07:49
![]() Jansen escribió:
Jansen escribió:
Ich stehe zwischen 2 Größen laut der Maßskizze. Wie sehr weiter sich die Wolle? Ist es sinnvoller, die größere oder die kleinere Größe zu wählen?
13.01.2026 - 20:49DROPS Design respondió:
Liebe Frau Jansen, hier lesen Sie, wie Sie am besten Ihre Größe wählen. Viel Spaß beim Stricken!
15.01.2026 - 08:27
![]() Ángela escribió:
Ángela escribió:
Hola,tengo una duda ,el patron dice que para una talla mediana o grande necesito 300 gramos de lana,a mí me parece muy poco,normalmente uso 450 gramos con otras lanas.¿Es seguro que solo necesite 300 gramos?
08.01.2026 - 00:02DROPS Design respondió:
Hola Angela, Es correcto, este hilo es muy ligero. Saludos!
12.01.2026 - 11:34
![]() Maylis escribió:
Maylis escribió:
Bonjour, je viens de terminer l'empiècement et l'on me demande de monter 8 mailles sous la manche. Comment fait-on ? Merci
06.01.2026 - 11:57DROPS Design respondió:
Bonjour Maylis, procédez comme indiqué dans cette vidéo ou bien cette leçon; retrouvez cette étape à partir de la photo 10 dans cette leçon. Bon tricot!
07.01.2026 - 07:24
![]() Lydia escribió:
Lydia escribió:
Ich habe eine Frage zur Anleitung. Und zwar bei den Raglanzunahmen steht ja man solle diese machen bis man 228 Maschen hat. Danach glatt rechts weiterstricken, bis die Arbeit eine länge von 20cm hat. Heisst das, wenn man die 228 Maschen erreicht hat soll man ohne weitere Raglanzunahmen stricken bis man 20cm erreicht hat? Liebe Grüsse :)
05.01.2026 - 17:27DROPS Design respondió:
Liebe Lydia, ja genau, wenn Sie diese 228 Maschen erhalten, dann sind die Raglanzunahmen fertig, weiter (genauso wie zuvor) stricken, bis die Arbeit 20 cm misst, aber ohne weitere Zunahmen. Viel Spaß beim Stricken!
06.01.2026 - 09:02
![]() Daniele Jubelin escribió:
Daniele Jubelin escribió:
Jusqu'à quand vont les modèles a 2 ou 4 aiguilles
23.12.2025 - 11:39DROPS Design respondió:
Bonjour Mme Jubelin, je ne suis pas bien sûre de comprendre votre question, vous pourrez trouver ici comment adapter un modèle sur aiguilles droites ou bien découvrez nos modèles tricotés de bas en haut ici, la plupart facilement adaptables sur aiguilles droites. Bon tricot!
23.12.2025 - 17:41
![]() Mita escribió:
Mita escribió:
Ik zou graag weten of ik dit ook gewoon van onder naar boven kan breien. Ik vraag me eigenlijk af waarom jullie deze pull op deze manier breien, zijn daar voordelen aan verbonden ????
21.12.2025 - 19:59DROPS Design respondió:
Dag Mita,
Er is helaas alleen een beschrijving van het patroon van boven naar beneden. Als je van boven naar beneden breit kun je gaandeweg het werkstuk beter passen en de lengtes van de mouwen en het lijf precies naar wens aanpassen.
22.12.2025 - 20:18
![]() Claudia escribió:
Claudia escribió:
Guten Tag, könnt ihr mir sagen, mit welcher Farbe Gitte aus Dänemark gestrickt hat? Weiß oder Natur für Baby Merino? Kit Silk vermutlich Kalkweiß? finde die Farbe sehr schön
24.11.2025 - 15:41DROPS Design respondió:
Liebe Claudia, hier lesen Sie mehr über ihren Pullover, gerne können Sie Ihr auch mal Ihre Frage stellen. Viel Spaß beim Stricken!
25.11.2025 - 08:51
![]() Christiane escribió:
Christiane escribió:
Hallo, ich habe noch nie einen Pulli gestrickt, immer nur Socken, Mützen und Schals und würde nun gerne diesen Stricken. Ich verstehe aber die hälfte überhaupt nicht, wie kann ich gut an so eine Anleitung herangehen? Ist der Pullover für mich überhaupt geeignet?
20.11.2025 - 13:38DROPS Design respondió:
Liebe Christiane, dieser Pullover wird hier von oben nach unten gestrickt und es wird für Raglan zugenommen; hier finden Sie im Video und hier mit Fotos, als Beispiel, wie man so einen Pullover strickt; sollten Sie weitere Frage haben, stellen Sie sie gerne hier. Viel Spaß beim Stricken!
20.11.2025 - 16:47
![]() Mary-Ann Edsbäcker escribió:
Mary-Ann Edsbäcker escribió:
Ska sätta i markörerna på oket men får det inte att stämma. Om man lägger ihop antalet maskor, i mitt fall M, 16+14+32+14+16 blir det 92 m. Men varvet har 96 m. Vad är det jag inte förstår?
15.11.2025 - 23:19DROPS Design respondió:
Hej Mary-Ann. Du har missat maskorna du sätter markörerna i: 16+1+14+1+32+1+14+1+16=96. Mvh DROPS Design
19.11.2025 - 10:48
|
|
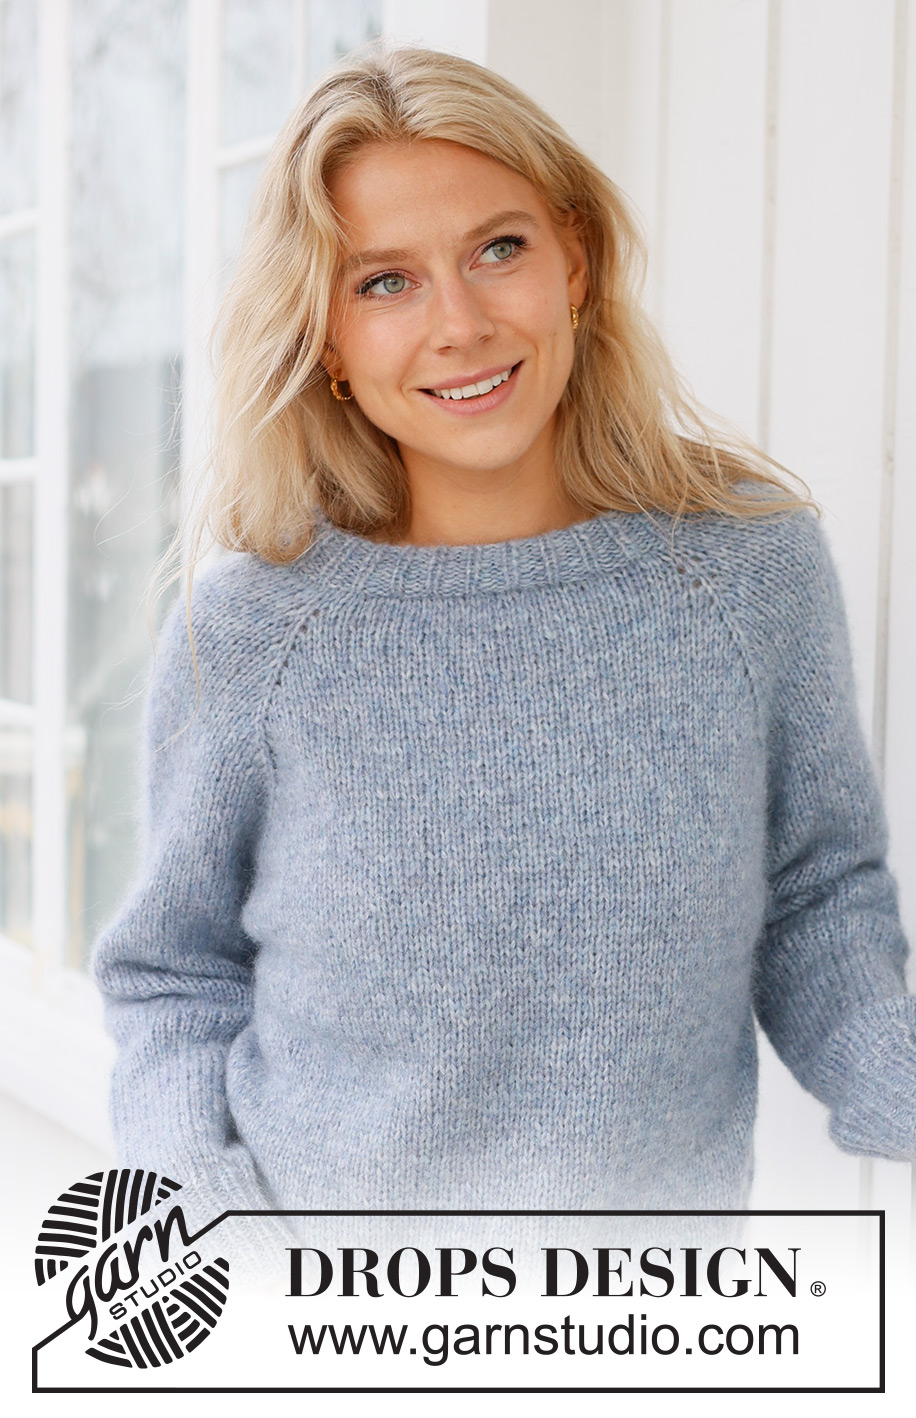
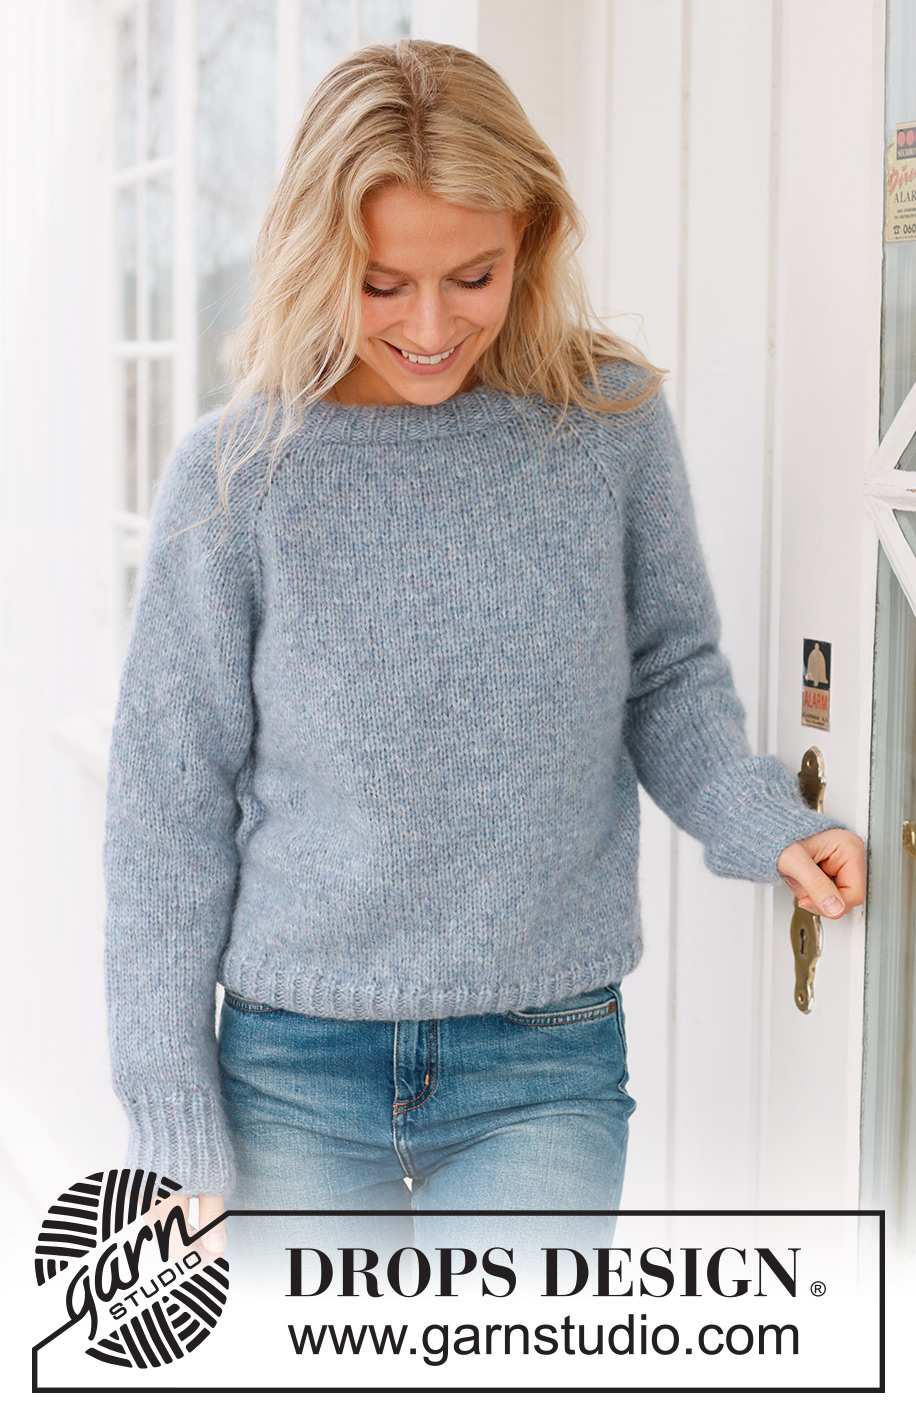
Foggy Autumn#foggyautumnsweater |
|
 |
 |
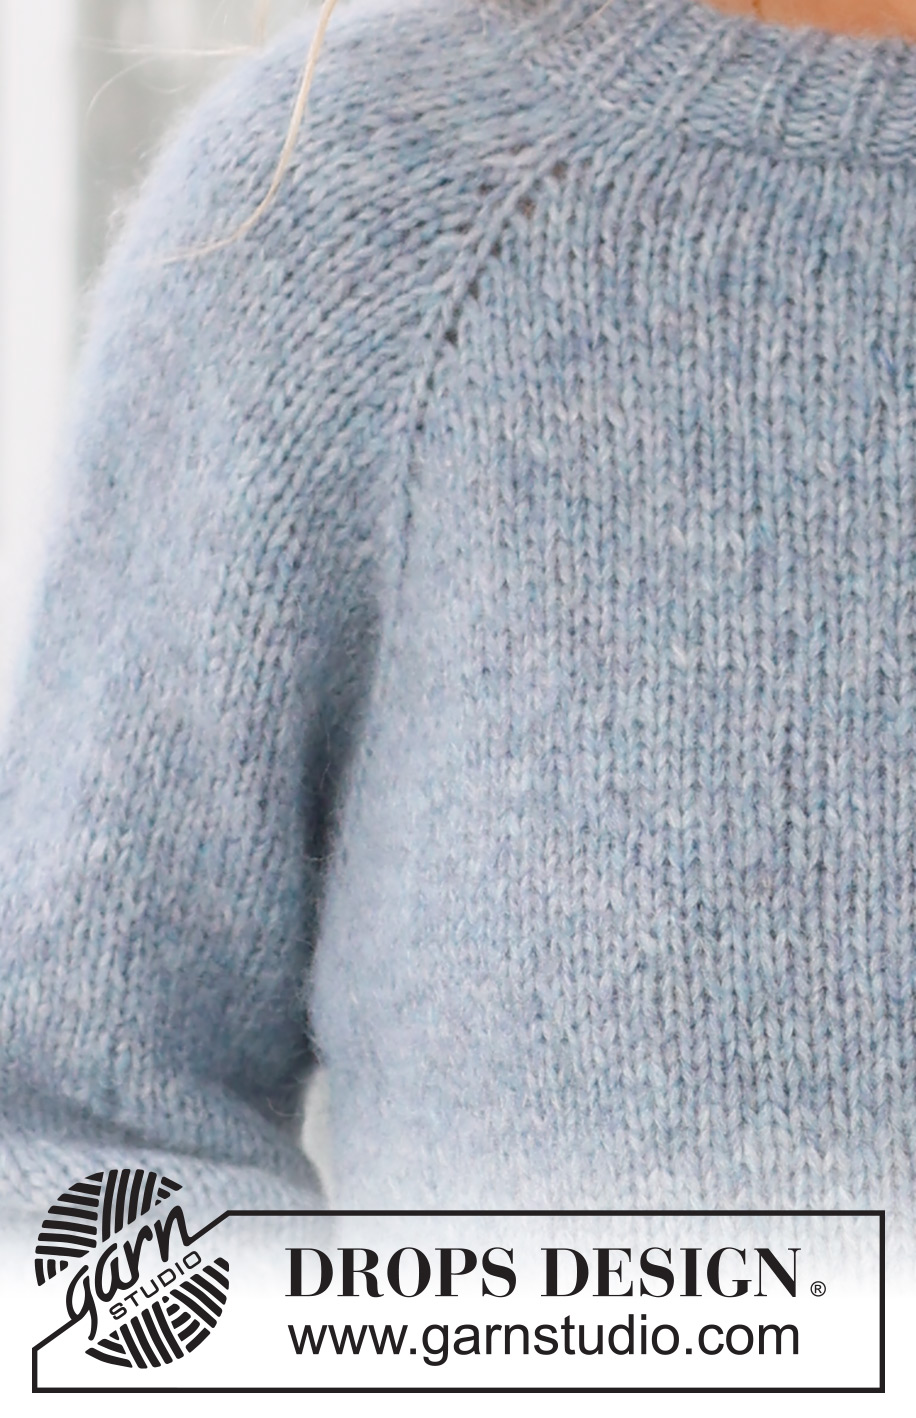
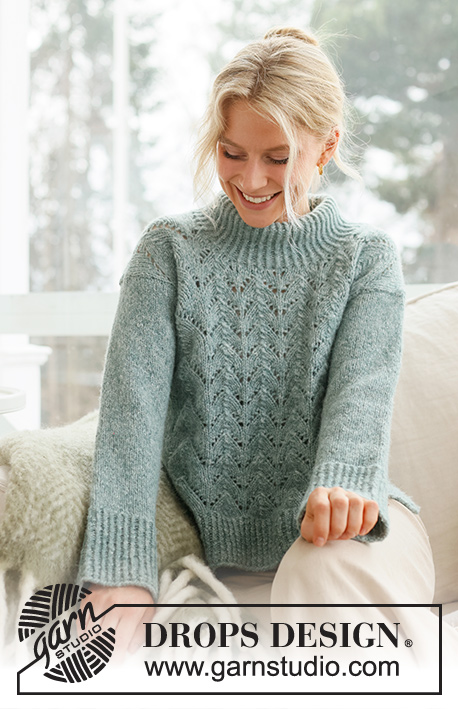
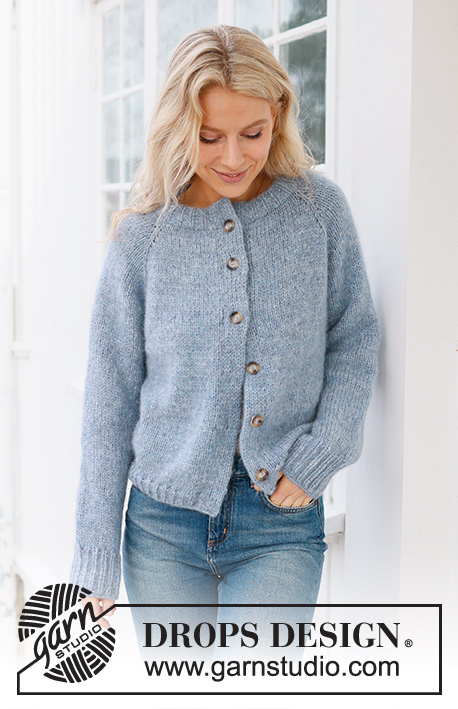
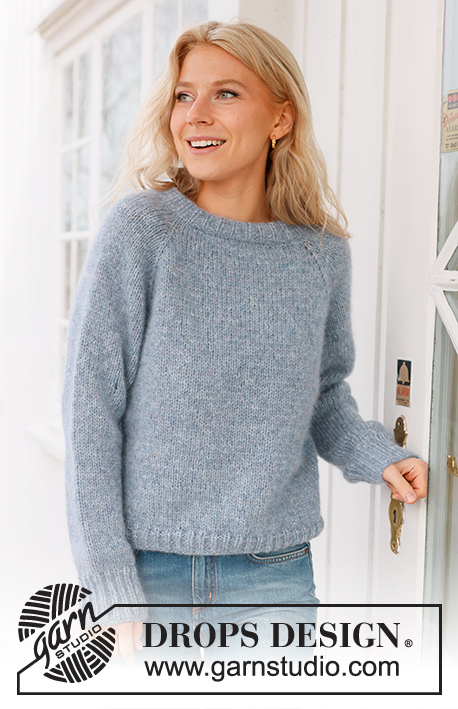
Jersey a punto en DROPS Air. La labor está realizada de arriba abajo con raglán. Tallas S - XXXL.
DROPS 236-34 |
|
|
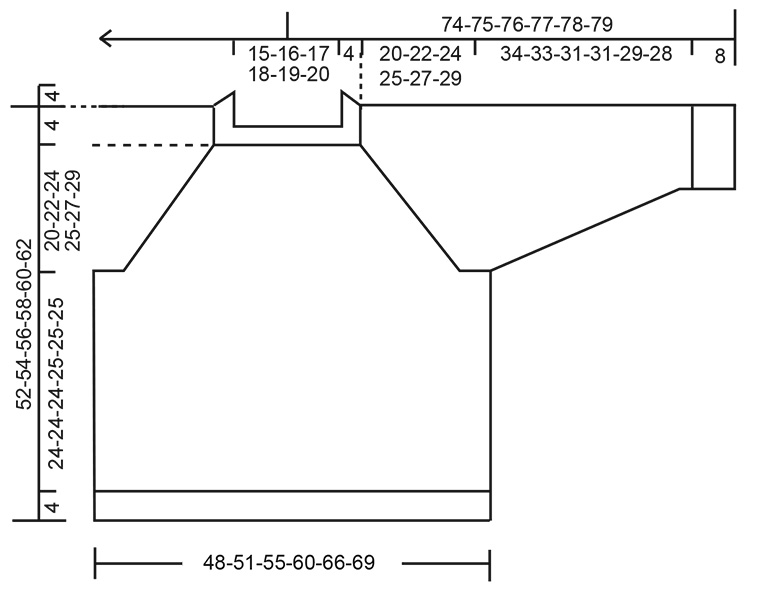
EXPLICACIONES PARA REALIZAR LA LABOR: ------------------------------------------------------- RAGLÁN: Aumentar para el raglán a cada lado de cada punto con marcapuntos como sigue: Trabajar hasta el punto con el marcapuntos, 1 hebra, trabajar el punto con marcapuntos de derecho, 1 hebra (= 8 puntos aumentados). En la siguiente vuelta trabajar las hebras como sigue: ANTES del punto con el marcapuntos: Deslizar las hebra a la aguja derecha como de derecho, colocarla de vuelta en la aguja izquierda dada la vuelta (retorcida), trabajar la hebra de derecho (retorcida y alejada del punto con marcapuntos). DESPUÉS del punto con marcapuntos: Trabajar la hebra de derecho retorcido (se retuerce (retorcida y alejada del punto con marcapuntos). TIP PARA LAS DISMINUCIONES (mangas): Disminuir 1 punto a cada lado del marcapuntos como sigue: Trabajar hasta que queden 3 puntos antes del marcapuntos, 2 puntos juntos de derecho, 2 derechos (el marcapuntos se encuentra entre estos 2 puntos), deslizar 1 punto como de derecho, 1 derecho y pasar el punto deslizado sobre el punto trabajado (2 puntos disminuidos). ------------------------------------------------------- COMENZAR LA LABOR AQUÍ: ------------------------------------------------------- JERSEY - RESUMEN DE LA LABOR: El cuello y el canesú se trabajan en redondo con una aguja circular, desde el centro de la espalda y de arriba abajo. El canesú se divide para el cuerpo y las mangas y el cuerpo se continúa en redondo con una aguja circular. Las mangas se trabajan en redondo con agujas de doble punta. CUELLO DOBLE: Montar 78-81-87-90-93-96 puntos con DROPS Air usando 2 agujas circulares cortas, de 4 y 5.5 mm, juntas. Quitar la aguja de 5.5 mm y trabajar con la aguja circular corta de 4 mm (así se obtiene un borde de montaje elástico). Trabajar el elástico en redondo (1 derecho, 2 reveses) 9 cm. Ahora doblar el cuello por la mitad hacia dentro y, en la siguiente vuelta y trabajando en punto jersey, trabajar cada 2º punto junto con cada 2º punto del borde de montaje. Cambiar a una aguja circular de 5.5 mm. Insertar 1 marcapuntos en el inicio de la vuelta (en el centro de la espalda); el canesú se mide desde este marcapuntos! CANESÚ: Trabajar 1 vuelta de derecho y aumentar 14-15-17-10-11-14 puntos repartidos = 92-96-104-100-104-110 puntos. Insertar 4 marcapuntos (sin trabajar los puntos) como sigue: Contar 15- 16-18-17-18-19 puntos (mitad de la espalda), insertar 1 marcapuntos en el siguiente punto, contar 14 puntos (manga), insertar 1 marcapuntos en el siguiente punto, contar 30-32-36-34-36-39 puntos (delantero), insertar 1 marcapuntos en el siguiente punto, contar 14 puntos (manga), insertar 1 marcapuntos en el siguiente punto. Quedan 15-16-18-17-18-20 puntos después del último punto con marcapuntos (mitad de la espalda). Trabajar en punto jersey y aumentar para el RAGLÁN – leer descripción arriba, cada 2ª vuelta 17-19-20-24-26-27 veces = 228-248-264-292-312-326 puntos. RECORDAR MANTENER LA TENSIÓN DEL TEJIDO! Trabajar hasta que el canesú mida 20-22-24-25-27-29 cm. Ahora dividir para el cuerpo y las mangas como sigue: 34-37-39-43-47-49 derechos, colocar los siguientes 46-50-54-60-62-64 puntos en un gancho auxiliar para la manga, montar 8-8-10-10-12-12 puntos bajo la manga, 68-74-78-86-94-99 derechos, colocar los siguientes 46-50-54-60-62-64 puntos en un gancho auxiliar para la manga, montar 8-8-10-10-12-12 puntos bajo la manga, trabajar de derecho los últimos 34-37-39-43-47-50 puntos. CUERPO: = 152-164-176-192-212-222 puntos. Continuar con punto jersey en redondo 24-24-24-25-25-25 cm más. Ahora aumentar 13-13-16-18-19-21 puntos repartidos en la siguiente vuelta = 165-177-192-210-231-243 puntos. Cambiar a una aguja circular de 4 mm y trabajar el elástico (1 derecho, 2 reveses) 4 cm. Cerrar. El jersey mide aprox. 52-54-56-58-60-62 cm desde el hombro hacia abajo. MANGAS: Colocar los 46-50-54-60-62-64 puntos desde el gancho auxiliar a un lado de la labor con una aguja circular corta/ agujas de doble punta de 5.5 mm y recoger 1 punto en cada uno de los 8-8-10-10-12-12 puntos montados bajo la manga = 54-58-64-70-74-76 puntos. Insertar un marcapuntos en el medio de los nuevos puntos bajo la manga. Trabajar en punto jersey en redondo 2 cm. Ahora disminuir 2 puntos bajo la manga – leer TIP PARA LAS DISMINUCIONES. Disminuir de esta manera cada 4½-4-3-2-2-1½ cm un total de 7-8-10-13-14-14 veces = 40-42-44-44-46-48 puntos. Cuando la manga mida 34-33-31-31-29-28 cm desde la división, aumentar 5-6-7-7-5-6 puntos repartidos = 45-48-51-51-51-54 puntos. Cambiar a agujas de doble punta de 4 mm y trabajar el elástico (2 reveses, 1 derecho) 8 cm. Cerrar. La manga mide aprox. 42-41-39-39-37-36 cm desde la división. Trabajar la otra manga de la misma manera. |
|
 |
|
¿Terminaste este patrón?Entonces, etiqueta tus fotos con #dropspattern #foggyautumnsweater o envíalas a la galería #dropsfan. ¿Necesitas ayuda con este patrón?Encontrarás 30 videos tutoriales, un espacio para comentarios/preguntas y más visitando la página del patrón en garnstudio.com © 1982-2026 DROPS Design A/S. Todos los derechos reservados. Este documento, incluyendo todas sus sub-secciones, está protegido por los derechos de autor (copyright). Lee más acerca de lo que puedes hacer con nuestros patrones en la parte de abajo de cada patrón de nuestro sitio. |
|


Con más de 40 años en el diseño de modelos de punto y de ganchillo, DROPS Design ofrece una de las más vastas colecciones de patrones gratuitos en el internet - traducidos en 17 idiomas. Al día de hoy, contamos con 324 catálogos y 12284 patrones - de los cuales 11664 están traducidos en español.
Nosotros trabajamos con mucho esmero para brindarte lo mejor que las labores de punto y ganchillo tienen para ofrecer,inspiración y consejos, así como hilos de magnífica calidad a precios increíbles! Te gustaría usar nuestros patrones para otro fin además del uso personal? Puedes leer acerca de lo que estás permitida a hacer en el texto de Copyright en la parte de abajo de todos nuestros patrones. Felices labores!
Escribe un comentario sobre DROPS 236-34
¡Nos encantaría saber qué piensas acerca de este patrón!
Si quieres escribir una pregunta referente al patrón, por favor asegúrate de elegir la categoría correcta en el formulario debajo, para acelerar el proceso de respuesta. Los campos obligatorios están marcados con un *.