
Categorías populares
¿Buscas un hilo?


Comentarios / Preguntas (93)
![]() Françoise escribió:
Françoise escribió:
Pourrais je avoir les dimensions de la cagoule (largeur du dessus de la tête) taille M/L ? Merci beaucoup
25.05.2025 - 15:36
![]() Lis escribió:
Lis escribió:
Hej. Jeg er itvivl om der startes på rundpind?
29.04.2025 - 16:39DROPS Design respondió:
Hej Lis, du starter med at strikke frem og tilbage på rundpinden og når du har strikket hele hættedelen (ifølge målene i opskriften) slår du nye masker op og fortsætter med at strikke rundt :)
30.04.2025 - 09:52
![]() Sara escribió:
Sara escribió:
Vilka huvudmått passar storlekarna?
20.04.2025 - 19:03DROPS Design respondió:
Hej Sara, vi har ikke hovedmål til balaclavaen, du må hellere bedømme om du normalt er en S/M eller M/L i forhold til om du vil have den lidt stor som på billedet :)
30.04.2025 - 11:55
![]() Yvonne escribió:
Yvonne escribió:
Är en pensionär som älskar att sticka. Använder Drops mönster och garn. Jag säljer mina arbeten (främst balaclavas) på olika marknader. Är det ok att i marknadsföringen använda Drops’ bilder?
17.02.2025 - 11:08DROPS Design respondió:
Hej, det går bra att använda DROPS bilder för marknadsföringen.
24.02.2025 - 18:46
![]() Martine escribió:
Martine escribió:
Quelle couture conseillez-vous pour fermer la cagoule, vu son emplacement sur le sommet de la tête?
01.02.2025 - 15:42DROPS Design respondió:
Bonjour Martine, vous pouvez utiliser (par ex), cette technique. Bon assemblage!
03.02.2025 - 08:34
![]() Renate Bjørndal escribió:
Renate Bjørndal escribió:
Når man er ferdig med hettedelen og legger opp 8 masker i enden.. regner man begynnelsen på omgangen før eller etter de 8 maskene?
16.01.2025 - 18:00DROPS Design respondió:
Hej Renate, du kan starte omgangen fra efter de 8 masker :)
17.01.2025 - 11:56
![]() Jemima escribió:
Jemima escribió:
Hei! Jeg vurderer å bestille garn og utstyr til å strikke en Balaclava her hos dere, men lurer på hvor lang tid det tar å sende varene? (Jeg har et skoleprosjekt som jeg skal begynne på)
16.01.2025 - 09:51DROPS Design respondió:
Hej Jemima, der vil nok gå 3-4 dage. Men du kan gå ind på "FINN EN BUTIK" og finde en fysisk butik hvor du kan se og mærke garnet og få det med det samme :)
17.01.2025 - 11:52
![]() De Wouters escribió:
De Wouters escribió:
Bonjour, pourriez-vous me donner les explications pour effectuer ce modèle à deux aiguilles (non circulaires) . Merci
15.01.2025 - 14:53DROPS Design respondió:
Bonjour Mme De Wouters, nous avons seulement les explications pour des aiguilles circulaires, cette leçon pourra éventuellement vous aider à faire les ajustements nécessaires. Bon tricot!
15.01.2025 - 16:12
![]() Märta escribió:
Märta escribió:
Jag stickar Luna Asyl gratismönster. Jag har köpt 4 rundstickor som det står i mönstret. I mönstret står det när jag ska byta rundsticka, sammanlagt två gånger. När ska jag byta till de andra stickorna. Det verkar som att det räcker med två rundstickor. Synd att jag inte kan läsa kommentarer när de inte går att få på svenska.
10.01.2025 - 16:20DROPS Design respondió:
Hej Märta, du strikket det slätstickade med 5,5 och resåren på 4,5 :)
14.01.2025 - 12:13
![]() Claire escribió:
Claire escribió:
Bonjour, Les quantités indiquées pour le modèle me semble peu vraisemblables. Pouvez vous me confirmer que c’est exact ou me dire quelles quantités commander. Cordialement.
02.01.2025 - 19:28DROPS Design respondió:
Bonjour Claire, je vous confirme les quantités requises, autrement dit 2 pelotes Alpaca + 3 pelotes Brushed Alpaca Silk ou bien 2 pelotes Mélody - pensez à bien vérifier votre tension et à ajuster la taille des aiguilles si besoin. Bon tricot!
03.01.2025 - 08:04
|
|
Luna Azul#lunaazulbalaclava |
|
 |
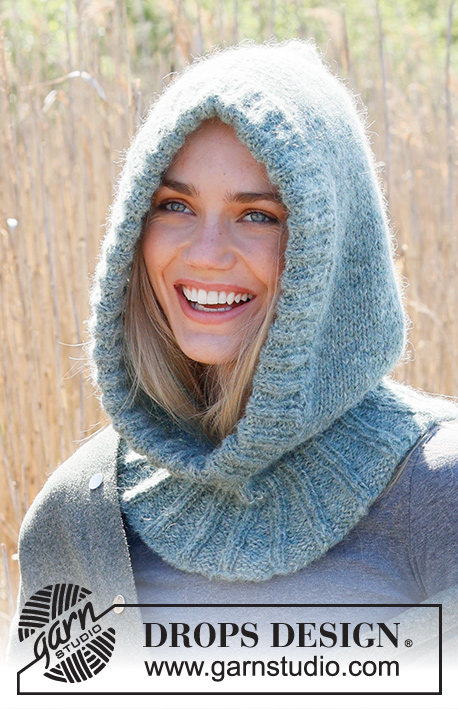 |
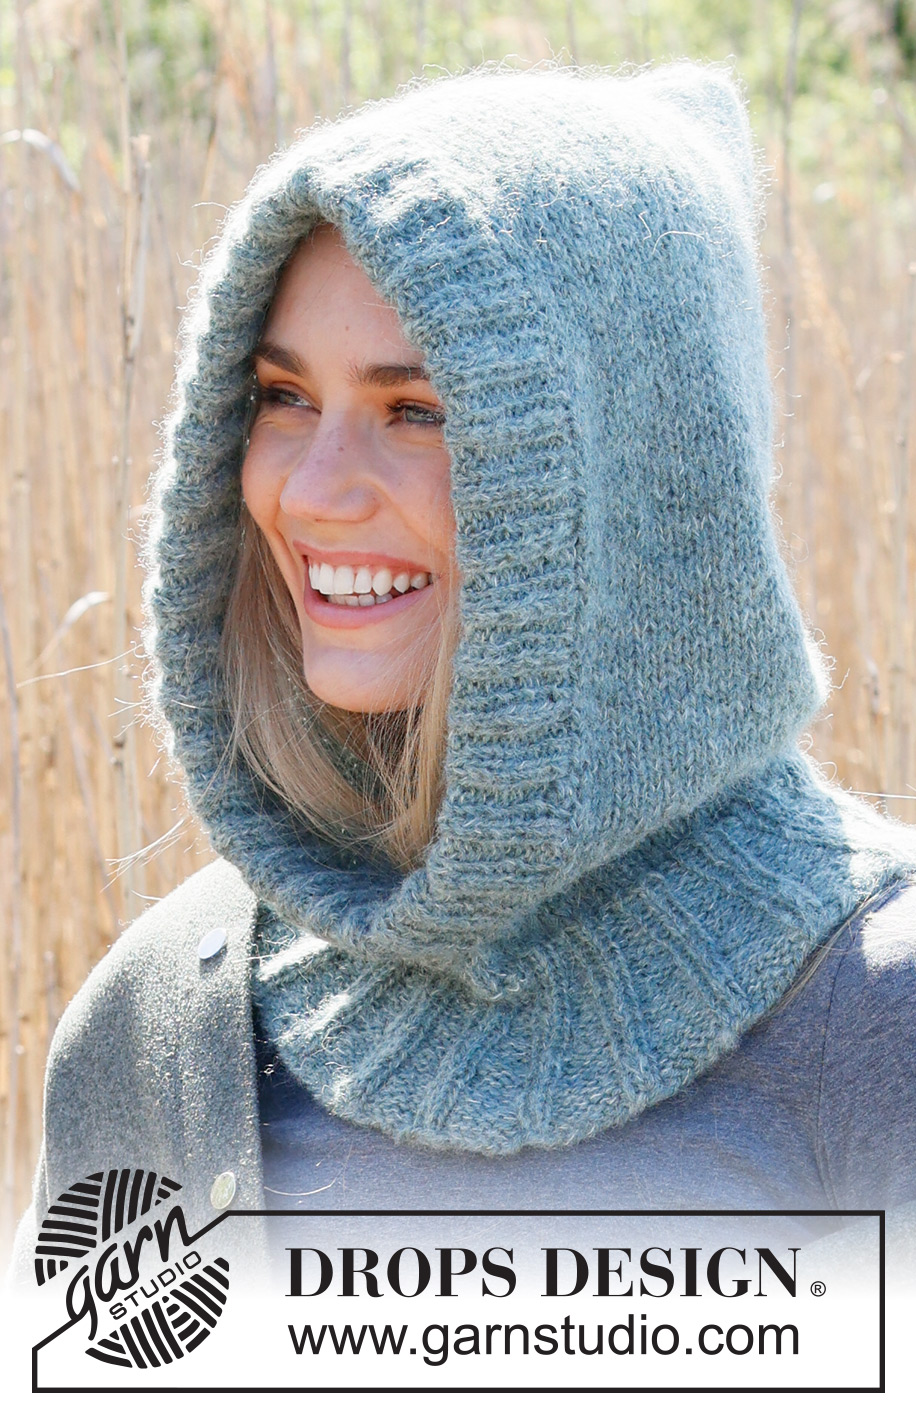
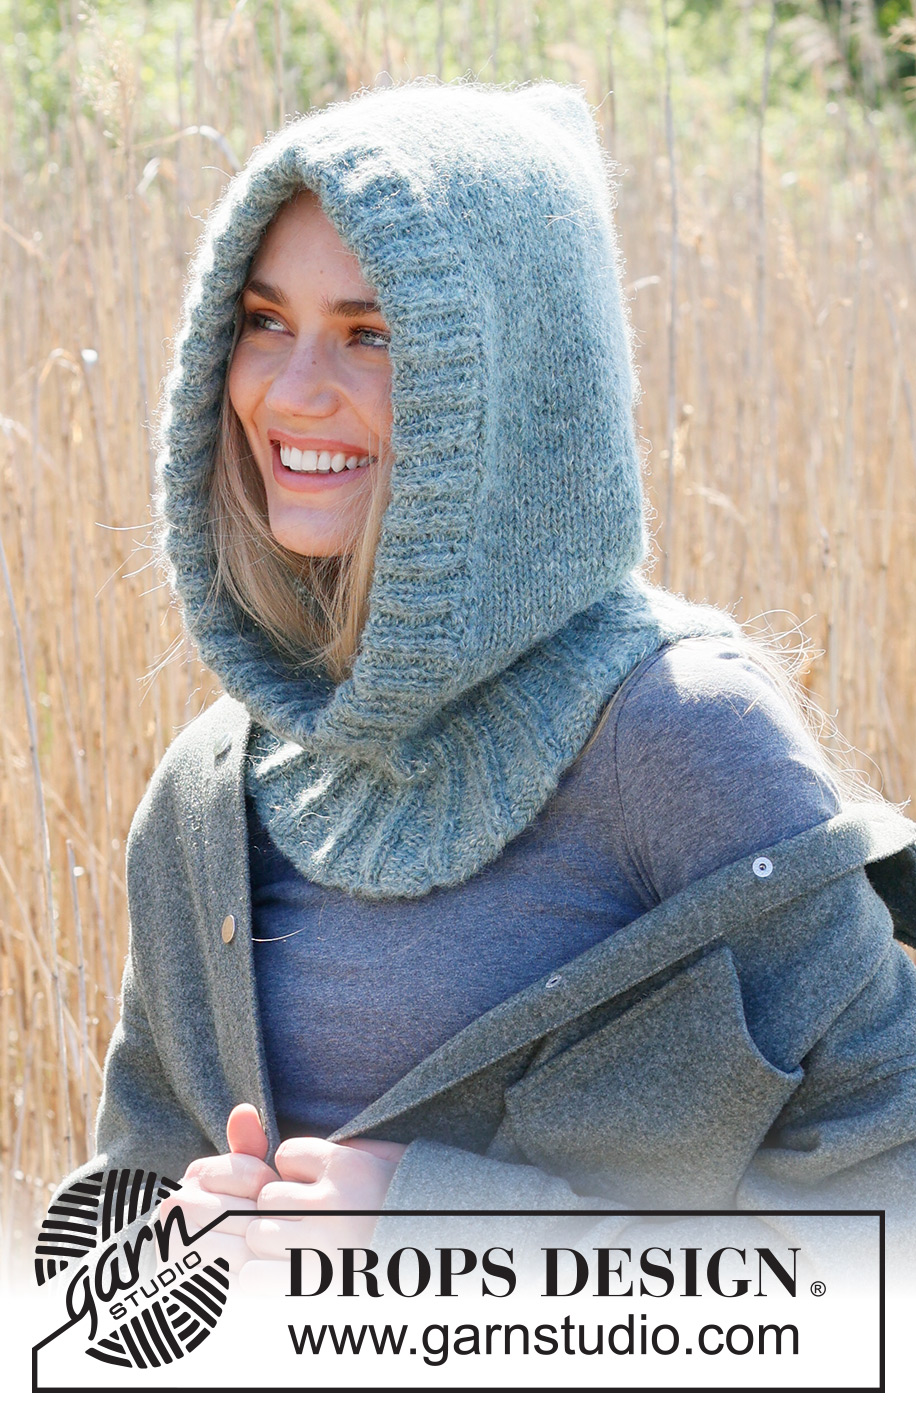
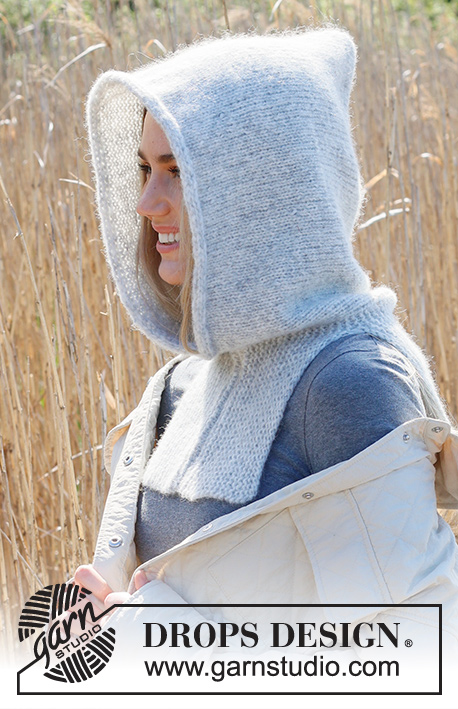
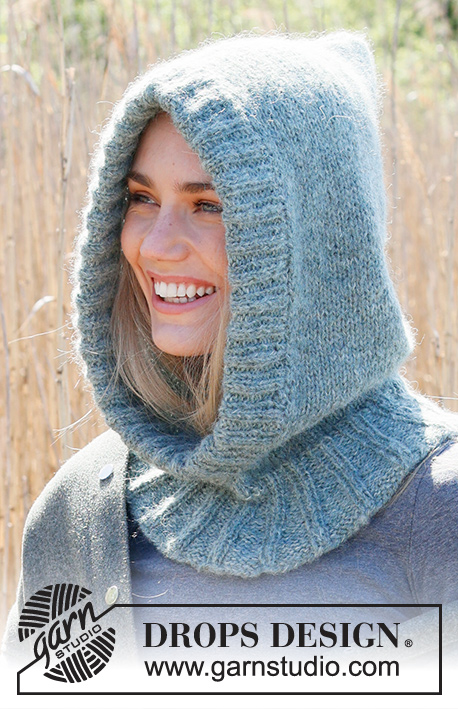
Capucha / balaclava de punto en DROPS Alpaca y DROPS Brushed Alpaca Silk o DROPS Melody. La pieza está tejida en punto jersey.
DROPS 234-14 |
|
|
EXPLICACIONES PARA REALIZAR EL PATRÓN: ------------------------------------------------ PUNTO MUSGO (de ida y vuelta): Tejer todas las hileras de derecho. 1 surco verticalmente = tejer 2 hileras de derecho. ------------------------------------------------ COMENZAR LA PIEZA AQUÍ: ------------------------------------------------ BALACLAVA – RESUMEN DE LA PIEZA: La pieza se teje de arriba hacia abajo. Tejer una orilla doble alrededor de la abertura de la cara. BALACLAVA: Montar 72-78 puntos en aguja circular tamaño 5.5 mm con 1 hilo DROPS Alpaca y 1 hilo DROPS Brushed Alpaca Silk o 1 hilo DROPS Melody. Tejer en punto jersey con 1 punto de orillo en PUNTO MUSGO a cada lado – leer la explicación arriba. Cuando la pieza mida 36-38 cm, montar 8 nuevos puntos al final de la hilera siguiente por el lado derecho y continuar la pieza en redondo en punto jersey = 80-86 puntos. Cuando la pieza mida 3 cm a partir de los puntos montados, cambiar a una aguja circular corta tamaño 4.5 mm y continuar con el cuello de la manera siguiente: Tejer 1 vuelta de derecho y disminuir 0-6 puntos distribuidos equitativamente = 80 puntos. Tejer * 2 derechos, 2 reveses *, tejer de *a* sobre todos los puntos. Cuando el resorte mida 3 cm, aumentar todos los 2 reveses a 3 reveses = 100 puntos. Tejer 4 vueltas con 2 derechos/3 reveses. En la vuelta siguiente, aumentar todos los 3 reveses a 4 reveses = 120 puntos. Tejer 4 vueltas con 2 derechos/4 reveses. En la vuelta siguiente, aumentar todos los 4 reveses a 5 reveses = 140 puntos. Tejer 4 vueltas con 2 derechos/5 reveses. En la vuelta siguiente, aumentar todos los 5 reveses a 6 reveses = 160 puntos. Tejer 4 vueltas con 2 derechos/6 reveses. Rematar. ENSAMBLAJE: Doblar la orilla de montaje en dos y coser juntas en el bucle más externo. ORILLA DOBLE: Levantar aprox. 116 a 128 puntos a lo largo de la abertura de la cara en una aguja circular corta tamaño 4.5 mm. El número de puntos debe ser múltiplo de 4. Tejer en resorte (2 derechos/2 reveses). Cuando el resorte mida 10 cm, aumentar todos los 2 reveses a 3 reveses. Rematar. Doblar el resorte en dos y coser la orilla de remate al lado revés del gorro. Asegurarse de evitar una costura apretada. |
|
¿Terminaste este patrón?Entonces, etiqueta tus fotos con #dropspattern #lunaazulbalaclava o envíalas a la galería #dropsfan. ¿Necesitas ayuda con este patrón?Encontrarás 20 videos tutoriales, un espacio para comentarios/preguntas y más visitando la página del patrón en garnstudio.com © 1982-2026 DROPS Design A/S. Todos los derechos reservados. Este documento, incluyendo todas sus sub-secciones, está protegido por los derechos de autor (copyright). Lee más acerca de lo que puedes hacer con nuestros patrones en la parte de abajo de cada patrón de nuestro sitio. |
|


Con más de 40 años en el diseño de modelos de punto y de ganchillo, DROPS Design ofrece una de las más vastas colecciones de patrones gratuitos en el internet - traducidos en 17 idiomas. Al día de hoy, contamos con 324 catálogos y 12290 patrones - de los cuales 11675 están traducidos en español.
Nosotros trabajamos con mucho esmero para brindarte lo mejor que las labores de punto y ganchillo tienen para ofrecer,inspiración y consejos, así como hilos de magnífica calidad a precios increíbles! Te gustaría usar nuestros patrones para otro fin además del uso personal? Puedes leer acerca de lo que estás permitida a hacer en el texto de Copyright en la parte de abajo de todos nuestros patrones. Felices labores!
Escribe un comentario sobre DROPS 234-14
¡Nos encantaría saber qué piensas acerca de este patrón!
Si quieres escribir una pregunta referente al patrón, por favor asegúrate de elegir la categoría correcta en el formulario debajo, para acelerar el proceso de respuesta. Los campos obligatorios están marcados con un *.