
Categorías populares
¿Buscas un hilo?


Comentarios / Preguntas (30)
![]() Laura escribió:
Laura escribió:
Hi, I loved this pattern but I have a problem: following the instructions the hat ends up being huge. I am usually L/XL for the other patterns (58 cm). Is there any guidance on how many stitches should be decreased to have more regular sizes and not a huge one size? I already re-knitted the elastic band at least 8 times with no luck to hit an alright size and I cannot wear the beret at all.
22.02.2026 - 01:49DROPS Design respondió:
Hej Laura, strikker du med DROPS Nepal og har 17 masker på 10 cm ifølge opskriften, så kommer den til at se ud som på billedet :)
26.02.2026 - 10:36
![]() Éva escribió:
Éva escribió:
A felső szöveg nem a képhez tartozó a leírás. Lehetne módosítani? Köszönöm.
24.12.2024 - 07:41
![]() Kasia escribió:
Kasia escribió:
Beret super, ale moglo by byc opisane ze narzuty trzeba przerabiac jak oczko przekrecone , ja tego nie zrobilam I dlatego tam gdzie sa listki mam dziurki mi sie tam I tak podoba
20.10.2024 - 08:01DROPS Design respondió:
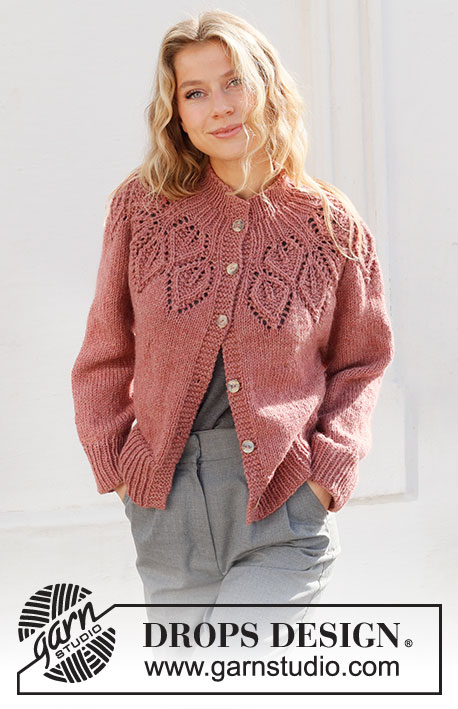
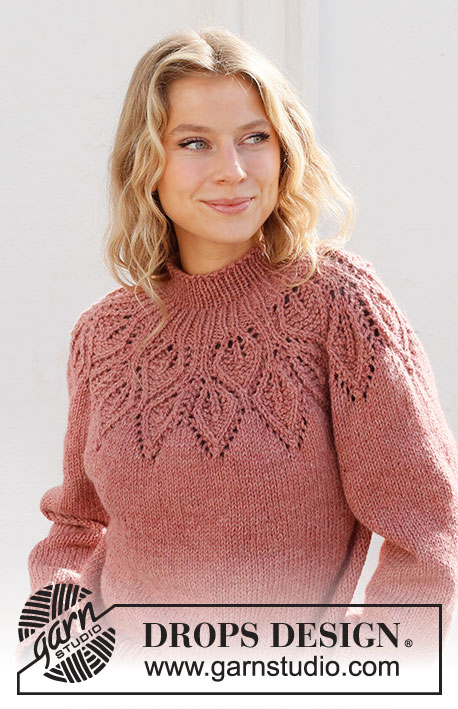
Witaj Kasiu, te narzuty są przerabiane normalnie, nie są przekręcone. Na zdjęciu nie jest to tak widoczne, z uwagi na specyfikę tej części garderoby (jak jest noszona). Ten sam wzór jest wykorzystany na swetrze 228-1 i ponieważ jest rozciągnięty na klatce piersiowej narzuty są dobrze widoczne. Serdecznie pozdrawiamy!
21.10.2024 - 09:13
![]() Vanessa escribió:
Vanessa escribió:
Hallo! Ich bin ziemlicher anfänger und habe momentan probleme damit eine so geringe anzahl an maschen auf ein nadelspiel zu bekommen. Gibt es da vielleicht einen tipp?
09.10.2024 - 12:41DROPS Design respondió:
Liebe Vanessa, vielleicht kann Ihnen dieses Video helfen? Es zeigt wie man von der Mitte nach aussen mit wenige Maschen strickt; sonnst können Sie auch Magic Loop stricken. Viel Spaß beim Stricken!
09.10.2024 - 15:41
![]() LOIS HALE escribió:
LOIS HALE escribió:
Beautiful sweater and love the Tam. Thanks for sharing.
26.04.2024 - 01:42
![]() Juanita Ubilla escribió:
Juanita Ubilla escribió:
He tejido varias veces esta boina ,se me hizo muy fácil la explicación y tejer en circular con 4 palillos doble punta asegura un resultado óptimo. Si alguna compatriota lectora quiere que yo le explique ,busqueme en FB Juanita Ubilla Gaete ,soy de Chile, un saludo cordial , gracias por estos patrones fáciles y gratuitos.👌
23.04.2024 - 03:41
![]() Tamara escribió:
Tamara escribió:
Beautiful design! I cannot wait to make this!
26.03.2024 - 20:29
![]() Martha Meagher escribió:
Martha Meagher escribió:
I find this pattern very limited and very difficult to understand. Is it starting at the crown and ending at the rib? I have knitted an aran jumper and could follow the pattern and I have knitted berets with circular kneedles- but I have no idea how to follow this pattern which is a bit disappointing because it looks lovely. I could maybe knit one leaf by following the pattern - but I don't see how the whole pattern fits together and how you shape the beret.
28.01.2024 - 01:43DROPS Design respondió:
Dear Martha, yes, the beret is worked top down. You work the chart the whole round, so you repeat the leaf pattern the whole round (7 times in total). You can see here how to read our knitting charts: https://www.garnstudio.com/lesson.php?id=68&cid=19. As you work the chart, there are increases in the lower rows that will help you work the higher rows and correctly align the pattern and shape the beret. Happy knitting!
29.01.2024 - 00:18
![]() Denise escribió:
Denise escribió:
I am a bit confused, I follow the whole pattern across for each line, and tha should repeat 7 times? Because I do not see the lines for which part of the pattern I repeat.
19.06.2023 - 05:33DROPS Design respondió:
Dear Denise, there are 7 stitches on the needles and you will repeat the whole diagram a total of 7 times; ie on the very first row you will repeat (YO, K1) a total of 7 times and so on. This means you will repeat the whole diagram all the round a total of 7 times to the last round. Happy knitting!
19.06.2023 - 09:18
![]() Elizabeth escribió:
Elizabeth escribió:
Hola! Acabo de tejer este diseño usando orquidea XL, en lugar de comenzar con 7 puntos, lo hice con 5 así me quedé con 5 repeticiones del patrón A1. Aún así me quedó un poco grande, pero bien, fue mi tercer intento tratando de sacar la boina, pero me gusta el resultado, queda muy linda. Gracias por compartir!
13.06.2023 - 20:28
|
|||||||||||||||||||
Posh Petals#poshpetalshat |
|||||||||||||||||||
 |
 |
||||||||||||||||||
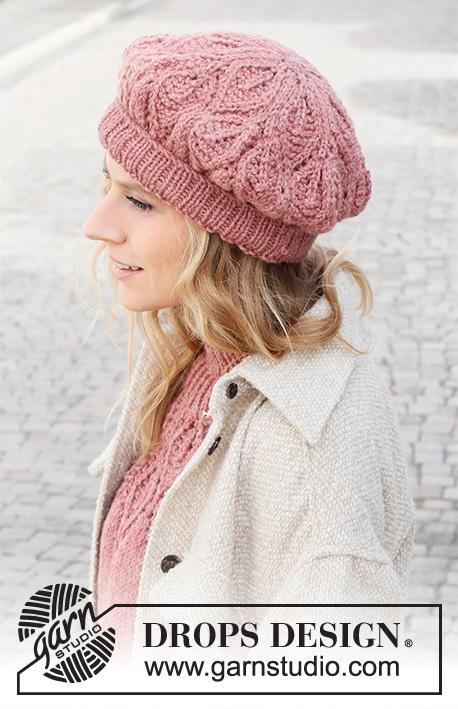
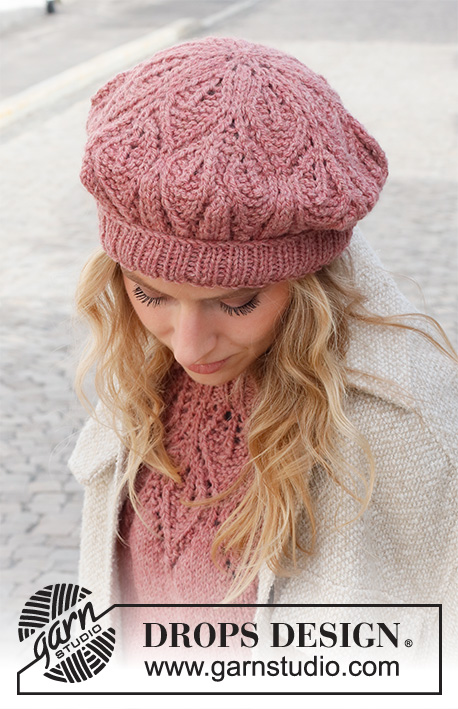
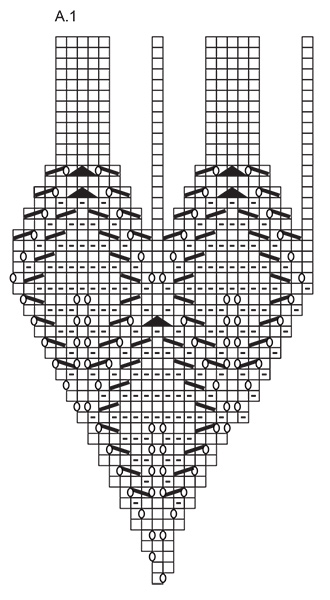
Boina a punto en DROPS Nepal. La labor está realizada con el patrón de hojas. Talla: única.
DROPS 225-14 |
|||||||||||||||||||
|
EXPLICACIONES PARA REALIZAR LA LABOR: ------------------------------------------------------- PATRÓN: Ver el diagrama A.1. FORMA: Humedecer la boina y estrujar el exceso de agua. Colocar la boina sobre un plato de aprox. el mismo diámetro que el gorro. Colocar el plato en un cristal para que la boina no toque la superficie. Permitir que se seque la boina y quitarla con cuidado del plato. Repetir tras cada lavado. ------------------------------------------------------- COMENZAR LA LABOR AQUÍ: ------------------------------------------------------- BOINA - RESUMEN DE LA LABOR: La labor se trabaja en redondo con agujas de doble punta/ una aguja circular, de arriba abajo. Los puntos se aumentan y se disminuyen como se muestra en el diagrama. BOINA: Montar 7 puntos con agujas de doble punta de 5 mm y DROPS Nepal. Trabajar según A.1 (= 7 repeticiones en horizontal). RECORDAR MANTENER LA TENSIÓN DEL TEJIDO! Cambiar a una aguja circular de 5 mm cuando se tengan suficientes puntos. Cuando se haya completado A.1 hay 84 puntos. Cambiar a una aguja circular de 4 mm. Trabajar el elástico (1 derecho, 2 reveses) 4 cm. Cerrar con derecho sobre derecho y revés sobre revés. Cerrar el agujero en la parte superior de la boina y asegurar el hilo. Leer FORMA. |
|||||||||||||||||||
Explicaciones del diagrama |
|||||||||||||||||||
|
|||||||||||||||||||
 |
|||||||||||||||||||
¿Terminaste este patrón?Entonces, etiqueta tus fotos con #dropspattern #poshpetalshat o envíalas a la galería #dropsfan. ¿Necesitas ayuda con este patrón?Encontrarás 18 videos tutoriales, un espacio para comentarios/preguntas y más visitando la página del patrón en garnstudio.com © 1982-2026 DROPS Design A/S. Todos los derechos reservados. Este documento, incluyendo todas sus sub-secciones, está protegido por los derechos de autor (copyright). Lee más acerca de lo que puedes hacer con nuestros patrones en la parte de abajo de cada patrón de nuestro sitio. |
|||||||||||||||||||


Con más de 40 años en el diseño de modelos de punto y de ganchillo, DROPS Design ofrece una de las más vastas colecciones de patrones gratuitos en el internet - traducidos en 17 idiomas. Al día de hoy, contamos con 324 catálogos y 12290 patrones - de los cuales 11685 están traducidos en español.
Nosotros trabajamos con mucho esmero para brindarte lo mejor que las labores de punto y ganchillo tienen para ofrecer,inspiración y consejos, así como hilos de magnífica calidad a precios increíbles! Te gustaría usar nuestros patrones para otro fin además del uso personal? Puedes leer acerca de lo que estás permitida a hacer en el texto de Copyright en la parte de abajo de todos nuestros patrones. Felices labores!
Escribe un comentario sobre DROPS 225-14
¡Nos encantaría saber qué piensas acerca de este patrón!
Si quieres escribir una pregunta referente al patrón, por favor asegúrate de elegir la categoría correcta en el formulario debajo, para acelerar el proceso de respuesta. Los campos obligatorios están marcados con un *.