
Categorías populares
¿Buscas un hilo?


Comentarios / Preguntas (7)
![]() Mercedes Cuadra escribió:
Mercedes Cuadra escribió:
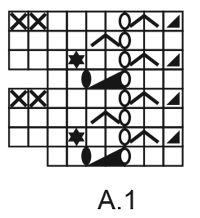
Thanks, this is my first knitting with a diagram. Now I understand well. Another thing that confuses me is if the "knit" symbol in the diagram means the same thing for the right side and the wrong side. The instruction says "knit from the right side, knit from the wrong side". In other words, you don't do a purl on the wrong side, on this 9 stitches. Is that correct? Cheers, Mercedes
20.07.2023 - 22:00DROPS Design respondió:
Hi Mercedes, there is 1 purl, second yarn over is purled. Happy knitting!
20.07.2023 - 22:27
![]() Mercedes Cuadra escribió:
Mercedes Cuadra escribió:
Hello, my question is about how to knit the wrong side of diagram A1. The pattern says that diagram A1 shows all rows from the right side. So, for example, in row 1, how should I knit those 9 stitches from the wrong side? Thank you. Mercedes
20.07.2023 - 17:27DROPS Design respondió:
Hi Mercedes, 1st row (on the right side; read the diagram from right to left): knit 3, yarn over, purl 2 together, between 2 stitches make 2 yarn overs, knit 2. 2nd row (on the wrong side; read the diagram from left to right): knit 2, knit 1 in the first yarn over, purl 1 in the 2nd yarn over, knit 2, yarn over, knit 2 twisted together, knit 1 twisted. More about how to read knitting diagrams you will find HERE. Happy knitting!
20.07.2023 - 19:42
![]() Mercedes Cuadra escribió:
Mercedes Cuadra escribió:
Hello, thank you for your previous answer. I am a beginner in knitting, so I appreciate your help with another question, When I finish the first row I have 86 stitches in total, I understand that there are 9, A1 stitches, (instead of 7), 76 stockinette and 1 garter. I understand that I am going to knit these 9 stitches like this: 3 garter stitch, 1 purl (2nd YO), and 5 garter stitches. Let me know is that's right. Have a nice day. Mercedes
19.07.2023 - 19:37DROPS Design respondió:
Dear Mercedes, the first row is correct. Now we work as follows: knit 3, purl 1 in the 2nd yo, knit 2, 1 yarn over, knit 2 stitches twisted together and knit 1 stitch twisted. Now work over the stockinette stitches and the garter stitch as before. Happy knitting!
20.07.2023 - 12:18
![]() Mercedes Cuadra escribió:
Mercedes Cuadra escribió:
Hi, its a pleasure to greet you! Thank you for your help. 1. When you say that I have to do 76 stockinette stitches on the first row, do you mean knit 76 stitches on the right side, and make purl stitches (84) on the back or 2nd row? 2. The diagram shows 7 stitches on the first row and 9 stitches on the next 3 rows. Does this mean that every four rows on the RS, I am going to repeat those stitches after knitting 76 or 74 stitches? Thank you again. Mercedes
09.07.2023 - 22:10DROPS Design respondió:
Hi Mercedes, Yes, stockinette is knitted on the right side and purled on the wrong side. You work 1 garter stitch at the beginning of the row, stockinette over the middle 76 stitches and A.1 over the last 7 stitches on the right side. This will be reversed from the wrong side, with A.1 first, then 76 stockinette (purl) and finish with 1 garter stitch. Happy knitting!
10.07.2023 - 07:41
![]() Cornelia escribió:
Cornelia escribió:
Hallo.Kann ein Fehler in der Strickschrift sein?In der 4.Reihe (Hinreihe) nach den zwei M rechts abketten ist es nicht möglich 4 M rechts zu Stricken, es ist eine zu viel angegeben. Zum abketten von 2 M am Rundenbeginn benötigt man 3 M nicht zwei. Zählt man das Muster kommt man auf 8 nicht auf 7 LG
12.05.2022 - 08:01DROPS Design respondió:
Liebe Cornelia, ja richtig, bei der 4. Reihe (= Rückreihe), ketten Sie 2 Maschen ab, dann stricken Sie insgesamt 4 Maschen links, aber die erste ist schon auf der Nadel nach der Abketten, so stricken Sie nur 3 Maschen links (es sind 4 glatt rechte Maschen auf der rechten Nadel). Viel Spaß beim stricken!
12.05.2022 - 09:16
![]() Agnes escribió:
Agnes escribió:
Hej Skulle ni vilja lägga upp en video på hur man stickar diagrammet. Får ingen rätsida på det
14.12.2021 - 09:20
![]() Hannelore Goormans escribió:
Hannelore Goormans escribió:
Wie kann ich eine Anleitung per PDF runter laden
16.07.2021 - 10:26DROPS Design respondió:
Liebe Frau Goormans, unsere Anleitungen können nur ausgedruckt werden, aber wenn Sie eine virtuelle Drucker wählen, dann können Sie als .PDF speichern. Viel Spaß beim stricken!
16.07.2021 - 11:42
|
|||||||||||||||||||||||||
Warm Delights#warmdelightsbag |
|||||||||||||||||||||||||
 |
 |
||||||||||||||||||||||||
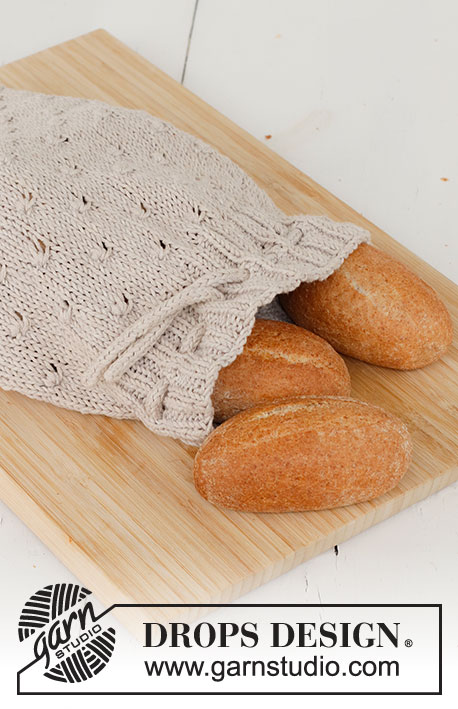
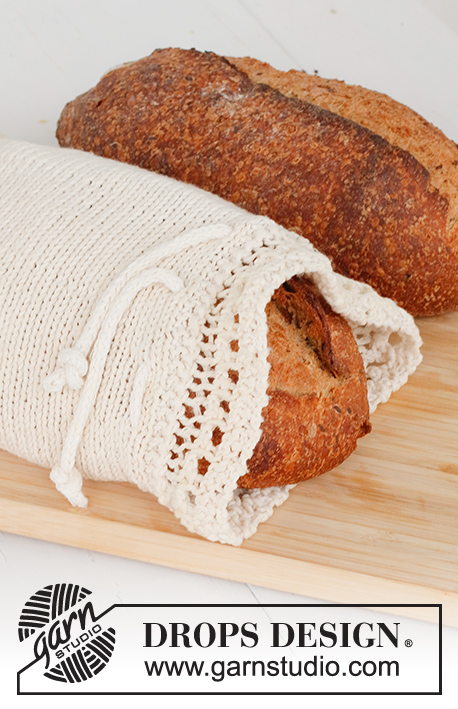
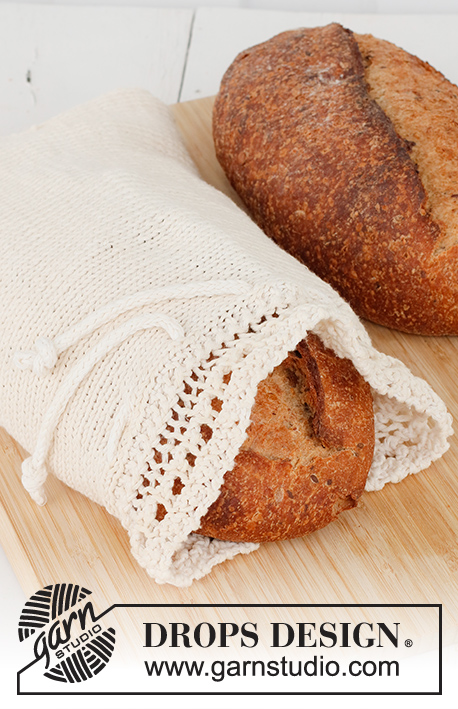
Bolsa para pan de punto con volantes en DROPS Cotton Light.
DROPS 221-53 |
|||||||||||||||||||||||||
|
EXPLICACIONES PARA REALIZAR EL PATRÓN: ------------------------------------------------ SURCO/PUNTO MUSGO (tejido de ida y vuelta): Tejer todas las hileras de derecho. 1 surco = tejer 2 hileras de derecho. PATRÓN: Ver diagrama A.1. El diagrama muestra todas las hileras del patrón por el lado derecho. ------------------------------------------------ COMENZAR LA PIEZA AQUÍ: ------------------------------------------------ BOLSA PARA PAN – RESUMEN DE LA PIEZA: La bolsa para pan se teje lateralmente, de ida y vuelta en la aguja y se une con una costura a lo largo del lado y del fondo. BOLSA PARA PAN: Montar 84 puntos con aguja tamaño 4.5 mm y DROPS Cotton Light. Tejer 2 SURCOS sobre todos los puntos – leer descripción arriba. Insertar un marcador – LA PIEZA SE MIDE A PARTIR DE AQUÍ. La hilera siguiente se teje de la manera siguiente por el lado derecho: 1 punto de orillo en punto musgo, 76 puntos en punto jersey y A.1 sobre 7 puntos. ¡RECORDAR MANTENER LA MISMA TENSIÓN DE TEJIDO DE LA MUESTRA! Continuar con el patrón A.1 en un lado, punto jersey y punto musgo en el otro lado hasta que la pieza mida aprox. 48 cm a partir del marcador – ajustar para terminar después de la hilera 4 u 8 de A.1. Tejer 2 surcos sobre todos los puntos. Rematar flojo, cortar el hilo. CORDONES: Tejer de ida y vuelta con aguja circular. Montar 3 puntos con aguja circular tamaño 3.5 mm y DROPS Cotton Light. Tejer 3 puntos derechos * no virar sino empujar los puntos de vuelta al otro extremo de la aguja, pasar el hilo hacia atrás de los puntos, apretar y tejer los puntos de derecho por el lado derecho nuevamente *, tejer de *a* hasta que el cordón mida aprox. 60 cm, rematar los puntos y rematar el hilo. ENSAMBLAJE: Doblar la pieza en dos de manera que los volantes queden enfrentados; esta es la abertura de la bolsa. Coser la orilla de remate a la orilla de montaje en el bucle más externo del punto más externo. Doblar la pieza de manera que la costura del lado quede en el centro de la pieza. Coser el fondo de la bolsa, en el interior de 1 punto de orillo. Pasar el cordón de adentro hacia afuera de la pieza a través de los puntos en punto jersey, unos cuantos cm abajo del patrón A.1 – ver foto. Atar un nudo en cada extremo del cordón. |
|||||||||||||||||||||||||
Explicaciones del diagrama |
|||||||||||||||||||||||||
|
|||||||||||||||||||||||||
 |
|||||||||||||||||||||||||
¿Terminaste este patrón?Entonces, etiqueta tus fotos con #dropspattern #warmdelightsbag o envíalas a la galería #dropsfan. ¿Necesitas ayuda con este patrón?Encontrarás 18 videos tutoriales, un espacio para comentarios/preguntas y más visitando la página del patrón en garnstudio.com © 1982-2026 DROPS Design A/S. Todos los derechos reservados. Este documento, incluyendo todas sus sub-secciones, está protegido por los derechos de autor (copyright). Lee más acerca de lo que puedes hacer con nuestros patrones en la parte de abajo de cada patrón de nuestro sitio. |
|||||||||||||||||||||||||


Con más de 40 años en el diseño de modelos de punto y de ganchillo, DROPS Design ofrece una de las más vastas colecciones de patrones gratuitos en el internet - traducidos en 17 idiomas. Al día de hoy, contamos con 324 catálogos y 12290 patrones - de los cuales 11675 están traducidos en español.
Nosotros trabajamos con mucho esmero para brindarte lo mejor que las labores de punto y ganchillo tienen para ofrecer,inspiración y consejos, así como hilos de magnífica calidad a precios increíbles! Te gustaría usar nuestros patrones para otro fin además del uso personal? Puedes leer acerca de lo que estás permitida a hacer en el texto de Copyright en la parte de abajo de todos nuestros patrones. Felices labores!
Escribe un comentario sobre DROPS 221-53
¡Nos encantaría saber qué piensas acerca de este patrón!
Si quieres escribir una pregunta referente al patrón, por favor asegúrate de elegir la categoría correcta en el formulario debajo, para acelerar el proceso de respuesta. Los campos obligatorios están marcados con un *.