
Popular categories
Looking for a yarn?


Comments / Questions (6)
![]() Nyllie wrote:
Nyllie wrote:
So just to clarify, there are two decrease both Row eight and 10. That means that in row 10 where there is no indication of a second decrease there should have been? so I will need to take back the work that I have done to make sure that there is a decrease on each side of the marker in route 10 as well as row eight? Thanks
22.04.2025 - 18:21DROPS Design answered:
Dear Nyllie, pattern will be checked again and if necessary there will be a correction - thanks already in advance for your patience.
23.04.2025 - 07:34
![]() Nyllie wrote:
Nyllie wrote:
Doses this site still answer questions? I have been waiting to continue pattern so would like to know if i should look elsewhere for clarification. Thanks.
22.04.2025 - 02:21DROPS Design answered:
Dear Nyllie, your question has been answered, however we might have to wait for a feedback from our design team, so thanks in advance for your patience, there might be a correction.
22.04.2025 - 16:38
![]() Sharon wrote:
Sharon wrote:
I have the same question as Nyllie. I was getting ready to begin this pattern and checked through reading it, as well as the comments questions when I saw the questions I checked the pattern again and realize that there is a double increase for a single decrease. Won’t that make the heel section uneven or lopsided?
20.04.2025 - 01:32DROPS Design answered:
Dear Sharon, pattern is now updated, you should decrease 2 sts on each row 8 and on row 10. Happy knitting!
25.04.2025 - 11:21
![]() Nyllie wrote:
Nyllie wrote:
Ready to begin at row 11. On ROW 10 Knit until 2 stitches remain before stitch with marker, slip 1 stitch, knit 1 and pass slipped stitch over, knit 1 (stitch with marker), knit until 24 stitches remain,…There is only one decrease no decrease after the stitch with the stitch marker yet on ROW 14 Knit until stitch with marker, 1 yarn over, knit 1 (= stitch with marker), 1 yarn over and knit until 24 stitch remain,2 increases??????
18.04.2025 - 00:50DROPS Design answered:
Dear Nyllie, after row 10 you will repeat row 7 til 10, this means you will decrease each time you work row 8 and row 10 the same way as you did: work until 2 sts remain before the stitch with the marker and decrease 2 stitches (1 on each side of the stitch with marker), continue working as before to the end of row (when working row 8) / work until 24 sts remain, cast off 18 and K 6 (when working row 10). Work these 4 rows (7-10) a total of 3 times (including 1st time). Happy knitting!
22.04.2025 - 11:14
![]() Nyllie wrote:
Nyllie wrote:
Ready to begin at row 11. On ROW 10 Knit until 2 stitches remain before stitch with marker, slip 1 stitch, knit 1 and pass slipped stitch over, knit 1 (stitch with marker), knit until 24 stitches remain,…There is only one decrease no decrease after the stitch with the stitch marker yet on ROW 14 Knit until stitch with marker, 1 yarn over, knit 1 (= stitch with marker), 1 yarn over and knit until 24 stitch remain,2 increases??????
16.04.2025 - 00:49
![]() Pam wrote:
Pam wrote:
I want to make these booties but I can’t understand how you can cast 56 stitches of chunky yarn onto a single double pointed needle, can you provide some additional guidance?
26.11.2022 - 00:29DROPS Design answered:
Dear Pam, there seems to be a mistake in the US version of the pattern. This model uses straight needles (so 56 stitches fit in there) or you can use any other type of needle with enough space for the 56 stitches (like circular needles). Happy knitting!
27.11.2022 - 15:52
|
|
Snow Braid#snowbraidslippers |
|
 |
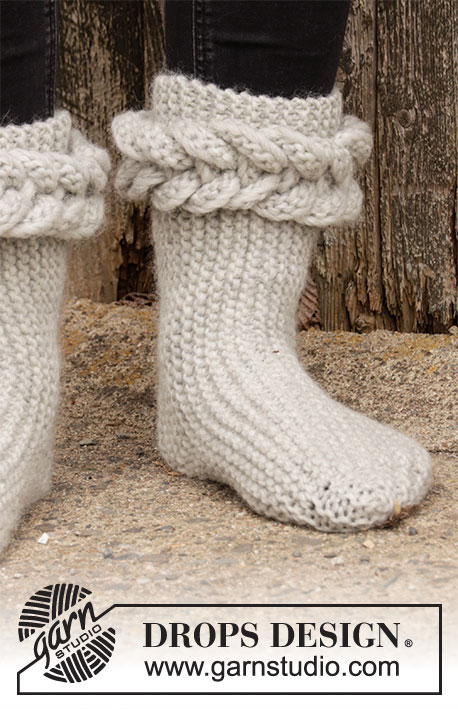 |
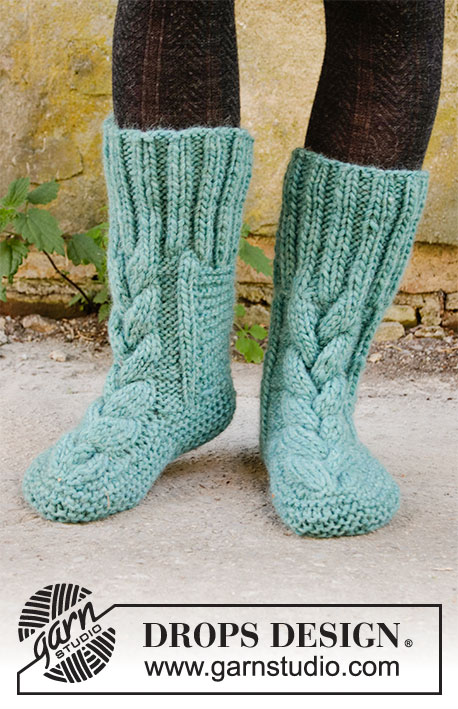
Knitted slippers with cable and in garter stitch in DROPS Snow. Piece is knitted sideways with short rows and a cable. Size 35-42.
DROPS 203-35 |
|
|
---------------------------------------------------------- EXPLANATION FOR THE PATTERN: ---------------------------------------------------------- GARTER STITCH (back and forth): Knit all rows. 1 ridge vertically = knit 2 rows. ---------------------------------------------------------- START THE PIECE HERE: ---------------------------------------------------------- SLIPPER - SHORT OVERVIEW OF THE PIECE: Work slippers in one piece, work back and forth on needle. Work the entire slippers in GARTER STITCH - read explanation above. Cast on and cast off stitch in one end along the way, these stitches create loop that will go around the leg part of slipper. At the loops are pulled through one another and make a cable pattern. SLIPPER: Cast on 56-61-66 stitches on needles size 6 mm with Snow. Begin by working short rows with loops at the top of slipper as follows: ROW 1 (= right side): Knit 16 stitches. Turn piece. ROW 2 (= wrong side): Knit all stitches. Turn piece. ROW 3 (= right side): Knit 6, cast on 18 new stitches on needle and then work 18 stitches from needle. Turn piece. ROW 4 (= wrong side): Knit all stitches. Turn piece. Now work short rows towards the toe, make loops at the top and decrease for heel as follows from right side: ROW 5 (= right side): Knit until 5-5-6 stitches remain towards the toe. Turn piece. ROW 6 (= wrong side): Work until 24 stitches remain, cast off the next 18 stitches and knit 6. Turn piece. ROW 7 (= right side): Knit 6, cast on 18 new stitches on needle and work the rest of row. Turn piece. ROW 8 (= wrong side): Insert a marker in the 26th-29th-32nd stitch from toe (used when decreasing and increasing for heel, let the marker follow this stitch through the entire piece). Tighten the yarn, slip first stitch and work until 2 stitch before stitch with marker, slip 1 stitch, knit 1 and pass slipped stitch over, knit 1 (stitch with marker), knit 2 together and knit the rest of row. Turn piece. ROW 9 (= right side): Knit until 5-5-6 stitches remain towards the toe. Turn piece. ROW 10 (= wrong side): Knit until 2 stitches remain before stitch with marker, slip 1 stitch, knit 1 and pass slipped stitch over, knit 1 (stitch with marker), knit 2 stittches together, knit until 24 stitches remain, cast off the next 18 stitches and knit 6. Turn piece. Repeat 7th-10th ROW like this until decrease for heel has been done 6 times in total (7th-10th ROW have been worked 3 times in total). Continue to work as 7th-10th row but now without heel decrease. Work like this until piece measures 10-12-14 cm from last heel decrease – adjust so that last row is as 10th ROW (the 18 stitches for loop are cast off from wrong side). Now continue with short rows towards the toe, make loops and increase for heel as follows from wrong side: ROW 11 (= right side): Knit 6, cast on 18 new stitches on needle and work the rest of row. Turn piece. ROW 12 (= wrong side): Tighten yarn, slip first stitch, work until stitch with marker, 1 yarn over, knit 1 (= stitch with marker), 1 yarn over and knit the rest of row. Turn piece. ROW 13 (= right side): Knit until 5-5-6 stitches remain towards the toe. Turn piece. ROW 14 (= wrong side): Knit until stitch with marker, 1 yarn over, knit 1 (= stitch with marker), 1 yarn over and knit until 24 stitch remain, cast off the next 18 stitches and knit 6. Turn piece. Repeat 11th-14th ROW like this until increase for heel has been done 6 times in total (11th-14th row have been worked 3 times in total). Now work short rows towards the toe, and make an open loop as follows from right side: ROW 15 (= right side): Knit 6, cast on 18 new stitches on needle. Turn piece. ROW 16 (= wrong side): Knit all stitches. Turn piece. ROW 17 (= right side): Knit 24 stitches. Turn piece. ROW 18 (= wrong side): Cast off the first 18 stitches, work the rest of row. Turn piece. ROW 19 (= right side): Knit 6 stitches. Turn piece. ROW 20 (= wrong side): Cast off the 6 stitches by knitting. Cut the yarn, let the yarn end be approx. 10 cm, this is used for assembly later. Turn piece. Now work short rows at the top of slipper as follows from right side (the side where the open loop is). ROW 21 (= right side): Knit 10 stitches. Turn piece. ROW 22 (= wrong side): Knit all stitches. Turn piece. ROW 23 (= right side): Knit 18 stitches. Turn piece. ROW 24 (= wrong side): Knit all stitches. Turn piece. ROW 25 (= right side): Knit all stitches. Turn piece. ROW 26 (= wrong side): Cast off all stitches by knitting. Cut the yarn, let the yarn end be approx. 50 cm, this is used for assembly later. ASSEMBLY: Sew slipper together mid back and under, begin at the top where the 6 stitches at the top of leg were cast off. Sew stitch to stitch downward - the open loop is hanging on right side. Make sure to sew toe tightly together. Now thread the loop through one another as follows: Pull first loop over second loop and pull second loop over third loop. Continue like this until last stitch and pull this through the open loop. Pull the open loop through last loop so that the open loop is on the top side of loop. Thread the open loop around the first loop from beginning and thread it then in the last loop again so that the open loop is coming out on the underside of loop. Fasten end of the open loop with small stitch on the underside of cable. Knit another slipper the same way. |
|
Have you finished this pattern?Tag your pictures with #dropspattern #snowbraidslippers or submit them to the #dropsfan gallery. Do you need help with this pattern?You'll find 13 tutorial videos, a Comments/Questions area and more by visiting the pattern on garnstudio.com. © 1982-2026 DROPS Design A/S. We reserve all rights. This document, including all its sub-sections, has copyrights. Read more about what you can do with our patterns at the bottom of each pattern on our site. |
|


With over 40 years in knitting and crochet design, DROPS Design offers one of the most extensive collections of free patterns on the internet - translated to 17 languages. As of today we count 324 catalogues and 12290 patterns translated into English (UK/cm).
We work hard to bring you the best knitting and crochet have to offer, inspiration and advice as well as great quality yarns at incredible prices! Would you like to use our patterns for other than personal use? You can read what you are allowed to do in the Copyright text at the bottom of all our patterns. Happy crafting!
Post a comment to pattern DROPS 203-35
We would love to hear what you have to say about this pattern!
If you want to leave a question, please make sure you select the correct category in the form below, to speed up the answering process. Required fields are marked *.