Comments / Questions (40)
![]() Pharahilde wrote:
Pharahilde wrote:
Ik gebruik dit patroon in twee kleuren (brioche). Perfect te doen, en tot nu toe, prachtig resultaat. Ok, al een paar foutjes moeten herstellen, (links waar rechts moet en vv) maar met een haaknaald erbij, toch eenvoudig. Meestal valt het pas op na ca. 4 toeren, dus lekker laten vallen die steek, herstellen en weer ophalen. Hopelijk lukt het om jullie een foto van het eindresultaat te sturen.
23.09.2022 - 20:11
![]() Raffaella wrote:
Raffaella wrote:
Grazie per la vostra premura ma il problema non è ogni quanti ferri fare gli aumenti ma come procedere per gli aumenti lungo il ferro. I primi aumenti riesco a collocarli poi lavoro 5 ferri al 6 ferro che prevede i nuovi aumenti faccio confusione. Potreste aiutarmi ?? Vi ringrazio sempre tanto per la cortesia e gentilezza che mettete nel vs lavoro.
14.02.2022 - 21:15DROPS Design answered:
Buonasera Raffaella, per lavorare gli aumenti deve seguire sempre le indicazioni riportate nel paragrafo raglan all'inizio delle spiegazioni. Buon lavoro!
16.02.2022 - 23:28
![]() Raffaella wrote:
Raffaella wrote:
Dopo il primo giro di aumenti non mi è chiaro come procedere per i successivi. Sul punto costa inglese procedo senza difficoltà. Grazie per la disponibilità e buon lavoro
12.02.2022 - 22:04DROPS Design answered:
Buonasera Raffaella, se sta facendo riferimento agli aumenti per il raglan deve aumentare prima ogni 6 giri per le volte indicate per le diverse taglie e poi ogni 8 giri per le volte indicate. Buon lavoro!
14.02.2022 - 19:37
![]() Raffaella wrote:
Raffaella wrote:
Non mi è chiaro il procedimento per gli aumenti della manica raglan a coste inglesi ho provato diverse volte ma senza successo. Potete aiutarmi per favore vi sarei molto grata
03.02.2022 - 22:09DROPS Design answered:
Buonasera Raffaella, quale passaggio non le è chiaro? Buon lavoro!
05.02.2022 - 20:53
![]() Confused wrote:
Confused wrote:
Hi. I too have a Q on the raglan increase (size M). Once I increase 16 sts on round 2 of English rib pattern, would I increase again on round 8, 14, 22, 30, etc?? begin with 84 sts RND 1 - work the pattern RND 2 - INC 16 sts RND 3 to 7 - work the pattern RND 8 - INC 16 sts RND 14 to 21 - work the pattern RND 22 - INC 16 sts RND 23 to 29 - work the pattern RND 30 - INC 16 sts . . . RND 94 - INC 16 sts (last increase) Thanks in advance.
17.01.2021 - 10:15DROPS Design answered:
Hi, sorry, this confuse me, you should increase like this: 1st round with increase as explained, then work 5 rounds without increase and increase on next round (= round 2 English rib). Now work *7 rounds, increase on next round*, repeat from *-* a total of 10 times. Hope this will help. Happy knitting!
18.01.2021 - 09:43
![]() Ditte wrote:
Ditte wrote:
Hej. Jeg har strikket halskanten på Drops Lagoon. Jeg forstår ikke helt hvordan udtagningerne på bærestykket skal laves? Der står, at de skal laves på 2. omgang..... -men kan det passe, når der på 2. omgang er vrangmasker
20.12.2020 - 20:14DROPS Design answered:
Hej Ditte, du skal tage ud på den pind hvor masken skal strikkes vrang sammen med omslaget. Se stykket om "tag ud således". God fornøjelse!
21.12.2020 - 15:39
![]() Maria Virginia wrote:
Maria Virginia wrote:
È possibile realizzare questo modello non con i ferri circolari? Grazie
25.11.2020 - 09:14DROPS Design answered:
Buongiorno Maria Virginia, questo modello è stato progettato per essere lavorato in tondo: se desidera lavorarlo in piano deve prestare attenzione alla lavorazione delle coste inglesi. Buon lavoro!
25.11.2020 - 09:49
![]() Carla M Zamperetti wrote:
Carla M Zamperetti wrote:
Dopo la spiegazione della costa inglese , nella versione italiana si dice di contate i gettati come m , mentre nella versione in inglese dice di NON considerare i gettati come maglie
23.11.2020 - 17:27DROPS Design answered:
Buonasera Carla, grazie per la segnalazione: abbiamo corretto la versione italiana. Buon lavoro!
28.11.2020 - 21:32
![]() Freja wrote:
Freja wrote:
Jeg forstår ikke raglanudtagningen, foregår denne på patent ret eller patent vrang omgangen? I jeres oversigt er p1 = start, p2 = vrang og p3 = ret, under udtagning står dog at der skal tages ret ud på "2. omgang patent". Hvad er rigtigt?
11.09.2020 - 17:59
![]() Zoka wrote:
Zoka wrote:
Actually I'm not sure how to reach 276 st. after all increases. Wish you good health
02.05.2020 - 14:00DROPS Design answered:
Dear Zoka, you start in M with 84 sts and increase a total of 16 stitches - see RAGLAN at the beg of the pattern: 2 times on every 6 th round + 10 times on every 8th round = 12 rounds with 16 stiches increased on each of these 12 rounds = 192 sts will be increased due to the raglan + the 84 sts from beg = 276 sts. Happy knitting!
04.05.2020 - 11:52
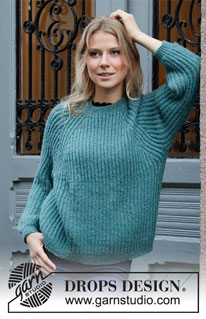
Lagoon#lagoonsweater |
|
 |
 |
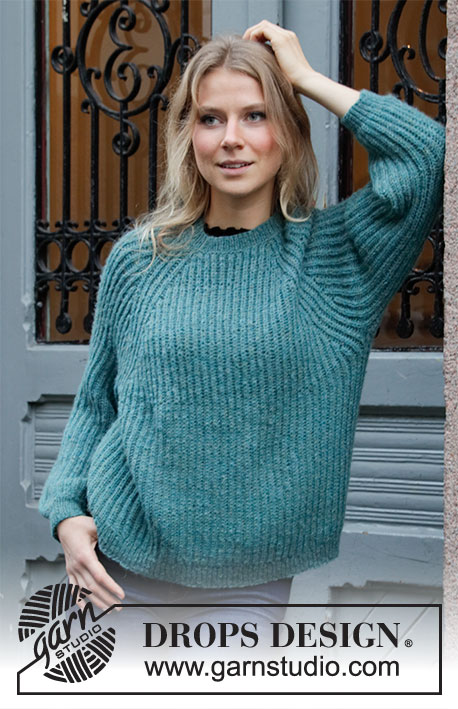
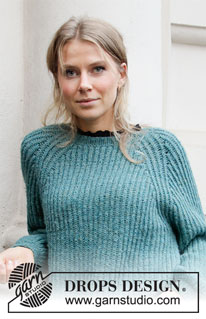
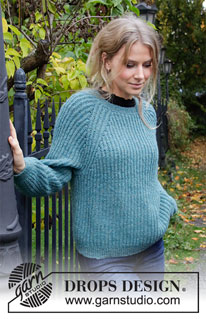
Knitted jumper with raglan in DROPS Sky. Piece is knitted top down with English rib. Size: S - XXXL
DROPS 207-40 |
|
|
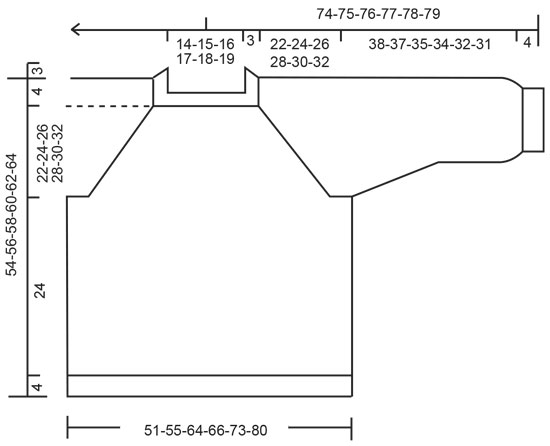
---------------------------------------------------------- EXPLANATION FOR THE PATTERN: ---------------------------------------------------------- ENGLISH RIB: ROUND 1: * Knit 1, 1 yarn over, slip 1 stitch as if to purl *, work from *-*. ROUND 2: * 1 yarn over, slip 1 stitch purlwise, purl together yarn over and slipped stitch *, work from *-*. ROUND 3: * Knit together yarn over and slipped stitch, 1 yarn over, slip 1 stitch as if to purl *, repeat from *-*. Repeat rounds 2 to 3. ENGLISH RIB STITCH: When counting the stitches, the yarn overs are not counted as stitches. RAGLAN: All increases are done on 2 round in English rib pattern! NOTE! If the knitting tension is not correct vertically the raglan increase will be too short/long vertically. Raglan increase is written in both number of round and cm. If the knitting tension is incorrect vertically, work raglan increase in cm. Increase as follows: Work until 4 stitches remain before stitch with marker. Increase 2 stitches in next stitch (one purl stitch + yarn over) as follows: Knit yarn over and stitch together but wait to slip stitch and yarn over off the needle, make 1 yarn over on right needle, knit stitch and yarn over together 1 more time = 3 stitches (= 2 stitches increased). Work the next 7 stitches in English rib as before. Increase 2 stitches in next stitch (one purl stitch + yarn over) as follows: Knit yarn over and stitch together but wait to slip stitch and yarn over off the needle, make 1 yarn over on right needle, knit stitch and yarn over together 1 more time = 3 stitches (= 2 stitches increased). Repeat at each of the remaining markers (= 16 stitches increased in total on round). On next round work the increased stitches in English rib pattern - there are no English rib yarn overs in increase, so on next round in English rib pattern work stitch to be worked together yarn over, without yarn over. DECREASE TIP-1 (evenly): To calculate how to decrease evenly, use the total number of stitches on row (e.g. 96 stitches) and divide stitches by number of decreases to be done (e.g. 16) = 6. In this example decrease by knitting every 5th and 6th stitch together. DECREASE TIP-2 (applies to sleeves): All decreases are done on 2 round in English rib pattern. Decrease as follows: Work like this until 2 stitches remain before stitch with marker, slip the next 3 stitches (+ yarn overs that belongs to stitches) loosely over on to right needle as if to knit together, knit the next 2 stitches (+ yarn over that belongs to stitch) together, pass the 3 slipped stitches over stitches knitted together (= 4 stitches decreased). NOTE! On next round do not work any English rib stitch together with middle stitch under sleeve, then on next round in English rib pattern, work stitch together with yarn over, without yarn over. INCREASE TIP (evenly): To calculate how to increase evenly, use the total number of stitches on row (e.g. 164 stitches) and divide stitches by number of increases to be done (e.g. 70) = 2.3. In this example increase by making 1 yarn over after approx. every other stitch. On next round work yarn overs twisted to avoid holes. ---------------------------------------------------------- START THE PIECE HERE: ---------------------------------------------------------- JUMPER - SHORT OVERVIEW OF THE PIECE: Worked in the round on circular needle, top down. Work sleeves in the round on a short circular needle/double pointed needles. NECK EDGE: Cast on 96-102-106-110-114-118 stitches on a short circular needle size 3 mm with Sky. Knit 1 round, then work rib = knit 1/purl 1 for 3 cm. Knit 1 round while decreasing 16-18-18-22-22-26 stitches evenly - read DECREASE TIP-1 (evenly) = 80-84-88-88-92-92 stitches. Purl 1 round. Insert a marker here (= beginning of round approx. mid back). NOW MEASURE PIECE FROM HERE! YOKE: Switch to circular needle size 4.5 mm. Then work ENGLISH RIB - read explanation above. When 1 round has been worked with English rib, insert 4 markers in piece without working (insert all markers in a purl stitch) - read ENGLISH RIB STITCH: Skip the first 13-13-15-15-15-15 stitches, insert a marker in next stitch (= in transition between half back piece and right sleeve), skip the next 13 stitches, insert a marker in next stitch (= in transition between right sleeve and front piece), skip the next 25-27-29-29-31-31 stitches, insert a marker in next stitch (= in transition between front piece and left sleeve), skip the next 13 stitches, insert a marker in next stitch (= in transition between left sleeve and half back piece), there are now 12-14-14-14-16-16 stitches between last marker and beginning of round. REMEMBER THE KNITTING TENSION! There is now a marker in every transition between body and sleeves. Move the markers upwards when working. Continue in the round with English rib, AT THE SAME TIME on next round (= 2nd round in English rib) begin increase for RAGLAN - read explanation above. Increase like this every 6th round (approx. every 1½ cm), 1-2-4-5-6-8 times in total and every 8th round (approx. every 2 cm) 10 times in all sizes = 256-276-312-328-348-380 stitches. When all increases are done, continue with English rib until piece measures 22-24-26-28-30-32 cm from marker, finish after 2nd round in English rib. Work next round as follows: Work the first 37-39-47-49-53-59 stitches (= approx. half back piece), slip the next 55-59-63-67-67-71 stitches on a stitch holder for sleeve and cast on 9 new stitches on needle (= in the side under sleeve), work the next 73-79-93-97-107-119 stitches (= front piece), insert the next 55-59-63-67-67-71 stitches on a stitch holder for sleeve and cast on 9 new stitches on needle (= in the side under sleeve), work the last 36-40-46-48-54-60 stitches on round (= approx. half back piece). Finish body and sleeves separately. NOW MEASURE PIECE FROM HERE! BODY: There are now 164-176-204-212-232-256 stitches on round. Continue in the round with English rib until piece measures 24 cm - adjust to finish after 2nd round in English rib. Switch to circular needle size 3 mm. Work next round as follows: * Knit yarn over and slipped stitch together, purl 1 *, work from *-* the entire round, AT THE SAME TIME increase 70-76-90-92-104-112 stitches - read INCREASE TIP = 234-252-294-304-336-368 stitches. Work rib (knit 1/purl 1) in the round for 4 cm. Cast off stitches with knit over knit and purl over purl. Jumper measures approx. 54-56-58-60-62-64 cm from shoulder and down. SLEEVE: Slip the 55-59-63-67-67-71 stitches from stitch holder in one side of piece back on a short circular needle/double pointed needles size 4.5 mm and pick in addition up 1 stitch in each of the 9 new stitches cast on in the side under sleeve = 64-68-72-76-76-80 stitches. Continue in the round with English rib. When sleeve measures 4 cm – adjust so that next round is 2nd round in English rib, insert a marker in the middle stitch under sleeve (= one knit stitch). On next round, decrease 4 stitches under sleeve - read DECREASE TIP-2. Decrease like this every 8-8-5-4-4-3 cm 4-4-5-6-6-6 times in total = 48-52-52-52-52-56 stitches. When sleeve measures 38-37-35-34-32-31 cm – adjust so that next round is 3rd round in English rib pattern, switch to double pointed needles size 3 mm. Work next round as follows: * Knit yarn over and slipped stitch together, purl 1 *, work from *-* the entire round = 48-52-52-52-52-56 stitches. Now work rib (= knit 1/purl 1) for 4 cm. Cast off stitches with knit over knit and purl over purl. Sleeve measures 42-41-39-38-36-35 cm from division. Work the other sleeve the same way. |
|
 |
|
Have you finished this pattern?Tag your pictures with #dropspattern #lagoonsweater or submit them to the #dropsfan gallery. Do you need help with this pattern?You'll find 17 tutorial videos, a Comments/Questions area and more by visiting the pattern on garnstudio.com. © 1982-2026 DROPS Design A/S. We reserve all rights. This document, including all its sub-sections, has copyrights. Read more about what you can do with our patterns at the bottom of each pattern on our site. |
|





Post a comment to pattern DROPS 207-40
We would love to hear what you have to say about this pattern!
If you want to leave a question, please make sure you select the correct category in the form below, to speed up the answering process. Required fields are marked *.