
Popular categories
Looking for a yarn?


Comments / Questions (8)
![]() Leigh Trigilio wrote:
Leigh Trigilio wrote:
Also :) I started knitting A1 from right to left through both charts, as is standard. However, when I got to the end of the first section and placed the bottom foot sts on a holder, my live yarn was at the beginning of a ws row. So, when I knit across with my color, I see white purl bumps on the rs. How did you avoid that in your picture?
21.04.2025 - 14:43DROPS Design answered:
Dear Mrs Trigillio, you can cut the yarn and start again from the right side to start with a knit row from the right side. Happy knitting!
22.04.2025 - 16:07
![]() Leigh wrote:
Leigh wrote:
After binding off the first ridges section, do I cut or cast on and keep the last bind off stitch includes in the count and live yarn?
19.04.2025 - 21:14DROPS Design answered:
Dear Leigh, you cut the thread and start with a new thread. Happy knitting!
21.04.2025 - 00:29
![]() Gaetane wrote:
Gaetane wrote:
Bonjour ! Y a t il un vidéo pour tricoter le jacquard? Comment place t on les fils ? En étant si éloigné ? J en ai déjà fait mais pas ainsi écarté? Merci 🙏
12.12.2022 - 12:44DROPS Design answered:
Bonjour Gaetane, vous trouverez 2 vidéos montrant comment faire: méthode anglaise/américaine ou méthode continentale, quand il y a plusieurs mailles tricotées d'une seule couleur (1er rang du dessous et du dessus du pied par ex), croisez les fils toutes les 3/5 mailles. Bon tricot!
12.12.2022 - 16:11
![]() Gaetane wrote:
Gaetane wrote:
Bonjour ! Comment fait on au début tricoter le diagramme c est tout serré petit ,j en ai les doigts cramper! Je comprends votre modèle mais c est le début c est corsé 😢 on fait comment ? Merci 🙏
11.12.2022 - 15:37DROPS Design answered:
Bonjour Gaetane, les premiers tours peuvent être un peu "tricky" mais après quelques tours, lorsque vous aurez suffisamment de mailles, ce sera plus confortable. Vous pouvez aussi tricoter en magic loop; peut-être que vous serez plus à l'aise. Bon tricot!
12.12.2022 - 09:41
![]() Gaetane wrote:
Gaetane wrote:
Bonjour , après avoir monté mes 12 m. Au point magique, est ce que je fait des tours en jersey avant de commencer le diagramme ? Le diagramme commence par 5 cases et j ai 12 m ! Comment je fait ça ? Merci 🙏
11.12.2022 - 13:06DROPS Design answered:
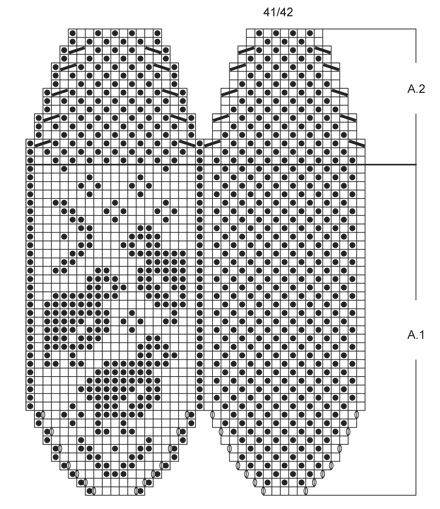
Bonjour Gaetane, le diagramme A.1 se lit sur toute la ligne, autrement dit, on commence par les 5 m du dessous du pied puis on tricote les 7 maille du dessus du pied = on a bien 12 m ainsi; en même temps, on augmente comme indiqué dans le diagramme, autrement dit: 1 jeté, 5 m end, 1 jeté, 1 m end, 1 jeté, 5m end, 1 jeté, 1 m end (on a maintenant 16 m). Bon tricot!
12.12.2022 - 09:33
![]() Åsa Persson wrote:
Åsa Persson wrote:
Varför ska det vara så omständigt att skriva ut era mönster? Jag vill inte ha all reklam och alla andra oväsentligheter när jag vill ha ett mönster. Det tar massor av extra papper och färg!
14.07.2018 - 19:12DROPS Design answered:
Hei Åsa. Hvordan gjør du det når du printer ut? Hvis du skriver ut oppskriften ved å trykke på det lille printer-ikonet rett under der matrialene med priser står, vil du kunne velge hvilke sider du skal printe ut, og da kan du la vær å printe ut den siden med reklame på slutten om du vil. God fornøyelse
18.07.2018 - 11:30
![]() Framboizul wrote:
Framboizul wrote:
Bonjour, y a-t-il une vidéo qui explique comment "rabattre les mailles avec deux fils"?
23.02.2018 - 12:37DROPS Design answered:
Bonjour Framboizul, nous n'avons pas encore de vidéo montrant cette technique: prenez simplement le fil en double (par ex celui de l'intérieur et celui de l'extérieur de la pelote) et rabattez ensuite les mailles comme vous le faites d'habitude. Bon tricot!
23.02.2018 - 13:28
![]() Terttu Hänninen wrote:
Terttu Hänninen wrote:
Hei! Varmaan hyvä ohje .En vai ymmärrä mistä päästä aloitetaan työstämään . jos saisin vastauksen olisin tyytyväinen.
08.12.2015 - 12:09
|
||||||||||||||||
Tip Tip Toe#tiptiptoeslippers |
||||||||||||||||
 |
 |
|||||||||||||||
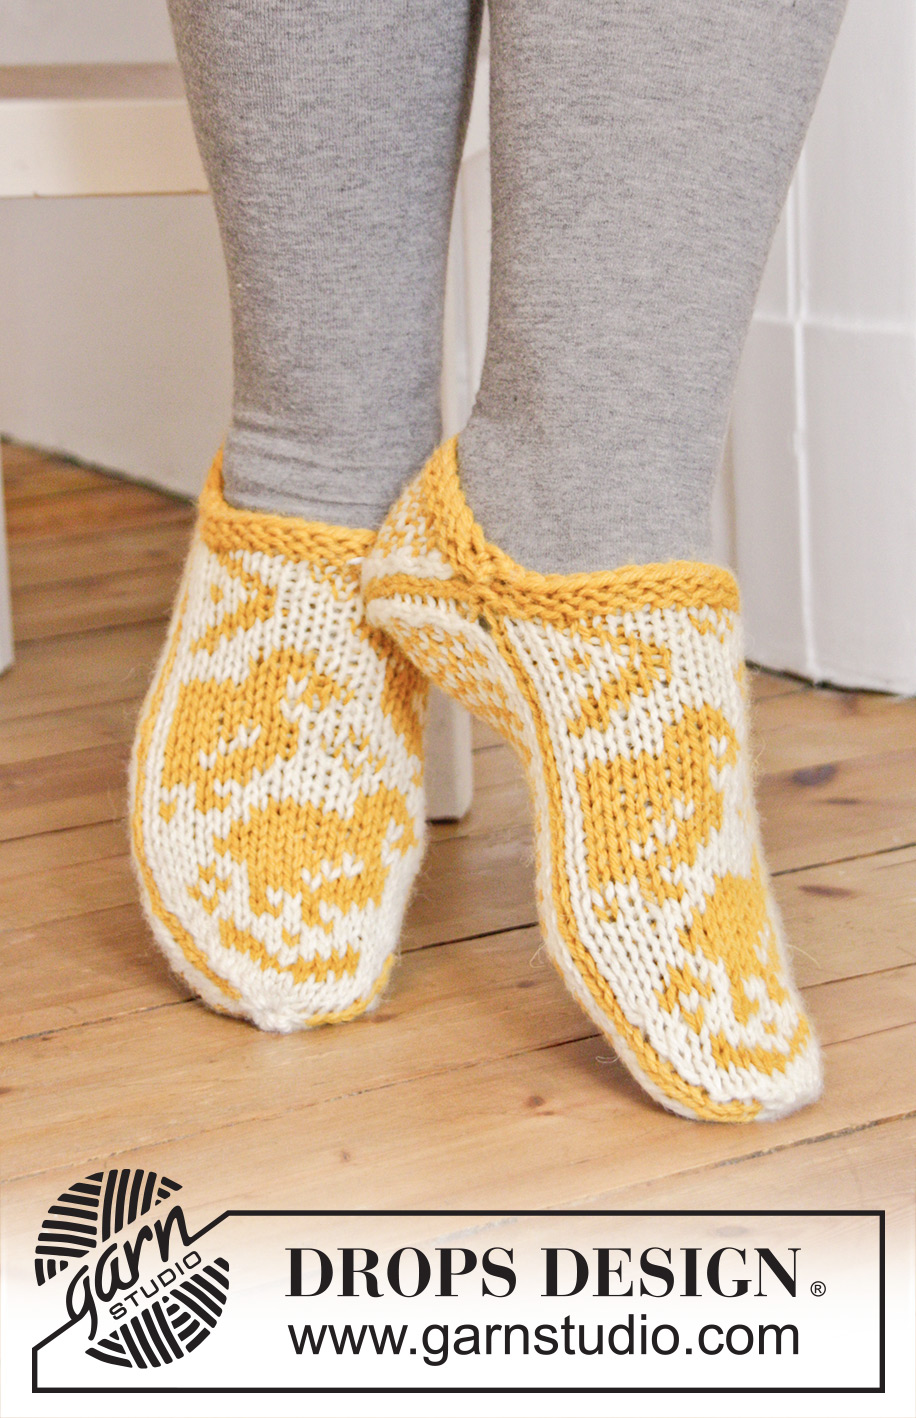
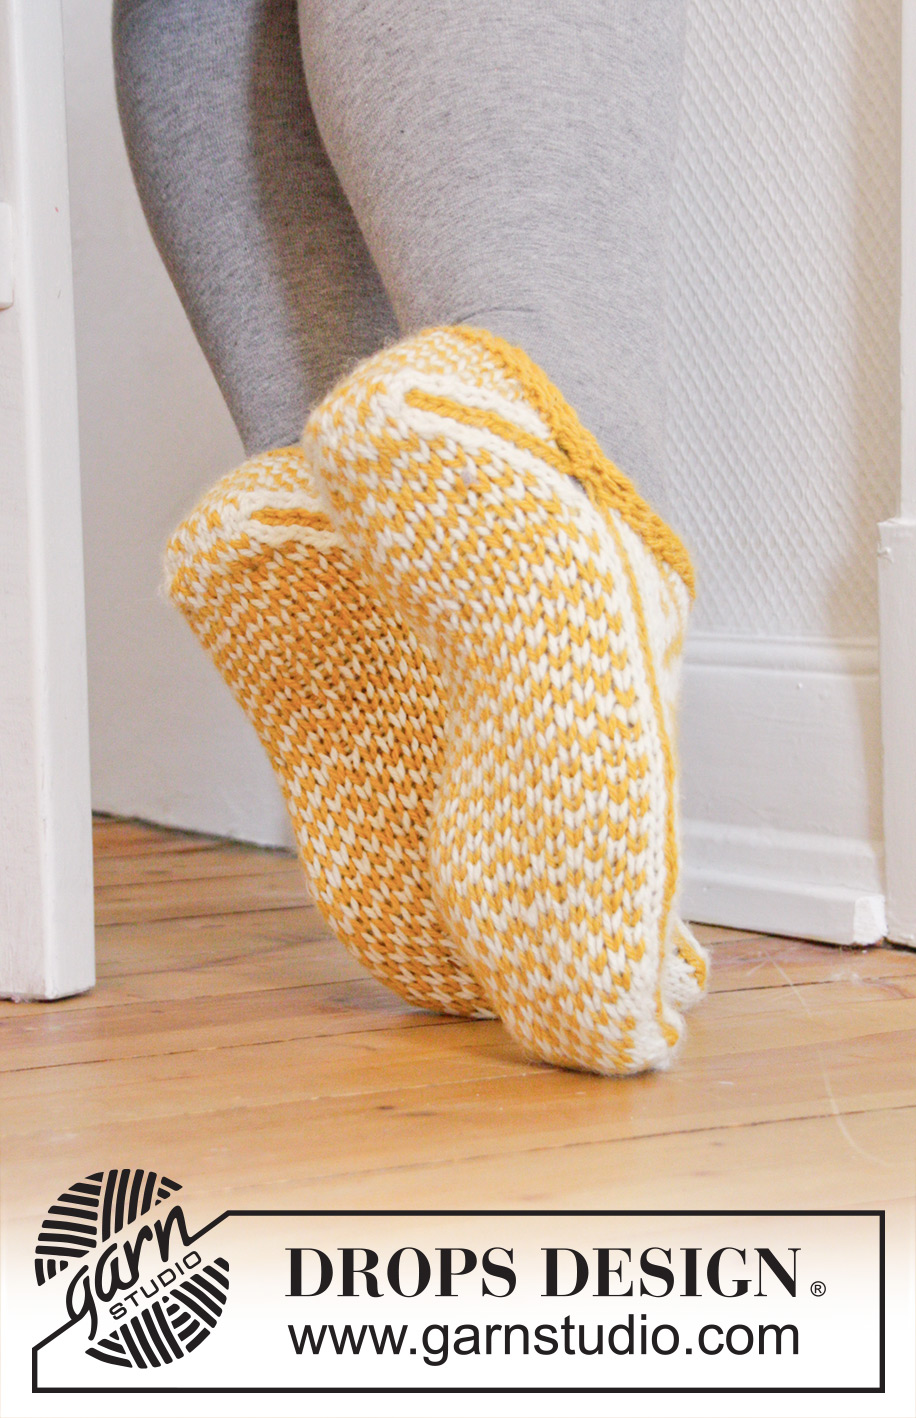
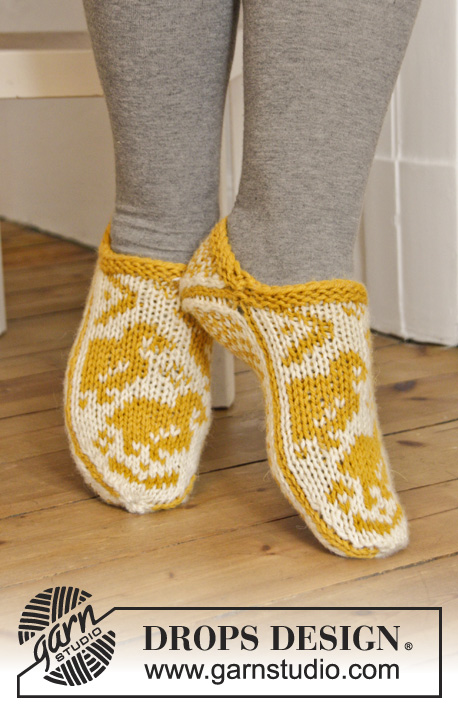
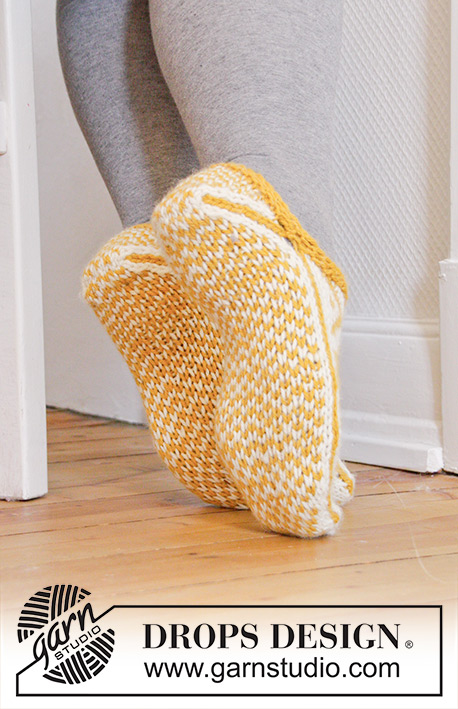
DROPS Easter: Knitted DROPS slippers with chicken in Norwegian pattern in "Nepal". Size 35 - 43
DROPS Extra 0-1101 |
||||||||||||||||
|
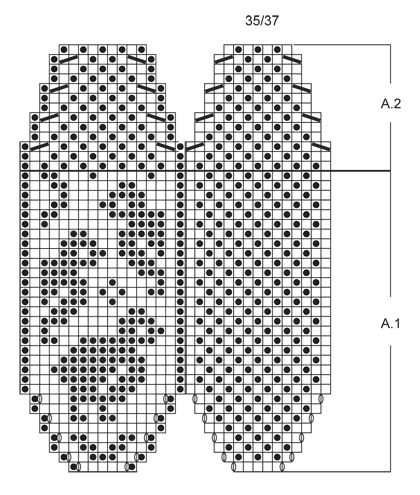
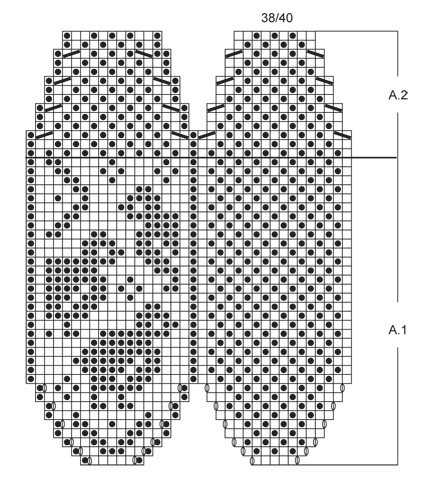
GARTER ST (back and forth): K all rows. 1 ridge = 2 rows K. MAGIC CIRCLE: To avoid hole in the middle beg with this technique: Hold yarn end in the left hand and make a loop around left index finger (from left to right). Hold the loop with left thumb and index finger. Insert needle through loop, get yarn from ball, pull yarn back through loop, 1 YO (place yarn from the back and towards you) and pull YO through sts on needle, * insert needle through loop, 1 YO, pull YO through loop, 1 YO and pull YO through outermost st on right needle (i.e. the last st made) *, repeat from *-* until there are 12-12-12 sts on needle. Distribute sts on double pointed needles size 4.5 mm. Then work as explained in pattern – AT THE SAME TIME pull yarn end so that loop is tighten tog and the hole disappears. PATTERN: See diagrams A.1 and A.2. The diagrams show all rows in pattern seen from RS. Work entire slipper in stocking st. ---------------------------------------------------------- SLIPPER: Work in the round in stocking st from the toe and back towards heel. Start with off white and MAGIC CIRCLE - see explanation above. On first round work PATTERN according to diagram A.1 (choose diagram for correct size) - see explanation above. REMEMBER THE KNITTING TENSION When A.1 has been worked, there are 32-36-40 sts on needle. Now slip the first 15-17-19 sts on round (= under foot) on a stitch holder, then switch to needle size 4 mm and work 2 ridges in GARTER ST back and forth - see explanation above, over the last 17-19-21 sts on round (= on top of foot) with goldenrod. Loosely cast off with 2 strands. Now cast on 17-19-21 sts on needle size 4 mm with 2 strands goldenrod. Then work with 1 strand goldenrod. Work 2 ridges back and forth, then switch to double pointed needles size 4.5 mm and put sts from stitch holder back on needle = 32-36-40 sts. Continue in the round with pattern and dec according to diagram A.2. When entire diagram has been worked vertically and 16-20-20 sts remain on round, cast off the remaining sts. Knit another slipper the same way. ASSEMBLY: Sew tog heel in one and one st inside cast-off edge. Sew edges in garter st neatly tog on each side of foot as follows: Place edge on edge in garter st from top of foot over edge in garter st from back of foot and sew tog through both layers in the sides. Fasten off. |
||||||||||||||||
Diagram explanations |
||||||||||||||||
|
||||||||||||||||
 |
||||||||||||||||
 |
||||||||||||||||
 |
||||||||||||||||
Have you finished this pattern?Tag your pictures with #dropspattern #tiptiptoeslippers or submit them to the #dropsfan gallery. Do you need help with this pattern?You'll find 21 tutorial videos, a Comments/Questions area and more by visiting the pattern on garnstudio.com. © 1982-2026 DROPS Design A/S. We reserve all rights. This document, including all its sub-sections, has copyrights. Read more about what you can do with our patterns at the bottom of each pattern on our site. |
||||||||||||||||


With over 40 years in knitting and crochet design, DROPS Design offers one of the most extensive collections of free patterns on the internet - translated to 17 languages. As of today we count 324 catalogues and 12290 patterns translated into English (UK/cm).
We work hard to bring you the best knitting and crochet have to offer, inspiration and advice as well as great quality yarns at incredible prices! Would you like to use our patterns for other than personal use? You can read what you are allowed to do in the Copyright text at the bottom of all our patterns. Happy crafting!
Post a comment to pattern DROPS Extra 0-1101
We would love to hear what you have to say about this pattern!
If you want to leave a question, please make sure you select the correct category in the form below, to speed up the answering process. Required fields are marked *.