
Popular categories
Looking for a yarn?


Comments / Questions (51)
![]() Leah wrote:
Leah wrote:
When the pattern says work until marker _ and then turn and work back, does that mean to work to the beginning of the row every time or just until the previous stitch marker?
13.01.2026 - 15:37DROPS Design answered:
Dear Leah, work back means "work back up to the beginning of the row". So you work from the beginning of the row towards different markers, to adjust the length of the skirt. Happy knitting!
25.01.2026 - 19:21
![]() Alina Gabriela wrote:
Alina Gabriela wrote:
Dear designers, could you, please tell what Fabel yarn shade was used by Wendy(USA) in her project showing in the pictures gallery for this pattern? I thought is Picnic and I'm knitting it now, but it's not the same. Thank you kindly
19.08.2025 - 15:53
![]() Alina Gabriela wrote:
Alina Gabriela wrote:
Dear designers, I am knitting size L but I'd like the length to be 10 cm more than the L size in the chart. Could you, please, advise me how to knit in order to get that result. I assume that I have to start with more stitches than size L shows, but not sure how many more and how to go about the pattern further. Thank you for your expert advise and for all the gorgeous patterns that you make available to us!
02.08.2025 - 22:34DROPS Design answered:
Dear Alina, the piece is worked from side to side, so if you want a longer skirt you need to change the number of initial stitches. Cast on as many stitches as needed to have the desired length of the skirt (so measure the cast-on row as the length of the skirt). You can then spread the new stitches over the first 5 markers, adding 1 more stitch in each of the 5 sections (or 2 or 3, depending on the necessary number of stitches), spreading them evenly in these sections; the 6-stitch sections for the other markers should remain the same. Work the rest as normal for size L. Happy knitting!
03.08.2025 - 13:37
![]() Anne Maaninka wrote:
Anne Maaninka wrote:
Hei, Minkälaisella ohjeella hameesta saisi pohjepituisen?
18.11.2023 - 18:30DROPS Design answered:
Katso esimerkiksi ohjeet DROPS 118-15 ja 118-16.
24.11.2023 - 17:27
![]() Carla wrote:
Carla wrote:
Buongiorno, non sono particolarmente esperta di uncinetto, c'è un tutorial che mi faccia vedere come fare le asole? Grazie
21.05.2023 - 09:46DROPS Design answered:
Buonasera Carla, non ci sono video in particolare, ma può trovare i video delle singole tecniche dei punti ad uncinetto. Buon lavoro!
22.05.2023 - 21:55
![]() Sam wrote:
Sam wrote:
Buonasera, ho difficoltà a comprendere questa spiegazione Lavorare 9-10-11-12-13-14 m, inserire il SEGNAPUNTI 1, Lavorare 11-12-13-14-15-16 m, inserire il SEGNAPUNTI 2 Lavorare 9-10-11-12-13-14 m, inserire il SEGNAPUNTI 4, Lavorare 9-10-11-12-13-14 m, inserire il SEGNAPUNTI 5, Significa che il SEGNAPUNTI 2 si trova dopo 2m dal SEGNAPUNTI 1, e il SEGNAPUNTI 4 e 5 si trovano nel SEGNAPUNTI 1? Grazie per la delucidazione
26.12.2022 - 15:42DROPS Design answered:
Buonasera Sam, deve inserire i segnapunti come indicato. Ad esempio per la taglia S deve lavorare 9 maglie, inserire il segnapunti-1, lavorare 11 maglie, inserire il segnapunti-2, lavorare 17 maglie, inserire il segnapunti-3, lavorare 9 maglie, inserire il segnapunti-4, lavorare 9 maglie e inserire il segnapunti-5. Buon lavoro!
28.12.2022 - 19:02
![]() Sam wrote:
Sam wrote:
Buonasera, non comprendo bene la seguente spiegazione: Lavorare 9-10-11-12-13-14 m, inserire il SEGNAPUNTI 1, Lavorare 11-12-13-14-15-16 m, inserire il SEGNAPUNTI 2, Lavorare 9-10-11-12-13-14 m, inserire il SEGNAPUNTI 4, Lavorare 9-10-11-12-13-14 m, inserire il SEGNAPUNTI 5, Cioè il SEGNAPUNTI 2 è soltanto 2 maglie dopo il SEGNAPUNTI 1, mentre per il SEGNAPUNTI 4 e 5 bisogna tornare al SEGNAPUNTI 1, ho interpretato correttamente? Grazie per l'aiuto
26.12.2022 - 15:38DROPS Design answered:
Buonasera Sam, deve inserire i segnapunti come indicato. Ad esempio per la taglia S il segnapunti 2 è 11 maglie dopo il segnapunti 2. Buon lavoro!
28.12.2022 - 19:03
![]() Marianne wrote:
Marianne wrote:
Goedemorgen, in de instructievideo over verkorte toeren breien, staat dat je na het keren de eerste steek moet afhalen zonder deze te breien. In het patroon staat dat niet. Kan ik het beste wel of niet de eerst steek afhalen? Wat zijn de voor- en nadelen van wel of niet afhalen? Alvast bedankt!
09.02.2021 - 09:14DROPS Design answered:
Dag Marianne,
Voor het patroon maakt het verder niet uit of je dit wel of niet doet, dus kijk maar even wat je mooier vindt door het uit te proberen. Zelf vind ik de overgangen mooier als je de steek afhaalt.
16.02.2021 - 15:55
![]() Anna Landers wrote:
Anna Landers wrote:
Danke für die Information, dass es inzwischen eine Korrektur gibt. Dort steht allerdings das Gleiche wie in der Anleitung: "Updated online: 28.09.2016 SKIRT: Work until MARKER 14, turn and work back. " Ich würde den Rock gerne stricken, habe aber an mehreren Orten gelesen, dass die Anleitung fehlerhaft sei. Was tun?
19.07.2020 - 18:10DROPS Design answered:
Liebe Frau Landers, ja genau, die online Anleitung wurde korrigiert, diese Korrektur gilt für die jenigen, die die Anleitung vor der Korrektur gedruckt haben. Viel Spaß beim stricken!
20.07.2020 - 09:56
![]() AnnaLanders wrote:
AnnaLanders wrote:
Ist die Verbesserung der Anleitung inzwischen gelungen? Vor ein paar Jahren ist einer deutschen Anfrage Antwort versprochen worden, weil die Anleitung fehlerhaft sei (meinte auch das Drops Team), aber im Thread habe ich keine Aktualisierung gesehen. Ist die Anleitung nun fehlerhaft oder nicht? Wenn ja: Gibt es eine verbesserte Version? Wenn ja, wo? Wenn nicht: Wann wird es sie geben?
13.07.2020 - 16:34DROPS Design answered:
Liebe Frau Landers, es gibt eine Korrektur der Anleitung aus dem Jahr 2016, Sie finden die Info zur Korrektur, wenn Sie nach der Anleitung (vor dem Diagramm) auf den roten Text klicken. Viel Spaß beim Stricken!
14.07.2020 - 10:02
|
||||
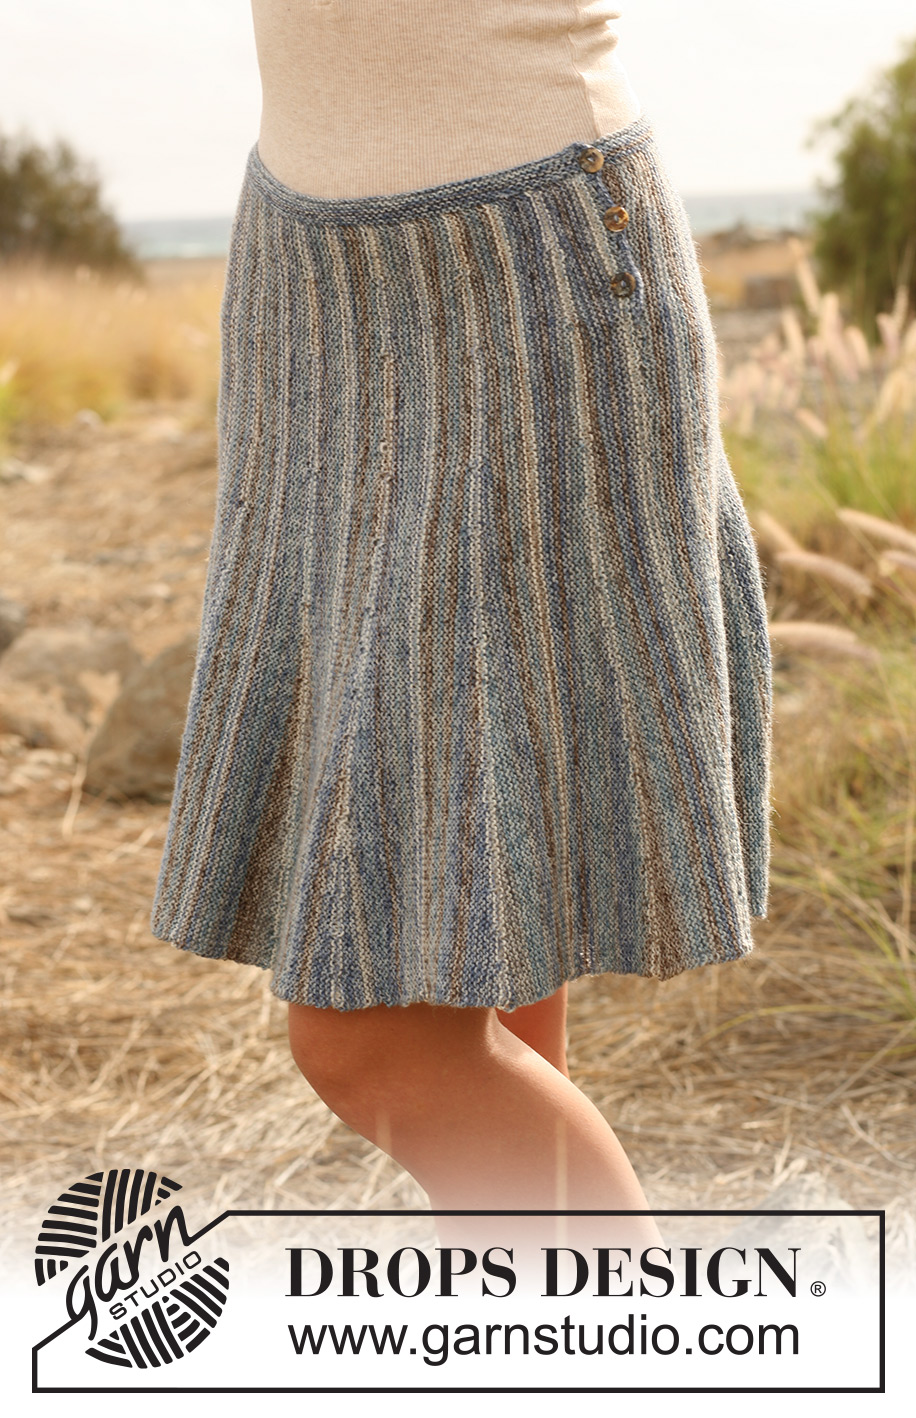
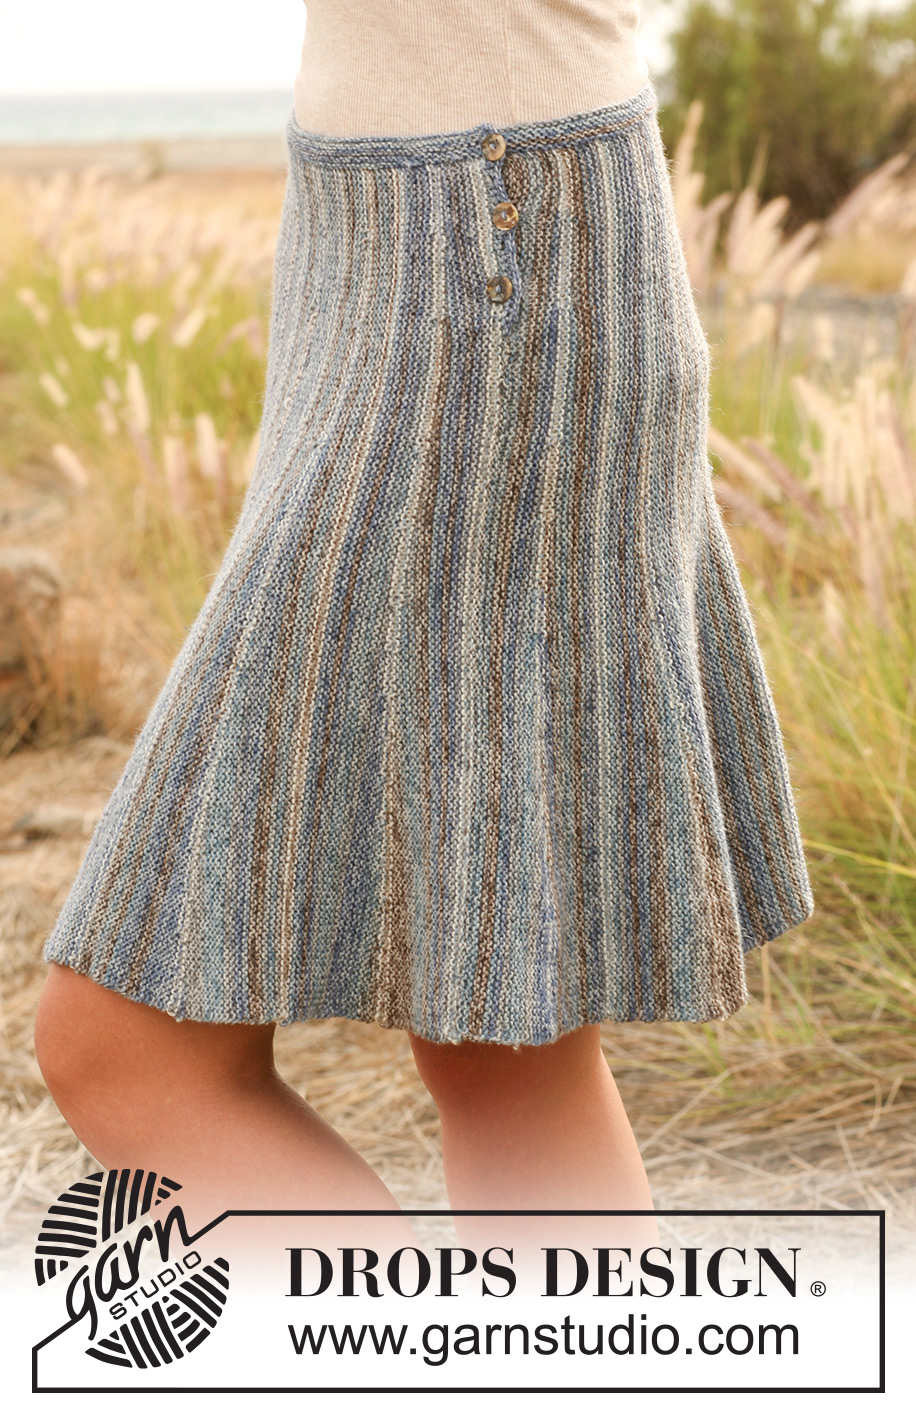
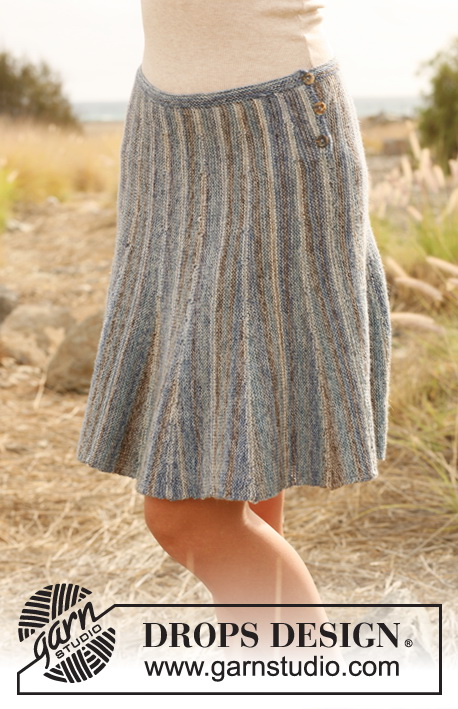
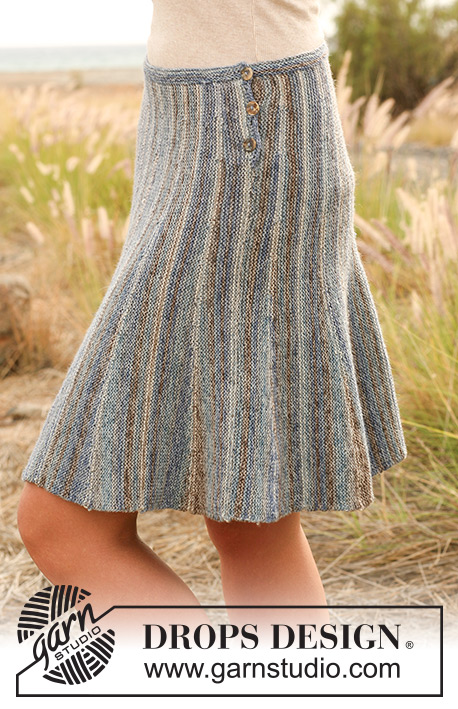
Rays in the Fog#raysinthefogskirt |
||||
 |
 |
|||
Knitted DROPS skirt with stripes worked from side to side with short rows in "Fabel". Size: S - XXXL.
DROPS 128-17 |
||||
|
SKIRT: Worked back and forth on circular needle from side to side. To give the skirt width at the bottom work with short rows. The piece is worked in garter st, i.e. K all rows. Cast on 115-120-125-130-135-140 sts on 2 circular needles size 3 mm (this is done to avoid a tight cast on edge) with ocean view. Pull out one of the needles and then work as explained below . Work first row as follows (from waist down): Work 9-10-11-12-13-14 sts, insert MARKER 1, work 11-12-13-14-15-16 sts, insert MARKER 2, work 17-18-19-20-21-22 sts, insert MARKER 3, work 9-10-11-12-13-14 sts, insert MARKER 4, work 9-10-11-12-13-14 sts, insert MARKER 5, work 6 sts, insert MARKER 6, work 6 sts, insert MARKER 7, work 6 sts, insert MARKER 8, work 6 sts, insert MARKER 9, work 6 sts, insert MARKER 10, work 6 sts, insert MARKER 11, work 6 sts, insert MARKER 12, work 6 sts, insert MARKER 13, work 6 sts, insert MARKER 14, work the remaining 6 sts. Move the markers upwards when working. Continue to work with short rows as follows (NOTE! Tighten the thread on every turn in mid of piece before continuing, to avoid holes): * Work 2 rows with off white back and forth over all sts (1st row = WS), work 10-10-10-10-12-12 rows with ocean view back and forth over all sts (= 12-12-12-12-14-14 rows in garter st over all sts). Then work until MARKER 1, turn and work back. Work until MARKER 2, turn and work back. Work until MARKER 3, turn and work back. Work until MARKER 4, turn and work back. Work until MARKER 5, turn and work back. Work until MARKER 6, turn and work back. Work until MARKER 7, turn and work back. Work until MARKER 8, turn and work back. Work until MARKER 9, turn and work back. Work until MARKER 10, turn and work back. Work until MARKER 11, turn and work back. Work until MARKER 12, turn and work back. Work until MARKER 13, turn and work back. Work until MARKER 14, turn and work back. Switch to off white and work 2 rows back and forth over all sts. Switch back to ocean view and work until MARKER 14, turn piece and work back. Then work until MARKER 13, turn and work back. Work until MARKER 12, turn and work back. Work until MARKER 11, turn and work back. Work until MARKER 10, turn and work back. Work until MARKER 9, turn and work back. Work until MARKER 8, turn and work back. Work until MARKER 7, turn and work back. Work until MARKER 6, turn and work back. Work until MARKER 5, turn and work back. Work until MARKER 4, turn and work back. Work until MARKER 3, turn and work back. Work until MARKER 2, turn and work back. Work until MARKER 1, turn and work back. Work 10-10-10-10-12-12 rows back and forth over all sts with ocean view *. Repeat from *-* until piece measures approx. 64-72-78-86-100-108 cm at the top, finish with 1 whole repetition so that the pattern fits when the skirt is sewn tog in the side. Then cast off VERY loosely from the bottom edge (= from WS), cast off until 27-27-27-35-35-35 sts remain at the top towards the waist. Work 10 rows back and forth over these sts with ocean view for button folding edge, then cast off. ASSEMBLY: Knit up from RS 1 st in every ridge (2 rows in garter st) along the entire top edge of the skirt on circular needle size 3 mm with ocean view. Work waistband back and forth as follows: K 1 row from WS while AT THE SAME TIME adjusting the no of sts to 154-174-188-208-240-260. Then K 10 rows back and forth over all sts before casting off LOOSELY. Sew the skirt tog edge to edge up to button folding edge. Crochet 3-3-3-4-4-4 button hole loops along the side without folding edge, on hook size 3 mm as follows: Beg at the top with 1 dc in each of the first 3 sts, * 3 ch, skip 2 sts, work 1 dc in each of the next 6 sts *, repeat from *-* a total of 3-3-3-4-4-4 times, turn and work back with 1 dc in each dc and 2 dc in every ch-loop. Sew the buttons on to the button folding edge. |
||||
Diagram explanations |
||||
|
||||
 |
||||
Have you finished this pattern?Tag your pictures with #dropspattern #raysinthefogskirt or submit them to the #dropsfan gallery. Do you need help with this pattern?You'll find 12 tutorial videos, a Comments/Questions area and more by visiting the pattern on garnstudio.com. © 1982-2026 DROPS Design A/S. We reserve all rights. This document, including all its sub-sections, has copyrights. Read more about what you can do with our patterns at the bottom of each pattern on our site. |
||||


With over 40 years in knitting and crochet design, DROPS Design offers one of the most extensive collections of free patterns on the internet - translated to 17 languages. As of today we count 324 catalogues and 12290 patterns translated into English (UK/cm).
We work hard to bring you the best knitting and crochet have to offer, inspiration and advice as well as great quality yarns at incredible prices! Would you like to use our patterns for other than personal use? You can read what you are allowed to do in the Copyright text at the bottom of all our patterns. Happy crafting!
Post a comment to pattern DROPS 128-17
We would love to hear what you have to say about this pattern!
If you want to leave a question, please make sure you select the correct category in the form below, to speed up the answering process. Required fields are marked *.