
Popular categories
Looking for a yarn?


Comments / Questions (4)
![]() Ανθή wrote:
Ανθή wrote:
Για να έχω τα 22 ποδαράκια, (treble crochet), σε 10 εκατοστά, μόνο με Νο 2,50 βελονάκι, (hook), γίνεται. Είναι αυτό πρόβλημα για το τελικό αποτέλεσμα;
06.09.2025 - 14:33
![]() Emma wrote:
Emma wrote:
Jag har en fråga om A5. Avser A5 3 luftmassor eller 6 luftmassor (3x2)? Det ser mycket märkligt ut att ha 6 st. Men om ni avser 3 st borde väl det finnas en liten ofylld stjärna bredvid ned nedre ”tre luftmaskor” som avtecknas i A.5?
26.05.2025 - 17:04DROPS Design answered:
Hej Emma, den lange ovale ring som er i A.5 betyder 3 luftmasker :)
28.05.2025 - 07:52
![]() Emma wrote:
Emma wrote:
Virkat axlar + bakstycke. Nu börjat på framstycket. Hö och vän framstycke ska virkas samman. I strl XL ska jag ha 31 stolpar i slutet av beskrivningen för hö framstycke, RAD 5. Men sen när jag ska vända och virka en till rad dvs första raden för sammanvirkning - där jag sedan lägger upp maskor för urringning/sammanvirkning - så skriver ni att jag bara ska göra 30 stolpar. Hur går det ihop? Tänker jag fel?
22.05.2025 - 16:01DROPS Design answered:
Hej Emma, du virkar A.1A i första m, A.1B i de nästa 30 m osv :)
27.05.2025 - 09:45
![]() Emma wrote:
Emma wrote:
Virkat axlar + bakstycke. Nu börjat på framstycket. Hö och vän framstycke ska virkas samman. I strl XL ska jag ha 31 stolpar i slutet av beskrivningen för hö framstycke, RAD 5. Men sen när jag ska vända och virka en till rad dvs första raden för sammanvirkning - där jag sedan lägger upp maskor för urringning/sammanvirkning - så skriver ni att jag bara ska göra 30 stolpar. Hur går det ihop? Tänker jag fel?
22.05.2025 - 15:59
|
|||||||||||||||||||||||||||||||||||||
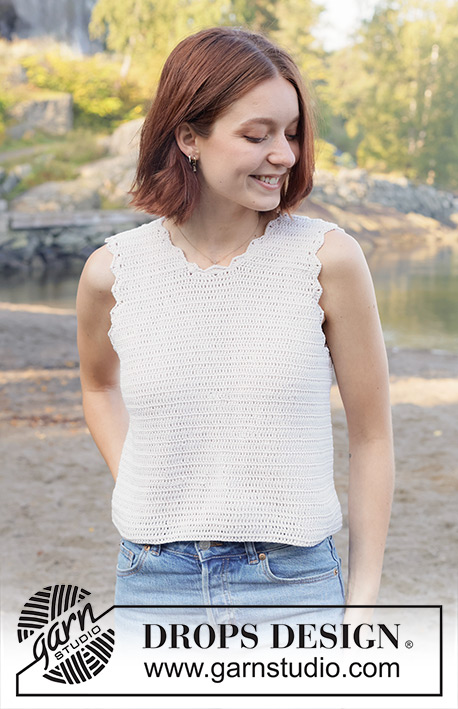
Scallop Bliss Top#scallopblisstop |
|||||||||||||||||||||||||||||||||||||
 |
 |
||||||||||||||||||||||||||||||||||||
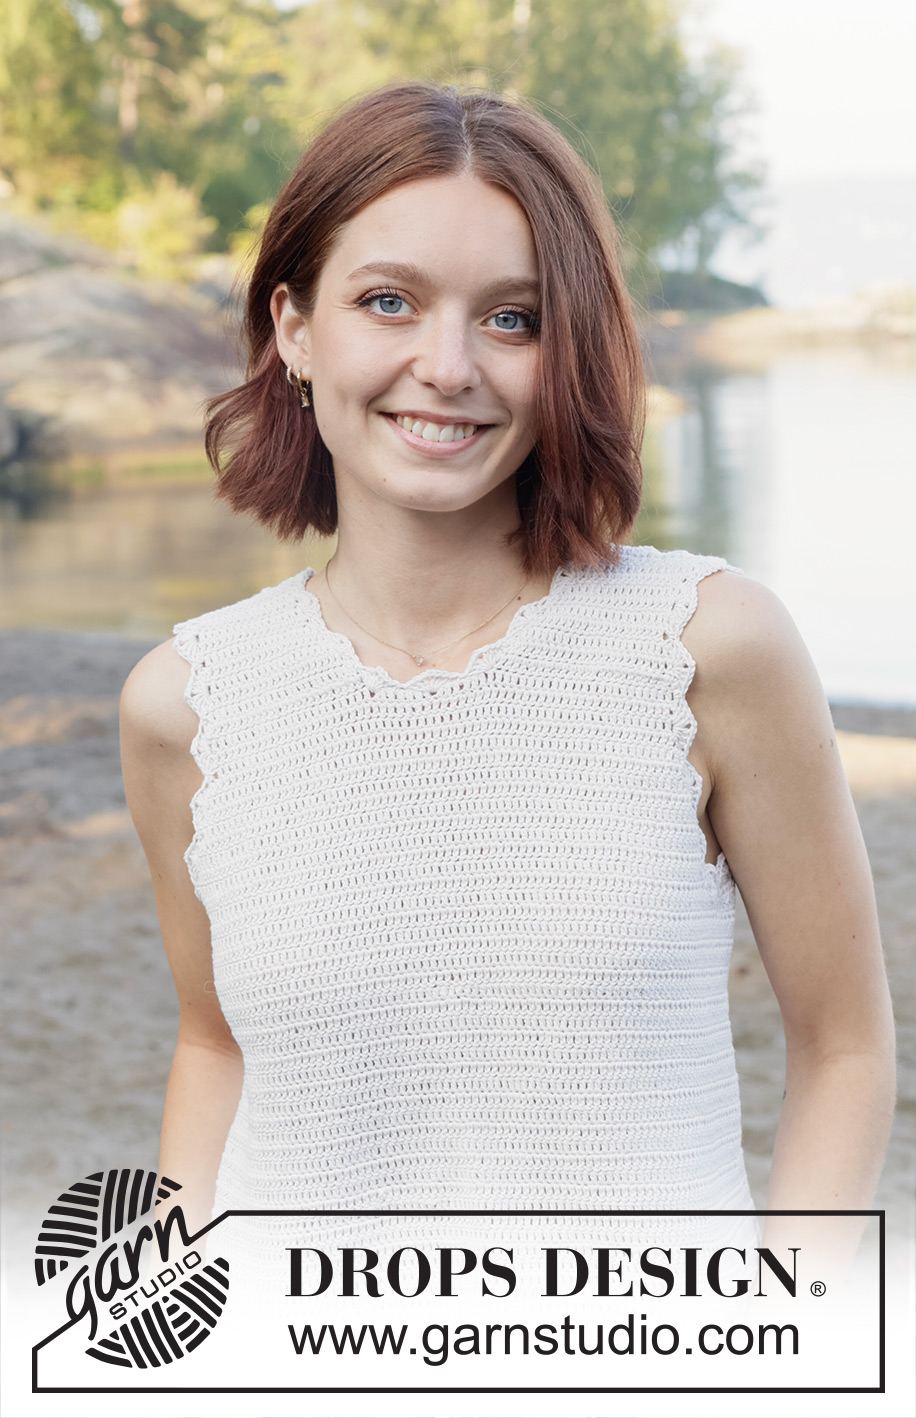
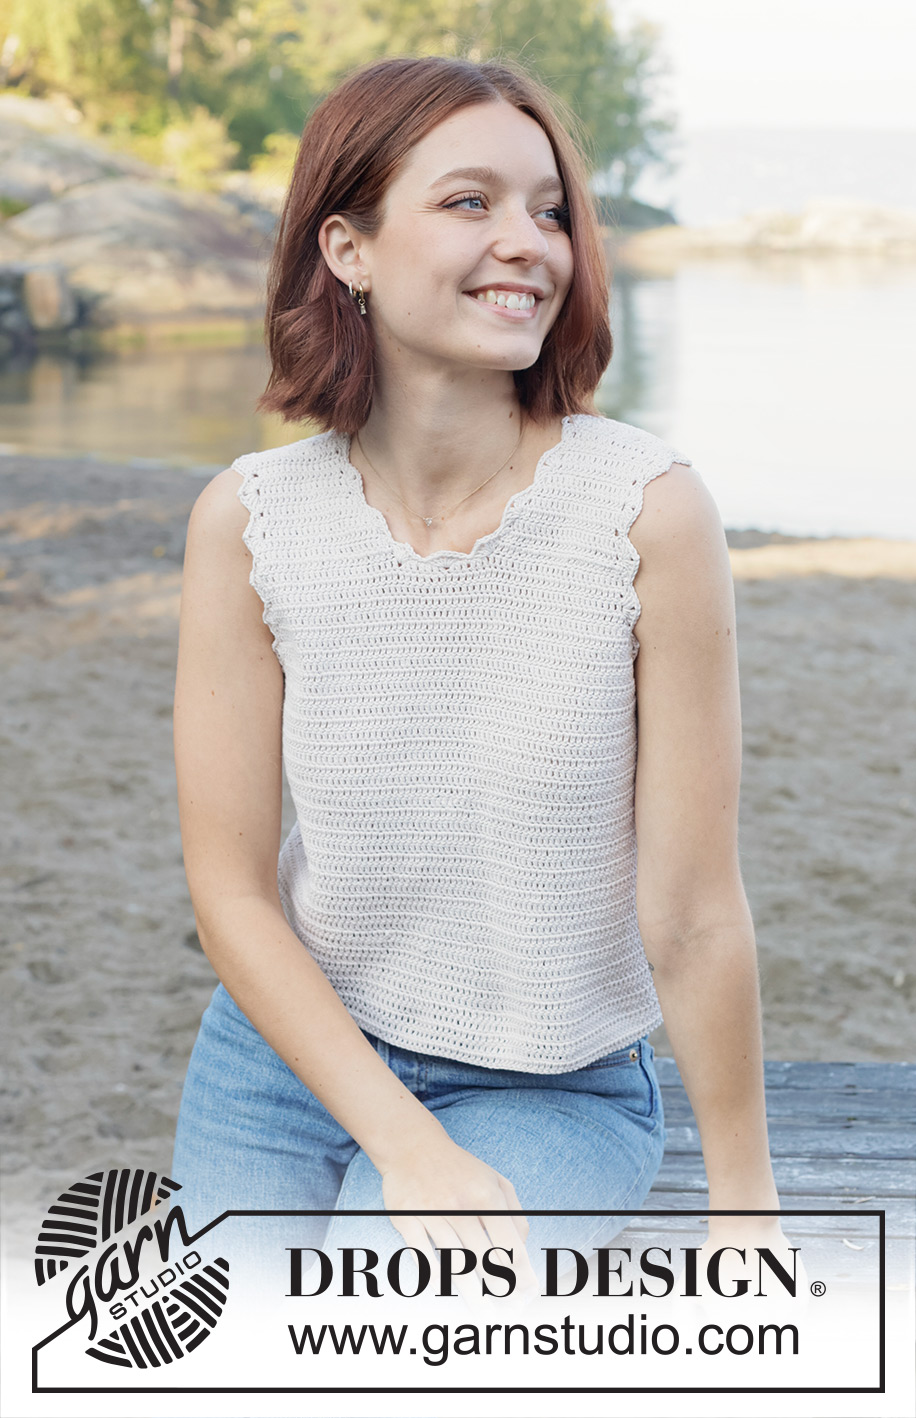
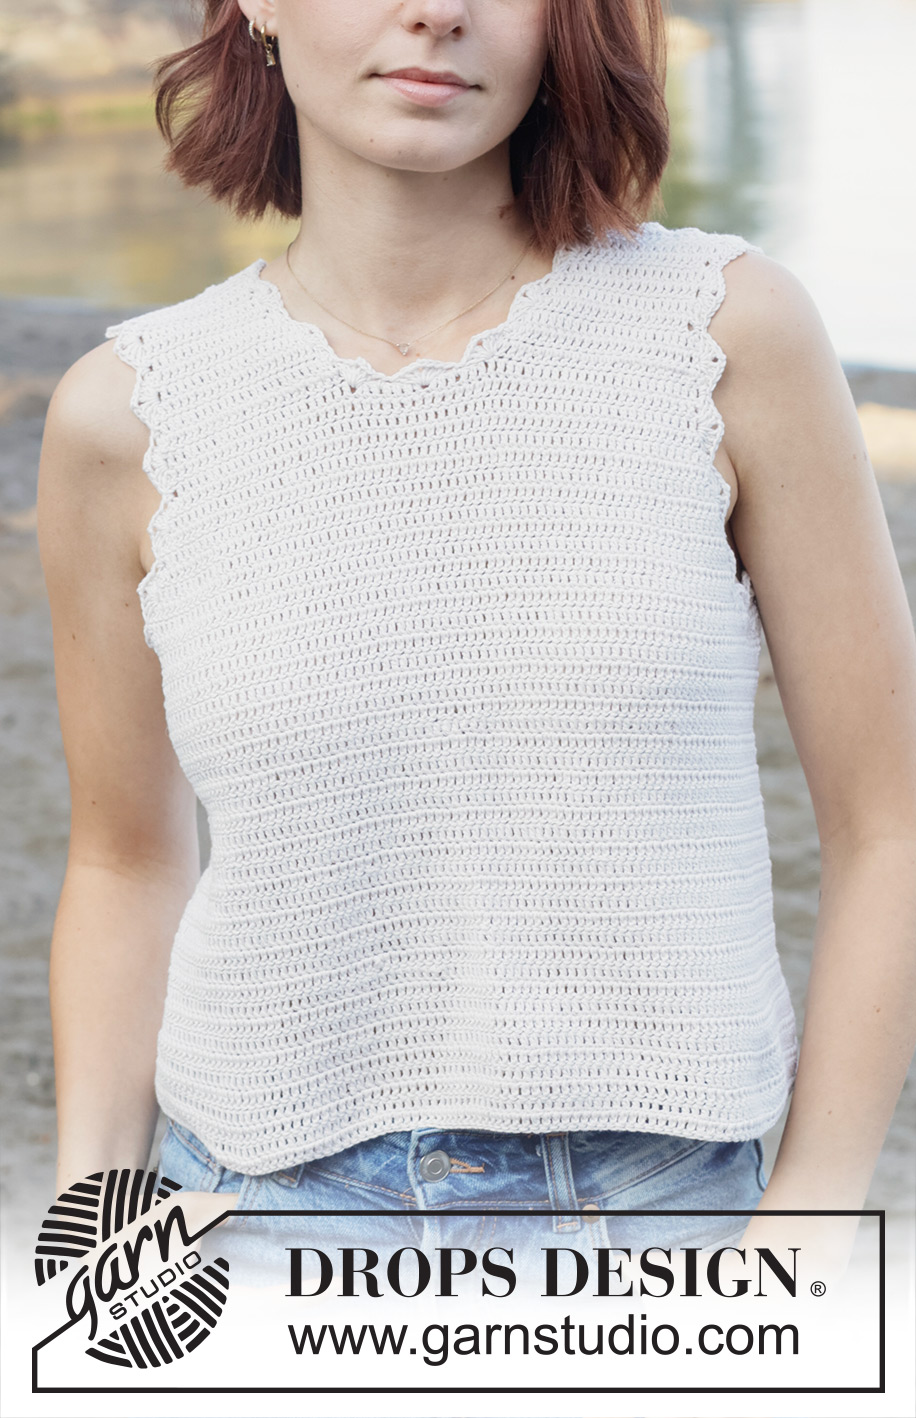
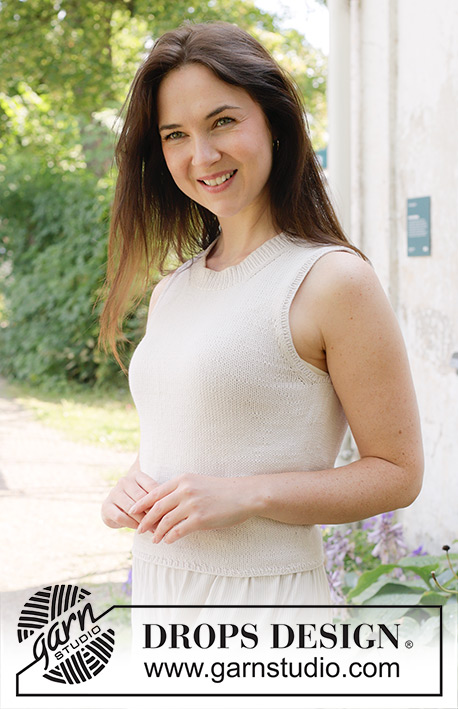
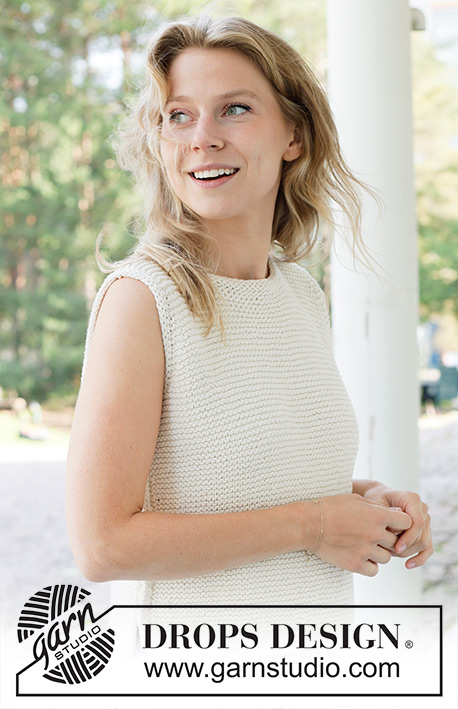
Crocheted top in DROPS Safran. The piece is worked top down with treble crochet and fan-patterned edges. Sizes S - XXXL.
DROPS 257-31 |
|||||||||||||||||||||||||||||||||||||
|
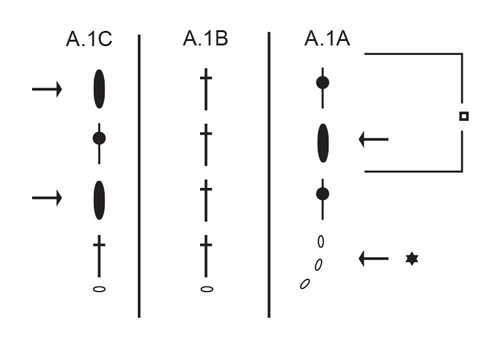
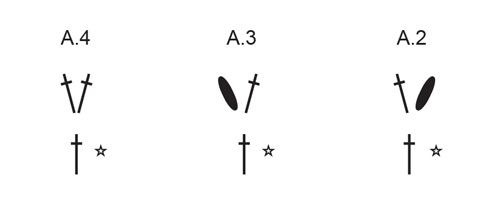
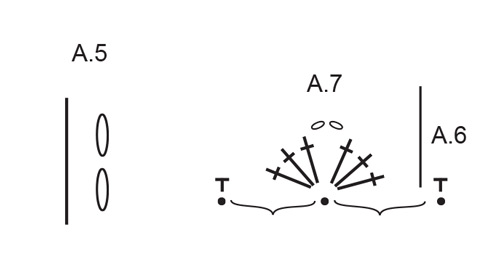
------------------------------------------------------- EXPLANATIONS FOR THE PATTERN: ------------------------------------------------------- CHAIN STITCH: If you work outermost on the hook the chain stitch will often be too tight; 1 chain stitch should be as long as 1 treble crochet is wide. PATTERN: See diagrams A.1 to A.7. The diagrams are read from left to right from the wrong side. CROCHET INFORMATION: At the beginning of each row of treble crochets, replace the first treble crochet with 3 chain stitches. The last treble crochet on the row is worked in the 3rd chain stitch from beginning of previous row. At the beginning of each round of treble crochets, replace the first treble crochet with 3 chain stitches. The round finishes with 1 slip stitch in the 3rd chain stitch at beginning of round, before turning (i.e., alternate rounds from the right and wrong side). INCREASE TIP (evenly spaced): To work out how to increase evenly, count the total number of stitches on the round (e.g., 176 stitches) and divide by the number of increases to be made (e.g., 6) = 29.3. In this example, increase by working A.4 in approx. every 29th stitch (i.e., work 2 treble crochets in every 29th stitch). ------------------------------------------------------- START THE PIECE HERE: ------------------------------------------------------- TOP – SHORT OVERVIEW OF THE PIECE: The piece is worked back and forth, top down, starting with the 2 back shoulders, crocheting new stitches for the neckline between them, then increasing for the armholes. When the armholes are finished, the front piece is worked in 2 sections, first crocheting up stitches along the left back shoulder and working downwards, then increasing for the neckline. This is repeated on the right back shoulder. When the neckline is finished the 2 front pieces are joined and the front piece is worked back and forth to the armholes. The front and back pieces are joined and the body continued in the round, turning after each round to maintain the textured pattern. A fan-patterned edge is worked around the neckline and armholes to finish. If there is a «0» in your chosen size, skip the information and go straight to the next instruction. LEFT BACK SHOULDER (when garment is worn): Work 21-23-24-26-27-28 CHAIN STITCHES – read description above, with hook size 3.5 mm and DROPS Safran, turn. ROW 1 (right side): Work A.1B in the 4th chain stitch from the hook, then A.1B in each chain stitch until there is 1 chain stitch left, A.1C in the last stitch = 18-20-21-23-24-25 treble crochets + 3 chain stitches. ROW 2 (wrong side): Read CROCHET INFORMATION, work A.3 in the first stitch (= 1 increased treble crochet), A.1B until there is 1 stitch left, A.1A in the last stitch = 20-22-23-25-26-27 treble crochets. ROW 3 (right side): Work A.1A in the first stitch, A.1B until there is 1 stitch left, A.4 in the last stitch (= 1 increased treble crochet) = 21-23-24-26-27-28 treble crochets. Cut and fasten the strand. RIGHT BACK SHOULDER: Work 21-23-24-26-27-28 chain stitches, with hook size 3.5 mm and DROPS Safran, turn. ROW 1 (right side): Work A.1B in the 4th chain stitch from the hook, then A.1B in each chain stitch until there is 1 chain stitch left, A.1C in the last stitch = 18-20-21-23-24-25 treble crochets + 3 chain stitches. ROW 2 (wrong side): Work A.1C in the first stitch, A.1B until there is 1 stitch left, A.4 in the last stitch (= 1 increased treble crochet) = 20-22-23-25-26-27 treble crochets. ROW 3 (right side): Work A.2 in the first stitch (= 1 increased treble crochet), A.1B until there is 1 stitch left, A.1C in the last stitch = 21-23-24-26-27-28 treble crochets Now join the shoulders for the back piece. BACK PIECE: ROW 1 (wrong side): Work A.1C in the first stitch, A.1B in each of the next 20-22-23-25-26-27 stitches on the right shoulder, work 26-26-28-28-30-32 chain stitches for the neckline, then A.1B in each of the first 20-22-23-25-26-27 stitches on the left shoulder (working from the wrong side), A.1A in the last stitch = 68-72-76-80-84-88 treble crochets. ROW 2 (right side): Work A.1A in the first stitch, A.1B in each treble crochet and chain stitch until there is 1 stitch left, work A.1C in the last stitch = 68-72-76-80-84-88 treble crochets. After ROW 2: Work A.1 back and forth with 1 treble crochet in each stitch until the piece measures 13-13-13-14-14-14 cm from the cast-on edge. Now increase for the armholes. INCREASE FOR ARMHOLES: ROW 1: Work A.2 (from right side)/A.3 (from wrong side) in the first stitch (= 1 increased treble crochet), A.1B until there is 1 stitch left, A.4 in the last stitch (= 1 increased treble crochet). Work ROW 1 a total of 6-7-6-5-5-5 times = 80-86-88-90-94-98 treble crochets. The armhole-increases are finished in sizes S and M. Continue increasing as follows in sizes L, XL, XXL and XXXL: ROW 1: Work A.2/A.3 in the first stitch (= 1 increased treble crochet), A.1B in the next stitch, A.4 in the next stitch (= 1 increased treble crochet), A.1B in each stitch until there are 3 stitches left, A.4 in the next stitch (= 1 increased treble crochet), A.1B in the next stitch, A.4 in the last stitch (= 1 increased treble crochet). A total of 4 treble crochets increased on the row Work ROW 1 a total of 0-0-2-3-5-6 times = 80-86-96-102-114-122 treble crochets. The piece measures approx. 18-19-20-21-22-23 cm from the cast-on edge. Now work the left front piece along the left back shoulder. LEFT FRONT PIECE (when garment is worn): Find the left back shoulder as follows: Lay the back piece flat, right side up, with the bottom of the armholes towards you; left side of piece = left shoulder. Insert 1 marker in the cast-on edge – the front piece is measured from here. Start from the right side by the neck on the left back shoulder, work 1 slip stitch in the first stitch, start on row 3 in A.1, work A.1A in the first stitch, A.1B until there is 1 stitch left, A.1C in the last stitch = 19-21-22-24-25-26 treble crochets. Work A.1 back and forth with 1 treble crochet in each stitch for 4-4-6-6-8-8 cm and with the next row from the wrong side. Now increase for the neckline as follows: ROW 1 (wrong side): Work A.1C in the first stitch, A.1B until there is 1 stitch left, A.4 in the last stitch (= 1 increased treble crochet). ROW 2 (right side): Work A.2 in the first stitch, (= 1 increased treble crochet), A.1B until there is 1 stitch left, A.1C in the last stitch. ROW 3 (wrong side): Work A.1C in the first stitch, A.1B until there is 1 stitch left, A.4 in the last stitch (= 1 increased treble crochet). ROW 4 (right side): Work A.2 in the first stitch (= 1 increased treble crochet), A.1B in the next stitch, A.4 in the next stitch (= 1 increased treble crochet), A.1B until there is 1 stitch left, A.1C in the last stitch. ROW 5 (wrong side): Work A.1C in the first stitch, A.1B until there are 3 stitches left, A.4 in the next stitch (= 1 increased treble crochet), A.1B in the next stitch, A.4 in the last stitch (= 1 increased treble crochet) = 26-28-29-31-32-33 treble crochets. Now work the right front piece along the right back shoulder. RIGHT FRONT PIECE: Insert 1 marker in the cast-on edge – the piece is measured from here. Start from the right side by the armhole on the right back shoulder, work 1 slip stitch in the first stitch, start on row 3 in A.1 and work A.1A in the first stitch, A.1B until there is 1 stitch left, A.1C in the last stitch = 19-21-22-24-25-26 treble crochets. Work A.1 back and forth with 1 treble crochet in each stitch for 4-4-6-6-8-8 cm and with the next row from the wrong side. Now increase for the neckline as follows: ROW 1 (wrong side): Work A.3 in the first stitch (= 1 increased treble crochet), A.1B until there is 1 stitch left, A.1A in the last stitch. ROW 2 (right side): Work A.1A in the first stitch, A.1B until there is 1 stitch left, A.4 in the last stitch (= 1 increased treble crochet). ROW 3 (wrong side): Work A.3 in the first stitch (= 1 increased treble crochet), A.1B until there is 1 stitch left, A.1A in the last stitch. ROW 4 (right side): Work A.1A in the first stitch, A.1B until there are 3 stitches left, A.4 in the next stitch (= 1 increased treble crochet), A.1B in the next stitch, A.4 in the last stitch (= 1 increased treble crochet). ROW 5 (wrong side): Work A.3 in the first stitch (= 1 increased treble crochet), A.1B in the next stitch, A.4 in the next stitch (= 1 increased treble crochet), A.1B until there is 1 stitch left, A.1A in the last stitch = 26-28-29-31-32-33 treble crochets. Now join the 2 pieces for the front piece. FRONT PIECE: ROW 1 (right side): Work A.1A in the first stitch on the right front piece, A.1B in each of the next 25-27-28-30-31-32 stitches, work 16-16-18-18-20-22 chain stitches for the neckline, A.1B in each of the first 25-27-28-30-31-32 stitches on the left front piece (from the right side), A.1C in the last stitch = 68-72-76-80-84-88 treble crochets. ROW 2 (wrong side): Work A.1C in the first stitch, A.1B in each treble crochet and chain stitch until there is 1 stitch left, A.1A in the last stitch = 68-72-76-80-84-88 treble crochets. After ROW 2: Work A.1 back and forth with 1 treble crochet in each stitch until the piece measures 13-13-13-14-14-14 cm from the marker. Now increase each side for the armholes, making sure you begin from the same side as on the back piece. INCREASE FOR ARMHOLES: ROW 1: Work A.2 (from right side)/A.3 (from wrong side) in the first stitch (= 1 increased treble crochet), A.1B until there is 1 stitch left, A.4 in the last stitch (= 1 increased treble crochet). Work ROW 1 a total of 6-7-6-5-5-5 times = 80-86-88-90-94-98 treble crochets. The armhole increases are finished in sizes S and M. Continue increasing as follows in sizes L, XL, XXL and XXXL: ROW 1: Work A.2/A.3 in the first stitch (= 1 increased treble crochet), A.1B in the next stitch, A.4 in the next stitch (= 1 increased treble crochet), A.1B in each stitch until there are 3 stitches left, A.4 in the next stitch (= 1 increased treble crochet), A.1B in the next stitch, A.4 in the last stitch (= 1 increased treble crochet). A total of 4 treble crochets increased on the row Work ROW 1 a total of 0-0-2-3-5-6 times = 80-86-96-102-114-122 treble crochets. The piece measures approx. 18-19-20-21-22-23 cm from the cast-on edge Join the front and back pieces for the body. BODY: You now work in the round, finishing each round with 1 slip stitch in the 3rd chain stitch at the beginning of the round, then turning and working the next round from the other side: alternate rounds from the right and wrong side. Work A.5 in the first stitch on the front piece, A.1B across the 79-85-87-89-93-97 stitches, work 8-10-12-14-18-22 chain stitches for the armhole, A.1B in each of the 80-86-88-90-94-98 stitches on the back piece, work 8-10-12-14-18-22 chain stitches for the armhole = 176-192-216-232-264-288 stitches. Work the next round as follows: A.5 in the first stitch, A.1B in each treble crochet and chain stitch to end of round. When the piece measures 4-4-5-5-5-5 cm from the join, increase 6 treble crochets evenly spaced – read INCREASE TIP. Increase like this every 4-4-4-5-5-5 cm a total of 5 times = 206-222-246-262-294-318 stitches. Work until the piece measures 44-46-48-50-52-54 cm from the shoulder-marker. Cut and fasten the strand. CROCHETED EDGE AROUND NECK: Use crochet hook size 3.5 mm. Start from the right side in the front corner of the right-hand side of the neckline, work A.6 in the first stitch, then A.7 around the neckline (adjusting so you have a complete repeat of A.7 at the bottom of the neck in front and finishing A.7 with 1 slip stitch in the first double crochet at the beginning of the round (instead of 1 double crochet in the last stitch). Cut and fasten the strand. CROCHETED EDGE AROUND ARMHOLES: Use crochet hook size 3.5 mm. Start from the right side at the bottom of the armhole, work A.6 in the first stitch, then A.7 around the armhole– adjusting so th at A.7 finishes with 1 slip stitch in the first double crochet at the beginning of the round (instead of 1 double crochet in the last stitch). Cut and fasten the strand. |
|||||||||||||||||||||||||||||||||||||
Diagram explanations |
|||||||||||||||||||||||||||||||||||||
|
|||||||||||||||||||||||||||||||||||||
 |
|||||||||||||||||||||||||||||||||||||
 |
|||||||||||||||||||||||||||||||||||||
 |
|||||||||||||||||||||||||||||||||||||
 |
|||||||||||||||||||||||||||||||||||||
Have you finished this pattern?Tag your pictures with #dropspattern #scallopblisstop or submit them to the #dropsfan gallery. Do you need help with this pattern?You'll find 9 tutorial videos, a Comments/Questions area and more by visiting the pattern on garnstudio.com. © 1982-2026 DROPS Design A/S. We reserve all rights. This document, including all its sub-sections, has copyrights. Read more about what you can do with our patterns at the bottom of each pattern on our site. |
|||||||||||||||||||||||||||||||||||||


With over 40 years in knitting and crochet design, DROPS Design offers one of the most extensive collections of free patterns on the internet - translated to 17 languages. As of today we count 324 catalogues and 12290 patterns translated into English (UK/cm).
We work hard to bring you the best knitting and crochet have to offer, inspiration and advice as well as great quality yarns at incredible prices! Would you like to use our patterns for other than personal use? You can read what you are allowed to do in the Copyright text at the bottom of all our patterns. Happy crafting!
Post a comment to pattern DROPS 257-31
We would love to hear what you have to say about this pattern!
If you want to leave a question, please make sure you select the correct category in the form below, to speed up the answering process. Required fields are marked *.