
Popular categories
Looking for a yarn?


Comments / Questions (101)
![]() Mascha Grips wrote:
Mascha Grips wrote:
Hallo liebes Drops Team, bitte meine Anfrage löschen/ignorieren. Ich habe tatsächlich eine Masche übersehen und die Rapporte sind jetzt stimmig.
21.12.2025 - 21:20
![]() Mascha Grips wrote:
Mascha Grips wrote:
Hallo, ich hätte eine Frage bzgl. Diagramm A2, Runde 11. Durch die Zunahmen bis Runde 11 sind es 120 Maschen. Bei dem viermaligen Rapport ergeben sich aber insgesamt nur 116 Maschen, also habe ich 4 Maschen zuviel. Was übersehe ich hier?
21.12.2025 - 20:50DROPS Design answered:
Liebe Mascha, der Rapport A.2 besteht aus 30 Maschen und geht daher genau in den 120 Maschen auf. Viel Spaß beim Häkeln!
24.02.2026 - 22:00
![]() Anna Davidson wrote:
Anna Davidson wrote:
I Just love this pattern. I have made several . Just wanted to say thank you for sharing it ☺️
16.12.2025 - 05:11
![]() Inge wrote:
Inge wrote:
Hallo, wunderschöne Tasche, aber die abgebildete Tasche ist niemals mit Nepal und Nadelstärke 3,5 gearbeitet worden. Meine ist ein Täschchen geworden, und ich ans schon mit Nagel Nr. 4,gehäkelt.
16.09.2025 - 13:55
![]() Rachel wrote:
Rachel wrote:
What color do I do the the ch3 at the beginning of the row? Is that my first stitch according to the chart or do I do the ch3 and then the next stitch is my first for that row? How does that work when switching colors from row to row….for example…row 4 or row 6. The row prior ends in a darker color so when I start the next row…what color is my ch 3?
25.08.2025 - 00:41DROPS Design answered:
Dear Rachel, the ch3 at the beginning of the round count as the first dc. So you need to work them in the colour of the first square in the chart. You work in the round so you simply change colours in the last dc of the round as explained in the "COLOR PATTERN (worked in the round)" tip above, working the ch3 as the 1st dc, all in the same colour. If you need to change colours in the next stitch after the ch3, work the first 2 in their corresponding colour and work the 3rd chain stitch in the new colour. Happy crochetting!
27.08.2025 - 00:00
![]() Rachel Dew wrote:
Rachel Dew wrote:
I need clarification. At what row do I start the A.1 pattern? When do I transition to A.2? Where is the instructions for the bottom of the bag when it changes from the dark to light and then has the small dark marks/arrows? Is there a video that shows this or explains it better?
22.08.2025 - 06:47DROPS Design answered:
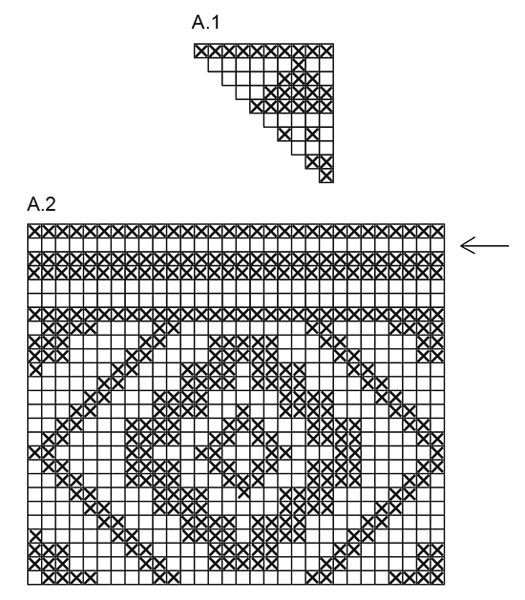
Dear Rachel, A.1 and A.2 are the colour patterns. For the first 10 rounds of the bag you work A.1 12 times on the round, working the stitches as in the written instructions while you check the colour changes in the chart. Then, after round 10, start round 11 with A.2, working only dc, without increases. Happy crochetting!
25.08.2025 - 01:53
![]() María Bañuelos wrote:
María Bañuelos wrote:
Muy bonita bolsa
04.05.2025 - 18:33
![]() Diane Bujold wrote:
Diane Bujold wrote:
Bonjour Pour le modèle ne-232 Après le tour 11 à la flèche dois-je augmenter les brides 1b dans chacune des 3 premières b/ des 3 b suivantes???? Merci de m’expliquer
12.04.2025 - 01:23DROPS Design answered:
Bonjour Mme Bujold, lorsque vous avez terminé A.1, vous crocheter le diagramme A.2 en commençant à partir du bas. Lorsque vous arrivez au rang avec la flèche (avant-dernier rang de A.2), vous n'augmentez pas mais vous créez un rang ajouré pour y passer le lien: (1 bride dans chacune des 3 premières brides / des 3 brides suivantes; 1 maille en l'air, sautez 1 bride) répétez de (à) tout le tour, vous allez obtenir ainsi 30 "trous" (- 1 maille en l'air pour 1 bride sautée); au tour suivant, crochetez 1 bride dans chaque bride et 1 bride dans chaque maille en l'air. Bon crochet!
22.04.2025 - 08:15
![]() MariaLuisa wrote:
MariaLuisa wrote:
Riguardo i manici a treccia, OGNI treccia è composta da 27 capi (9 per ogni gruppo) oppure 54 capi (18 per ogni gruppo)?
22.02.2025 - 11:44DROPS Design answered:
Buonasera Marialuisa i manici sono 2, ogni manico è costituito da una treccia formata da 36 capi, 12 per ogni "braccio" della treccia. Buon lavoro!
24.02.2025 - 00:20
![]() Julia Zimmermann wrote:
Julia Zimmermann wrote:
Ich verstehe leider überhaupt nicht was in Rd 5-10 gemeint ist mit „Zunahmen folgerichtig fortsetzen“. Könnten Sie mir bitte erklären wie ich in den Reihen 5-10 Maschen zunehmen muss? Viele Grüße und schon mal vielen Dank!
24.06.2024 - 22:31DROPS Design answered:
Liebe Frau Zimmermann, die Zunahmen häkeln Sie wie zuvor, mit je 1 Stäbchen mehr zwischen jede Zunahme; so bei der 5. Runde häkeln Sie 2 Stb in jede 4. Masche, bei der 6. Runde in jeder 5. Masche, bei der 7. Runde in jeder 6. Masche usw, gleichzeitig häkeln Sie A.1 (die Zunahme ist jeweils die 2 letzten Maschen in A.1). Viel Spaß beim Häkeln!
25.06.2024 - 09:06
|
|||||||
Santa Fe#santafebag |
|||||||
|
|
|||||||
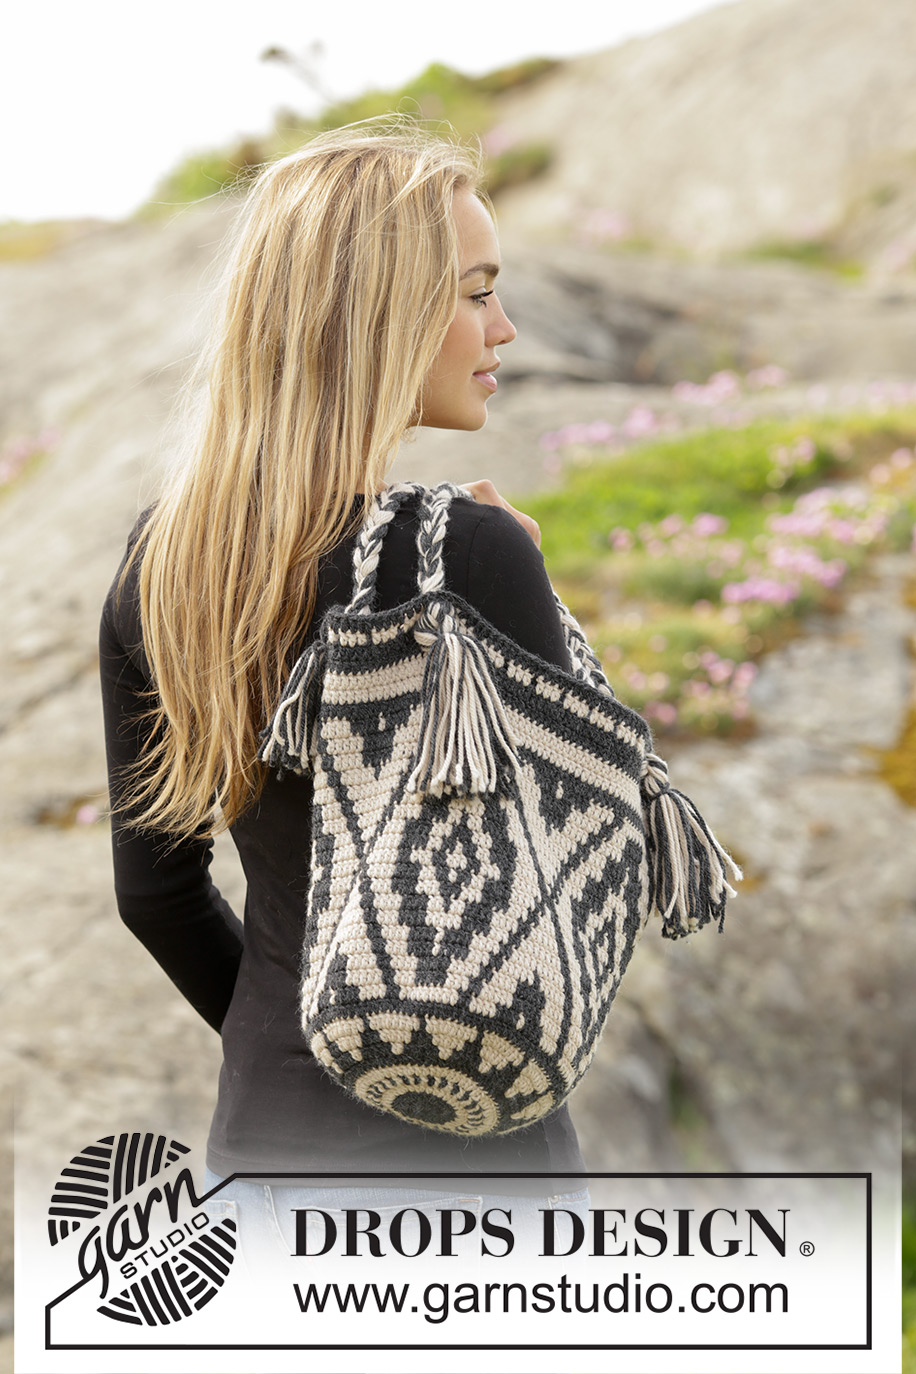
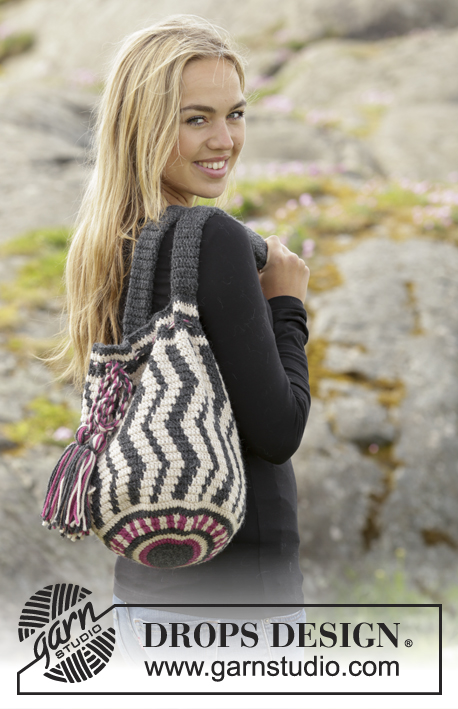
Crochet DROPS bag with colour pattern in ”Nepal”.
DROPS 173-1 |
|||||||
|
PATTERN: See diagrams A.1 and A.2. Diagrams show colours in pattern. 1 square = 1 tr. COLOUR PATTERN (worked in the round): When changing colour work as follows: Work last tr with first colour but wait with last pull through, switch to next colour and work last pull through, then work next tr. When working with two colours place strands for the colour not worked over sts from previous round, work around the strands so that they is hidden and follows in the round. CROCHET INFO: Replace first tr at beg of every round with 3 ch, finish round with 1 sl st in third ch. --------------------------------------------------------- BAG: Worked in the round. Work 5 ch with dark grey on hook size 3.5 mm and form a ring with 1 sl st in first ch. Then work in the round and according to A.1 (work 12 repetitions of A.1 in width) - READ COLOUR PATTERN. ROUND 1: Work 12 tr in ring – read CROCHET INFO. ROUND 2: Work 2 tr in every tr = 24 tr. ROUND 3: Work * 1 tr in first tr, 2 tr in next tr *, repeat from *-* the entire round = 36 tr. ROUND 4: Work * 1 tr in each of the first 2 tr, 2 tr in next tr *, repeat from *-* the entire round = 48 tr. REMEMBER THE CROCHET TENSION! ROUNDS 5-10: Continue with inc and pattern as before, i.e. on every round work 1 more tr between inc = 120 tr. ROUND 11: Continue to work in the round but without inc and work according to A.2 (= 4 repetitions in width). On round with arrow work as follows: * 1 tr in each of the first/next 3 tr, 1 ch, skip 1 tr *, repeat from *-*. Continue until A.2 has been worked, fasten off. STRAPS: Cut 18 lengths of each colour of 120 cm = 36 strands. Place the strands tog and tie a loose knot, leave approx. 12 cm after knot. Distribute strands in 3 piles with 12 strands in each pile. Plait the three piles tog until plait measures approx. 68 cm. Divide strands into 2 piles. Thread the 2 halves through bag, 3 tr apart, in round with holes. Tie the tog into a knot on the front of bag. Take the knot at beg of plait and fasten the end to bag the same way but in the opposite side. Make another plait the same way - see photo. |
|||||||
Diagram explanations |
|||||||
|
|||||||
 |
|||||||
Have you finished this pattern?Tag your pictures with #dropspattern #santafebag or submit them to the #dropsfan gallery. Do you need help with this pattern?You'll find 7 tutorial videos, a Comments/Questions area and more by visiting the pattern on garnstudio.com. © 1982-2026 DROPS Design A/S. We reserve all rights. This document, including all its sub-sections, has copyrights. Read more about what you can do with our patterns at the bottom of each pattern on our site. |
|||||||


With over 40 years in knitting and crochet design, DROPS Design offers one of the most extensive collections of free patterns on the internet - translated to 17 languages. As of today we count 324 catalogues and 12245 patterns translated into English (UK/cm). 12245
We work hard to bring you the best knitting and crochet have to offer, inspiration and advice as well as great quality yarns at incredible prices! Would you like to use our patterns for other than personal use? You can read what you are allowed to do in the Copyright text at the bottom of all our patterns. Happy crafting!
Post a comment to pattern DROPS 173-1
We would love to hear what you have to say about this pattern!
If you want to leave a question, please make sure you select the correct category in the form below, to speed up the answering process. Required fields are marked *.