
Popular categories
Looking for a yarn?
































Comments / Questions (9)
 CASTEL wrote:
Bonjour, je ne comprends pas comment faire le début point mousse avec I CORD (Tricoter 4 côtes au POINT MOUSSE avec 2 mailles I-CORD de chaque côté – cf. explications ci-dessus (= 8 rangs). Mettre 1 marqueur après les mailles de bordure devant d'un côté de l'ouvrage (= milieu du devant), mesurer désormais à partir de ce marqueur). Pouvez-vous m'aider merci beaucoup Sylvie
29.10.2026 - 08:29DROPS Design answered:
Bonjour Sylvie, pour obtenir 1 côte mousse, il faut tricoter 2 rangs endroit, pour tricoter 4 côtes mousse, on va donc tricoter 8 rangs endroit, en même temps, on va tricoter les 2 premières et les 2 dernières mailles comme indiqué sous I-CORD:. Vous mettez ensuite un marqueur après les 6 premières mailles en début de rang = c'est le milieu du devant, vous mesurerez désormais l'ouvrage à partir d'ici, le long du devant (et pas à partir du rang de montage). Bon tricot!
29.10.2026 - 10:10
 Jeannette wrote:
Forstå okke lige hvad jeg skal hvor jeg skal lave ører
25.10.2026 - 18:12DROPS Design answered:
Hei Jeannette. Når man strikker hætten skal midtstykke strikkes sammen med maskerne fra hjælpepinden på denne måde som er forklart i oppskriften helt til alle maskerne er strikket sammen. OG samtidig skal der strikkes forkortede pinde for at forme ører. Det er det forklart i oppskriften punkt for punkt. Så alt dette skal strikkes samtidig. Er det et spesielt punkt du har problemer med? Husk å oppgi hvilken str. du strikker, hvor nøyaktig i oppskriften du er. mvh DROPS Design
26.10.2026 - 11:51
Jeannette wrote:
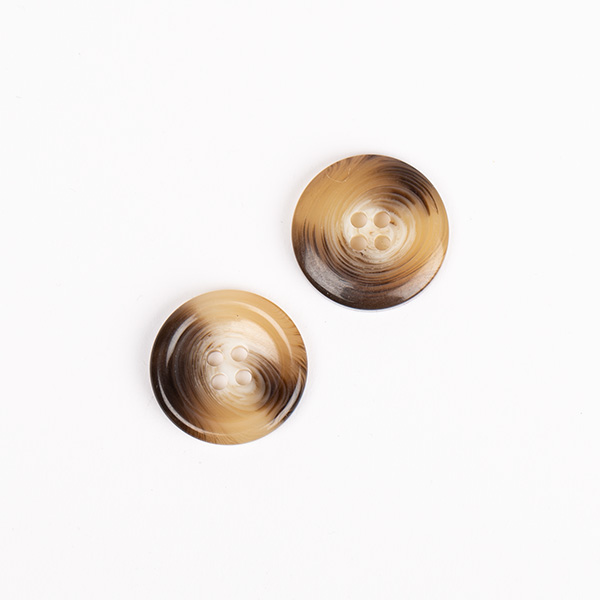
Hvor stor er knapperne
23.10.2026 - 20:47
 Tinneke wrote:
Hoi, ik ben bezig aan de broekspijp. Ik heb 21 steken averecht gebreid, dan 19 steken afgekant, en de overige 2 steken averecht gebreid zoals uitgelegd in het patroon. Nu loop ik vast. Moet ik de 2 averechte steken plaatsen op de naald met de 21 steken? Waar start ik met de nieuwe draad? Alvast bedankt!
18.10.2026 - 20:10
 Anita wrote:
Kan det beskrives hvordanjeg begynner 1 pinne med sammen strikkingen og forkortede pinner. Strikker jeg forkortede pinner på slutten av pinnen eller i midtmaskene?
16.10.2026 - 10:22DROPS Design answered:
Hej Anita, Vi kan prøve at hjælpe dig, men hvilken størrelse strikker du? Hvor mange masker har du? Hvor helt nøjagtig er du i opskriften?
20.10.2026 - 11:52
Anita wrote:
Så da skal jeg begynne med forkortede pinner samtidig som jeg begynner sammenstrikkingen?
16.10.2026 - 09:11DROPS Design answered:
Hei igjen, Ja, du skal begynne forkortede pinner samtidig som du begynner sammenstrikkingen :).
16.10.2026 - 12:04
Anita wrote:
Når skal jeg begynne med forkortede pinner? Er det etter at alle maskene fra hjelpepinnene er steikket sammen med midtmaskene? Eller må det gjøres samtidig?
15.10.2026 - 23:38DROPS Design answered:
Hei Anita, Du skal strikke maskene sammen med midtmaskene samtidig som du strikker forkortede pinner for ørene. Hilsen Drops Team..
16.10.2026 - 05:27
Castel wrote:
Je ne comprends pas comment faire I-cord en fin de rang, pouvez-vous m aider merci beaucoup
15.10.2026 - 16:05DROPS Design answered:
Bonjour Mme Castel, tricotez votre rang jusqu'à ce qu'il reste 2 mailles sur l'aiguille gauche (le jeté et la dernière maille), mettez votre fil devant l'ouvrage et glissez ces 2 mailles l'une après l'autre comme pour les tricoter à l'envers; le fil se retrouve à 2 mailles du bord. Tournez et tricotez ces 2 mailles ensemble torse à l'endroit. Vous pouvez vous entrainer à cette technique sur votre échantillon par exemple. Bon tricot!
16.10.2026 - 16:08
Anita Stensrud wrote:
Når skal en lage første knapphull?
07.10.2026 - 22:53DROPS Design answered:
Hei Anita, Første knapphull felles på første pinne fra retten etter at halskanten er ferdig (se Knapphull i Forklaringene). Hilsen Drops team.
08.10.2026 - 05:12
|
|
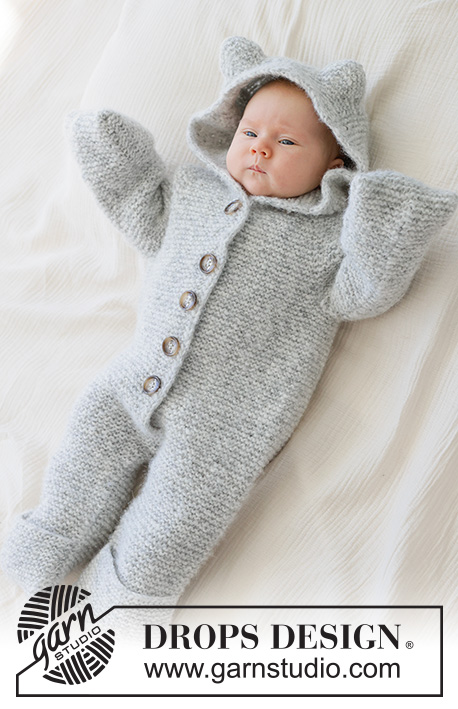
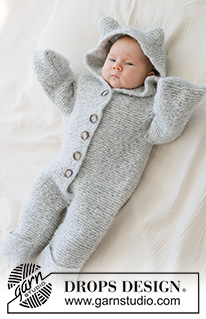
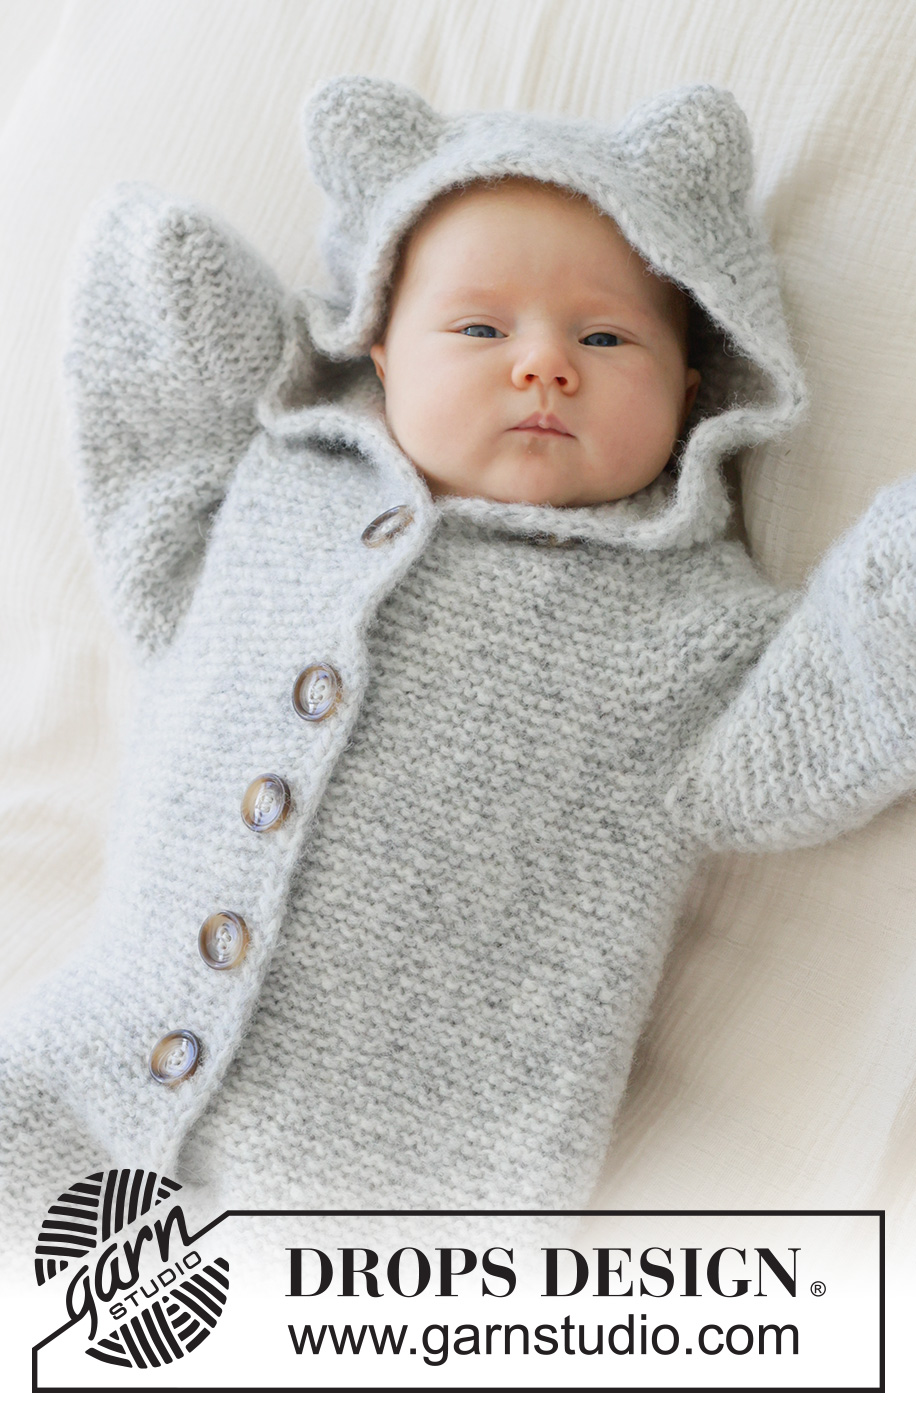
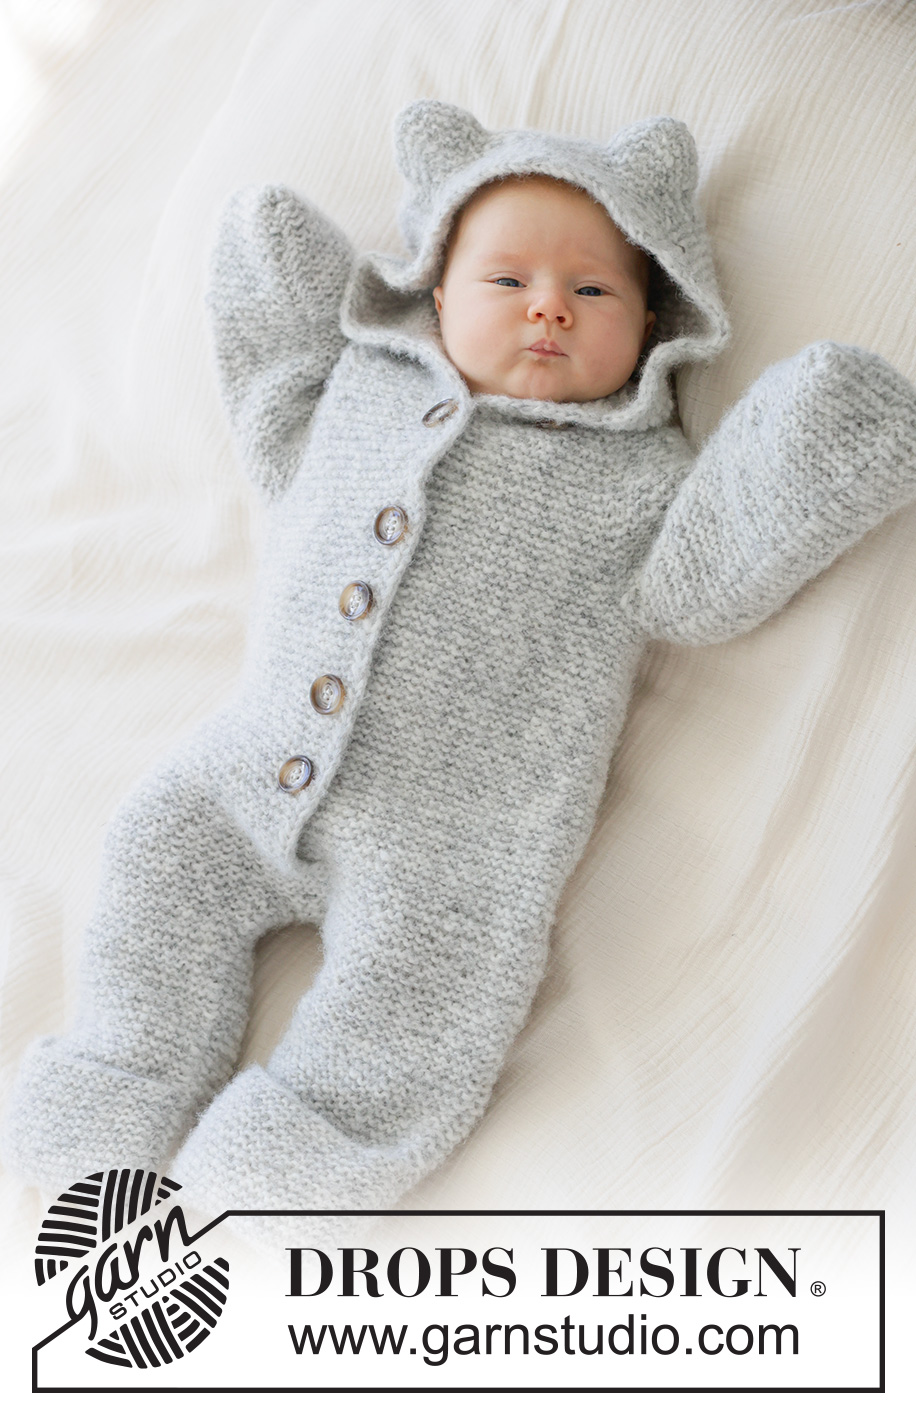
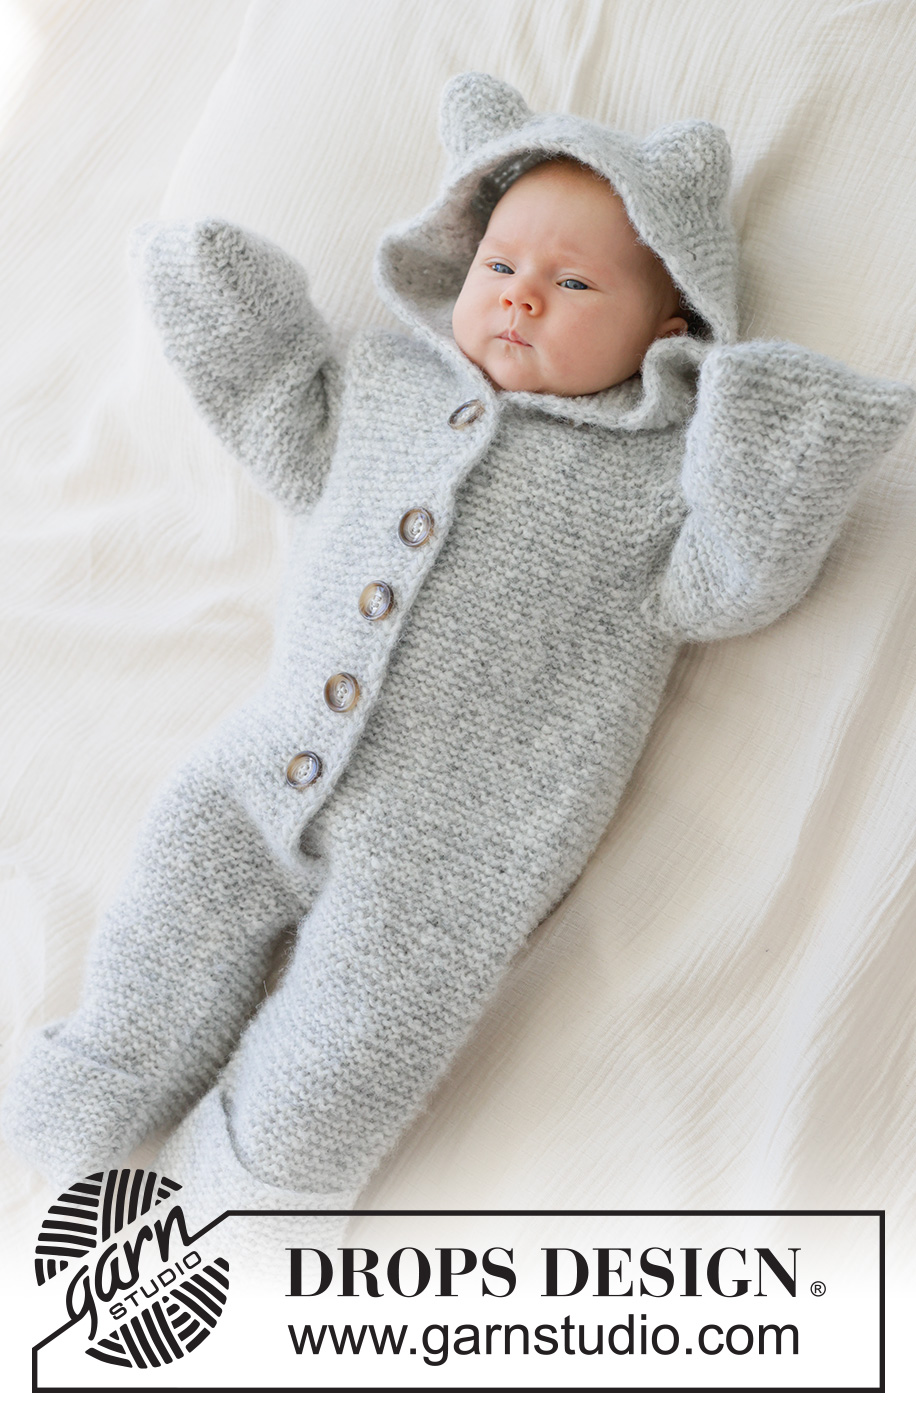
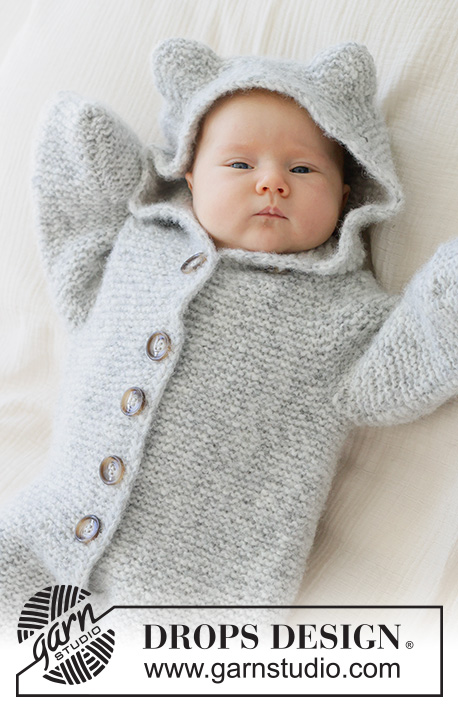
Fluffy Kitten Overall#fluffykittenoverall |
|
 |
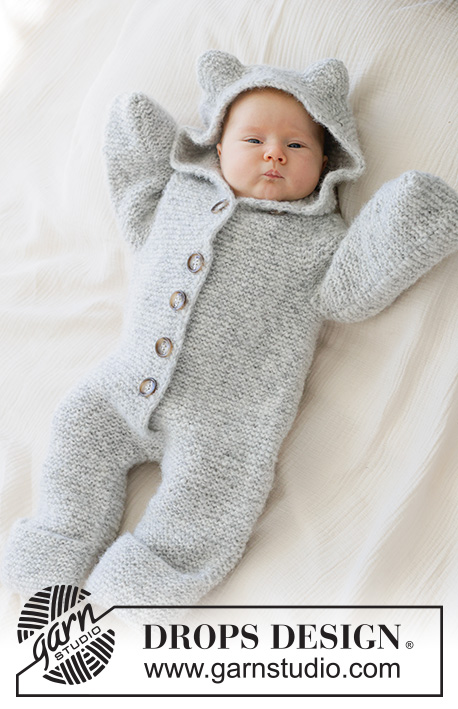 |
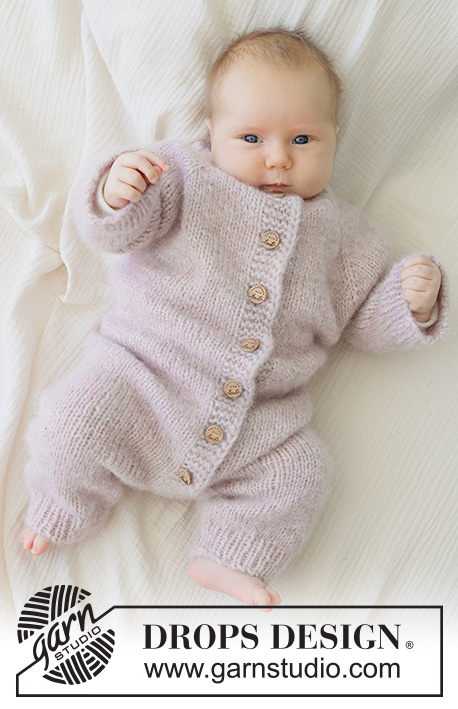
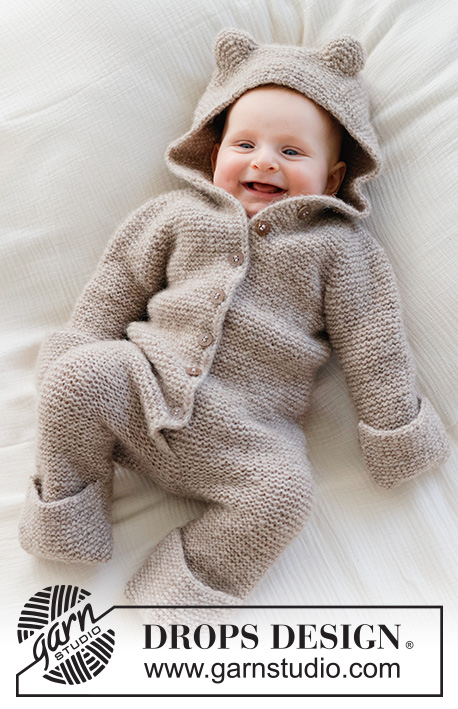
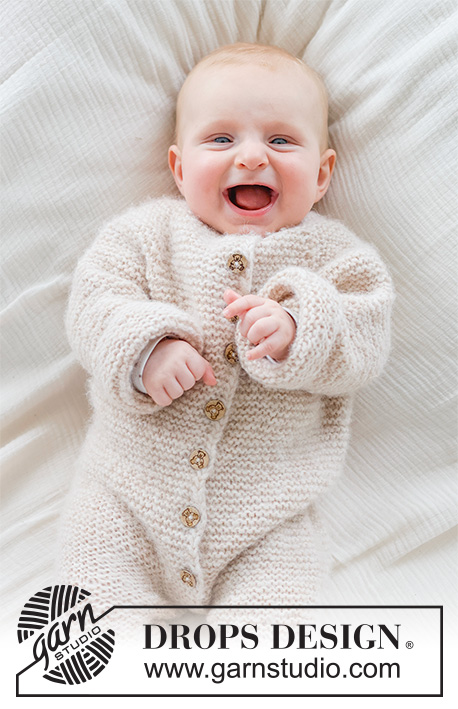
Knitted suit for baby in DROPS Air. Piece is knitted top down with raglan, garter stitch, hood, ears and I-cord. Size 0 - 4 years
DROPS Baby 53-20 |
|
|
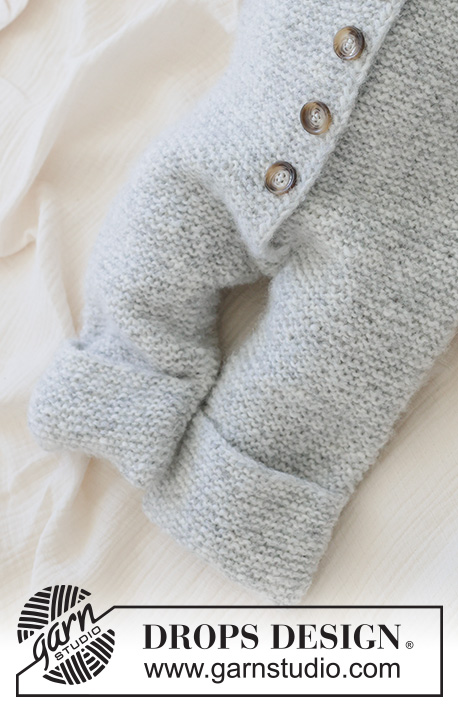
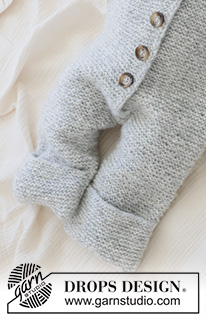
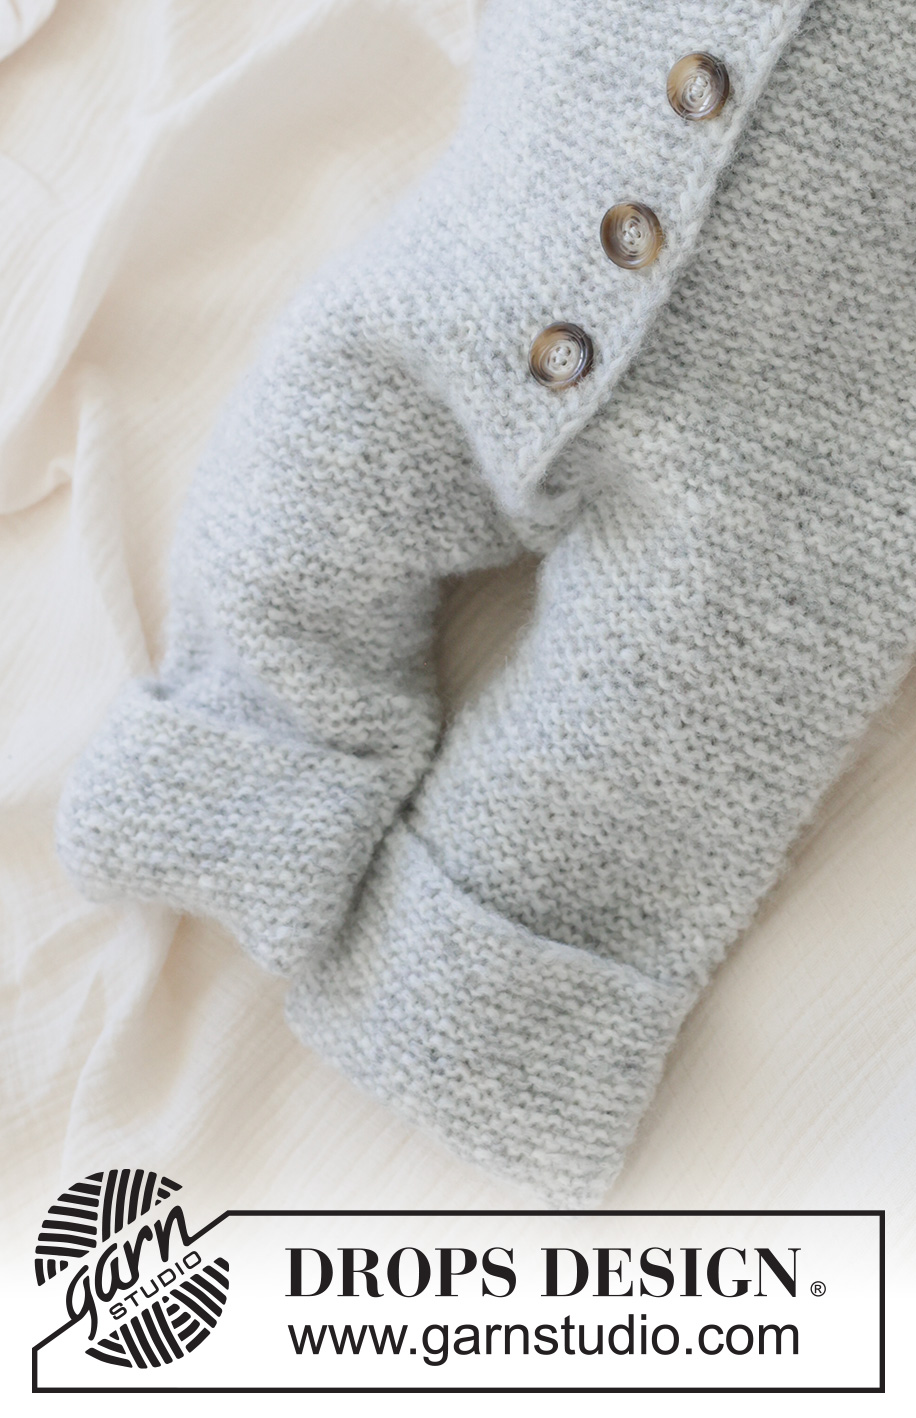
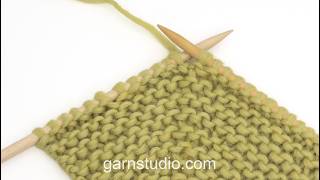
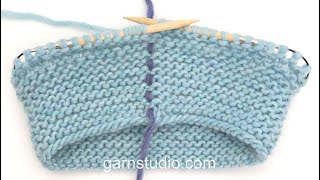
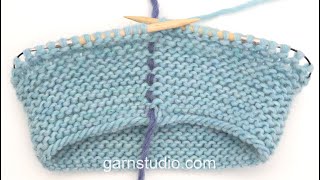
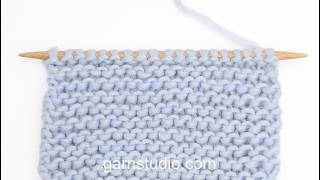
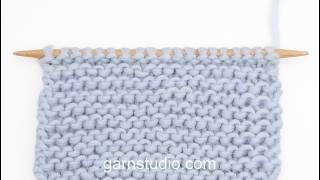
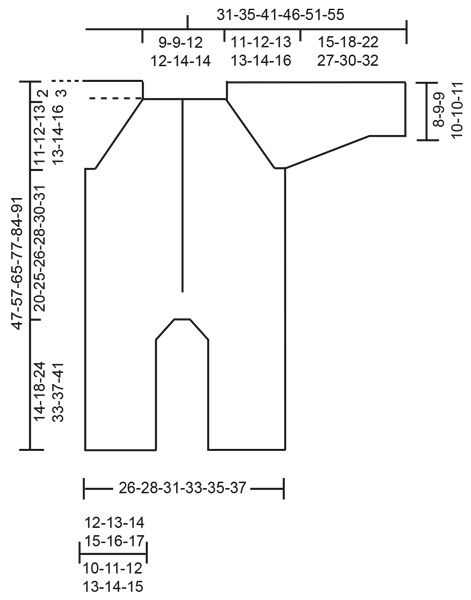
---------------------------------------------------------- EXPLANATION FOR THE PATTERN: ---------------------------------------------------------- GARTER STITCH (when working back and forth): Knit on all rows, i.e. knit from right side and knit from wrong side. 1 ridge vertically = knit 2 rows. GARTER STITCH (when working in the round): Alternately knit 1 round and purl 1 round. 1 ridge vertically = 2 rounds. I-CORD: BEGINNING OF ROW: Work I-cord as follows: Knit 2 twisted together, make 1 yarn over. END OF ROW: Work I-cord as follows: Work until 2 stitches remain on needle, slip 2 stitches purlwise with strand in front of piece. Continue like this on right side and wrong side. RAGLAN: Increase 1 stitch by making 1 yarn over. On next row knit yarn over twisted to avoid holes. SLEEVE TIP: When picking up stitches mid under sleeve, there will be a small hole in the transition between stitches on body and sleeves. The holes can be closed by picking up the strand between two stitches - work this strand twisted together with the first stitch between body and sleeve to close the hole. DECREASE TIP (applies to mid under sleeves and on inside of legs): Decrease on a round with knit stitches. Knit 1, slip 1 stitch knitwise, knit 1, pass slipped stitch over stitch worked, work until 3 stitches remain, knit 2 together, knit 1 (= 2 stitches decreased). BUTTONHOLES: Decrease for buttonholes on right band (when garment is worn). Decrease from right side when 5 stitches remain on row as follows: ROW 1 (= right side): Make 1 yarn over, knit 2 together, knit 1, slip 2 stitches purlwise with strand in front of piece. ROW 2 (= wrong side): Work band as before and knit yarn over to make a buttonhole. Decrease for first buttonhole on first row from right side after neck edge has been worked. Then decrease the next 5-5-6-6-7-7 buttonholes, approx. 5-6-5½-6-5½-5½ cm apart. ---------------------------------------------------------- START THE PIECE HERE: ---------------------------------------------------------- SUIT - SHORT OVERVIEW OF THE PIECE: In this pattern needles of different length have been used, begin with fitting length for number of stitches and switch as needed. Work the entire suit in garter stitch with 2 stitches I-cord in each side towards mid front. Work yoke back and forth on circular needle from mid front and work top down with increases for raglan. When yoke is done, divide piece for body and sleeves. Work body downwards back and forth on circular needle until button band has been worked while putting the sleeves aside. After button band slip the piece together and work in the round in garter stitch. Piece is divided for legs and each leg is worked in the round. Then work sleeves downwards in the round on needle. Finish by working a hood with ears. NECK EDGE: Cast on 58-58-66-70-78-82 stitches on circular needle size 3 mm with DROPS Air. Work 4 ridges in GARTER STITCH with 2 stitches I-CORD in each side – read explanation above(= 8 rows). Insert 1 marker on the inside of band in one side of piece (= mid front), measure piece from this marker. YOKE: Insert 4 markers in piece without working the stitches, insert markers between 2 stitches stitches, these 2 stitches are called raglan stitches and increase is done for raglan on each side of raglan stitches. Count 12-12-14-14-16-16 stitches (= left front piece), insert 1st marker before next stitch, count 8-8-8-10-10-12 stitches (= sleeve), insert 2nd marker before next stitch, count 18-18-22-22-26-26 stitches (= back piece), insert 3rd marker before next stitch, count 8-8-8-10-10-12 stitches (= sleeve), insert 4th marker before next stitch. 12-12-14-14-16-16 stitches remain on row for right front piece. Switch to circular needles size 4 mm, work in garter stitch with I-cord in each side back and forth and increase for RAGLAN on each side of raglan stitches – read explanation above for increase method. Remember to decrease for BUTTONHOLES - read explanation above. Increase for raglan as explained below, increase on each side of raglan stitches as follows: ROW 1: Knit and increase for raglan on each side of raglan stitches = 8 stitches increased. ROW 2: Knit and work yarn overs as explained above. ROW 3: Knit and increase for raglan on each side of raglan stitches = 8 stitches increased. ROW 4: Knit and work yarn overs as explained above. ROW 5: Knit without increases. ROW 6: Knit without increases. Work 1st to 6th ROW 4-4-5-4-5-4 times in total (= 24-24-30-24-30-24 rows worked), then work 1st and 2nd rows 0-1-1-0-0-0 more times = 122-130-154-134-158-146 stitches on needle. Remember to follow the knitting tension! Then work and increase for raglan as follows: ROW 1: Knit and increase for raglan on each side of raglan stitches = 8 stitches increased. ROW 2: Knit and work yarn overs as explained above. ROW 3: Knit and increase for raglan on front pieces and back piece, do not increase stitches on sleeves = 4 stitches increased. ROW 4: Knit and work yarn overs as explained above. ROW 5: Knit without increases. ROW 6: Knit without increases. Work 1st to 6th ROW 3-3-2-4-3-5 times in total (= 18-18-12-24-18-30 rows worked = 3-3-2-4-3-5 increases on sleeves and 6-6-4-8-6-10 increases on front pieces/back piece) = 158-166-178-182-194-206 stitches on needle. All increases for raglan are done, 14-15-15-16-16-18 increases have been done on front pieces/back piece and 11-12-13-12-13-13 increases on sleeves. Piece measures now approx. 11-12-13-13-14-16 cm from marker mid front. Now divide yoke for body and sleeves. DIVIDING FOR BODY AND SLEEVES: AT THE SAME TIME as next row is worked divide yoke for body and sleeves as follows: Work 26-27-29-30-32-34 stitches as before (= front piece), slip the next 30-32-34-34-36-38 stitches on a stitch holder for sleeve, cast on 4-6-6-8-8-8 new stitches on row (= in the side mid under sleeve), work 46-48-52-54-58-62 stitches as before (= back piece), slip the next 30-32-34-34-36-38 stitches on a stitch holder for sleeve, cast on 4-6-6-8-8-8 new stitches on row (= in the side mid under sleeve) and work the last 26-27-29-30-32-34 stitches as before (= front piece). Finish body and sleeves separately. BODY: = 106-114-122-130-138-146 stitches. Work as before until piece measures 28-34-36-38-41-44 cm from marker mid front. Now put piece together and work in the round - work from right side as explained below. Work as before until 6 stitches remain on row, place these 6 stitches on top of the 6 last stitches from left front piece and work stitches together 2 by 2 (knit 1 stitch from right front piece together with 1 stitch from left front piece) = 100-108-116-124-132-140 stitches. Then work GARTER STITCH in the round over all stitches - read explanation above - insert 1 marker in the middle of the 6 stitches worked together - this is now the beginning of round. Work in the round until piece measures 31-37-39-41-44-47 cm from marker mid front (3 cm have been worked in the round over all stitches). Now divide the piece for legs and finish each leg separately. Cut the yarn. DIVIDING FOR LEGS: Divide the piece for legs without working: Begin 3 stitches before marker on beginning of round, slip the first 6 stitches (= mid front) on a stitch holder, slip the next 44-48-52-56-60-64 stitches on a strand (= left leg), slip the next 6 stitches on a stitch holder (= mid back), 44-48-52-56-60-64 stitches remain on needle for right leg. Finish each leg separately. RIGHT LEG: = 44-48-52-56-60-64 stitches. Insert 1 marker at beginning of round (= on the inside of leg) and work in garter stitch in the round. When 1 round has been worked, decrease 2 stitches on inside of leg - read DECREASE TIP. Decrease like this every 3rd round 3 times in total = 38-42-46-50-54-58 stitches on needle. Then work until leg measures 14-18-24-33-37-41 cm from division, adjust so that next round is a purl round. Purl until 19-21-23-25-27-29 stitches remain on round, cast off the next 17-19-21-23-25-27 stitches, purl the last 2 stitches on round = 21-23-25-27-29-31 stitches on needle. Cut the yarn. Work in garter stitch back and forth on needle for 8 cm. Cast off. LEFT LEG: Work as right leg but when leg measures 14-18-24-33-37-41 cm from division work as follows: make sure this is a purl round: Purl 2 stitches, cast off the next 17-19-21-23-25-27 stitches, purl over the next 19-21-23-25-27-28 stitches = 21-23-25-27-29-31 stitches on needle. Cut the yarn and work in garter stitch back and forth on needle for 8 cm. Cast off. SLEEVES: Slip 30-32-34-34-36-38 sleeve stitches from one thread on to needle size 4 mm and pick in addition up 1 stitch in each of the 4-6-6-8-8-8 stitches cast on under sleeve - read SLEEVE TIP = 34-38-40-42-44-46 stitches. Insert 1 marker in the middle of the 4-6-6-8-8-8 new stitches under sleeve - round begins at the marker. Work in garter stitch in the round on needle - AT THE SAME TIME when 1 round has been worked after division, decrease 2 stitches mid under sleeve – read DECREASE TIP. Repeat decrease when piece measures 3 cm = 30-34-36-38-40-42 stitches. Work until sleeve measures 15-18-22-27-30-32 cm from division, adjust so that next round is a purl round. Begin at the marker, work the first 8-9-10-10-11-11 stitches, cast off the next 14-16-16-18-18-20 stitches and work over the last 8-9-10-10-11-11 stitches on round = 16-18-20-20-22-22 stitches on needle. Cut the yarn. Work in garter stitch back and forth on needle for 8 cm. Cast off. HOOD: Use circular needle size 4 mm and pick up 1 stitch in every stitch from cast-on edge in the neck = 58-58-66-70-78-82 stitches. Work in garter stitch back and forth with 2 stitches I-cord in each side, AT THE SAME TIME on first row increase 6 stitches evenly = 64-64-72-76-84-88 stitches. Work until hood measures 14-15-16-18-18-19 cm. Slip 20-20-22-24-27-29 stitches in each side on auxiliary needles (= the middle 24-24-28-28-30-30 stitches remain on needle). Cut the yarn, begin from right side and work the 24-24-28-28-30-30 stitches on needle. Knit until 1 stitch remain on needle, slip 1 stitch knitwise, work first stitch from one of the auxiliary needle, pass slipped stitch over, turn, work until 1 stitch remain, slip 1 stitch, work first stitch from the auxiliary needle, pass slipped stitch over. Stitches from middle piece are worked together with stitches from the auxiliary needles like this until all stitches have been worked together. AT THE SAME TIME work short rows to shape ears as explained below: Work 8-8-12-14-16-18 rows with knitting together at the end of every row. Now insert 2 markers in the piece, insert markers in the 4th-4th-4th-4th-6th-6th stitch in from each side, there are 16-16-16-16-18-18 stitches between stitch with markers. Stitches with markers are called ear middle stitch. INCREASE FOR EAR: FROM RIGHT SIDE: Work until first ear middle stitch, make 1 yarn over, work ear middle stitch, make 1 yarn over, work until second ear middle stitch, make 1 yarn over, work ear middle stitch, make 1 yarn over, work the rest of row. Turn piece and work back, knit yarn overs twisted from wrong side. Increase the same way 1 more time. INCREASE FOR EAR POINT 1-4: 1 - FROM RIGHT SIDE: Work until first ear middle stitch, make 1 yarn over, work ear middle stitch, make 1 yarn over, work 2 stitches. Turn piece and work 7 stitches back while at the same time knitting the yarn overs twisted from wrong side (= 2 new stitches for ear). Turn piece. 2 - FROM RIGHT SIDE: Work until first ear middle stitch, make 1 yarn over, work ear middle stitch, make 1 yarn over, then work until second ear middle stitch, make 1 yarn over, work second ear middle stitch, make 1 yarn over, work the 2 stitches (= 2 new stitches for each ear). Turn piece and work 7 stitches back while at the same time knitting the yarn overs twisted from wrong side. Turn piece. 3 - FROM RIGHT SIDE: Work from right side until second ear middle stitch, make 1 yarn over, work ear middle stitch, make 1 yarn over and work the rest of row (= 2 new stitches the other ear). Turn piece 4 - FROM WRONG SIDE: Work 1 row over all stitches. There are now 9 stitches in each ear. Work POINT 1-4 3-3-3-3-4-4 times in total, increase on each side of ear middle stitch and work short rows over more and more stitches, after all increases there are 17-17-17-17-21-21 stitches in each ear. DECREASE FOR EAR POINT 1-3: 1 - FROM RIGHT SIDE: Work until 8-8-8-8-10-10 stitches remain before first ear middle stitch, work 6-6-6-6-8-8 stitches, knit 2 together, work ear middle stitch, knit 2 together, work 6-6-6-6-8-8 stitches (= 2 stitches decreased in the ear). Turn piece and work over 15-15-15-15-19-19 stitches from wrong side. Turn piece. 2 - FROM RIGHT SIDE: Work 5-5-5-5-7-7 stitches, knit 2 together, work ear middle stitch, knit 2 together, work until 8-8-8-8-10-10 stitches remain before the other ear middle stitch, work 6-6-6-6-8-8 stitches, knit 2 together, work ear middle stitch, knit 2 together, work 6-6-6-6-8-8 stitches (= 2 stitches decreased in the ear). Turn piece and work over 15-15-15-15-19-19 stitches from wrong side. Turn piece. 3 - FROM RIGHT SIDE: Work 5-5-5-5-7-7 stitches, knit 2 together, work ear middle stitch, knit 2 together and work the rest of row (= 2 stitches decreased in the ear). Turn piece and work 1 row from wrong side. There are now 13-13-13-13-17-17 stitches in each ear. Work POINT 1-3 3-3-3-3-4-4 times in total, decrease on each side of stitches with markers and work short rows over fewer and fewer stitches, after all decreases there are 5 stitches in each ear. Remember knitting together in each side. DECREASE FROM RIGHT SIDE: Work until 2 stitches remain before ear middle stitch, knit 2 together, work ear middle stitch, knit 2 together, work until 2 stitches before other ear middle stitch, knit 2 together, work ear middle stitch, knit 2 together, work the rest of row (= 4 stitches decreased). Work like this 3 times in total on every row from right side. When all stitches from cable needles have been worked together with middle piece, cast off by knitting from right side. Hood measures approx. 11 to 15 cm from where stitches were put on stitch holders. ASSEMBLY: Sew the 6 stitches from stitch holder mid front together with the 6 stitches from stitch holder mid back - sew with grafting/kitchener stitches to avoid a thick seam. Fold the flaps from legs and sleeves up on to front side and fasten in each side. Sew nicely in outer loop of stitch to avoid a chunky seam. Sew buttons on to left front piece. |
|
 |
|
Have you finished this pattern?Tag your pictures with #dropspattern #fluffykittenoverall or submit them to the #dropsfan gallery. Do you need help with this pattern?You'll find 23 tutorial videos, a Comments/Questions area and more by visiting the pattern on garnstudio.com. © 1982-2026 DROPS Design A/S. We reserve all rights. This document, including all its sub-sections, has copyrights. Read more about what you can do with our patterns at the bottom of each pattern on our site. |
|





With over 40 years in knitting and crochet design, DROPS Design offers one of the most extensive collections of free patterns on the internet - translated to 17 languages. As of today we count 333 catalogues and 12536 patterns translated into English (UK/cm). 12525
We work hard to bring you the best knitting and crochet have to offer, inspiration and advice as well as great quality yarns at incredible prices! Would you like to use our patterns for other than personal use? You can read what you are allowed to do in the Copyright text at the bottom of all our patterns. Happy crafting!
Post a comment to pattern DROPS Baby 53-20
We would love to hear what you have to say about this pattern!
If you want to leave a question, please make sure you select the correct category in the form below, to speed up the answering process. Required fields are marked *.