
Popular categories
Looking for a yarn?


Comments / Questions (47)
![]() Wies wrote:
Wies wrote:
Volgens mij komt het telpatroon en beschrijving van toer 8 niet overeen.
05.03.2016 - 10:38DROPS Design answered:
Hoi Wies. Ik heb nagekeken en ik zie geen verschil.
09.03.2016 - 09:42
![]() Cindy Thomas wrote:
Cindy Thomas wrote:
I have pattern vs-026 I'm diagram a 2 I am trying to find the corresponding video help Thank you!!
27.02.2016 - 20:23DROPS Design answered:
Dear Mrs Thomas, There isn't any video yet to diagram A.2, start reading diagram at the bottom corner on the right side (= replace 1st dc with 3 ch): row 1: 5ch, *skip 2 dc, 1 dc between dc as shown in diagram, 2 ch*, repeat from *-*. On row 2, work 3 dc in each 2-ch-spaces. Happy crocheting!
29.02.2016 - 09:09Maria Argumedo wrote:
Me gustaria recibir revistas de tejido o correos me gustaria comprar estambres
12.02.2016 - 17:47
![]() Lechien wrote:
Lechien wrote:
J'adore , j'aimerai les explications Merci
07.02.2016 - 21:26
![]() Eva wrote:
Eva wrote:
Ich brauche eine Herausforderung. Bitte stellen Sie die Anleitung ein. Zichmal am Tag gucke ich ob die Anleitung vorhanden ist.
07.02.2016 - 10:44
![]() Mamita wrote:
Mamita wrote:
Absolument superbe exactement ce que je recherche depuis des années j'attends ses explications avec impatience
28.01.2016 - 08:38
![]() Anna wrote:
Anna wrote:
Så fin! Den vill jag göra!
24.01.2016 - 01:57
![]() Eva wrote:
Eva wrote:
Ein super tolles Teil. Ein großes Lob für Designer. Bitte auf schnellsten Weg die Anleitung freigeben. Ich bin sehr ungeduldig. Ich arbeite viel mit Drops-Anleitungen. Ich hoffe das es auch mit dieser schnell funktioniert.
20.01.2016 - 19:12
![]() Ulla wrote:
Ulla wrote:
Når opskriften kommer ud skal den absolut laves. Super lækker.
13.01.2016 - 20:41
![]() Nadia Geusens wrote:
Nadia Geusens wrote:
Prachtig!
04.01.2016 - 19:54
|
|||||||||||||||||||||||||||||||||||||||||||||||||||||||
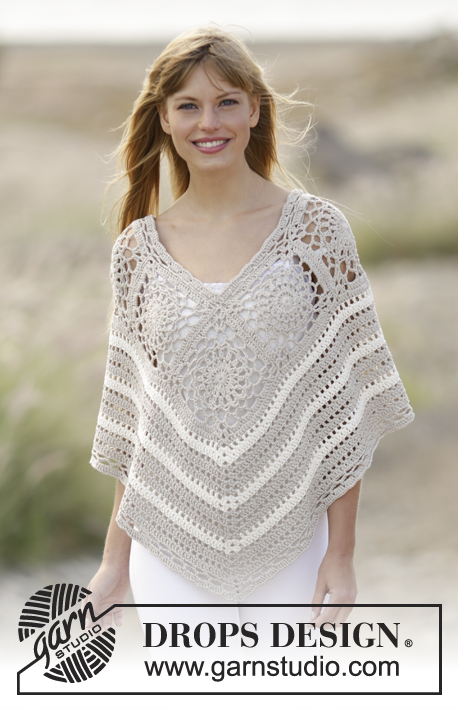
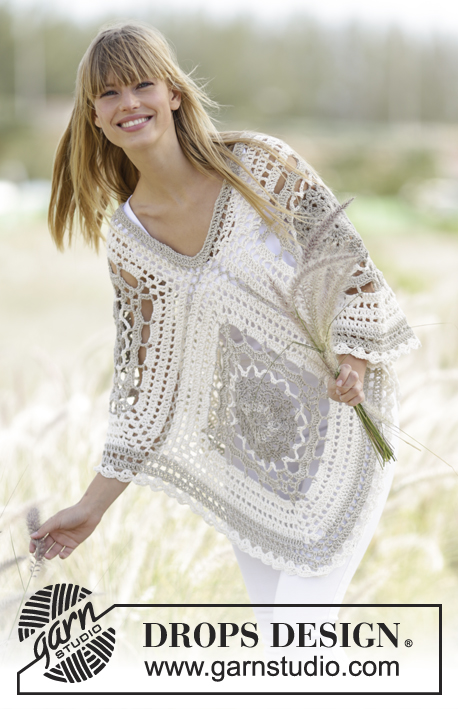
Rhapsody in Rose#rhapsodyinroseponcho |
|||||||||||||||||||||||||||||||||||||||||||||||||||||||
|
|
|||||||||||||||||||||||||||||||||||||||||||||||||||||||
Crochet DROPS poncho with lace pattern in squares in 2 strands ”Belle”. One-size
DROPS 167-22 |
|||||||||||||||||||||||||||||||||||||||||||||||||||||||
|
PATTERN: See diagrams A.1 and A.2. A.1 shows entire square on 1st-4th round, then 1 side and 2 corners on square. CROCHET INFO: Replace first tr on every round with 3 ch. Finish round with 1 sl st in 3rd ch at beg of round. ---------------------------------------------------------- PONCHO: Work 4 large squares as explained below. Then work squares tog into a poncho. Finish by working a neck edge and a border along bottom edge before fastening fringes at the bottom around the entire poncho. Work entire poncho with 2 strands. Work A.1 as follows: Work 4 ch on hook size 8 mm with 2 strands Belle and form a ring with 1 sl st in first ch. ROUND 1: 1 ch, 8 dc in ch-ring, finish with 1 sl st in first dc. ROUND 2: Work 6 ch (= 1 tr + 3 ch) - READ CROCHET INFO, * 1 tr in next dc, 3 ch *, repeat from *-* a total of 7 times and finish with 1 sl st in 3rd ch from beg of round = 8 tr with 3 ch between each. ROUND 3: 1 ch, then work as follows in every ch-space: 1 dc, 1 htr, 3 tr, 1 htr and 1 dc, finish round with 1 sl st in ch from beg of round = 8 leaves. REMEMBER THE CROCHET TENSION! ROUND 4: Work 7 ch, * 1 dc between the next 2 leaves, 6 ch *, repeat from *-* a total of 7 times, finish round with 1 sl st in 1st ch from beg of round = 8 ch-spaces. ROUND 5: 1 ch, then work as follows in every ch-space: 1 dc, 1 htr, 5 tr, 1 htr and 1 dc, finish round with 1 sl st in ch from beg of round = 8 leaves. ROUND 6: Work 10 ch, * 1 dc between the next 2 leaves, 9 ch *, repeat from *-* a total of 7 times, finish round with 1 sl st in 1st ch from beg of round = 8 ch-spaces. ROUND 7: 1 ch, then work as follows in every ch-space: 1 dc, 1 htr, 1 tr, 5 dtr, 1 tr, 1 htr and 1 dc, finish round with 1 sl st in ch from beg of round = 8 leaves. ROUND 8: Work sl sts until first dtr on first leaf, 3 ch (= 1 tr), * 8 ch (= corner), skip 3 dtr, 1 dc in last dtr on same leaf, 5 ch, 1 dc in first dtr on next leaf, 5 ch, skip 3 dtr, 1 dc in last dtr on same leaf, 5 ch, 1 tr in first dtr on next leaf *, repeat from *-* a total of 4 times but finish with 1 sl st in 3rd ch from beg of round (instead of 1 tr in 1st dtr on next leaf). ROUND 9: 1 sl st in 8-ch-space, * 4 tr + 4 ch + 4 tr in ch-space in the corner, (4 ch, 1 tr in next ch-space), repeat from (-) a total of 3 times, 4 ch *, repeat from *-* a total of 4 times, finish with 1 sl st in first tr (= 3rd ch) from beg of round. ROUND 10: * 1 tr in each of the first 4 tr, in ch-space in the corner work 3 tr + 2 ch + 3 tr, 1 tr in each of the next 4 tr, 4 tr in each of the next 4 ch-spaces *, repeat from *-* a total of 4 times, finish round with 1 sl st in first tr (= 3rd ch) from beg of round. There are now 30 tr along each side and 2 ch in every corner. Work sl sts until ch in first corner. Then work according to A.2 along the sides on square, around ch in corners work 3 tr + 2 ch + 3 tr. Continue according to A.2 until square measures approx. 38 x 38 cm - adjust after round with tr. NOTE: If you want a bigger poncho continue according to A.2 until desired measurements. Fasten off. ASSEMBLY: Place squares as shown in chart. Beg in the bottom edge, up to neck and down on opposite side of middle square as follows: Place 2 squares on top of each other WS against WS, and crochet them tog with 2 strands as follows: ** Work 1 dc around ch-space in corner on 1st square, 1 ch, 1 dc around ch-space in corner on 2nd square, * 3 ch, 1 dc between 2 tr-groups on 1st square, 1 ch, 1 dc between 2 tr-groups on 2nd square *, repeat from *-* until next corner, finish with 3 ch for transition to next square **, repeat from **-** down along other side of middle square and next square. Cut the yarn and work the same way on opposite side of poncho. NECK EDGE: Work a finishing edge on 2 rows around the neck on hook size 8 mm as follows: Continue working according to A.2 - remember CROCHET INFO. - but adjust in the corner mid front and mid back so that neck edge lies nicely. Fasten off. EDGE AROUND THE BOTTOM OF PONCHO: Work a finishing edge on 2 rows at the bottom around the poncho on hook size 8 mm with 2 strands as follows: Continue working according to diagram A.2. NOTE: To continue the edge into a nice tip as on squares it is important to continue inc mid front and mid back, i.e. in the middle ch-space mid front and mid back work 3 tr + 2 ch + 3 tr on every round. When edge is done, fasten off. FRINGES: 1 fringe = 6 threads of approx. 40 cm. Fold the threads double, thread the space through the opening between 2 tr-groups and pull the yarn ends through the loop (so that 12 strands hang down in every fringe). Beg with 1 fringe in ch-space in the tip mid front and mid back, then insert fringes along the diagonal edge on poncho between every other tr-group. |
|||||||||||||||||||||||||||||||||||||||||||||||||||||||
Diagram explanations |
|||||||||||||||||||||||||||||||||||||||||||||||||||||||
|
|||||||||||||||||||||||||||||||||||||||||||||||||||||||

|
|||||||||||||||||||||||||||||||||||||||||||||||||||||||

|
|||||||||||||||||||||||||||||||||||||||||||||||||||||||
Have you finished this pattern?Tag your pictures with #dropspattern #rhapsodyinroseponcho or submit them to the #dropsfan gallery. Do you need help with this pattern?You'll find 10 tutorial videos, a Comments/Questions area and more by visiting the pattern on garnstudio.com. © 1982-2025 DROPS Design A/S. We reserve all rights. This document, including all its sub-sections, has copyrights. Read more about what you can do with our patterns at the bottom of each pattern on our site. |
|||||||||||||||||||||||||||||||||||||||||||||||||||||||


With over 40 years in knitting and crochet design, DROPS Design offers one of the most extensive collections of free patterns on the internet - translated to 17 languages. As of today we count 314 catalogues and 11821 patterns translated into English (UK/cm). 11821
We work hard to bring you the best knitting and crochet have to offer, inspiration and advice as well as great quality yarns at incredible prices! Would you like to use our patterns for other than personal use? You can read what you are allowed to do in the Copyright text at the bottom of all our patterns. Happy crafting!
Post a comment to pattern DROPS 167-22
We would love to hear what you have to say about this pattern!
If you want to leave a question, please make sure you select the correct category in the form below, to speed up the answering process. Required fields are marked *.