
Popular categories
Looking for a yarn?


Comments / Questions (51)
![]() Sarah wrote:
Sarah wrote:
Hi, I am having the same problem as several people who have written comments. At row 2 of the pattern, once I get to M1B, I have an extra stitch right before the "knit into 2 yarn overs". I have repeated the pattern several time and I am still getting this extra stitch and I can't figure it out... As other people seem to be having the same problem, do you have an idea of what the problem might be? Thank you
01.04.2014 - 03:06DROPS Design answered:
Dear Sarah, remember you have inc on row 1, so that on next row, you should start M1C above M1C and work inc separately. Insert markers between each repeat can be a good idea to keep pattern work. Happy knitting!
01.04.2014 - 09:03
![]() Sara wrote:
Sara wrote:
Gracias! Ya encontré el error... leyendo las preguntas en otros idiomas y sin tener ni idea x intuición encontré respuesta. El problema estaba en las vueltas en que sobran dos puntos del patrón, yo lo tejía del derecho justo antes de los centrales, pero es uno después del orillo y otro antes de los centrales. En las instrucciones esto no se explica con claridad, al menos yo no lo entendí. Gracias de nuevo por contestar.
27.03.2014 - 21:33
![]() Sara wrote:
Sara wrote:
Hola! He empezado este chal como unas cuatro veces. Hasta tener 46 puntos sin problema, pero al ir tejiendo el patrón, el dibujo a cada lado de los puntos centrales no queda igual. Mirando el chal se frente, a la izquierda de los puntos centrales queda perfecto, pero a la derecha queda mal, como con los puntos cambiados. Espero pque podáis ayudarme y explicarme. Gracias
25.03.2014 - 23:48DROPS Design answered:
Hola Sara! Pues la verdad es que he repasado el patrón y parece que está correcto. Te recomiendo mirar en el apartado de videos a ver si encuentras donde puede estar el error.
27.03.2014 - 21:01
![]() Ingrid wrote:
Ingrid wrote:
De beschrijving klopt volgens mij niet. Er staat dat hij van boven naar beneden word gemaakt. Dat moet betekenen dat hij in 2 delen gemaakt word anders zou het bovenaan smal beginnen en krijg je de v-gedeeltes er niet in. Maar als hij in 2 gedeeltes moet, waarom moet ik dan wel die middenbaan breien en die 4cm kantbanen aan beide kanten? En waarom staat er dan niet dat hij uit 2 gedeeltes bestaat? Of kijk ik er nu zo raar tegen aan en zie ik het fout?
31.01.2014 - 11:41DROPS Design answered:
Hoi Ingrid. De beschrijving is correct. De sjaal wordt van boven naar beneden gebreid. Door de meerderingen aan de zijkanten en in het midden wordt de driehoek gevormd.
04.02.2014 - 15:02
![]() Marguerite wrote:
Marguerite wrote:
Merci j'ai réussi à faire le 3e rang pour le rang 4 dites-moi si je suis correct je débute avec 4m end, 1m end, 1m end, et je débute avec le diagramme 2m end, 1m env, 1m env,2m end,1m env et je répète M.1B....et je termine par 1m end,1m end, 4m end. c'est la 6e maille du début est-ce à l'envers ou à l'endroit???
17.12.2013 - 18:28DROPS Design answered:
Bonjour Marguerite, c'est bien ça, au rang 4, vous commencez par 4 m end (bordure), 1 m end (jeté rang 3), 1 m end (augm rang 1), puis M.1C (le "-" = 1 m end sur l'env, soit 2 m end, 2 m env, etc. et vous terminez par 1 m end (augm rang 1), 1 m end (jeté rang 3) et 4 m end. Bon tricot!
18.12.2013 - 09:24Marguerite wrote:
Bonjour sur le rang 3 je pars avec 50mailles je commence avec 4 m end, 1 jeté, 1 m end mais lorsque j'arrive à la fin juste avant les 2 mailles centrale il me reste 3 mailles et après ce sont les 2m centrale j'aimerais savoir c'est quoi mon erreur.merci de votre compréhension
16.12.2013 - 23:09DROPS Design answered:
Bonjour Marguerite, je vous recommande de placer un marqueur entre chaque motif pour bien repérer où il va commencer et se terminer à chaque rang. Vous pouvez en mettre 1 avant M.1A et 1 après M.1C ou à chaque répétition. Bon tricot!
17.12.2013 - 08:54
![]() Marguerite wrote:
Marguerite wrote:
Alors si je comprends bien ...ce qui veux dire que la deuxième maille du début du rang 3 (1 maille envers) et l'avant dernière maille à la fin du M1C ( 1 maille envers ) on ne les fait pas...?
16.12.2013 - 14:22DROPS Design answered:
Bonjour Marguerite, toutes les mailles du diagramme doivent être tricotées, sur 50 m (3ème rang de M1), vous aurez : 4 m end, 1 jeté, 1 m end, [3 m de M1A, 12 m de M1B (=4xM1B),3 m de M1C], 1 m end, 1 jeté, 2 m end, 1 jeté, 1 m end, répétez de [à], 1 m end, 1 jeté, 4 m end (=54m). Bon tricot!
17.12.2013 - 08:48Marguerite wrote:
Bonjour j'ai fait le rang 3 en partant avec 50 mailles et je n'arrive pas à le faire pourrais-je avoir des explications s.v.p à trois on a pas réussi... merci à vous
15.12.2013 - 20:40DROPS Design answered:
Bonjour Marguerite, au rang 3 de M1, la dernière m de M1A se tricote avec la 1ère m de M1B, et la dernière m de M1B se tricote soit avec la 1ère m du M1B suivant soit avec la 1ère m de M1C (petite torsade). Veillez à bien aligner les mailles du point fantaisie les unes au-dessus des autres (au rang 3, vous avez au début 4 m end, 1 jeté, 1 m end avant de commencer M1A). Bon tricot!
16.12.2013 - 09:20
![]() Marguerite wrote:
Marguerite wrote:
Les augmentations en début et fin du rang dois-je les tricoter à l'endroit sur côté endroit et envers sur côté envers. encore une fois merci..! Marguerite
13.12.2013 - 20:05DROPS Design answered:
Bonjour Marguerite, les augmentations au début et à la fin du rang se tricotent au point mousse = à l'end sur l'end et sur l'env. Bon tricot!
13.12.2013 - 21:31Lise wrote:
Bonjour ! Je suis en train de tricoter ce châle, mais je rencontre des difficultés avec le diagramme. J'ai fait le 1er rang et le deuxième : tout va bien. Mais le rang suivant donc le 3e dois-je le tricoter tout d'un trait et le répéter??? merci de me répondre Lise
09.12.2013 - 23:34DROPS Design answered:
Bonjour Lise, effectivement la dernière m de M.1A va se tricoter avec la 1ère m de M.1B et la dernière m de M.1B va se tricoter soit avec la 1ère m du rapport M1B suivant (quand on répète M1B) soit avec la 1ère m de M1C (quand on arrive à la fin du motif). Bon tricot!
10.12.2013 - 09:14
|
|||||||||||||||||||||||||
Trellis Shawl#trellisshawl |
|||||||||||||||||||||||||
|
|
|||||||||||||||||||||||||
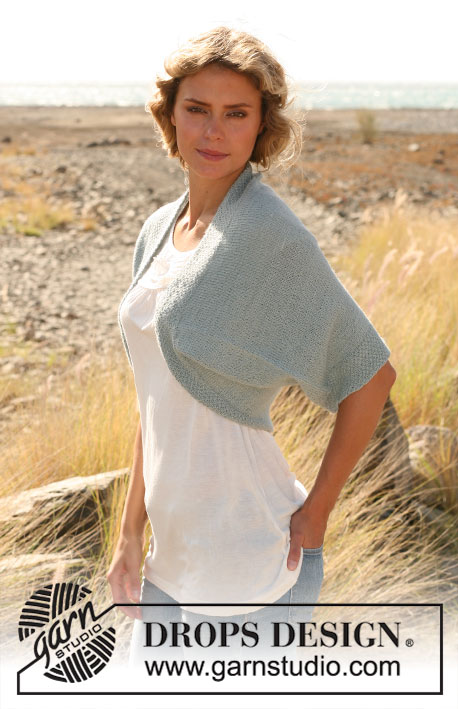
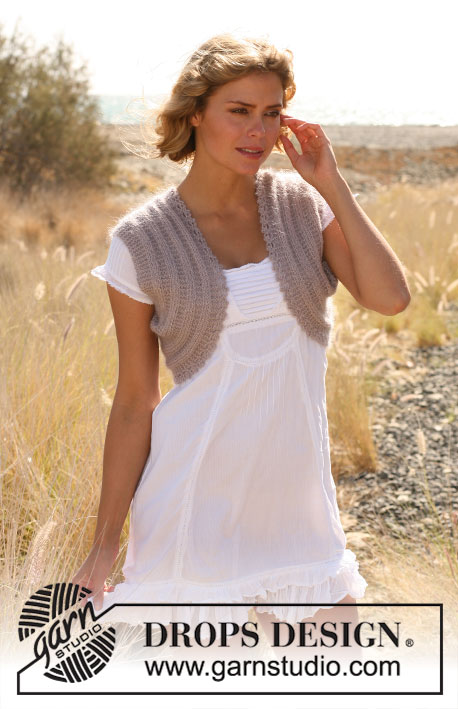
Knitted DROPS shawl with pattern in ”Alpaca” and ”Kid-Silk”.
DROPS 129-37 |
|||||||||||||||||||||||||
|
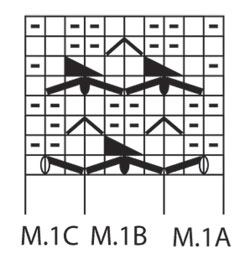
GARTER ST (back and forth on needle): K all rows. INCREASE TIP: All inc are done from RS. Inc 4 sts on every other row until finished measurements as follows: Inc 1 st at beg of row as follows: 4 edge sts in garter st, 1 YO. Inc 2 sts in the mid of piece as follows: 1 YO, 2 mid sts in stocking st, 1 YO. Inc 1 st at the end of row as follows (start when 4 sts remain): 1 YO, 4 edge sts in garter st. MEASURING TIP: All measurements are done along the middle of the shawl. PATTERN: See diagram M.1. The diagram shows the pattern from RS. PATTERN TIP: Until there are 4 sts inc to complete a full new repeat in M.1 B, these new inc sts are K on every row. --------------------------------------------------------- SHAWL: Worked back and forth, top down on circular needle. Cast on 4 sts on circular needle size 5 mm with 1 thread Alpaca and 1 thread Kid-Silk. K 1 row from WS. Work the next 12 rows as follows: 1st row (RS): K 1, 1 YO, K 2 (= mid sts), 1 YO, K 1 = 6 sts. 2nd, 4th, 6th, 8th, 10th and 12th row (WS): K all sts but P the 2 mid sts. 3rd row: K 2, 1 YO, K 2 (= mid sts), 1 YO, K 2. 5th row: K 3, 1 YO, K 2 (= mid sts), 1 YO, K 3. 7th row: K 4, 1 YO, K 2 (= mid sts), 1 YO, K 4. 9th row: K 5, 1 YO, K 2 (= mid sts), 1 YO, K 5. 11th row: K 4 (= edge sts), 1 YO, K 2, 1 YO, K 2 (= mid sts), 1 YO, K 2, 1 YO, K 4 (edge sts). Then work in GARTER ST - see explanation above - over all sts but work the 2 mid sts in stocking st. AT THE SAME TIME inc 4 sts on every row from RS - read INCREASE TIP. Work until there are 18 sts in each side between the 4 edge sts in garter st and the 2 mid sts = a total of 46 sts. The piece now measures approx. 8 cm - read MEASURING TIP. Then work PATTERN on next row from RS: 4 edge sts in garter st, 1 YO, M.1A (= 3 sts), repeat M.1B until 3 sts remain before the 2 mid sts, M.1C (= 3 sts), 1 YO, K 2, 1 YO, M.1A, repeat M.1B until 3 sts remain before the 4 edge sts in garter st, M.1C, 1 YO, 4 edge sts in garter st - read PATTERN TIP. Continue like this until piece measures approx. 22 cm. Now work in stocking st with 4 edge sts in garter st in the sides and inc as before until there are 94 sts in each side between the 4 edge sts in garter st and the 2 mid sts = a total of 198 sts. The piece measures approx. 42 cm. Then work from RS as follows: 4 edge sts in garter st, 1 YO, M.1A, repeat M.1B until 3 sts remain before the 2 mid sts, M.1C, 1 YO, K 2, 1 YO, M.1A, repeat M.1B until 3 sts remain before the 4 edge sts in garter st, M.1C, 1 YO, 4 edge sts in garter st. When piece measures approx. 57 cm, work in garter st over all sts with 4 inc as before and the 2 mid sts in stocking st. Cast off after approx. 18 rows in garter st (9 ridges) or when piece measures 65 cm. |
|||||||||||||||||||||||||
Diagram explanations |
|||||||||||||||||||||||||
|
|||||||||||||||||||||||||
 |
|||||||||||||||||||||||||
Have you finished this pattern?Tag your pictures with #dropspattern #trellisshawl or submit them to the #dropsfan gallery. Do you need help with this pattern?You'll find 14 tutorial videos, a Comments/Questions area and more by visiting the pattern on garnstudio.com. © 1982-2026 DROPS Design A/S. We reserve all rights. This document, including all its sub-sections, has copyrights. Read more about what you can do with our patterns at the bottom of each pattern on our site. |
|||||||||||||||||||||||||


With over 40 years in knitting and crochet design, DROPS Design offers one of the most extensive collections of free patterns on the internet - translated to 17 languages. As of today we count 324 catalogues and 12252 patterns translated into English (UK/cm). 12252
We work hard to bring you the best knitting and crochet have to offer, inspiration and advice as well as great quality yarns at incredible prices! Would you like to use our patterns for other than personal use? You can read what you are allowed to do in the Copyright text at the bottom of all our patterns. Happy crafting!
Post a comment to pattern DROPS 129-37
We would love to hear what you have to say about this pattern!
If you want to leave a question, please make sure you select the correct category in the form below, to speed up the answering process. Required fields are marked *.