
Popular categories
Looking for a yarn?


Comments / Questions (28)
![]() Jennifer wrote:
Jennifer wrote:
Diagrammet saknas. Kan ni fixa det?
17.09.2022 - 20:44DROPS Design answered:
Hei Jennifer. Diagram A.1 til denne genseren finner du ved siden av målskissen. Om du ikke finner det, mulig du da har noen problemer med nedlastningen på ditt nettverk. Alt vises her slik det skal. mvh DROPS Design
19.09.2022 - 13:10
![]() Bella wrote:
Bella wrote:
Hej. Jeg har nu øget raglan maskerne (str m) 24 gange, dog går mønsteret fortsat ikke op. Skal jeg fortsætte med to glatmasker rundt om maskemarkørerne og tilpasse A1, indtil der deles op i ærmer og forstykke/bagstykke? Eller er det meningen, at man udelukkende strikker A1 efter forøgningerne uden at fortsætte raglan mønsteret?
15.06.2022 - 19:03DROPS Design answered:
Hej Bella, mønsteret vil ikke gå op, du fortsætter med 2 glatstrikkede masker i hver side. God fornøjelse!
21.06.2022 - 14:22
![]() Bella wrote:
Bella wrote:
Jeg er lidt i tvivl omkring raglanudtagningerne ift. mønsteret. Strikker man ret, slå om og herefter mønster A1 (ret, vrang, vrang, ret) og så en retmaske ved masken før markøren?
16.05.2022 - 10:37DROPS Design answered:
Hei Bella. Det kommer an på hvor du er i mønstret når det økes. På omgangen der det økes til raglan blir det et kast på hver side av de 2 glattstrikkete maskene som danner en raglanslinjene. På neste omgang strikkes disse kastene vridd rett (for ikke å lage hull). På neste omgang strikkes den økte masken inn i diagrammet, men før man får økt nok masker til at det stemmer med en hel rapport av A.1 vil det avvike litt. mvh DROPS Design
16.05.2022 - 13:00
![]() Janis Goodall wrote:
Janis Goodall wrote:
The diagram for the knitting stitch is missing.
06.05.2022 - 12:04
![]() Kathrine Larsen wrote:
Kathrine Larsen wrote:
Er lige gået fra halskanten og skal nu strikke diagrammet. Kan se på diagrammet at jeg på seks omgange skal strikke 6 omgange ret og derefter skal der komme 2 omgange vrang. Men når jeg strikker, fortsætter det med ret, hele vejen ned. Har prøvet at strikke diagrammet to gang - altså 8 x2 omgange. Jeg tager ud med raglan som det står beskrevet. Hveranden omgang slå om p, og derefter drejet ret, og så strikke masken med ind i diagrammet. Hvad gør jeg forkert? Håber I kan hjælpe :)
03.03.2022 - 13:58DROPS Design answered:
Hej Kathrine, det lyder til at du læser diagrammet forkert. Du starter nederst i diagrammet, strikker første og anden omgang: 1ret,2vr,1ret, 1ret,2vr,1ret osv, tredje og fjerde omgang strikker du ret, femte og sjette omgang strikker du, 1vr,2ret,1vr, 1vr, 2ret,1vr osv og så de sidste 2 omgange i diagrammet strikkes ret. Disse 8 pinde gentages i højden. God fornøjelse!
09.03.2022 - 09:41
![]() Caroline wrote:
Caroline wrote:
Hvilken overvidde tilsvarer disse størrelsene?
20.09.2021 - 01:16DROPS Design answered:
Hei Caroline, Du finner en målskisse på bunnen av oppskriften med alle mål til de forskjellige størrelsene. God fornøyelse!
20.09.2021 - 12:56
![]() Stella wrote:
Stella wrote:
Flot sweater, som jeg utroligt gerne vil strikke i den nye tweedkvalitet + en anden tråd. Har I et forslag?
04.09.2021 - 14:51DROPS Design answered:
Hei Stella. Foreløpig har vi ikke en kvalitet du kan strikke sammen med Soft-Tweed som vil få den oppgitte strikkefastheten i denne oppskriften. mvh DROPS design
06.09.2021 - 14:33
![]() Carina wrote:
Carina wrote:
Hola, Muchas gracias por los patrones! Me gustaría saber qué significa el dibujo del diamante en la foto antes de entrar al patrón. Gracias
02.06.2021 - 10:05DROPS Design answered:
Hola Carina, no se como se dice en espanol, pero en inglese is 'featured patterns'. Buen trabajo!
02.06.2021 - 10:25
|
|||||||
Lightkeeper#lightkeepersweater |
|||||||
 |
 |
||||||
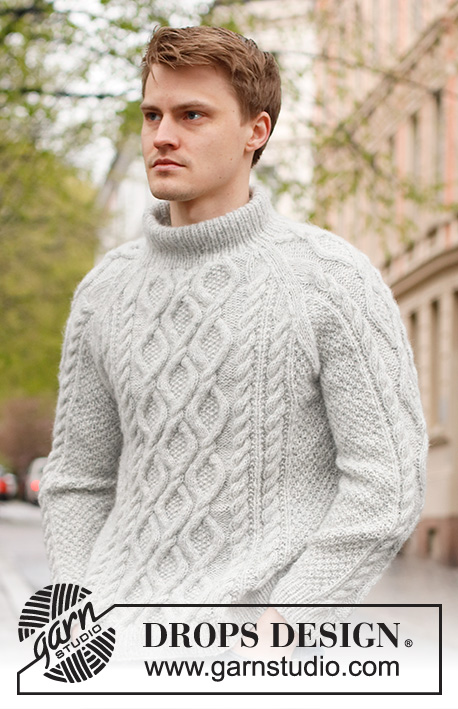
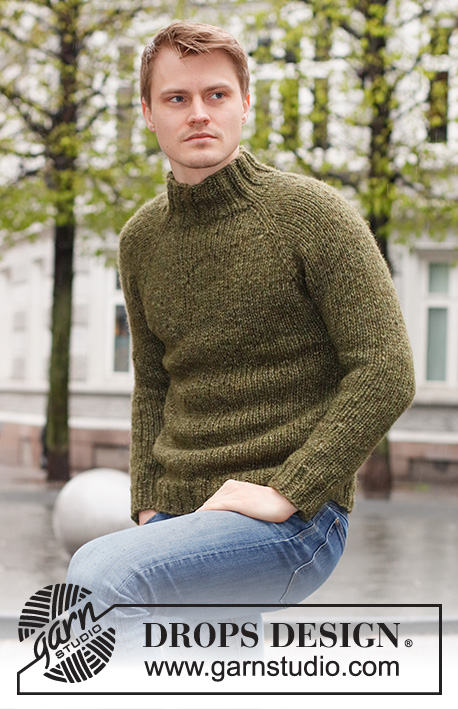
Knitted jumper for men in DROPS Air. The piece is worked top down, with raglan and textured pattern. Sizes S - XXXL.
DROPS 224-2 |
|||||||
|
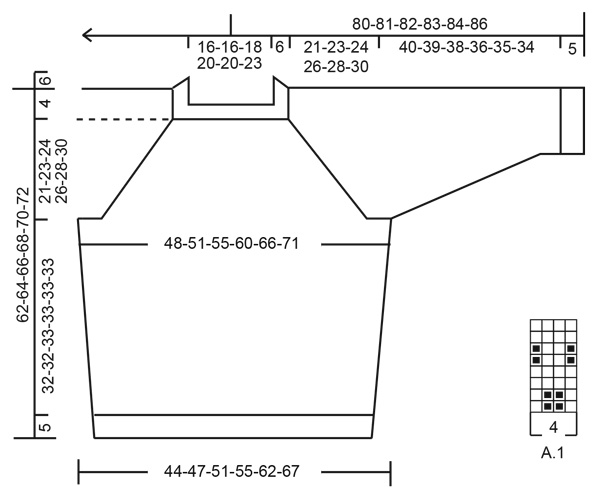
------------------------------------------------------- EXPLANATIONS FOR THE PATTERN: ------------------------------------------------------- PATTERN: See diagram A.1. RAGLAN: Increase to raglan on each side of the 2 stocking stitches at each marker as follows: Work 1 stitch past the marker, 1 yarn over. Work until there is 1 stitch left before the next marker, 1 yarn over. The increased stitches are knitted twisted on the next round, then subsequently worked into the pattern. DECREASE TIP: Decrease 1 stitch on each side of the marker as follows: Work until there are 3 stitches left before the marker, knit 2 together, knit 2 (marker thread sits between these 2 stitches), slip 1 stitch as if to knit, knit 1 and pass the slipped stitch over the knitted stitch. CASTING-OFF TIP: To avoid the cast-off edge being tight you can cast off with a larger size needle. If the edge is still tight, make 1 yarn over after approx. each 4th stitch at the same time as casting off; the yarn overs are cast off as normal stitches. ------------------------------------------------------- START THE PIECE HERE: ------------------------------------------------------- JUMPER – SHORT OVERVIEW OF THE PIECE: The neck and yoke are worked in the round with circular needle top down. The yoke is divided for body and sleeves and the body is continued in the round with circular needle. The sleeves are worked with double pointed needles/short circular needle. NECK: Cast on 80-80-88-96-96-104 stitches with circular needle size 4.5 mm and Air. Work rib in the round (knit 2, purl 2) for 12 cm (the neck is later folded double and sewn down to the wrong side). Knit 1 round. YOKE: Change to circular needle size 5 mm and insert a marker on this round, to be used when measuring the yoke. Insert 4 other markers, AT THE SAME TIME as you work, as follows: Insert 1 marker at the beginning of the round, work 1 stitch in stocking stitch, A.1 over 12 stitches (= sleeve), work 2 stitches in stocking stitch and insert 1 marker between these 2 stitches, A.1 over 24-24-28-32-32-36 stitches (= front piece), work 2 stitches in stocking stitch and insert 1 marker between these 2 stitches, A.1 over 12 stitches, work 2 stitches in stocking stitch and insert 1 marker between these 2 stitches and A.1 over 24-24-28-32-32-36 stitches (= back piece), work 1 stitch in stocking stitch. READ THE NEXT SECTION BEFORE CONTINUING! On the next round start to increase to RAGLAN – read description above and continue with A.1. REMEMBER THE KNITTING TENSION! Continue the pattern and increase to raglan every 2nd round a total of 21-24-26-28-31-33 times = 248-272-296-320-344-368 stitches. Continue the pattern without further increases until the piece measures 21-23-24-26-28-30 cm from the marker on the neck. Now divide the yoke for the body and sleeves as follows (the start of the round is the transition between back piece and sleeve): Work 4-3-2-2-4-4 stitches (= back piece), place the next 48-56-62-66-68-72 stitches on a thread (= sleeve), cast on 6-6-8-8-8-8 new stitches (= side under sleeve), work 76-80-86-94-104-112 stitches (= front piece), place the next 48-56-62-66-68-72 stitches on a thread (= sleeve), cast on 6-6-8-8-8-8 new stitches (= side under sleeve), work the last 72-77-84-92-100-108 stitches (= rest of back piece; a total of 76-80-86-94-104-112 stitches on the back piece). BODY: = 164-172-188-204-224-240 stitches. Insert 1 marker in the middle of the new stitches cast on in each side. Continue A.1 in the round; the pattern might not fit completely onto the round, the 2 stitches on each side of both markers are worked in stocking stitch and the other stitches are worked in pattern to fit with the front and back piece. When the piece measures 4 cm from the division, decrease 1 stitch on each side of both markers – read DECREASE TIP – continue the pattern on the front and back pieces and adjust the pattern in the sides as you decrease. Repeat the decrease every 6-8-8-8-8-6 cm a total of 4-3-4-4-3-4 times = 148-160-172-188-212-224 stitches. Continue working until the piece measures approx. 32-32-33-33-33-33 cm from the division (or to desired length; there is approx. 5 cm left to finished length) – adjust so you finish after 2 rounds of stocking stitch. Change to circular needle size 4.5 mm and work rib (knit 2, purl 2) for 5 cm. Loosely cast off with knit over knit and purl over purl. The piece measures approx. 62-64-66-68-70-72 cm from the shoulder down. SLEEVE: Place the 48-56-62-66-68-72 stitches from the thread on the one side of the piece on double pointed needles/short circular needle size 5 mm and knit up 1 stitch in each of the 6-6-8-8-8-8 stitches cast on under the sleeve = 54-62-70-74-76-80 stitches. Insert a marker in the middle of the 6-6-8-8-8-8 new stitches under the sleeve = beginning of round. Continue A.1 in the round; the pattern might not fit completely onto the round, the 2 stitches on each side of the marker are worked in stocking stitch and the other stitches are work in the pattern as before. When the sleeve measures 4 cm from the division, decrease 1 stitch on each side of the marker – remember DECREASE TIP. Repeat the decrease every 2-3-2-2-2-2 cm a total of 7-11-15-15-16-18 times = 40-40-40-44-44-44 stitches. Continue working until the sleeve measures approx. 40-39-38-36-35-34 cm from the division (or to desired length; there is approx. 5 cm left to finished length) – adjust so you finish after 2 rounds of stocking stitch. Change to double pointed needles size 4.5 mm and work rib (knit 2, purl 2) for 5 cm. Loosely cast off with knit over knit and purl over purl. Work the other sleeve in the same way. ASSEMBLY: Fold the neck double to the wrong side. Sew the cast-on edge to the neckline, with long, loose stitches from the wrong side (making sure the seam is invisible on the right side and that it is not tight). |
|||||||
Diagram explanations |
|||||||
|
|||||||
|
|||||||
Have you finished this pattern?Tag your pictures with #dropspattern #lightkeepersweater or submit them to the #dropsfan gallery. Do you need help with this pattern?You'll find 25 tutorial videos, a Comments/Questions area and more by visiting the pattern on garnstudio.com. © 1982-2025 DROPS Design A/S. We reserve all rights. This document, including all its sub-sections, has copyrights. Read more about what you can do with our patterns at the bottom of each pattern on our site. |
|||||||


With over 40 years in knitting and crochet design, DROPS Design offers one of the most extensive collections of free patterns on the internet - translated to 17 languages. As of today we count 314 catalogues and 11820 patterns translated into English (UK/cm). 11820
We work hard to bring you the best knitting and crochet have to offer, inspiration and advice as well as great quality yarns at incredible prices! Would you like to use our patterns for other than personal use? You can read what you are allowed to do in the Copyright text at the bottom of all our patterns. Happy crafting!
Post a comment to pattern DROPS 224-2
We would love to hear what you have to say about this pattern!
If you want to leave a question, please make sure you select the correct category in the form below, to speed up the answering process. Required fields are marked *.