
Beliebte Kategorien
Suchen Sie nach einem Garn?


Kommentare / Fragen (113)
![]() Amanda hat geschrieben:
Amanda hat geschrieben:
Once finished, do you use a button and buttonhole or sew the ends together? How do you finish? I don't see this included in the directions. Thanks.
21.12.2015 - 14:16DROPS Design hat geantwortet:
Dear Amanda, after you have cast off sts, sew cast-off edge to cast-on edge. Happy knitting!
22.12.2015 - 10:10Heather hat geschrieben:
Can you tell me the width of this headband, thanks
25.11.2015 - 16:51DROPS Design hat geantwortet:
Dear Heather, you can estimate the width from picture - and adjust when working the headband increasing more or less sts as you rather like. Happy knitting!
26.11.2015 - 09:25
![]() Anna Rita hat geschrieben:
Anna Rita hat geschrieben:
Buona sera, se gli aumenti vanno fatti sul dritto del lavoro e si fa un aumento a rovescio in tutti i gruppi di m lavorate a rov. ,dove trovo i gruppi di 2 maglie lavorate a rovescio per esempio quando sono a 8 cm. , visto che i ferri diritti dopo il vivagno si lavorano 2 diritti e 1 rovescio?
07.02.2015 - 22:54DROPS Design hat geantwortet:
Buongiorno Anna Rita. Quando ha ancora le coste 2 m dir, 1 m rov, aumenta prima o dopo la m rov; così avrà coste 2 m dir, 2 m rov. Continuando gli aumenti, le coste diventeranno: 2 m dir, 3 m rov; 2 m dir, 4 m rov e infine, dopo l'ultimo aumento 2 m dir, 5 m rov. Buon lavoro!
08.02.2015 - 08:36
![]() Lisa hat geschrieben:
Lisa hat geschrieben:
Hello! I know how to increase, but I'm confused about what to do at the 14cm increase. The previous row has 24 sts, and the next increase only has the row going to 29. So, 4 stitches. I just don't get this "inc all p2 to p3". Help! WHAT p2? This is probably easy, but I'm just not seeing it, thanks!
19.01.2015 - 04:48DROPS Design hat geantwortet:
Dear Lisa, the inc will be done in the purl sections, ie you have now P2 in each P section, you inc 1 st by P2 sts into 1 P st in each P section => you get P3 in each section. Happy knitting!
19.01.2015 - 14:13
![]() Delphine hat geschrieben:
Delphine hat geschrieben:
Bonjour, serait il possible de connaitre la taille du tour de tête en centimètre (circonférence). Car je souhaiterais le faire pour une personne qui a un tour de tête plus grand que la normale (sup à 56-58 cm). Merci
29.12.2014 - 09:43DROPS Design hat geantwortet:
Bonjour Delphine, vous pouvez ajuster la hauteur totale, en tricotant quelques cm de moins que le tour de tête pour que le bandeau reste bien en place (il doit être plus serré que la dimension "finale"). Bon tricot!
30.12.2014 - 14:06
![]() Birgit hat geschrieben:
Birgit hat geschrieben:
Ein ganz tolles Stirnband, sieht gut aus uns passt perfekt. Werde es nochmal Stricken:-)
14.11.2014 - 06:32
![]() Iris hat geschrieben:
Iris hat geschrieben:
Gibt es eine Videoanleitung dazu, wie man die Maschen auf eine Hilfsnadel legt und von dort mit dem Anschlagrand zusammennäht? Ich kann mir das leider gar nicht vorstellen :-(
12.09.2014 - 19:40DROPS Design hat geantwortet:
Liebe Iris, genau dazu gibt es kein Video, aber vielleicht hilft Ihnen das Video unter "Tipps & Hilfe" => "Technikvideos" => "fertigstellen" und dort "Fertigstellen: Maschenstich" weiter. Damit können Sie sehen, wie die stillgelegten M in die Naht eingearbeitet werden.
20.09.2014 - 10:24
![]() Riseon hat geschrieben:
Riseon hat geschrieben:
Hello...
30.06.2014 - 19:01
![]() Sipkjepost hat geschrieben:
Sipkjepost hat geschrieben:
Ik kom bij de telling met 19 st zoals beschreven alleen uit als ik brei: 1r *1 av en 2 r* 5 maal (ipv *2r 1 av*)en eindig dan wel met 2 r, en 6 ribbels gebreid.
17.03.2014 - 10:04DROPS Design hat geantwortet:
Hoi Sikjepost. Als je breit zoals in het patroon staat, dan heb je met de 19 st 1 ribbel + 2 r aan beide kanten en 4 x 2 r steken met av tussen in het midden. En dat is ook het correcte volgens de foto.
17.03.2014 - 14:35
![]() Alma hat geschrieben:
Alma hat geschrieben:
I'm new to knitting. This will be my first project. I did rows 1 and 2, but I'm lost for other. rows. Do I continue with rows 1 and 2 until I reach 3"? Also what does "start at center back" mean? Thank you
11.01.2014 - 01:21DROPS Design hat geantwortet:
Dear Alma, you are correct, repeat rows 1 and 2 until you reach 3" then inc as stated. Start at center back means first row from RS start on the left side of head when worn, ie end of rows from RS = towards face. Happy knitting!
11.01.2014 - 10:10
|
|
Saturn Rings |
|
|
|
|
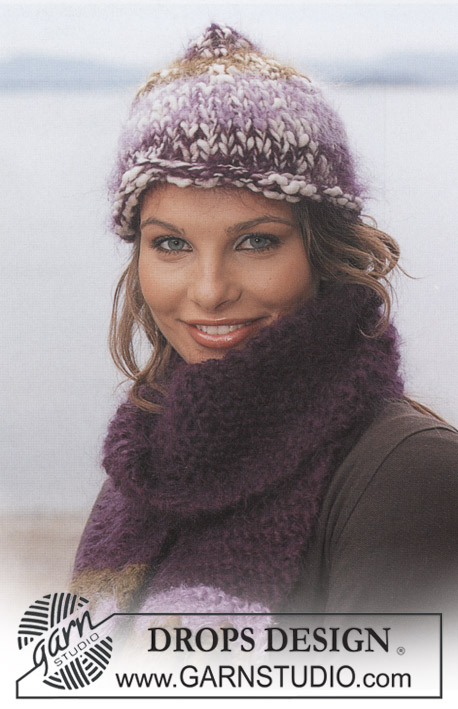
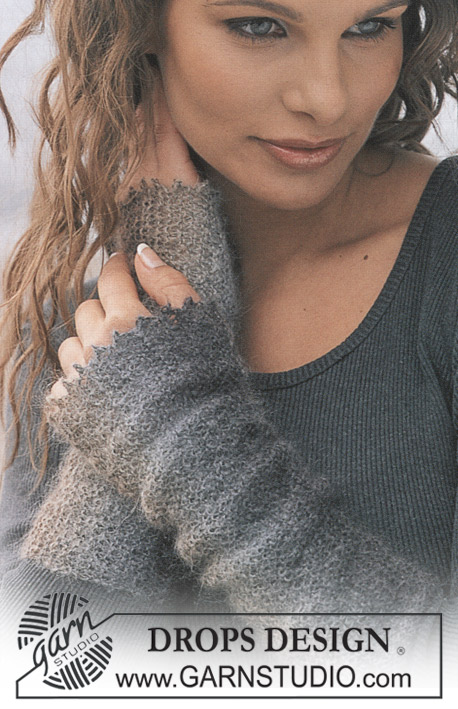
Gestricktes Stirnband in DROPS Alaska
DROPS 86-10 |
|
|
KRAUS RECHTS (in Hin- und Rück-R): Jede R re str. -------------------------------------------------------- STIRNBAND: In der Mitte hinten anfangen und mit Alaska auf Ndl. Nr. 4,5 19 M anschlagen. Die nächste R. in dieser Weise stricken: 1 M KRAUS RECHTS (siehe oben), * 2 M re, 1 M li *, von *-* insgesamt 5 Mal arbeiten und mit 2 M re und 1 M kraus rechts enden. Wenn die Arb. 8 cm misst, bei jeder Linksrippe 1 M zunehmen, sodass aus 1 M li 2 M li werden = 24 M auf der Ndl. Wenn die Arb. 14 cm misst, wieder in jeder Linksrippe 1 M zunehmen, sodass aus 2 M li 3 M li werden = 29 M auf der Ndl. Wenn die Arb.18 cm misst, wieder in jeder Linksrippe 1 M zunehmen, sodass aus 3 M li 4 M li werden = 34 M auf der Ndl. Wenn die Arb. 21 cm misst, wieder in jeder Linksrippe 1 M zunehmen, sodass aus 4 M li 5 M li werden = 39 M auf der Ndl. Wenn die Arb. 24 cm misst, einen Markierungsfaden anbringen = die Mitte oben. Von hier wird die Arb. gegengleich gestrickt - d.h. es werden die M abgenommen, die vorher zugenommen wurden. Dies wird gemacht, bis 19 M auf der Ndl. übrig sind. Wenn die Arb. 48 cm misst, die M auf einen Hilfsfaden legen. Die M vom Hilfsfaden mit dem Anschlagrand zusammennähen, dabei die Naht Masche an Masche arb, damit die Naht elastisch wird. |
|
Haben Sie diese Anleitung nachgearbeitet?Dann taggen Sie Ihre Fotos mit #dropspattern oder schicken Sie sie an die #dropsfan Galerie Brauchen Sie Hilfe bei dieser Anleitung?Sie finden 16 Videotutorials, einen Kommentar/Fragen-Bereich und vieles mehr, wenn sie die Anleitung bei garnstudio.com aufrufen. © 1982-2026 DROPS Design A/S. Wir besitzen alle Rechte. Dieses Dokument, einschließlich aller Untersektionen, hat Urheberrechte. Mehr dazu, was Sie mit unseren Anleitungen machen können, finden Sie ganz unten auf der Seite zu jeder Anleitung. |


Mit über 40 Jahren Tätigkeit im Entwerfen von Strick- und Häkelmustern bietet Ihnen DROPS Design eine der umfangreichsten Sammlungen von kostenlosen Anleitungen im Internet - in 17 Sprachen übersetzt. Zum jetzigen Zeitpunkt haben wir insgesamt 324 Handarbeitshefte und 12290 Anleitungen auf Deutsch. 12202
Unser Ziel ist es, Ihnen die besten Angebote zum Stricken und Häkeln, Inspirationen und Ratschläge sowie qualitativ hochstehende Garne zu unglaublichen Preisen zu bieten! Möchten Sie unsere Anleitungen nicht nur für den persönlichen Gebrauch nutzen? Unsere Copyright Bedingungen finden Sie bei allen unseren Anleitungen ganz unten auf der jeweiligen Seite. Viel Spaß beim Handarbeiten!
Kommentieren Sie die Anleitung DROPS 86-10
Wir würden gerne Ihre Meinung zu diesem Modell erfahren!
Wenn Sie eine Frage stellen möchten, prüfen Sie bitte, dass Sie die richtige Kategorie im unten stehenden Formular gewählt haben - so bekommen Sie schneller eine Antwort. Die obligatorischen Felder sind mit einem * gekennzeichnet.