
Popular categories
Looking for a yarn?


Comments / Questions (12)
![]() ELIZABETH wrote:
ELIZABETH wrote:
Hi, Greetings from Australia. I am viewing Garnstudio Foggy Morning on your website and want to download the pattern, but print seens to be the only option. I can't see download on the page, Thank you, Elizabeth.
27.05.2024 - 04:59DROPS Design answered:
Hi Elizabeth, If you right click on the pattern, the drop-down list gives you the option of saving the pattern to your computer. Happy crafting!
27.05.2024 - 06:39
![]() Claudia wrote:
Claudia wrote:
Liebes Drops Team, kann man auch die Ärmel vom Bündchen her anfangen zu stricken? MfG
05.12.2023 - 18:11DROPS Design answered:
Liebe Claudia, ja sicher, aber am besten stricken Sie sie von oben nach unten, so können Sie die Länge besser anpassen. Viel Spaß beim stricken!
06.12.2023 - 08:09
![]() Petra Güldner wrote:
Petra Güldner wrote:
Ich suche meine gespeicherten Pullover ,und andere Anleitungen.
16.01.2019 - 19:21DROPS Design answered:
Liebe Frau Güldner, die Favoriten wurden wegen technischen Gründen abgeschaltet aber sie kommen bald zurück. Danke fûr Ihr Verständnis.
17.01.2019 - 09:10
![]() Janie Vestli wrote:
Janie Vestli wrote:
Det står man kan bruke c+c, noen forslag? Hvor mye garn må man regne med i str S? ☺
03.03.2018 - 14:23DROPS Design answered:
Hei Janie. Ja, du kan bruke 2 tråder fra garngruppe C. Ta en titt over våre garn som tilhører garngruppe C. Deretter kan du bruke vår garn konverter som du finner til høyer/eller under bildet på den modellen du ønsker å strikke. Les informasjonen og gjør dine valg i vinduet som kommer opp. God Fornøyelse!
07.03.2018 - 08:22
![]() Bella wrote:
Bella wrote:
Hej! Om man gör denna i garngrupp E, hur mycket garn behöver man?
17.11.2017 - 16:37DROPS Design answered:
Hei Bella. Det kommer an på hvilken størrelse du skal strikke. Her er en link hvordan du selv kan regne ut garnmengde: Omregn garnmengde fra en kvalitet til en annen. God Fornøyelse!
27.11.2017 - 08:24
![]() Therese Öberg wrote:
Therese Öberg wrote:
Hej! Om jag vill sticka denna i endast en tråd, vilket garn skulle isf passa?
22.09.2017 - 11:16DROPS Design answered:
Hej, Då skall du välja DROPS Eskimo eller DROPS Andes som tillhör garngrupp E. 22.09.2017 - 11:25
![]() Sara wrote:
Sara wrote:
Efter första aviga varvet står att man ska sticka resår (2rm/2am) med två räta maskor i början och slutet på varvet. Sen står "fortsätt så" i 8 cm. Fortsätt hur?? Med två kantmaskor i rätstickning eller med aviga maskor över aviga även i kanterna? Tack på förhand.
25.07.2017 - 23:10DROPS Design answered:
Hej! Här menas att du ska sticka dessa två maskor i rätstickning på varje varv, dvs. maskorna stickas räta på varje varv.
26.07.2017 - 14:12
![]() Alex wrote:
Alex wrote:
Ich würde das Modell (Gr.S) gerne in Rauchblau stricken, welche Farben bestelle ich dann am besten?
22.07.2017 - 10:06DROPS Design answered:
Liebe Alex, für irgendeine persönnliche Hilfe um die Farbe zu wählen, wenden Sie sich bitte gern an Ihrem DROPS Laden. Viel Spaß beim stricken!
24.07.2017 - 09:03
![]() Alexandra Winter wrote:
Alexandra Winter wrote:
Hallo, wie ist die Beschaffenheit des Garnes, bin sehr empfindlich, wenn es auch nur minimal am Hals kratzt.
21.07.2017 - 21:53DROPS Design answered:
Liebe Frau Winter, am besten besprechen Sie mit Ihrem DROPS Laden, sie werden Ihnen ganz gerne hilfen, auch telefonish oder per mail. Viel Spaß beim stricken!
24.07.2017 - 08:59
![]() Mona wrote:
Mona wrote:
Hallo Liebes Drops Team. Würde gerne den Pullover nacharbeiten. Statt 4x Garnstärke A brauche ich dann nur 2x Garnstärke E? hab ich das so Richtig verstanden? Gruß Mona
17.07.2017 - 10:44DROPS Design answered:
Liebe Mona, ja genau, vergessen Sie aber nicht, daß Garne mit unterschiedlichen Strukturen auch unterschiedlich aussehen. Hier können Sie mehr lesen. Viel Spaß beim stricken!
17.07.2017 - 12:13
|
||||
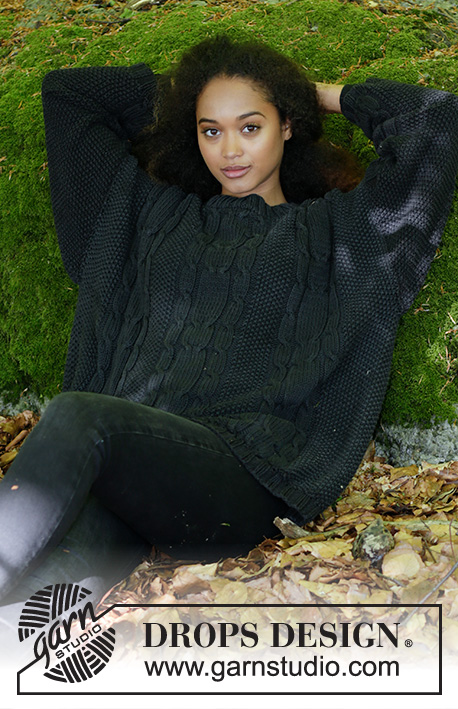
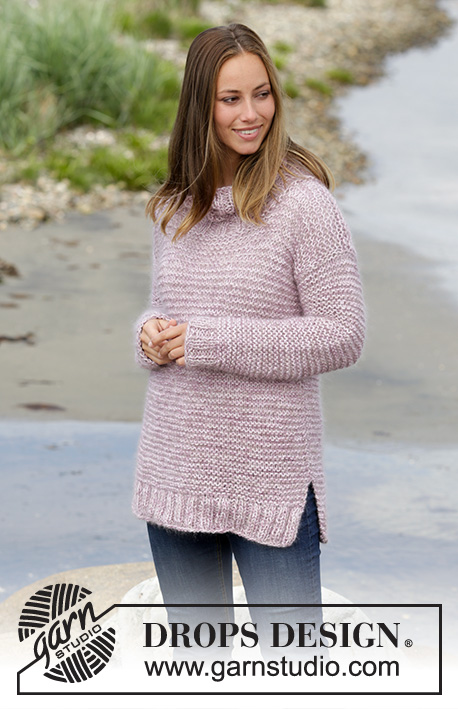
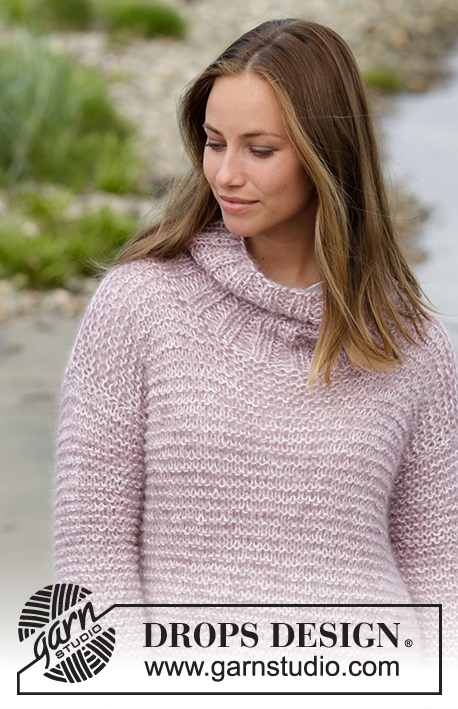
Foggy Morning#foggymorningsweater |
||||
 |
 |
|||
Knitted jumper in garter stitch and rib. Size: S - XXXL Piece is worked in DROPS BabyAlpaca Silk and DROPS Kid-Silk.
DROPS 179-19 |
||||
|
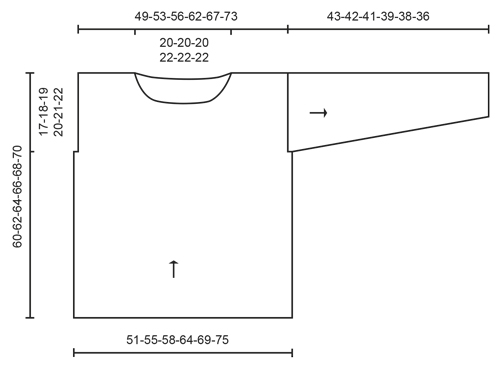
INFORMATION FOR PATTERN: GARTER STITCH (back and forth): 1 ridge = knit 2 rows. MEASURING TIP: Because of the weight of the yarn the part in garter stitch will be longer when worn. Length measurements on chart are shorter than the finished garment when worn. Measure the pieces flat. ---------------------------------------------------------- Worked back and forth on circular needle and sewn together when finished. Stitches for sleeves are picked up in armhole on body and sleeves are worked top down. BACK PIECE: Work piece back and forth on circular needle. Cast on 66-70-78-86-94-98 stitches on circular needle size 8 mm with 1 strand of each colour (= 4 strands). Purl 1 row from wrong side, then work as follows from right side: 2 stitches in GARTER STITCH - see explanation above - * knit 2/purl 2 *, repeat from *-* until 4 stitches remain on needle, knit 2 and 2 stitches in garter stitch. Continue like this until piece measures 8 cm - READ MEASURING TIP! Knit 1 row over all stitches while decreasing 10-10-14-16-18-16 stitches evenly = 56-60-64-70-76-82 stitches. Continue in garter stitch over all stitches. REMEMBER THE KNITTING TENSION! When piece measures 43-44-45-46-47-48 cm, cast off 1 stitch in each side for armholes = 54-58-62-68-74-80 stitches. When piece measures 58-60-62-64-66-68 cm, cast off the middle 20-20-20-22-22-22 stitches for neck and finish each shoulder separately. Then decrease 1 stitch on next row from neck =16-18-20-22-25-28 stitches for shoulder. Cast off when piece measures 60-62-64-66-68-70 cm. Work the other shoulder the same way. FRONT PIECE: Cast on and work the same way as back piece until piece measures 52-54-56-58-60-62 cm = 54-58-62-68-74-80 stitches on needle. Now slip the middle 14-14-14-16-16-16 stitches on a stitch holder for neck and finish each shoulder separately. Then cast off for neck on every row from neck as follows: Cast off 2 stitches 1 time and 1 stitch 2 times = 16-18-20-22-25-28 stitches remain for shoulder. Cast off when piece measures 60-62-64-66-68-70 cm. Work the other shoulder the same way. ASSEMBLY: Sew the shoulder seams. LEFT SLEEVE: Pick up stitches along the armhole at the top of jumper and work sleeve back and forth on circular needle, top down. Begin where 1 stitch was cast off for armhole on front piece, and pick up 38-40-42-44-46-48 stitches from right side with 1 yarn of each colour ( = 4 strands) on circular needle size 8 mm. Pick up stitches along armhole on front piece and down along armhole on back piece where 1 stitch was cast off for armhole. Work in garter stitch back and forth. When piece measures 3 cm, decrease 1 stitch in each side of piece. Decrease every 5-5-4-4-3-3 cm 7-7-8-8-9-9 times in total = 24-26-26-28-28-30 stitches. Continue until piece measures 37-36-35-33-32-30 cm (shorter measurements in the larger sizes because of wider shoulders) - REMEMBER MEASURING TIP. Knit 1 row over all stitches while increasing 2-4-4-6-6-8 stitches evenly = 26-30-30-34-34-38 stitches. Continue in rib as follows: 1 edge stitch in garter stitch, * knit 2/purl 2 *, repeat from *-* until 1 stitch remain, work 1 edge stitch. When piece measures 43-42-41-39-38-36 cm (rib measures 6 cm), cast off by knitting. Work right sleeve the same way. ASSEMBLY - 2: Sew underarm seams and side seams in one until 12 cm remain at the bottom of body = vent. Repeat in the other side. NECK: Worked in the round on circular needle. Pick up approx. 72-84 stitches (including stitches on stitch holder) on a short circular needle size 8 mm. Work 1 ridge in GARTER STITCH – see explanation above, then work rib knit 2/purl 2. Continue rib until piece measures 20 cm, cast off with knit over knit and purl over purl. |
||||
Diagram explanations |
||||
|
||||
|
||||
Have you finished this pattern?Tag your pictures with #dropspattern #foggymorningsweater or submit them to the #dropsfan gallery. Do you need help with this pattern?You'll find 22 tutorial videos, a Comments/Questions area and more by visiting the pattern on garnstudio.com. © 1982-2025 DROPS Design A/S. We reserve all rights. This document, including all its sub-sections, has copyrights. Read more about what you can do with our patterns at the bottom of each pattern on our site. |
||||


With over 40 years in knitting and crochet design, DROPS Design offers one of the most extensive collections of free patterns on the internet - translated to 17 languages. As of today we count 314 catalogues and 11822 patterns translated into English (UK/cm).
We work hard to bring you the best knitting and crochet have to offer, inspiration and advice as well as great quality yarns at incredible prices! Would you like to use our patterns for other than personal use? You can read what you are allowed to do in the Copyright text at the bottom of all our patterns. Happy crafting!
Post a comment to pattern DROPS 179-19
We would love to hear what you have to say about this pattern!
If you want to leave a question, please make sure you select the correct category in the form below, to speed up the answering process. Required fields are marked *.