
Popular categories
Looking for a yarn?


Comments / Questions (21)
![]() Agnes Schwind wrote:
Agnes Schwind wrote:
J'essaie de crocheter la girafe. Jusque au tour 8 tout va bien, mais dans vos explications ,vous indiquez crocheter 1ms dans chaque ms du tour " sans joindre à la fin des tours", Comment peut-on aller aller du tour 8 , au tour ? ? et continuer à partir du milieu du haut du cou. j'ai essayé en aller retour mais cela me laisse une ouverture , Ensuite en rond, et je reste bloqué. MERCI de trouver le temps de me répondre.
26.04.2025 - 14:51DROPS Design answered:
Bonjour Mme Schwind, à la fin du 8ème tour, au lieu de tourner comme vous le faisiez avant, crochetez 1 ms dans la 1ère m du 8ème tour, autrement dit, du 8 au 20ème tour, vous crochetez simplement 1 ms dans chaque m pendant 13 tours; placez un marqueur entre la dernière m du tour et la 1ère m du tour suivant pour mieux repérer le début des tours (dans cette vidéo nous montrons comment crocheter des brides de cette façon, peut être que cette vidéo pourra vous aider. Bon crochet!
28.04.2025 - 07:57
![]() Caro wrote:
Caro wrote:
Liebes Drops Team, Ich verstehe die Anleitung leider ab der Reihe 8 nicht. Durch die Hin- und Rückrunden bis Reihe 7 habe eine Art Halbkreis. Wo werden die fM angesetzt und wenn die Runden nicht geschlossen werden sind dann wieder Hin- und Rückrunden gemeint? Vielen Dank für eure Hilfe.
11.07.2019 - 23:20DROPS Design answered:
Liebe Caro, Sie häkeln jetzt 1 fM in jedem fM (= 10 fM pro Runde), ohne die Runde mit 1 kM zu schliessen, am Ende der Runde, einfach 1 fM in das ersten fM der Runde häkeln, eine Markierung können Sie hier zwischen den letzten und ersten Maschen der Runde anbringen. Es wird ein Loch entstehen (= Reihen 3 bis 7) hier wird man später die Schnauze häkeln. Viel Spaß beim häkeln!
12.07.2019 - 08:39
![]() Anna wrote:
Anna wrote:
Hallo, ich verstehe nicht so ganz, wie man die Reihen 29-34 häkeln soll. Wohin sollen die Festmaschen gesetzt werden? Ich würde mich sehr über eine Erklärung freuen.
27.02.2019 - 20:42DROPS Design answered:
Liebe Anna, am Ende der Reihe 28,mit 1 Lm wenden, dann die nächste Festmasche überspringen und 1 Festmasche in jeder der nächsten 4 Maschen häkeln (= Reihe 29), mit 1 Luftmasche wenden, dann die nächste Masche überspringen, 1 Festmasche in jeder der nächsten 6 Maschen häkeln (= Reihe 30) und so weiter häkeln, bis Sie 14 Festmaschen gehäkelt haben. Nach 34. Reihe (= Rückreihe), wenden Sie mit 1 Luftmasche, dann wieder in Runden häkeln. Viel spaß beim häkeln!
28.02.2019 - 09:31
![]() Susana Rodríguez-Vida wrote:
Susana Rodríguez-Vida wrote:
Las instrucciones de las vueltas 8-20 del cuerpo no se entienden. Para que quede claro debería decir: "Trabajar en redondo los 10 p.b., pero sin hacer el p.bjs y la cadeneta de final de vuelta; como se trabajará en espiral, el inicio de cada vuelta se irá desplazando y la vuelta 20 acabará en el centro de la parte posterior del cuello (o sea, el lado opuesto a la abertura del hocico)".
04.12.2018 - 16:20
![]() Kristýna wrote:
Kristýna wrote:
Dobrý den Nerozumím řadám 23 - 34, resp. jak pak pokračovat dále. Z těchto řad mi vznikly dva spojené trojúhelníky, na ně pak navazuje tělo. Jak ale tyto trojúhelníky spojím? Děkuji moc za odpověď
12.10.2017 - 20:31
![]() Viky Fernandez wrote:
Viky Fernandez wrote:
Como soy nueva en esto del ganchillo, no entiendo que significa trabajar en redondo sin terminar cada vuela (vuelta 8 a 20),como se hace?. Saludos
21.02.2017 - 16:26DROPS Design answered:
Hola Vicky. En las vueltas 8-20 no terminamos las vueltas como se explica en el TIP PARA LA ELABORACIÓN DEL TRABAJO, sino que trabajamos como sigue: 1 punto bajo en el último punto bajo de la fila anterior, 1 punto bajo en el primer punto bajo de la fila anterior ( trabajo en el espiral).
27.02.2017 - 20:29
![]() Monica wrote:
Monica wrote:
Bellissimi tutti questi animaletti ... ma ci fate anche un cavallino?
14.07.2016 - 20:40DROPS Design answered:
Buongiorno Monica. Inoltriamo volentieri la sua richiesta alla casa madre. Grazie e buon lavoro!
14.07.2016 - 20:46
![]() Nancy Verbist wrote:
Nancy Verbist wrote:
Bonjour De 2 a 22 faut il fermer le cercle svp et après? ?? Merci par ce que je n'y arrive pas
14.05.2016 - 15:33DROPS Design answered:
Bonjour Mme Verbist, on termine le tour 1 de la partie tête/cou/corps par 1 mc dans la 1ère ms (voir astuce crochet), à partir du 2ème tour, on ne ferme pas en rond, on tourne avec 1 ml et on crochète en rangs. À partir du tour 8 jusqu'au tour 20, on continue en rond en ms, sans fermer par une mc = crochetez la 1ère ms du tour dans la 1ère ms du début du tour précédent sans faire de mc. Bon crochet!
17.05.2016 - 09:15
![]() Fanchon wrote:
Fanchon wrote:
Je reprends donc pas à pas les explications !... J'ai refait à partir du rang 21 car je n'étais pas partie du milieu du dos .ok donc jusqu'au rang 34 mais après ??? continuer en rond et crocheter 35 crocheter tout autour de l'ouverture ???
29.01.2016 - 17:33DROPS Design answered:
Bonjour Fanchon, à partir du rang 23 vous avez crocheté en rangs (allers et retours en tournant à la fin de chaque rang), au tour 35, crochetez maintenant 1 ms tout autour de cette ouverture en ajustant le nombre de mailles à 22 ms à la fin de ce tour. Continuez ensuite en rond. Bon crochet!
29.01.2016 - 17:35
![]() Fanchon wrote:
Fanchon wrote:
Bonsoir Je travaille avec bonheur,depuis plusieurs années, avec les modèles DROPS. Les explications sont habituellement claires MAIS là, avec la girafe (drops children 24-8), je coïnce !... Jusqu'au rang 20, pas de problème mais après... Il serait intéressant de faire un schéma pour ce modèle. J'ai essayé d'appliquer les conseils donnés dans la rubrique commentaire, mais j'en suis au rang 45 et ma girafe a vraiment une drôle d'allure. Merci à toute l'équipe
28.01.2016 - 19:17DROPS Design answered:
Bonjour Fanchon, si vous suivez bien pas à pas les explications, votre girafe prendra forme. N'hésitez pas à contacter votre magasin DROPS, ou adressez-vous au forum DROPS si besoin. Bon crochet!
29.01.2016 - 09:18
|
|
Melman#dropsmelman |
|
 |
 |
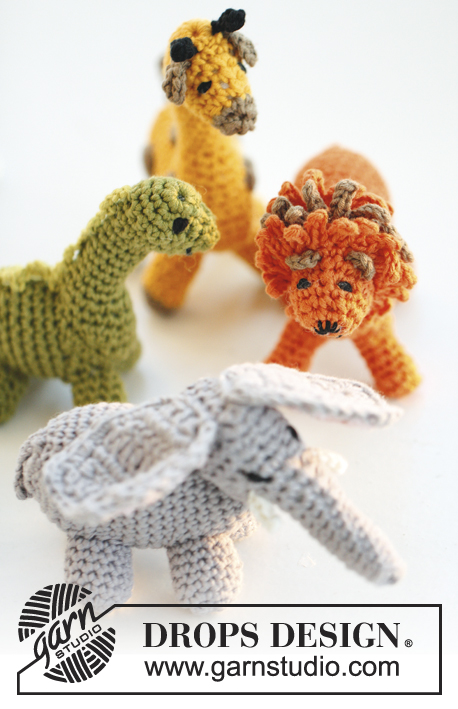
Crochet giraffe in DROPS Safran or DROPS Paris
DROPS Children 24-8 |
|
|
FILLING TIP: Gradually fill some cotton wool in the animal when working. CROCHET TIP: Beg every dc round with 1 ch (this does not replace first dc) and finish with 1 sl st in first dc from beg of round. Turn every dc row with 1 ch - this ch does not replace first dc on row. DECREASE TIP: Dec 1 dc by working 2 sts tog. This is done as follows: Insert hook in first st and pull thread through, insert hook in next st and pull thread through, make 1 YO and pull thread through all 3 sts on hook. ---------------------------------------------------------- SMALL GIRAFFE: Worked from the top of head, down the neck and along the body. Legs, tail, ears, horn and spots are worked separately and sew on at the end. READ FILLING TIP! HEAD, NECK AND BODY: Work 4 ch with strong yellow on hook size 3 mm and form a ring with 1 sl st in first ch. ROUND 1: Work 5 dc in ch-ring. ROUND 2: Work 2 dc in every dc = 10 dc. Turn with 1 ch, then work back and forth in one. ROW 3-7: Work 1 dc in every dc back and forth (= opening for snout, which is worked later). ROUND 8-20: Work 1 dc in every dc in the round without finishing every round, then work up to the middle on top of neck. ROUND 21: Work 1 dc in each of the first 4 dc, 2 dc in each of the next 2 and 1 dc in each of the last 4 = 12 dc. ROUND 22: Work 1 dc in each of the first 5 dc, 2 dc in each of the next 2 and 1 dc in each of the last 5 = 14 dc. ROW 23: Work 1 dc in each of the first 12 dc, turn piece with 1 ch, now work back and forth in one for chest. ROW 24 (WS): Skip the first dc, 1 dc in each of the next 10 dc, turn with 1 ch. ROW 25 (RS): Skip the first dc, 1 dc in each of the next 8 dc, turn with 1 ch. ROW 26 (WS): Skip the first dc, 1 dc in each of the next 6 dc, turn with 1 ch. ROW 27 (RS): Skip the first dc, 1 dc in each of the next 4 dc, turn with 1 ch. ROW 28 (WS): Skip the first dc, 1 dc in each of the next 2 dc, turn with 1 ch. ROW 29 (RS): Skip first dc, then work 4 dc, turn with 1 ch. ROW 30 (WS): Skip first dc, then work 6 dc, turn with 1 ch. ROW 31 (RS): Skip first dc, then work 8 dc, turn with 1 ch. ROW 32 (WS): Skip first dc, then work 10 dc, turn with 1 ch. ROW 33 (RS): Skip first dc, then work 12 dc, turn with 1 ch. ROW 34 (WS): Skip first dc, then work 14 dc, turn with 1 ch. Now continue in the round again. ROUND 35: Work dc around the entire opening - inc evenly so that there are 22 dc in total. ROUND 36-45: Continue in the round with 10 rounds dc. ROUND 46: Work dc, at the same time dec 4 dc evenly by working 2 and 2 dc tog – SEE DECREASE TIP = 18 dc. ROUND 47: Work dc, at the same time dec 4 dc evenly by working 2 and 2 dc tog = 14 dc. ROUND 48: Work dc, at the same time dec 4 dc evenly by working 2 and 2 dc tog = 10 dc. ROUND 49: Work all dc tog 2 by 2 = 5 dc. Cut the yarn, bast it around the opening, tighten tog and fasten. SNOUT: Work 14 dc with strong yellow around the opening at the front of head. Insert 1 marker mid on top of head. Continue with 3 rounds with 1 dc in every dc while at the same time working the 2 dc mid on top of head tog = 11 dc. Switch to light brown. Continue with 1 round dc while at the same time working the 2 middle dc on top of head tog on every round = 10 dc. Then work 1 round where all dc are worked tog 2 by 2 = 5 dc, fasten off. Put some cotton wool in snout, baste the yarn end around the opening, tighten tog and fasten. LEG: Work 4 ch with light brown and form a ring with 1 sl st in first ch. ROUND 1: 6 dc in ch-ring. ROUND 2: * 1 dc in first dc, 2 dc in next dc *, repeat from *-* = 9 dc, fasten off. ROUND 3-8: Switch to strong yellow and work 1 dc in every dc in the round, fasten off. Work a total of 4 legs like this. Fill some cotton wool in them and sew them to the underside of body. TAIL: Work 7 ch with light brown, then work 3 htr in 2nd ch from hook, then 1 sl st in each of the last 5 ch, fasten off and sew the tail to the back of body so that it stands up. EAR: Work 4 ch with light brown, then 1 dtr in first ch, 3 ch and 1 sl st at the bottom of dtr, fasten off. Work another ear and sew them on top of the head. HORN: Work 5 ch with black, then 1 htr in 2nd ch from hook, then work 1 dc in each of the last 3 ch, fasten off. Work another horn and sew them on top of the head, on the inside of ears. SPOTS: Work 4 ch with light brown and form a ring with 1 sl st in first ch. Then work 6 dc in ch-ring, finish with 1 sl st in first dc, fasten off. Work 5 spots in total and sew them to the top of giraffe's back. Embroider eyes with black. ---------------------------------------------------------- LARGE GIRAFF: Work as small giraffe, but on hook size 4 mm with Paris. Replace strong yellow with peach and replace light brown with medium pink. |
|
Have you finished this pattern?Tag your pictures with #dropspattern #dropsmelman or submit them to the #dropsfan gallery. Do you need help with this pattern?You'll find 9 tutorial videos, a Comments/Questions area and more by visiting the pattern on garnstudio.com. © 1982-2025 DROPS Design A/S. We reserve all rights. This document, including all its sub-sections, has copyrights. Read more about what you can do with our patterns at the bottom of each pattern on our site. |
|


With over 40 years in knitting and crochet design, DROPS Design offers one of the most extensive collections of free patterns on the internet - translated to 17 languages. As of today we count 314 catalogues and 11822 patterns translated into English (UK/cm).
We work hard to bring you the best knitting and crochet have to offer, inspiration and advice as well as great quality yarns at incredible prices! Would you like to use our patterns for other than personal use? You can read what you are allowed to do in the Copyright text at the bottom of all our patterns. Happy crafting!
Post a comment to pattern DROPS Children 24-8
We would love to hear what you have to say about this pattern!
If you want to leave a question, please make sure you select the correct category in the form below, to speed up the answering process. Required fields are marked *.